harbor搭建v1.8.3
harbor版本:harbor-offline-installer-v1.8.3.tgz
docker-compose version 1.24.1, build 4667896b
一、安装docker
curl -o /etc/yum.repos.d/CentOS-Base.repo http://mirrors.163.com/.help/CentOS7-Base-163.repo
curl -o /etc/yum.repos.d/docker-ce.repo http://mirrors.aliyun.com/docker-ce/linux/centos/docker-ce.repo
yum clean all && yum makecache
先检查docker-ce位于哪个仓库,安装时选择稳定版
# yum list docker-ce --showduplicates | sort -r
# yum install docker-ce -y
yum install docker-ce-18.09.8 -y
docker设置
vim /usr/lib/systemd/system/docker.service

#Environment="HTTP_PROXY=http://www.proxy.com"
#Environment="HTTPS_PROXY=http://www.proxy.com"
#Environment="NO_PROXY=127.0.0.0/8,172.20.0.0/16,10.10.10.0/24"
ExecStart=/usr/bin/dockerd -H fd:// --containerd=/run/containerd/containerd.sock
# ExecStartPost=/usr/sbin/iptables -P FORWARD ACCEPT
ExecStartPost=/usr/sbin/iptables -I FORWARD -s 0.0.0.0/0 -j ACCEPT     # 添加此行(可选)
ExecReload=/bin/kill -s HUP $MAINPID
TimeoutSec=0

# docker 加速
mkdir /etc/docker
cat <<EOF > /etc/docker/daemon.json
{
  "registry-mirrors": ["https://kz7brmw7.mirror.aliyuncs.com"]
}
EOF
启动docker
systemctl daemon-reload
systemctl restart docker
systemctl status docker
systemctl enable docker
二、安装harbor
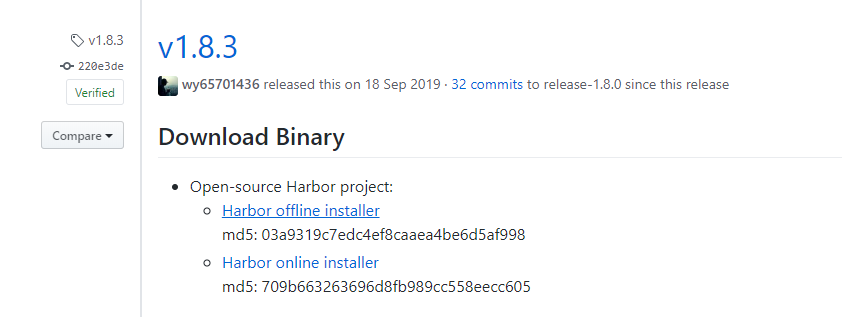
https://github.com/goharbor/harbor/releases/tag/v1.8.3
https://storage.googleapis.com/harbor-releases/release-1.8.0/harbor-offline-installer-v1.8.3.tgz
# 解压文件到 home 目录,注意,后面的操作都是基于 /home/harbor 路径。
tar xvf harbor-offline-installer-v1.8.3.tgz -C /home
创建证书文件
使用简单的 OpenSSL 命令创建的自签证书,浏览器显示是不安全的,但是方便。创建命令如下
[ ! -d /home/harbor/certs ] && mkdir -p /home/harbor/certs
cd /home/harbor/certs

openssl req \
-newkey rsa:4096 -nodes -sha256 -keyout ./harbor.key -x509 -out ./harbor.crt \
-subj /C=CN/ST=BJ/L=BJ/O=DEVOPS/CN=harbor.hub.com -days 3650

# (OpenSSL 创建SAN 证书,浏览器显示有安全的小锁  https://www.cnblogs.com/outsrkem/p/16056756.html )
如果使用cfssl创建证书,使用私有CA签署,浏览器显示有安全的小锁。创建方法于另一篇博客:https://www.cnblogs.com/outsrkem/p/12182243.html
修改配置
# The IP address or hostname to access admin UI and registry service.
# DO NOT use localhost or 127.0.0.1, because Harbor needs to be accessed by external clients.
hostname: harbor.hub.com     # 此处修改

# http related config
#http:     # 此处修改,注释掉
  # port for http, default is 80. If https enabled, this port will redirect to https port
#  port: 80  # 此处修改,注释掉

# https related config
https:  # 此处修改,打开注释,注意缩进
#   # https port for harbor, default is 443
  port: 443  # 此处修改,打开注释,注意缩进
#   # The path of cert and key files for nginx
  certificate: /home/harbor/certs/harbor.pem  # 此处修改,注意证书文件名
  private_key: /home/harbor/certs/harbor-key.pem  # 此处修改,注意证书文件名

······
# The default data volume
data_volume: /home/harbor/data   # 此处修改

······
启动harbor
./install.sh
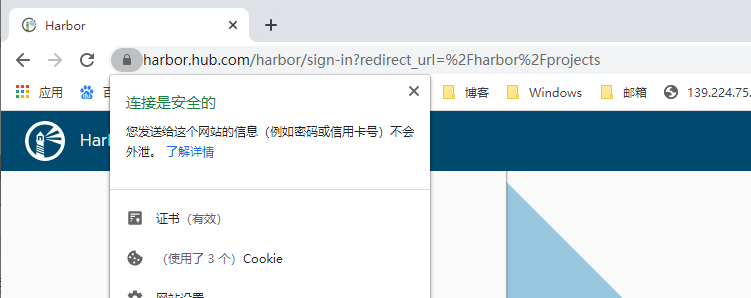
访问
设置 hosts 映射文件
C:\Windows\System32\drivers\etc\hosts
https://harbor.hub.com 。默认管理员用户名:  admin    密码: Harbor12345
指定镜像仓库地址
vim /etc/docker/daemon.json
{
  "insecure-registries": ["harbor.hub.com"]
}
下载测试镜像
docker pull hello-world
给镜像重新打标签
docker tag hello-world:latest harbor.hub.com/library/word:latest
docker login harbor.hub.com -uadmin -pHarbor12345
docker push harbor.hub.com/library/word:latest
注意:
同样标签的镜像是可以再次推送到仓库的,会覆盖之前的镜像
同样标签的镜像可以拉去到本地,上一个镜像标签会变成 <none>
配置 harbor 开机自启动
# /etc/systemd/system/harbor.service
# systemctl start harbor.service
# systemctl enable harbor.service
#
[Unit]
Description=Docker Compose Application Service
Requires=docker.service
After=network.target remote-fs.target nss-lookup.target
Documentation=http://github.com/vmware/harbor
[Service]
Type=oneshot
RemainAfterExit=yes
WorkingDirectory=/home/harbor
ExecStart=/usr/local/bin/docker-compose up -d
ExecStop=/usr/local/bin/docker-compose down
TimeoutStartSec=0
[Install]
WantedBy=multi-user.target
作者:Outsrkem
原文链接:https://www.cnblogs.com/outsrkem/p/12597759.html
本文版权归作者所有,欢迎转载,但未经作者同意必须保留此段声明,且在文章页面明显位置给出原文连接,否则保留追究法律责任的权利。

 浙公网安备 33010602011771号