
本地环境自建的es重启,http和https访问es,nested数据类型及设置es别名
本地环境自建的es重启,http和https访问es,nested数据类型及设置es别名
link:
https接口的支持判断,http升级到https需求
https://www.cnblogs.com/oktokeep/p/19176975
1.测试环境es本地自建的,由于没有设置账号和密码,导致es数据泄露。所以将测试环境本地的es停止,导致本地的测试环境的订单列表查询报错。
查询进程是否存在:
root@VM-22-212-centos:/dd/log $ ps -ef | grep "9200"
root      2737  2481  0 11:00 pts/0    00:00:00 grep --color=auto 9200
root@VM-22-212-centos:/dd/log $ ps -ef | grep "9201"
root      2778  2481  0 11:00 pts/0    00:00:00 grep --color=auto 9201
root@VM-22-212-centos:/dd/log $ ps -ef | grep "9300"
root      2813  2481  0 11:00 pts/0    00:00:00 grep --color=auto 9300
root@VM-22-212-centos:/dd/log $ ps -ef | grep "elastic"
root      2921  2481  0 11:00 pts/0    00:00:00 grep --color=auto elastic

root@VM-22-212-centos:/dd/log $ netstat -lntp|grep 9301
root@VM-22-212-centos:/dd/log $ netstat -lntp|grep 9300
tcp6       0      0 :::9300                 :::*                    LISTEN      13549/java
root@VM-22-212-centos:/dd/log $ netstat -lntp|grep 9200
tcp6       0      0 :::9200                 :::*                    LISTEN      13549/java
root@VM-22-212-centos:/dd/log $ netstat -lntp|grep 9201

启动命令:sudo systemctl restart elasticsearch

查询服务器上面的历史命令并导出txt
 2018  2025-11-06 11:39:05 history >> history22.212.txt
访问:参考es访问控制
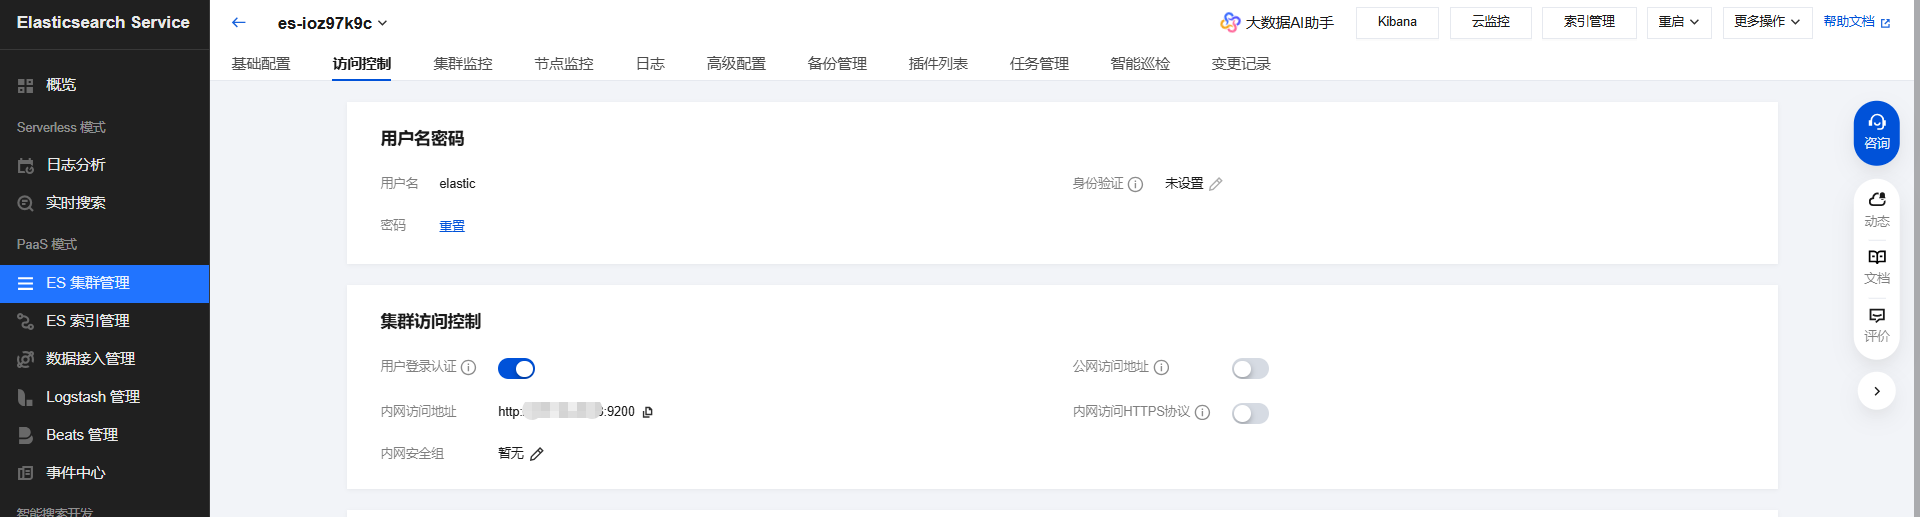
curl  -X GET "http://XX.16.22.XX:9200"   //以上截图的“内网访问地址”
{"error":{"root_cause":[{"type":"security_exception","reason":"missing authentication token for REST request [/]","header":{"WWW-Authenticate":"Basic realm=\"security\" charset=\"UTF-8\""}}],"type":"security_exception","reason":"missing authentication token for REST request [/]","header":{"WWW-Authenticate":"Basic realm=\"security\" charset=\"UTF-8\""}},"status":401}

curl -u elastic账号:es密码 -X GET "http://XX.16.22.XX:9200"

6.8.2版本
root@VM-1-247-centos:~ $ curl -u elastic账号:es密码 -X GET "http://XX.16.22.XX:9200"
{
  "name" : "1762409755007608632",
  "cluster_name" : "es-ioz97k9c",
  "cluster_uuid" : "Gz7KD51RSnSlkvhFfuvTpQ",
  "version" : {
    "number" : "6.8.2",
    "build_flavor" : "default",
    "build_type" : "zip",
    "build_hash" : "bde2f6a",
    "build_date" : "2025-09-08T13:32:47.932906Z",
    "build_snapshot" : false,
    "lucene_version" : "7.7.0",
    "minimum_wire_compatibility_version" : "5.6.0",
    "minimum_index_compatibility_version" : "5.0.0"
  },
  "tagline" : "You Know, for Search"
}

5.6.4版本
http://XX.16.22.YY:9200
curl -u elastic账号:es密码 -X GET "http://XX.16.22.YY:9200"
root@VM-1-247-centos:~ $ curl -u elastic账号:es密码 -X GET "http://XX.16.22.YY:9200"
{
  "name" : "1749716881004699232",
  "cluster_name" : "es-6jzhzcxg",
  "cluster_uuid" : "nXx5MYhZQIaPEb9nVZSlUQ",
  "version" : {
    "number" : "5.6.4",
    "build_hash" : "933ee86",
    "build_date" : "2019-11-22T13:04:34.110Z",
    "build_snapshot" : false,
    "lucene_version" : "6.6.1"
  },
  "tagline" : "You Know, for Search"
}
2.方案1,首先尝试将本地的es服务起来,然后再设置账号和密码,需要运维支持。
3.方案2,在腾讯云上面其实已经购买了云es的产品,需要考虑到es版本,es版本不对和http访问方式必须正确,否则es仍然会查询报错。
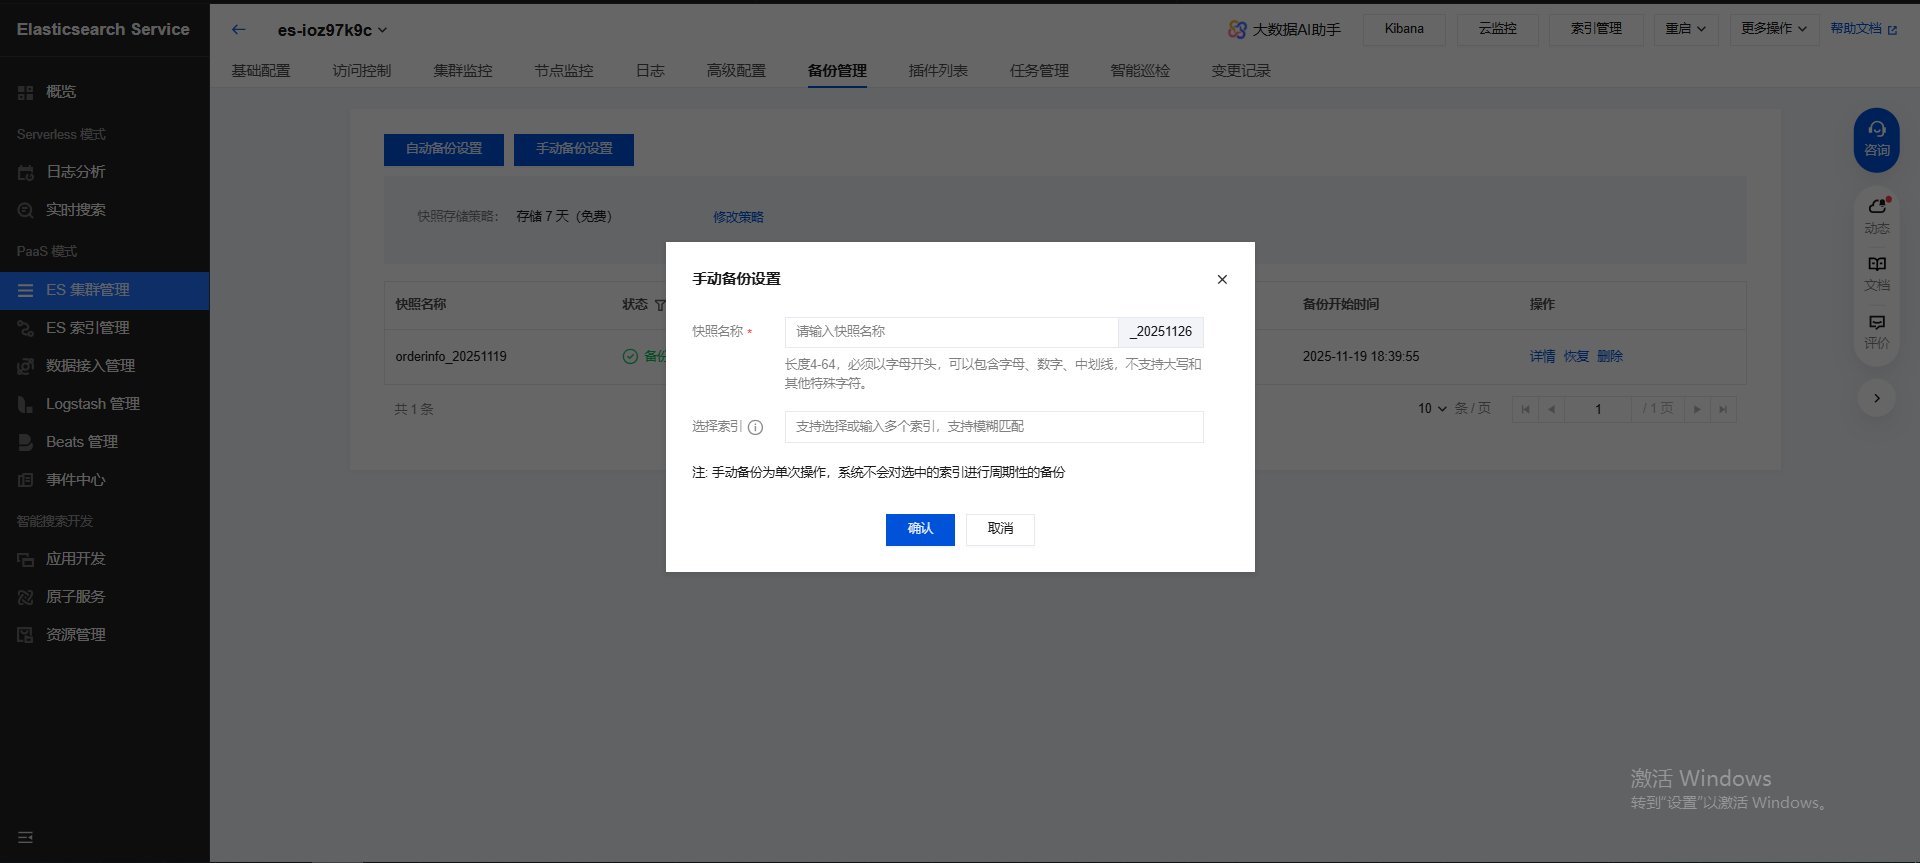
4.在腾讯云上面的es模块做数据备份,然后恢复到测试环境的es,这是一种方法。
手动快照备份
https://cloud.tencent.com/document/product/845/122407
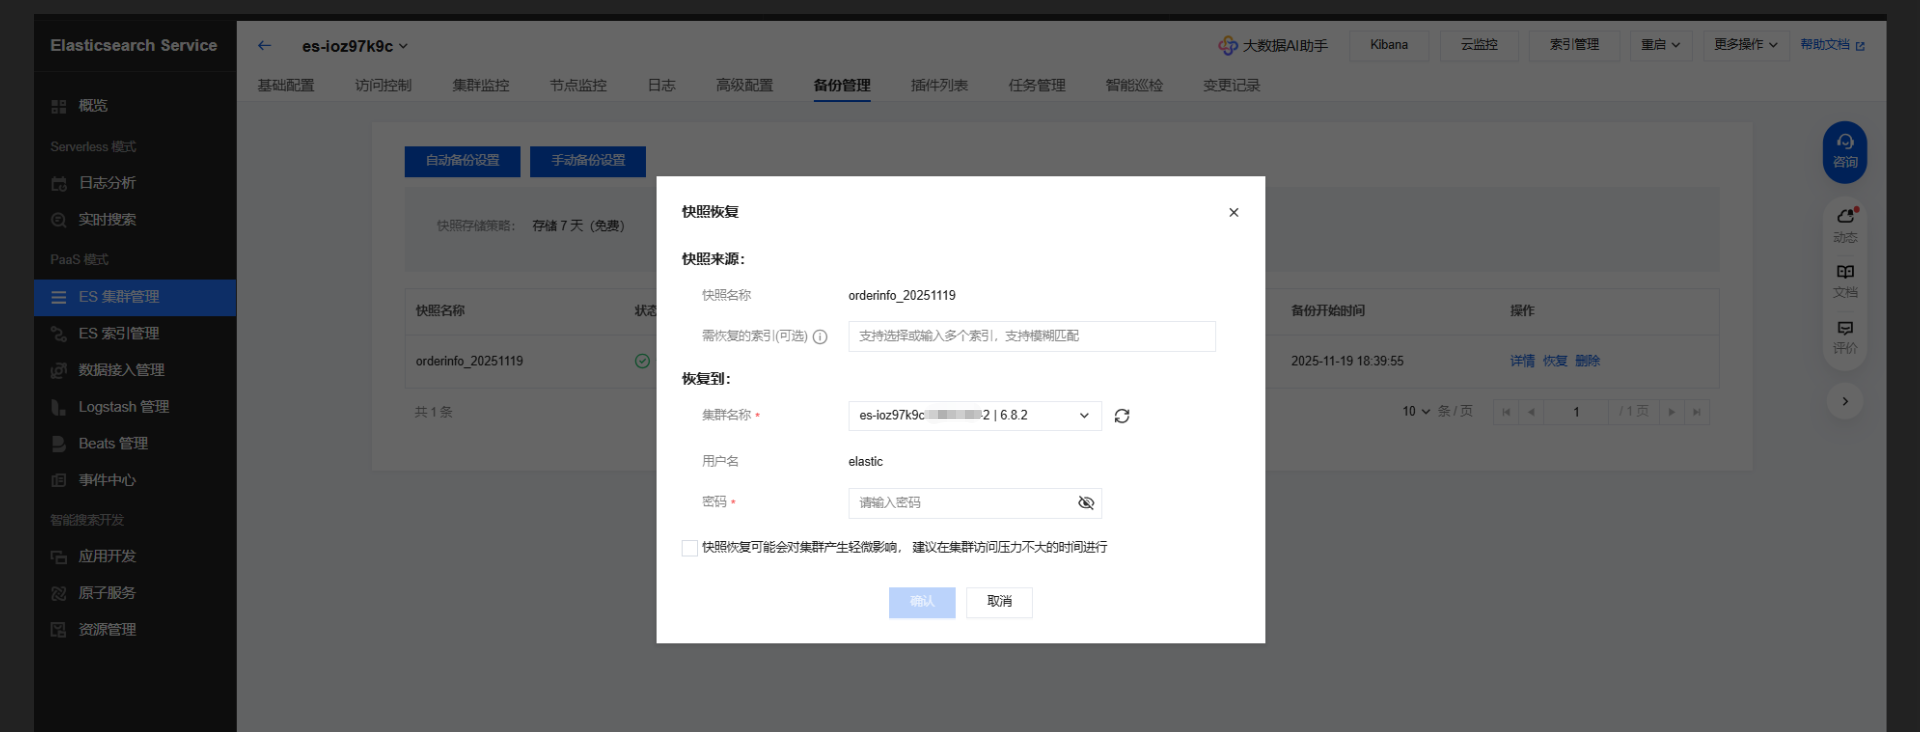
5.同时为了降低成本,将版本一致的es做了合并,方法同上,先备份,然后再恢复到另外一个target es服务中来。然后将引用原来source es的微服务,变更新的target es ip地址,然后重启微服务。线上自测观察,最终将source es 释放。
6.腾讯云上面的es 版本和http访问方式不对,运维重新购买一个新的,然后将老的释放。恢复同步的原则:es只能升级同步,不能降级同步数据。
7.更新ip es地址,调用微服务中的init初始化es接口,数据初始化,这样在管理后台的es 订单列表数据恢复。
8.在实际查询的过程中,根据车主订单列表查询需求,发现了一个nested数据类型不对的问题,原来init初始化的时候不会生成nested数据类型。
》》nested类型处理,重建索引。 查询的时候报错了。
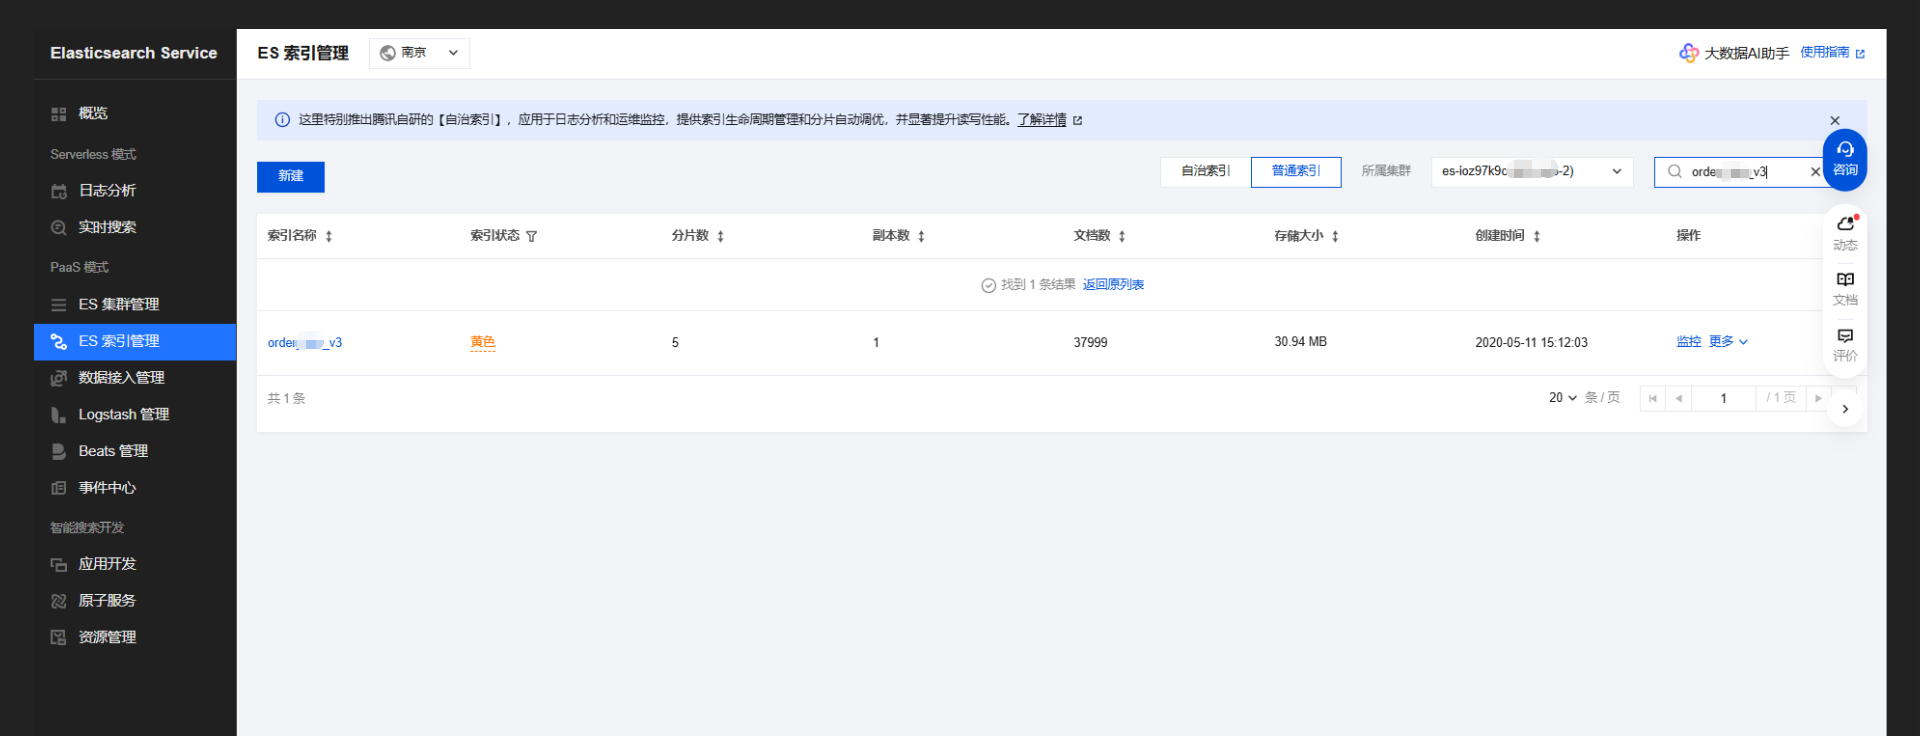
设置别名,结合腾讯云的后台 备份,恢复来创建 order_v3来解决。
根本原因是这个数据类型不对导致: 已解决
原来的:
"ownerOrderViewList": {
						"properties": {
							"accountOwnerIncomeExamineList": {

"ownerOrderList": {
						"properties": {
							"actRentTime": {
								"type": "date"

解决后的:
"ownerOrderViewList": {
						"type": "nested",
"ownerOrderList": {
						"type": "nested",

Caused by: org.elasticsearch.client.ResponseException: method [POST], host [http://XX.16.22.XX:9200], URI [/test_info/_search?rest_total_hits_as_int=true&typed_keys=true&ignore_unavailable=false&expand_wildcards=open&allow_no_indices=true&ignore_throttled=true&search_type=query_then_fetch&batched_reduce_size=512], status line [HTTP/1.1 400 Bad Request]
9.没有办法直接来修改es数据结构,在腾讯云的后台有操作界面,但是无法修改成功,个人认为:这个es数据结构已经存在数据了,而不是一个空的结构。
10.方法:将生产的一个order_v3的数据结构,同步到测试环境,检查数据结构中含有nested,ok
查询接口语法:
curl -u elastic账号:es密码 -X GET "http://XX.16.22.XX:9200/order_info/_mapping"

//查询某个字段的mapping
curl -u elastic账号:es密码 -X GET "http://172.16.22.93:9200/order_info/_mapping/field/ownerOrderList" //需要带上*
curl -u elastic账号:es密码 -X GET "http://172.16.22.93:9200/order_info/_mapping/field/ownerOrder*"    这个可以查询出来。正解,需要带上/field
11.然后使用设置索引 es别名的方法,指向到新的order_v3,最终问题解决。
修改索引:		Reindex data from old index to new index:
curl -u elastic账号:es密码 -X POST "http://XX.16.22.XX:9200/_reindex" -H 'Content-Type: application/json' -d '{"source": {"index": "order_info"},"dest": {"index": "order_v3"}}'

# Add alias  Update aliases or switch to new index:
# 前提是存在了别名,先删除,然后再新增
curl -u elastic账号:es密码 -X POST "http://XX.16.22.XX:9200/_aliases" -H 'Content-Type: application/json' -d '{"actions": [{ "remove": { "index": "order_info", "alias": "order_info" } },{ "add": { "index": "order_v3", "alias": "order_info" } }]}'


add,只新增别名:
curl -u elastic账号:es密码 -X POST "http://XX.16.22.XX:9200/_aliases" -H 'Content-Type: application/json' -d '{"actions": [{ "add": { "index": "order_v3", "alias": "order_info" } }]}'

查看别名:
curl -u elastic账号:es密码 -X GET "http://XX.16.22.XX:9200/_cat/aliases"

root@VM-22-216-centos:/ $ curl -u elastic账号:es密码 -X GET "http://XX.16.22.XX:9200/_cat/aliases"
.kibana      .kibana_1       - - -
car_property car_property_v3 - - -
.security    .security-6     - - -
order_info   order_v3   - - -
链接:
es创建索引及别名更新mapping方法 elasticsearch [nested] nested object under path [XXX] is not of nested type
https://www.cnblogs.com/oktokeep/p/14476798.html
12.nested查询语法片段
"nested": {
	"query": {
		"term": {
			"ownerOrderViewList.ownerMember.memNo": {
				"value": 967674718,
				"boost": 1.0
			}
		}
	},
	"path": "ownerOrderViewList",
	"ignore_unmapped": false,
	"score_mode": "none",
	"boost": 1.0
}

 浙公网安备 33010602011771号