Neo4j创建自动索引
一、创建Neo4j的Legacy indexing
1.为节点创建索引
官方API的创建示例为:

将一节点添加至索引:
public static void AddNodeIndex(String nid)
    {
        String txUri=SERVER_ROOT_URI+"index/node/favorites";
        WebResource resource = Client.create().resource(txUri);
        String entity="{\"value\" : \"n204\",\"uri\" : \"http://192.168.209.128:7474/db/data/node/"+nid+"\",\"key\" : \"n201\"}";
        ClientResponse response = resource.accept(MediaType.APPLICATION_JSON)
                .type(MediaType.APPLICATION_JSON).entity(entity)
                .post(ClientResponse.class);

        System.out.println(response.getStatus());
        System.out.println(response.getEntity(String.class));
        response.close();
    }
ps:nid是要添加索引的节点ID value是索引值 key是索引名称
2.通过属性查找节点
public static void GetNodeByIndex()
    {
        String txUri=SERVER_ROOT_URI+"index/node/favorites/n201/n201";
        WebResource resource = Client.create().resource(txUri);

        ClientResponse response = resource.accept(MediaType.APPLICATION_JSON)
                .type(MediaType.APPLICATION_JSON)
                .get(ClientResponse.class);

        System.out.println(response.getStatus());
        System.out.println(response.getEntity(String.class));
        response.close();
    }
txUri路径中:favorites为刚创建的索引名称,第一个n201是节点索引key,第二个n201是节点索引值
二、自动创建索引(Legacy Automatic Indexes)
What default configuration means depends on how you have configured your database. If you haven’t
changed any indexing configuration, it means the indexes will be using a Lucene-based backend.
数据库配置之后,就可以自动创建索引
1.配置文件配置
Auto-indexing must be enabled through configuration before we can create or configure them. Firstly
ensure that you’ve added some config like this into your server’s conf/neo4j.properties file:
打开conf/neo4j.properties文件如图
配置下面的节点
# Enable auto-indexing for nodes, default is false.
node_auto_indexing=true

# The node property keys to be auto-indexed, if enabled.
node_keys_indexable=name,ki

# Enable auto-indexing for relationships, default is false.
relationship_auto_indexing=true

# The relationship property keys to be auto-indexed, if enabled.
relationship_keys_indexable=name,ki
Node_keys_indexable、relationship_keys_indexable对应节点、关系的属性
配置完成之后重启服务
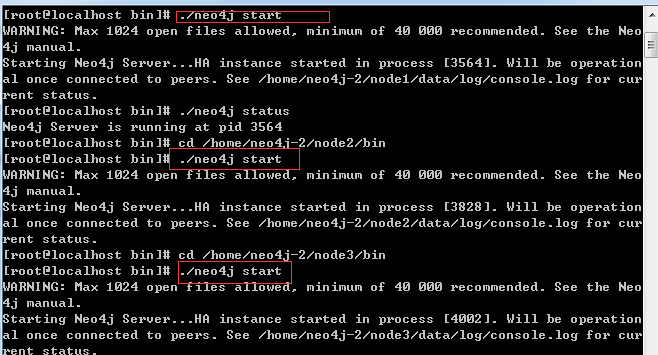
重启三个节点的集群
2。测试索引
插入一个节点和关系
    // 创建节点
    @Test
    public void test2() {
        URI uri = CreateSimpleGraph.createNode();
        CreateSimpleGraph.addProperty(uri, "name", "张三");
        URI uri1 = CreateSimpleGraph.createNode();
        CreateSimpleGraph.addProperty(uri1, "name", "李四");
    }
// 为节点设置关系
    @Test
    public void test6() {
        for (int i = 1; i < 2; i++) {
            try {
                URI suri = new URI("http://192.168.209.128:7474/db/data/node/171391");
                String uri1="http://192.168.209.128:7474/db/data/node/";
                URI euri = new URI("http://192.168.209.128:7474/db/data/node/171392");
                URI reluri= CreateSimpleGraph.addRelationship(suri, euri, "家人","{\"ki\" : \"1234567890\", \"name\" : \"无\" }");
                System.out.println(reluri);
            } catch (URISyntaxException e) {
                // 异常信息输出该内容
                e.printStackTrace();
            }
        }
    }
3.通过属性查找节点
public static void GetNodeByAutoIndex(String ki)
    {
//        String txUri=SERVER_ROOT_URI+"index/node/node_auto_index/name/"+ki;
        String txUri=SERVER_ROOT_URI+"index/auto/node/ki/"+ki;
        WebResource resource = Client.create().resource(txUri);

        ClientResponse response = resource.accept(MediaType.APPLICATION_JSON)
                .type(MediaType.APPLICATION_JSON)
                .get(ClientResponse.class);

        System.out.println(response.getStatus());
        System.out.println(response.getEntity(String.class));
        response.close();
    }

    public static void GetRelationshipByAutoIndex(String ki)
    {
//        String txUri=SERVER_ROOT_URI+"index/node/node_auto_index/name/"+ki;
        String txUri=SERVER_ROOT_URI+"index/auto/relationship/ki/"+ki;
        WebResource resource = Client.create().resource(txUri);

        ClientResponse response = resource.accept(MediaType.APPLICATION_JSON)
                .type(MediaType.APPLICATION_JSON)
                .get(ClientResponse.class);

        System.out.println(response.getStatus());
        System.out.println(response.getEntity(String.class));
        response.close();
    }
关系的输出结果为:
[ {
  "extensions" : { },
  "metadata" : {
    "id" : 337,
    "type" : "家人"
  },
  "data" : {
    "name" : "无",
    "ki" : "1234567890"
  },
  "property" : "http://192.168.209.128:7474/db/data/relationship/337/properties/{key}",
  "start" : "http://192.168.209.128:7474/db/data/node/171391",
  "self" : "http://192.168.209.128:7474/db/data/relationship/337",
  "end" : "http://192.168.209.128:7474/db/data/node/171392",
  "type" : "家人",
  "properties" : "http://192.168.209.128:7474/db/data/relationship/337/properties"
} ]
这里说明一下,传值为中文的时候,查询不出来,可能需要编码,因为工作暂时没有用到,就没有再研究了
三、NEO4J批量插入和用户密码问题
1.批量操作
批量操作的官方文档地址:http://neo4j.com/docs/milestone/rest-api-batch-ops.html
public static int BatchInserterNode(String body) {
        // String
        // body="[{\"method\":\"POST\",\"to\":\"/node\",\"body\":{\"name\":\"aaa\",\"lead\":\"aaa1\"},\"id\":0},{\"method\":\"POST\",\"to\":\"/node\",\"body\":{\"name\":\"bbb\",\"lead\":\"bbb1\"},\"id\":1}]";
        // POST {} to the node entry point URI
        ClientResponse response = GetResourceInstance("batch")
                .accept(MediaType.APPLICATION_JSON)
                .type(MediaType.APPLICATION_JSON).entity(body)
                .post(ClientResponse.class);

        // System.out.println(String.format(
        // "POST to [%s], status code [%d], location header [%s]",
        // nodeEntryPointUri, response.getStatus(), location.toString()));
        String entity = response.getEntity(String.class);
        response.close();

        int status = response.getStatus();

        return status;
    }

//调用
//批量插入速度测试
    @Test
    public void test10()
    {

        StringBuilder sbody=new StringBuilder();
        sbody.append("[");
        for (int i = 161337; i < 171337; i++) {
            if(i>161337)
            {
                sbody.append(",");
            }
            sbody.append("{");
            sbody.append("\"method\":\"POST\",\"to\":\"/node\",\"body\":{\"name\":\"n"+i+"\",\"lead\":\"a"+i+"\"},\"id\":"+i+"");
            sbody.append("}");
        }


        sbody.append("]");
        long st = System.currentTimeMillis();
        int status= CreateSimpleGraph.BatchInserterNode(sbody.toString());
        System.out.println("插入状态:"+status);
        long et = System.currentTimeMillis();
        System.out.println("插入10000条数据总共耗时:" + (et - st) + "毫秒");
    }
批量插入的速度10000条大概在6秒左右吧
2.NEO4J密码操作
本次用的版本是:neo4j-enterprise-2.2.0-unix,连接数据库的时候需要输入用户名称密码。上个版本好像是不用的。
使用密码时:
public void checkDatabaseIsRunning() {
        // START SNIPPET: checkServer
        WebResource resource = Client.create().resource(SERVER_ROOT_URI);
        ClientResponse response = resource.get(ClientResponse.class);
        resource.addFilter(new HTTPBasicAuthFilter("neo4j", "123456"));
        if (response.getStatus() == 200) {
            System.out.println("连接成功!");
        } else {
            System.out.println("连接失败!");
        }
        // System.out.println(String.format("GET on [%s], status code [%d]",
        // SERVER_ROOT_URI, response.getStatus()));
        response.close();
        // END SNIPPET: checkServer
    }
如不需要使用密码,可以在配置文件进行配置
vi /conf/neo4j-server.properties这个文件
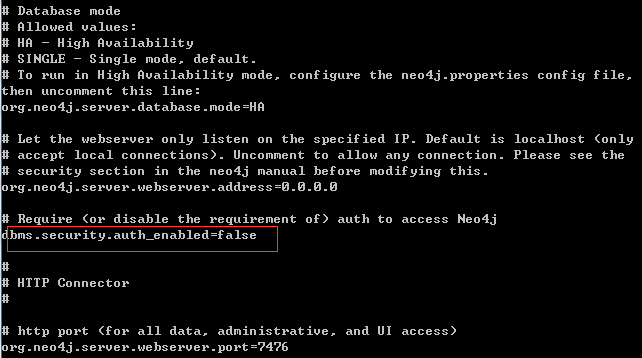
这里改成false即可,默认是True
参考文档
http://neo4j.com/docs/milestone/rest-api-batch-ops.html
http://neo4j.com/docs/milestone/rest-api-auto-indexes.html
http://neo4j.com/docs/milestone/rest-api-security.html

 浙公网安备 33010602011771号