mac os 编程基础软件安装
一、安装brew
官方安装
/bin/bash -c "$(curl -fsSL https://raw.githubusercontent.com/Homebrew/install/master/install.sh)"
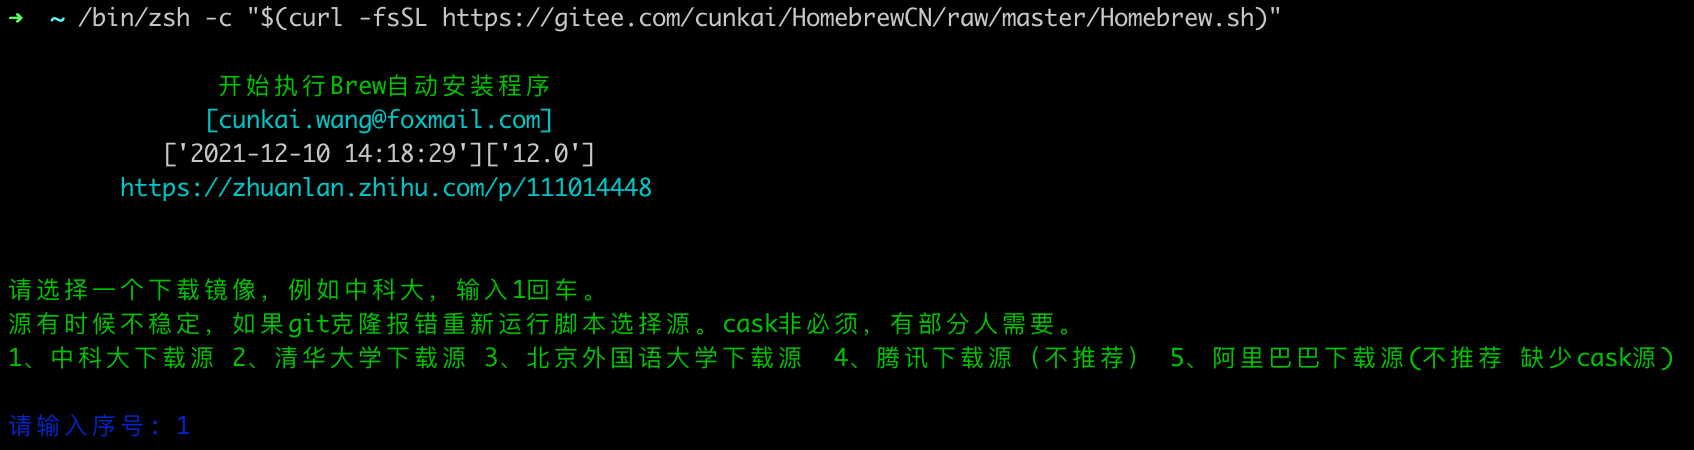
如果官方安装失败的话,使用国内源安装(安装完后需要重启下终端)
/bin/zsh -c "$(curl -fsSL https://gitee.com/cunkai/HomebrewCN/raw/master/Homebrew.sh)"
二、安装iTerm2
打开网址 https://iterm2.com/downloads.html 下载安装。
三、手动安装on my zsh
//先用git下载好内容
git clone git://github.com/robbyrussell/oh-my-zsh.git ~/.oh-my-zsh

//再替换zshrc,替换完成后重启终端就可以了
cp ~/.oh-my-zsh/templates/zshrc.zsh-template ~/.zshrc
- 应用配置
chsh -s /bin/zsh - 更换 agnoster 主题,主题官网
https://github.com/agnoster/agnoster-zsh-theme
打开并修改配置
vim ~/.zshrc
把默认的主题robbyrussell修改为
ZSH_THEME="agnoster"
- 安装完成后默认需要安装主题,不然会有乱码
# 克隆字体
git clone https://github.com/powerline/fonts.git --depth=1
# 切换到font目录,并执行令安装
cd fonts
./install.sh
# 安装完成后清理文件夹
cd ..
rm -rf fonts
- 字体安装完成后,iTerm2去掉前面的用户名称(修改后要重启下)
vim ~/.oh-my-zsh/themes/agnoster.zsh-theme
注释掉里面的prompt_context
build_prompt() {
  RETVAL=$?
  prompt_status
  prompt_virtualenv
#  prompt_context
  prompt_dir
  prompt_git
  prompt_bzr
  prompt_hg
  prompt_end
}
-
修改Solarized配色方案,这个配色方案选中效果因为是深色不太显眼。所以把选中的文本改为纯白色(ffffff),选中背景改为了橙色(d6702e),如图

选中效果图如下

-
zsh-autosuggestions 自动补全插件
git clone git://github.com/zsh-users/zsh-autosuggestions $ZSH_CUSTOM/plugins/zsh-autosuggestions
vim ~/.zshrc
找到 plugins=(git) 在git 后面加空格追加 git zsh-autosuggestions
- zsh-syntax-highlighting 高亮插件
git clone https://github.com/zsh-users/zsh-syntax-highlighting.git ${ZSH_CUSTOM:-~/.oh-my-zsh/custom}/plugins/zsh-syntax-highlighting
vim ~/.zshrc
找到 plugins=(git) 在git 后面继续加空格追加 zsh-syntax-highlighting
完整如下:
plugins=(
  git zsh-autosuggestions zsh-syntax-highlighting
  bundler
  dotenv
  macos
  rake
  rbenv
  ruby
)

 浙公网安备 33010602011771号