Zsh & Oh My Zsh
作为嵌入式开发者,离不开Linux,Linux又离不开Terminal终端,而终端又离不开 命令解释器.
所以,嵌入式开发者,离不开命令解释器.
Linux发行版系统默认命令解释器 -- Bash, 它简单不用配置,开盖即食.与之对应的就是不够强大.
常用的命令解释器有:
Sh , Bash , Zsh , Czh , Ash , Fish
为什么是Zsh
Zsh 全程Z shell, 相比于默认的Bash, Zsh有更多的自定义选项(一堆插件),并且支持扩展,
一旦支持扩展,那么想要的功能也会随之诞生.如,强大的命令补全,命令高亮等等一系列炫酷功能.
使用Git时,Bash无法体现当前Branch.
oh my zsh是什么
Zsh很强大,但是配置起来也非常的复杂.所以为了解决Zsh复杂的配置问题,oh my zsh就诞生了.
所以, oh my zsh就是管理zsh配置的工具.
Ubuntu安装zsh
安装之前,有些注意事项要说:
- 安装前先备份/etc/passwd
- oh my zsh安装容易,卸载麻烦.
- 安装了oh-my-zsh之后的环境变量入口就会从./bashrc变成./zshrc
- 装完Zsh,建议同时装一下
tmux+zsh以使用多终端
安装zsh
- 命令安装Zsh
$ sudo apt install zsh
确认安装是否成功
$ zsh --version

输出 zsh 5.0.8以上就是成功
- 把默认的Shell改为zsh
$ chsh -s /bin/zsh
不用sudo
确认安装是否成功
$ echo $SHELL

输出结果/usr/bin/zsh就是成功了
若出问题可以
sudo vim /etc/passwd将root和当前用户的/bin/bash改为/usr/bin/zsh
然后reboot就行了. 重启进入终端就是zsh了,第一次会有导航,直接q,等下装oh my zsh.
安装ohmyzsh
Github偶尔抽风,国内DNS被污染没办法.
# via wget
wget https://gitee.com/mirrors/oh-my-zsh/raw/master/tools/install.sh && chmod 777 install.sh && ./install.sh

然后执行install.sh 如果发现很慢,可以修改为gitee:
vim install.sh

REPO=${REPO:-ohmyzsh/ohmyzsh}
REMOTE=${REMOTE:-https://github.com/${REPO}.git}
两行改为:
REPO=${REPO:-mirrors/oh-my-zsh}
REMOTE=${REMOTE:-https://gitee.com/${REPO}.git}

### 完了之后
sh install.sh
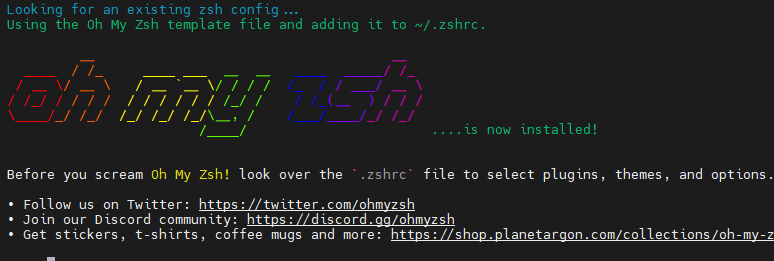
Git clone 完就ok了.
安装插件
语法高亮插件 zsh-syntax-highlighting
# 执行下面指令自动安装
git clone https://github.com/zsh-users/zsh-syntax-highlighting.git $ZSH_CUSTOM/plugins/zsh-syntax-highlighting

## 使用教程 就在这个github仓库里,有说明.
自动补全插件 zsh-autosuggestions
# 执行下面指令自动安装
git clone https://ghproxy.com/https://github.com/zsh-users/zsh-autosuggestions.git $ZSH_CUSTOM/plugins/zsh-autosuggestions

## 使用教程 就在这个github仓库里,有说明.
# 之前用过的命令,直接按→右方向键进行补全
自动跳转插件 autojump
# clone 到本地  这个镜像是韩国加速过的.
git clone https://ghproxy.com/https://github.com/wting/autojump.git
# 进入clone目录,接着执行安装文件
cd autojump
./install.py
# 安装完成后会提示你提示,在~/.zshrc最后添加下面语句:
Please manually add the following line(s) to ~/.zshrc:

        [[ -s /home/tony/.autojump/etc/profile.d/autojump.sh ]] && source /home/tony/.autojump/etc/profile.d/autojump.sh

        autoload -U compinit && compinit -u

Please restart terminal(s) before running autojump.

## 使用说明, 之前去过的目录,比如某个文件夹.
# 直接 j or jc 文件夹名, 不用把全路径打出来.
安装完后启用插件
# 编辑~/.zshrc   我用的是neovim编辑器用你自己的编辑器打开.
nvim ~/.zshrc
# 在plugins后括号里添加安装的插件名字
plugins=(git autojump zsh-autosuggestions zsh-syntax-highlighting)
# 最后刷新
source ~/.zshrc
reboot一下.
看一下~/.zshrc配置文件
如果你用bash就是~/.bashrc ,我们现在用zsh不用bash了.
nvim ~/.zshrc
ZSH_THEME="agnoster"
plugins=(git autojump zsh-autosuggestions zsh-syntax-highlighting)

[[ -s /home/你的用户/.autojump/etc/profile.d/autojump.sh ]] && source /home/你的用户/.autojump/etc/profile.d/autojump.sh
autoload -U compinit && compinit -u
# 就这西了.
主题你可以到 https://github.com/ohmyzsh/ohmyzsh/wiki/Themes 自己选你喜欢的.
我比较常用的是默认的,还以后bira ys agnoster这几个.其他的,也不高兴再去找了.
插件的使用, github仓库都有说明的.
- spaceship 主题
# 1. Clone仓库:
git clone https://ghproxy.com/https://github.com/spaceship-prompt/spaceship-prompt.git "$ZSH_CUSTOM/themes/spaceship-prompt"
# 2. 链接spaceship.zsh-theme到oh-my-zsh自定义主题目录:
ln -s "$ZSH_CUSTOM/themes/spaceship-prompt/spaceship.zsh-theme" "$ZSH_CUSTOM/themes/spaceship.zsh-theme"
# 在.zshrc设置ZSH_THEME="spaceship"
vim ~/.zshrc
# 使新主题在终端中生效
source ~/.zshrc
https://www.jianshu.com/p/ba090b3a7035
https://zhuanlan.zhihu.com/p/58073103
https://www.cnblogs.com/sddai/p/11185344.html
https://blog.csdn.net/weixin_43971252/article/details/122225757
https://gitee.com/zhang_qu/zq_ohmyzsh#介绍
https://github.com/ohmyzsh/ohmyzsh/tree/master/plugins

 浙公网安备 33010602011771号