IdentityServer4与ocelot实现认证与客户端统一入口
关于IdentityServer4与ocelot博客园里已经有很多介绍我这里就不再重复了。
ocelot与IdentityServer4组合认证博客园里也有很多,但大多使用ocelot内置的认证,而且大多都是用来认证API的,查找了很多资料也没看到如何认证oidc,所以这里的ocelot实际只是作为统一入口而不参与认证,认证的完成依然在客户端。代码是使用IdentityServer4的Quickstart5_HybridAndApi 示例修改的。项目结构如下

一 ocelot网关
我们先在示例添加一个网关。
修改launchSettings.json中的端口为54660

 "NanoFabricApplication": {
      "commandName": "Project",
      "launchBrowser": true,
      "applicationUrl": "http://localhost:54660",
      "environmentVariables": {
        "ASPNETCORE_ENVIRONMENT": "Development"
      }
    }
配置文件如下


{
  "ReRoutes": [
    { // MvcClient
      "DownstreamPathTemplate": "/MvcClient/{route}",
      "DownstreamScheme": "http",
      "DownstreamHostAndPorts": [
        {
          "Host": "localhost",
          "Port": 50891
        }
      ],
      "UpstreamPathTemplate": "/MvcClient/{route}",
      "UpstreamHeaderTransform": {
        "X-Forwarded-For": "{RemoteIpAddress}"
      }
    },
    { // signin-oidc
      "DownstreamPathTemplate": "/signin-oidc",
      "DownstreamScheme": "http",
      "DownstreamHostAndPorts": [
        {
          "Host": "localhost",
          "Port": 50891
        }
      ],
      "UpstreamPathTemplate": "/signin-oidc",
      "UpstreamHeaderTransform": {
        "X-Forwarded-For": "{RemoteIpAddress}"
      }
    },
    { // signout-callback-oidc
      "DownstreamPathTemplate": "/signout-callback-oidc",
      "DownstreamScheme": "http",
      "DownstreamHostAndPorts": [
        {
          "Host": "localhost",
          "Port": 50891
        }
      ],
      "UpstreamPathTemplate": "/signout-callback-oidc",
      "UpstreamHeaderTransform": {
        "X-Forwarded-For": "{RemoteIpAddress}"
      }
    },
    { // MyApi
      "DownstreamPathTemplate": "/MyApi/{route}",
      "DownstreamScheme": "http",
      "DownstreamHostAndPorts": [
        {
          "Host": "localhost",
          "Port": 50890
        }
      ],
      "UpstreamPathTemplate": "/MyApi/{route}",
      "UpstreamHeaderTransform": {
        "X-Forwarded-For": "{RemoteIpAddress}"
      }
    },
    { // IdentityServer
      "DownstreamPathTemplate": "/{route}",
      "DownstreamScheme": "http",
      "DownstreamHostAndPorts": [
        {
          "Host": "localhost",
          "Port": 50875
        }
      ],
      "UpstreamPathTemplate": "/IdentityServer/{route}",
      "UpstreamHeaderTransform": {
        "X-Forwarded-For": "{RemoteIpAddress}"
      }
    },
    { // IdentityServer
      "DownstreamPathTemplate": "/{route}",
      "DownstreamScheme": "http",
      "DownstreamHostAndPorts": [
        {
          "Host": "localhost",
          "Port": 50875
        }
      ],
      "UpstreamPathTemplate": "/{route}",
      "UpstreamHeaderTransform": {
        "X-Forwarded-For": "{RemoteIpAddress}"
      }
    }
  ]
}
这里我们定义3个下游服务,MvcClient,MyApi,IdentityServer,并使用路由特性把signin-oidc,signout-callback-oidc导航到MvcClient,由MvcClient负责生成最后的Cooike。并将默认路由指定到IdentityServer服务。
在ConfigureServices中添加Ocelot服务。
services.AddOcelot()
            .AddCacheManager(x =>
            {
                x.WithDictionaryHandle();
            })
            .AddPolly()
在Configure中使用Ocelot中间件
app.UseOcelot().Wait();
Ocelot网关就部署完成了。
二 修改QuickstartIdentityServer配置
首先依然是修改launchSettings.json中的端口为50875
在ConfigureServices中修改AddIdentityServer配置中的PublicOrigin和IssuerUri的Url为http://localhost:54660/IdentityServer/
 services.AddIdentityServer(Option =>
            {
                Option.PublicOrigin = "http://localhost:54660/IdentityServer/";
                Option.IssuerUri = "http://localhost:54660/IdentityServer/";
            })
                .AddDeveloperSigningCredential()
                .AddInMemoryIdentityResources(Config.GetIdentityResources())
                .AddInMemoryApiResources(Config.GetApiResources())
                .AddInMemoryClients(Config.GetClients())
                .AddTestUsers(Config.GetUsers());
这样一来发现文档中的IdentityServer地址就变为网关的地址了,进一步实现IdentityServer的负载均衡也是没有问题的。
修改Config.cs中mvc客户端配置如下
  ClientId = "mvc",
                    ClientName = "MVC Client",
                    AllowedGrantTypes = GrantTypes.HybridAndClientCredentials,
                    ClientSecrets =
                    {
                        new Secret("secret".Sha256())
                    },
                   // AccessTokenType = AccessTokenType.Reference,
                    RequireConsent = true,
                    RedirectUris = { "http://localhost:54660/signin-oidc" },
                    PostLogoutRedirectUris = { "http://localhost:54660/signout-callback-oidc" },
                    AllowedScopes =
                    {
                        IdentityServerConstants.StandardScopes.OpenId,
                        IdentityServerConstants.StandardScopes.Profile,
                        "api1"
                    },
                    AllowOfflineAccess = true,
                    //直接返回客户端需要的Claims
                    AlwaysIncludeUserClaimsInIdToken = true,
主要修改RedirectUris和PostLogoutRedirectUris为网关地址,在网关也设置了signin-oidc和signout-callback-oidc转发请求到Mvc客户端。
三 修改MvcClient
修改MvcClient的launchSettings.json端口为50891。
修改MvcClient的Authority地址为http://localhost:54660/IdentityServer和默认路由地址MvcClient/{controller=Home}/{action=index}/{id?}
          JwtSecurityTokenHandler.DefaultInboundClaimTypeMap.Clear();

            services.AddAuthentication(options =>
                {
                    options.DefaultScheme = "Cookies";
                    options.DefaultChallengeScheme = "oidc";
                    //options.DefaultSignInScheme = CookieAuthenticationDefaults.AuthenticationScheme;
                })
                .AddCookie("Cookies",options=> {
                    options.ExpireTimeSpan = TimeSpan.FromMinutes(30);
                    options.SlidingExpiration = true;
                })
                .AddOpenIdConnect("oidc", options =>
                {
                    options.SignInScheme = "Cookies";

                    options.Authority = "http://localhost:54660/IdentityServer";
                    options.RequireHttpsMetadata = false;

                    options.ClientId = "mvc";
                    options.ClientSecret = "secret";
                    options.ResponseType = "code id_token";

                    options.SaveTokens = true;
                    options.GetClaimsFromUserInfoEndpoint = true;

                    options.Scope.Add("api1");

                    options.Scope.Add("offline_access");
                });
   app.UseMvc(routes =>
            {

                    routes.MapRoute(
                        name: "default",
                        template: "MvcClient/{controller=Home}/{action=index}/{id?}");

            });
修改HomeController,将相关地址修改为网关地址
        public async Task<IActionResult> CallApiUsingClientCredentials()
        {
            var tokenClient = new TokenClient("http://localhost:54660/IdentityServer/connect/token", "mvc", "secret");
            var tokenResponse = await tokenClient.RequestClientCredentialsAsync("api1");

            var client = new HttpClient();
            client.SetBearerToken(tokenResponse.AccessToken);
            var content = await client.GetStringAsync("http://localhost:54660/MyApi/identity");

            ViewBag.Json = JArray.Parse(content).ToString();
            return View("json");
        }

        public async Task<IActionResult> CallApiUsingUserAccessToken()
        {
            var accessToken = await HttpContext.GetTokenAsync("access_token");
            //OpenIdConnectParameterNames
            var client = new HttpClient();
            client.SetBearerToken(accessToken);
            var content = await client.GetStringAsync("http://localhost:54660/MyApi/identity");

            ViewBag.Json = JArray.Parse(content).ToString();
            return View("json");
        }
四 修改Api项目
Api项目修改多一点。
将MvcClient的HomeController和相关视图复制过来,模拟MVC与API同时存在的项目。
修改Api的launchSettings.json端口为50890。
修改Startup
public class Startup
    {
        public void ConfigureServices(IServiceCollection services)
        {
            services.AddDataProtection(options => options.ApplicationDiscriminator = "00000").SetApplicationName("00000");

            services.AddMvc();
            JwtSecurityTokenHandler.DefaultInboundClaimTypeMap.Clear();

            services.AddAuthentication(options =>
            {
                options.DefaultScheme = "Cookies";
                options.DefaultChallengeScheme = "oidc";
            }).AddCookie("Cookies")
               .AddOpenIdConnect("oidc", options =>
               {
                   options.SignInScheme = "Cookies";

                   options.Authority = "http://localhost:54660/IdentityServer";
                   options.RequireHttpsMetadata = false;

                   options.ClientId = "mvc";
                   options.ClientSecret = "secret";
                   options.ResponseType = "code id_token";

                   options.SaveTokens = true;
                   options.GetClaimsFromUserInfoEndpoint = true;

                   options.Scope.Add("api1");
                   options.Scope.Add("offline_access");
               })
                    .AddIdentityServerAuthentication("Bearer", options =>
                     {
                         options.Authority = "http://localhost:54660/IdentityServer";
                         options.RequireHttpsMetadata = false;
                         options.ApiSecret = "secret123";
                         options.ApiName = "api1";
                         options.SupportedTokens= SupportedTokens.Both;
                     });

            services.AddAuthorization(option =>
            {
                //默认 只写 [Authorize],表示使用oidc进行认证
                option.DefaultPolicy = new AuthorizationPolicyBuilder("oidc").RequireAuthenticatedUser().Build();
                //ApiController使用这个  [Authorize(Policy = "ApiPolicy")],使用jwt认证方案
                option.AddPolicy("ApiPolicy", policy =>
                {
                    policy.AddAuthenticationSchemes(JwtBearerDefaults.AuthenticationScheme);
                    policy.RequireAuthenticatedUser();
                });
            });
        }

        public void Configure(IApplicationBuilder app, IHostingEnvironment env)
        {
            //var options = new ForwardedHeadersOptions
            //{
            //    ForwardedHeaders = ForwardedHeaders.XForwardedFor | ForwardedHeaders.XForwardedProto | ForwardedHeaders.XForwardedHost,
            //    ForwardLimit = 1
            //};
            //options.KnownNetworks.Clear();
            //options.KnownProxies.Clear();
            //app.UseForwardedHeaders(options);
            //if (env.IsDevelopment())
            //{
            //    app.UseDeveloperExceptionPage();
            //}
            //else
            //{
            //    app.UseExceptionHandler("/Home/Error");
            //}

            app.UseAuthentication();

            app.UseStaticFiles();
            app.UseMvc(routes =>
            {
                routes.MapRoute(
                    name: "default",
                    template: "MyApi/{controller=MAccount}/{action=Login}/{id?}");

            });
        }
    }
主要添加了oidc认证配置和配置验证策略来同时支持oidc认证和Bearer认证。
修改IdentityController中的[Authorize]特性为[Authorize(Policy = "ApiPolicy")]
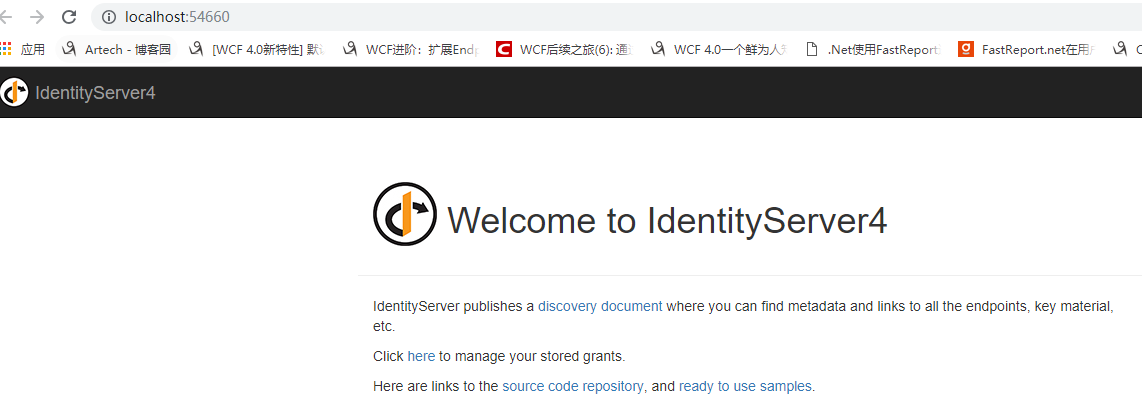
依次使用调试-开始执行(不调试)并选择项目名称启动QuickstartIdentityServer,Gateway,MvcClient,Api,启动方式如图

应该可以看到Gateway启动后直接显示了IdentityServer的默认首页
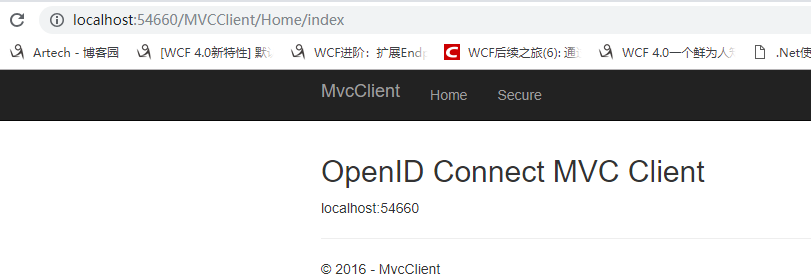
在浏览器输入http://localhost:54660/MVCClient/Home/index进入MVCClient
点击Secure进入需要授权的页面,这时候会跳转到登陆页面(才怪
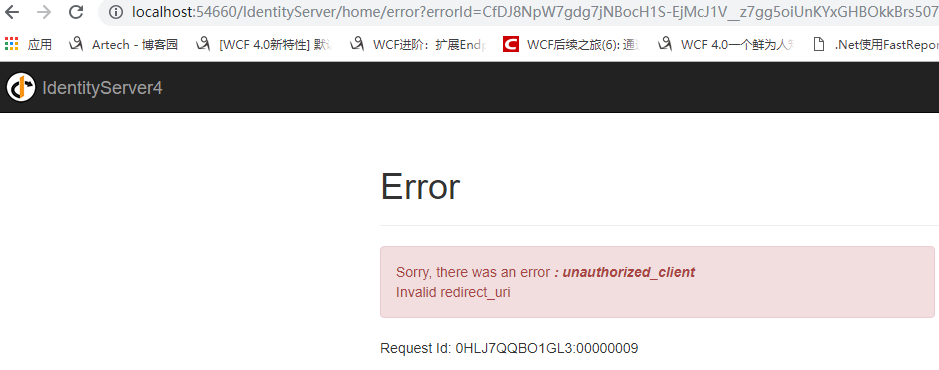
实际上我们会遇到一个错误,这是因为ocelot做网关时下游服务获取到的Host实际为localhost:50891,而在IdentityServer中设置的RedirectUris为网关的54660,我们可以通过ocelot转发X-Forwarded-Host头,并在客户端通过UseForwardedHeaders中间件来获取头。但是UseForwardedHeaders中间件为了防止IP欺骗攻击需要设置KnownNetworks和KnownProxies以实现严格匹配。当然也可以通过清空KnownNetworks和KnownProxies的默认值来不执行严格匹配,这样一来就有可能受到攻击。所以这里我直接使用硬编码的方式设置Host,实际使用时应从配置文件获取,同时修改MvcClient和Api相关代码
            app.Use(async (context, next) =>
            {
                context.Request.Host = HostString.FromUriComponent(new Uri("http://localhost:54660/"));
                await next.Invoke();
            });
            //var options = new ForwardedHeadersOptions
            //{
            //    ForwardedHeaders = ForwardedHeaders.XForwardedFor | ForwardedHeaders.XForwardedProto | ForwardedHeaders.XForwardedHost,
            //    ForwardLimit = 1
            //};
            //options.KnownNetworks.Clear();
            //options.KnownProxies.Clear();
            //app.UseForwardedHeaders(options);
在反向代理情况下通过转发X-Forwarded-Host头来获取Host地址应该时常见设置不知道还有没有其他更好的解决办法。
再次启动MVCClient并输入http://localhost:54660/MvcClient/Home/Secure。
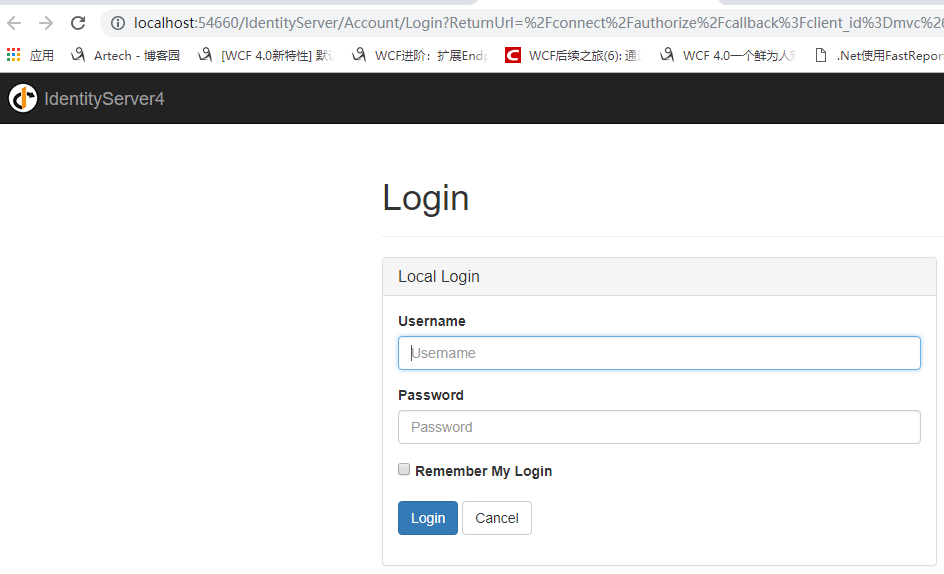
使用bob,password登陆一下
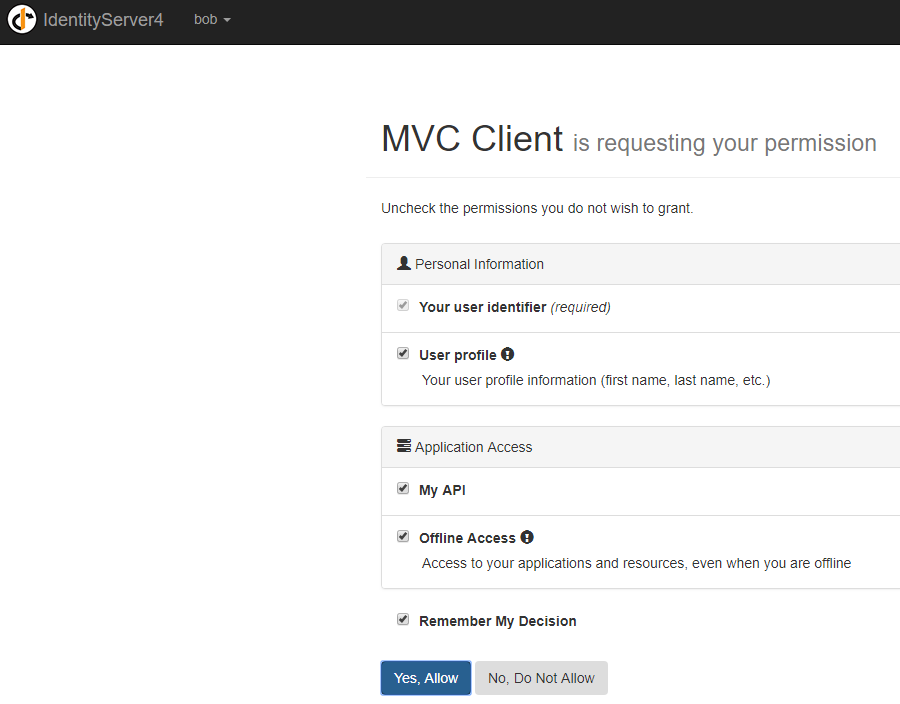
点击Yes, Allow返回http://localhost:54660/MvcClient/Home/Secure,此时可以查看到登陆后的信息
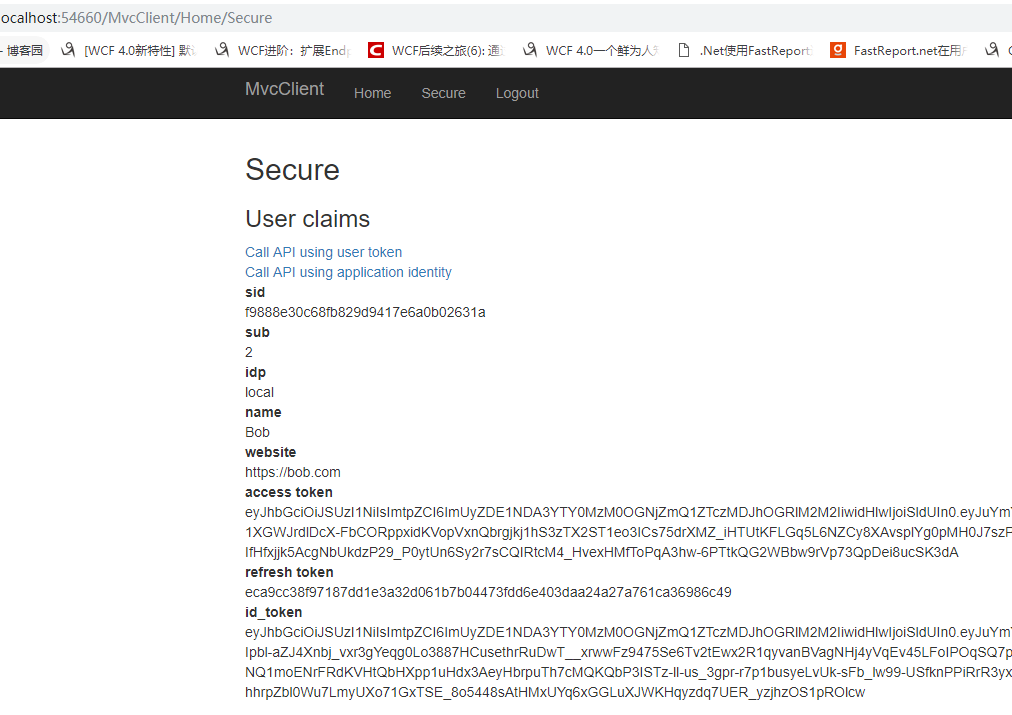
分别点击Call API using user token和Call API using application identity来验证一下通过access_token和ClientCredent模式请求来请求API

成功获取到返回值。
输入http://localhost:54660/myapi/Home/index来查看API情况
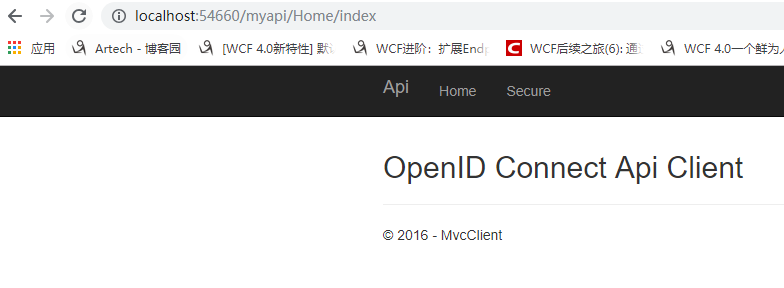
请求成功。
点击Secure从API项目查看用户信息,此时展示信息应该和MvcClient一致
嗯,并没有看到用户信息而是又到了授权页.....,这是因为.netCore使用DataProtection来保护数据(点击查看详细信息),Api项目不能解析由MvcClient生成的Cookie,而被重定向到了IdentityServer服务中。
在MvcClient和Api的ConfigureServices下添加如下代码来同步密钥环。
services.AddDataProtection(options => options.ApplicationDiscriminator = "00000").SetApplicationName("00000");
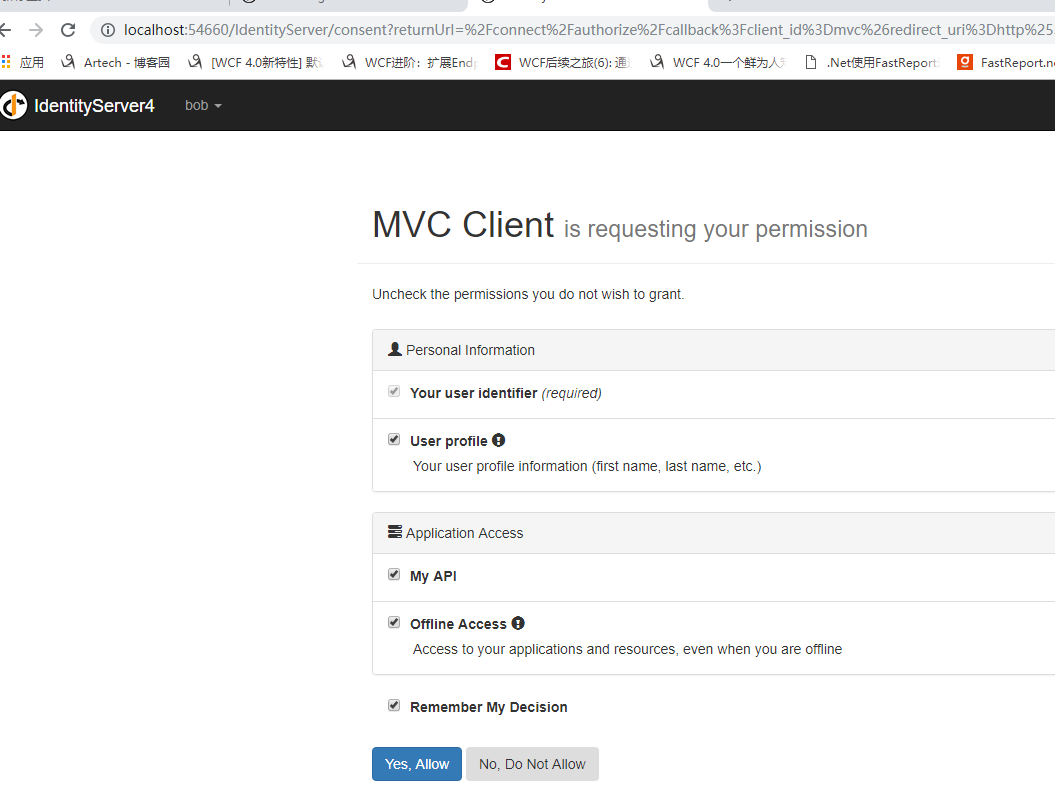
再次启动MvcClient和Api项目并在浏览器中输入http://localhost:54660/MvcClient/home/Secure,此时被要求重新授权,点击Yes, Allow后看到用户信息
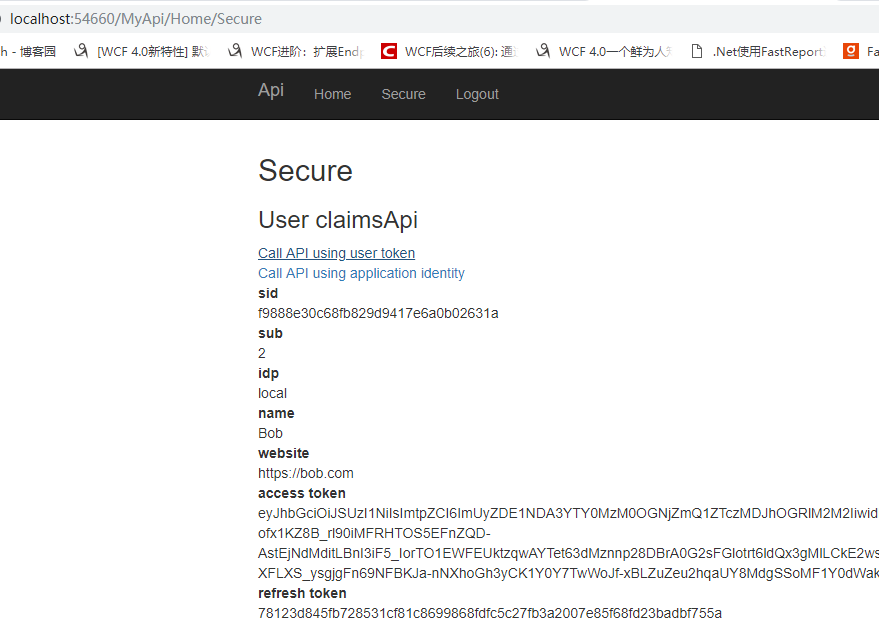
再输入http://localhost:54660/myapi/Home/Secure从API项目查看用户信息
分别点击Call API using user token和Call API using application identity来验证一下通过access_token和ClientCredent模式请求来请求API

请求成功。
如此我们便实现了通过ocelot实现统一入口,通过IdentityServer4来实现认证的需求
源代码 https://github.com/saber-wang/Quickstart5_HybridAndApi
参考
https://www.cnblogs.com/stulzq/category/1060023.html
https://www.cnblogs.com/xiaoti/p/10118930.html
https://www.cnblogs.com/jackcao/tag/identityserver4/

 浙公网安备 33010602011771号