
使用springboot简单构建发送邮件的功能
1.首先创建一个springboot项目,我的idea是2021.2
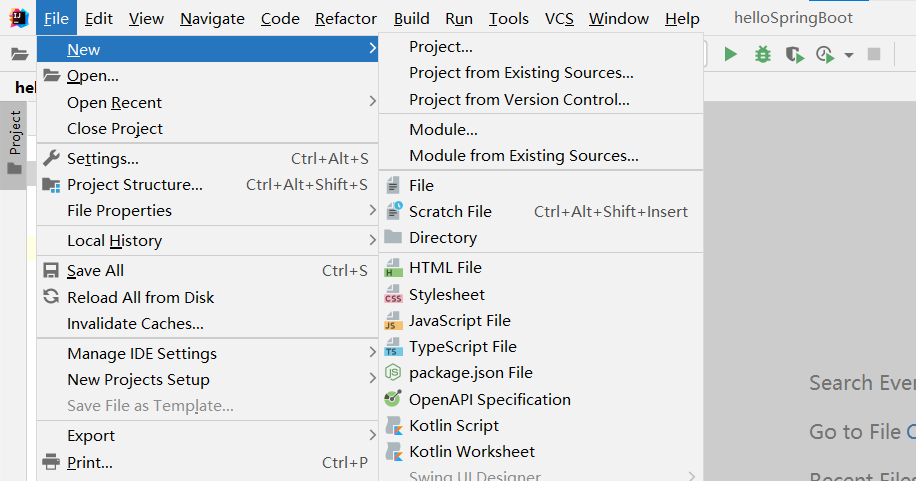
file ->new ->project
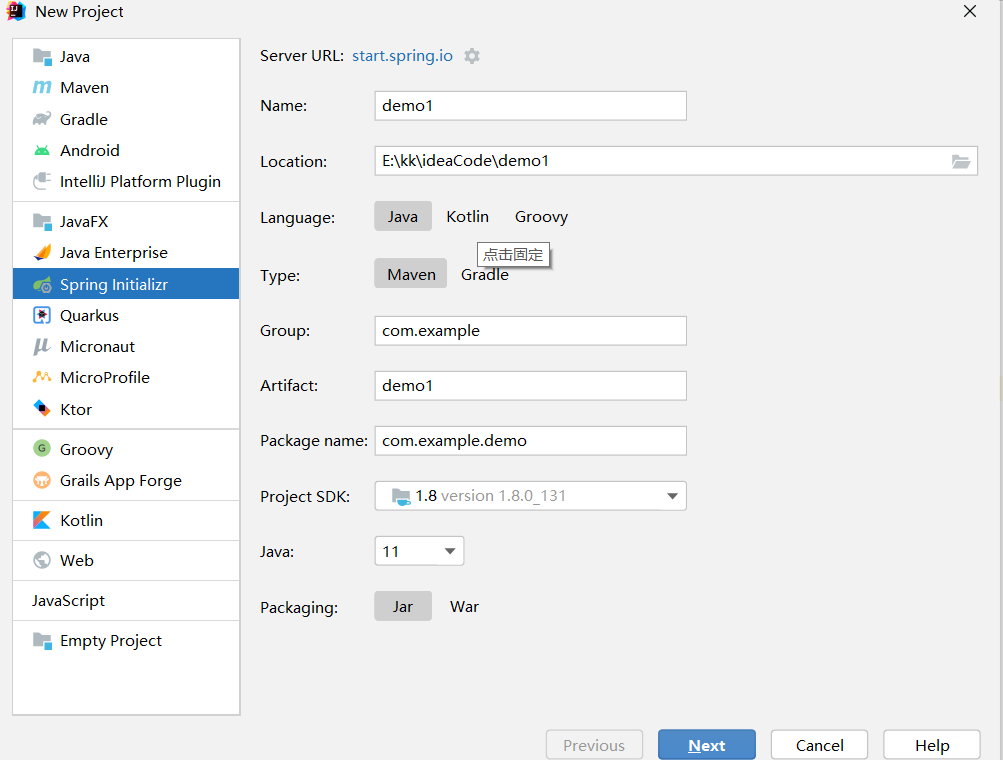
选择spring initializr,java版本选择和自己jdk适合的版本,如果上方server url报红,进入电脑防火墙将idea放开限制就可以了,如果没有解决,重新new就行
next,选中web里的spring web
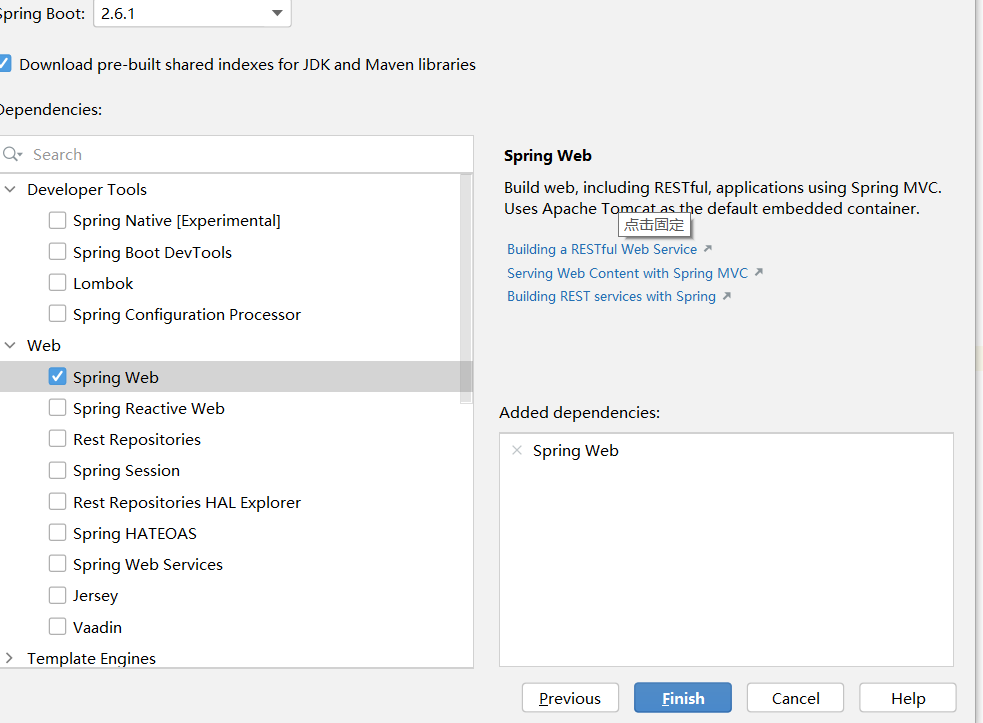
点击finish,等待idea加载
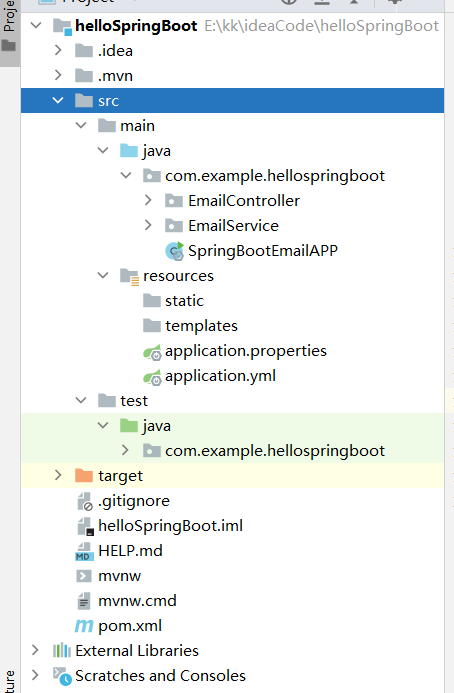
项目结构
在pom.xml中加入
<dependency>
    <groupId>org.springframework.boot</groupId>
    <artifactId>spring-boot-starter-mail</artifactId>
    <version>2.5.4</version>
</dependency>
2.开始代码写入
在hellospringboot下建立EmailController包和EmailService包
EmailController代码
package com.example.hellospringboot.EmailController;

import org.springframework.stereotype.Controller;

/**
 * @author kkk Email:xxxxxxxxxxx.com
 * @Description:
 * @version:
 * @Date 2021/12/15 14:51
 */
@Controller
public class EmailController {
}
EmailService代码
接口
package com.example.hellospringboot.EmailService;

public interface EmailService {


        /**
         * 发送文本邮件
         * @param to 收件人
         * @param subject 主题
         * @param content 内容
         */
        void sendSimpleMail(String to, String subject, String content);

        /**
         * 发送HTML邮件
         * @param to 收件人
         * @param subject 主题
         * @param content 内容
         */
        void sendHtmlMail(String to, String subject, String content);

        /**
         * 发送带附件的邮件
         * @param to 收件人
         * @param subject 主题
         * @param content 内容
         * @param filePath 附件
         */
        public void sendAttachmentsMail(String to, String subject, String content, String filePath);
    }
EmailService接口的实现类
package com.example.hellospringboot.EmailService;

import org.slf4j.Logger;
import org.slf4j.LoggerFactory;
import org.springframework.beans.factory.annotation.Autowired;
import org.springframework.beans.factory.annotation.Value;
import org.springframework.core.io.FileSystemResource;
import org.springframework.mail.SimpleMailMessage;
import org.springframework.mail.javamail.JavaMailSender;
import org.springframework.mail.javamail.MimeMessageHelper;
import org.springframework.stereotype.Service;
import javax.mail.MessagingException;
import javax.mail.internet.MimeMessage;
import java.io.File;

@Service
public class EmailServiceImpl implements EmailService {

    private final Logger logger = LoggerFactory.getLogger(this.getClass());

    @Autowired
    private JavaMailSender javaMailSender;

    @Value("${spring.mail.from}")
    private String from;

    @Override
    public void sendSimpleMail(String to, String subject, String content) {
        SimpleMailMessage message = new SimpleMailMessage();
        //发件人
        message.setFrom(from);
        //收件人
        message.setTo(to);
        //邮件主题
        message.setSubject(subject);
        //邮件内容
        message.setText(content);
        //发送邮件
        javaMailSender.send(message);
    }

    @Override
    public void sendHtmlMail(String to, String subject, String content) {
        MimeMessage message = javaMailSender.createMimeMessage();
        MimeMessageHelper messageHelper;
        try {
            messageHelper = new MimeMessageHelper(message,true);
            messageHelper.setFrom(from);
            messageHelper.setTo(to);
            message.setSubject(subject);
            messageHelper.setText(content,true);
            javaMailSender.send(message);
            logger.info("邮件已经发送!");
        } catch (MessagingException e) {
            logger.error("发送邮件时发生异常:"+e);
        }
    }

    @Override
    public void sendAttachmentsMail(String to, String subject, String content, String filePath) {
        MimeMessage message = javaMailSender.createMimeMessage();
        MimeMessageHelper messageHelper;
        try {
            messageHelper = new MimeMessageHelper(message,true);
            messageHelper.setFrom(from);
            messageHelper.setTo(to);
            messageHelper.setSubject(subject);
            messageHelper.setText(content,true);
            //携带附件
            FileSystemResource file = new FileSystemResource(filePath);
            String fileName = filePath.substring(filePath.lastIndexOf(File.separator));
            messageHelper.addAttachment(fileName,file);
            javaMailSender.send(message);
            logger.info("邮件加附件发送成功!");
        } catch (MessagingException e) {
            logger.error("发送失败:"+e);
        }
    }

}
SpringBootEmailAPP中代码
package com.example.hellospringboot;

import org.springframework.boot.SpringApplication;
import org.springframework.boot.autoconfigure.SpringBootApplication;

@SpringBootApplication
public class SpringBootEmailAPP {
    public static void main(String[] args) {
        SpringApplication.run(SpringBootEmailAPP.class,args);
    }
}
3.在resources下建立yml文件,application.yml,代码如下
此处配置需要开启自己的邮箱客户端授权码
开通步骤如下,以网易为实例
登陆网易邮箱,然后找到如下imp、smtp,imap设置,选择开启,此时需要验证,
需要记下自己的邮箱客户端授权码,此授权码只显示一次
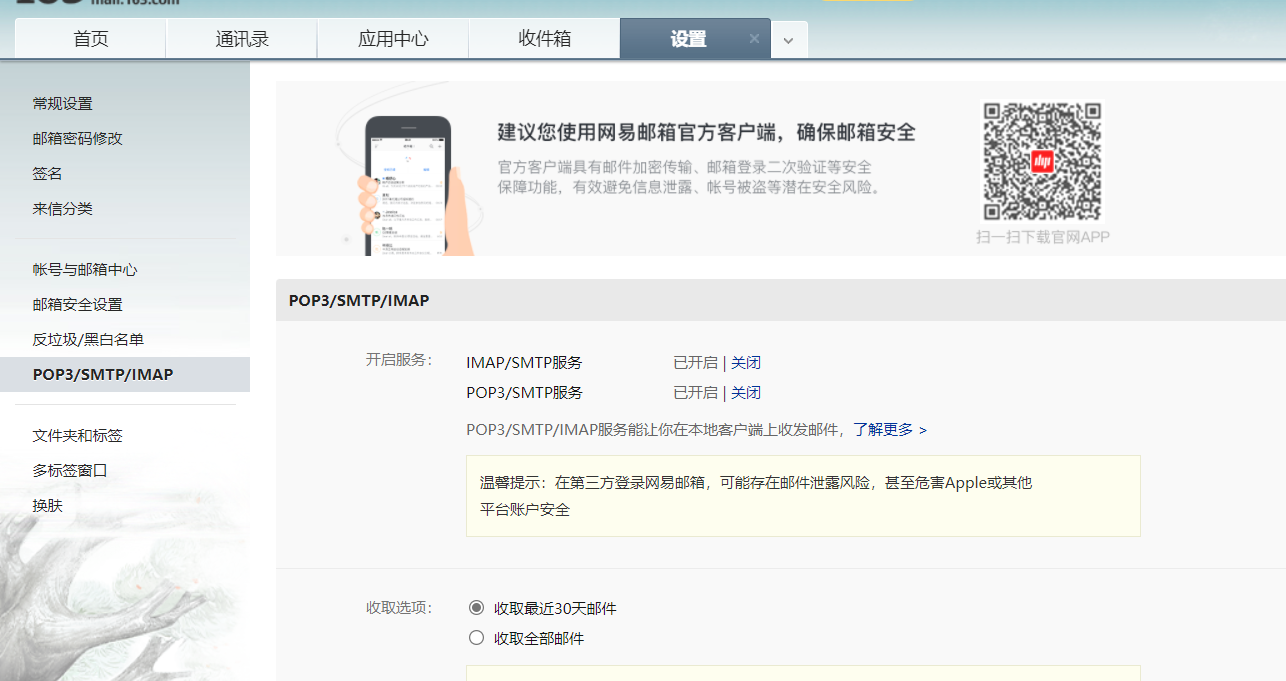
然后按照下列配置,配置自己的application.yml,如果是qq邮箱
则把下边的host改成smtp.qq.com,其余一致
spring:
  mail:
    host: smtp.163.com #发送邮件服务器
    username: xxxxxx@163.com #发送邮件的邮箱地址
    password:  xxxxxxxxxx #自己的客户端授权码
    properties.mail.smtp.port: 994 #465或者994
    from: xxxxxx@163.com # 发送邮件的地址,和上面username一致
    properties.mail.smtp.starttls.enable: true
    properties.mail.smtp.starttls.required: true
    properties.mail.smtp.ssl.enable: true
    default-encoding: utf-8
4.到这就是所有的代码和配置完成了,要建立测试,测试是否能正确发送邮件,完成功能
在test目录下,test的包中建立测试类,以下是代码
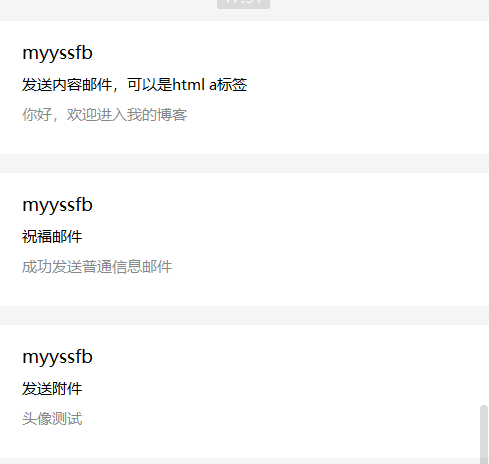
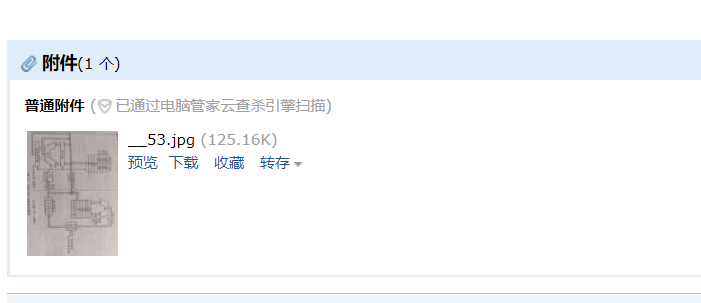
package com.example.hellospringboot;


import com.example.hellospringboot.EmailService.EmailService;
import org.junit.Test;

import org.junit.runner.RunWith;
import org.springframework.beans.factory.annotation.Autowired;
import org.springframework.boot.test.context.SpringBootTest;
import org.springframework.test.context.junit4.SpringRunner;

@RunWith(SpringRunner.class)
@SpringBootTest
public class SpringbootEmailApplicationTests {

    @Autowired
    private EmailService emailService;

    @Test
    public void sendSimpleEmail(){
        String content = "成功发送普通信息邮件";
        emailService.sendSimpleMail("xxxxxxxxxx@qq.com","祝福邮件",content);
    }

    @Test
    public void sendMimeEmail(){
        String content = "<a href='https://www.cnblogs.com/myyssfb/'>你好,欢迎进入我的博客</a>";
        emailService.sendHtmlMail("xxxxxxxx@163.com","发送内容邮件,可以是html a标签",content);
    }

    @Test
    public void sendAttachment(){
        emailService.sendAttachmentsMail("xxxxxxxxx@qq.com",
                "发送附件",
                "头像测试",
                "C:\\Users\\zhang\\Pictures\\53.jpg");
    }
}
运行test,注意发送带附件的test中路径不要有空格,否则可能运行失败

得到结果
可下载
至此结束
第一篇博客于2021年12月16写于上海,代码生涯-》实习一周

 浙公网安备 33010602011771号