[Nest] 02.nest之控制器
控制器 Controller
Nest 的核心概念
- 模块 Module
- 控制器 Controller
- 服务与依赖注入 Provider Dependency injection
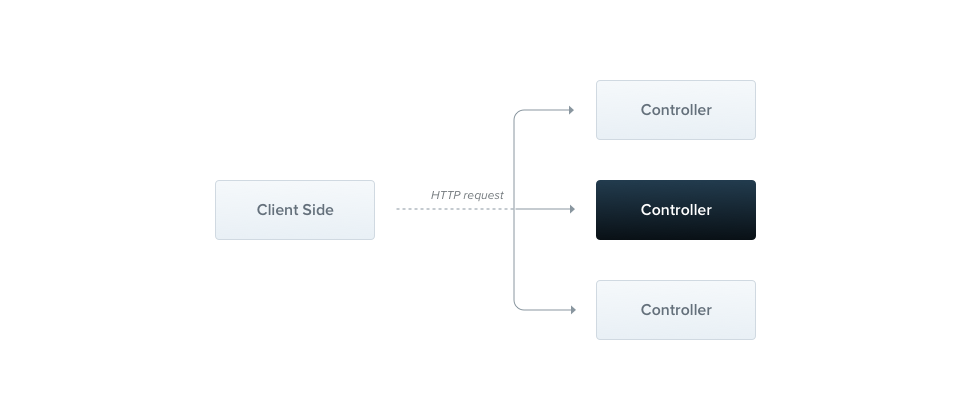
控制器负责处理应用的特定请求和向客户端返回响应.路由机制控制哪个控制器接收哪些请求.
Nest 中使用@Controller 和类来实现控制器的功能,使用装饰器来实现路由功能.装饰器将类与所需的元数据关联,并使 Nest 能够创建路由映射(将请求绑定到相应的控制器).
使用 cli 进行快速创建
简单示例
先创建 module
//全称
nest generate module collect

//简称
 nest g mo collect
/src/collect/collect.module.ts
import { Module } from '@nestjs/common';
import { CollectController } from './collect.controller';

@Module({
  controllers: [CollectController],
})
export class CollectModule {}
再进行 Controller,的创建,会自动在 module 中加入 Controller,
//全称
nest generate controller collect

//简称
nest g co collect
/src/collect/collect.controller.ts
import { Controller } from '@nestjs/common';

@Controller('collect')
export class CollectController {}

全称和简称
- class (alias: cl)
- controller (alias: co)
- decorator (alias: d)
- exception (alias: e)
- filter (alias: f)
- gateway (alias: ga)
- guard (alias: gu)
- interceptor (alias: i)
- middleware (alias: mi)
- module (alias: mo)
- pipe (alias: pi)
- provider (alias: pr)
- service (alias: s)
cli 还有个好用的命令是nest info用来查询当前项目的情况
创建路由
创建的 collect.controller.ts 文件中,使用@Controller('collect') 装饰器定义了一个路由前缀,前缀可以避免在所有路由共享通用前缀时出现冲突的情况,我们轻松对一组相关路由进行分组,并减少重复代码.
import { Controller, Get } from '@nestjs/common';

@Controller('collect')
export class CollectController {
  @Get()
  findAll(): string {
    return '这里是collect集合中的主页面';
  }
}
@Get() 请求方法装饰器告诉 Nest 为 HTTP 请求的特定端点创建处理程序.端点对应于 HTTP 请求方法(在本例中为 GET)和路由.路由是通过连接为控制器声明的(可选)前缀和请求装饰器中指定的任何路由来确定的.这里就是 Get /collect 请求映射到 findAll 处理函数
输入http://localhost:6688/collect,此时页面展示
上面的@Controller('collect')是一个路由的前缀,我们可以使用前缀组合成新的路由
......
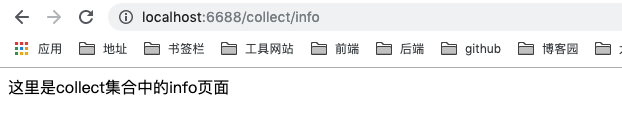
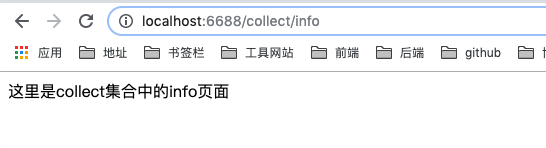
@Get('info')
findCollectInfo(): string {
return '这里是collect集合中的info页面';
}
......
输入http://localhost:6688/collect/info,此时页面展示
处理函数
当发出请求时,NEST 会自动匹配到用户定义的处理函数上面,该函数名称是任意的.我们必须声明一个绑定路由的函数,函数将返回 200 状态代码和相关的响应.
Nest 两种不同的操作响应选项
| 选项 | 介绍 |
|---|---|
| 标准 | 使用这个内置方法,当请求处理程序返回一个 JavaScript 对象或数组时,它将自动序列化为 JSON.但是,当它返回一个 JavaScript 基本类型(例如 string、number、boolean)时,Nest 将只发送值,而不尝试序列化它.这使响应处理变得简单:只需要返回值,其余的由 Nest 负责. |
| 框架 | 我们可以在函数签名通过 @Res() 注入类库特定的 响应对象(例如,Express),使用此函数,您具有使用该对象的响应处理函数.例如,使用 Express,您可以使用类似代码构建响应 response.status(200).send() |
注意! 禁止同时使用这两种方法. Nest 检测处理程序是否正在使用 @Res()或 @Next(),如果两个方法都用了的话, 那么标准模式会在这个路由上被禁用, 可能得到的结果不是你想要的.
Request 对象和 Response 对象
处理程序有时需要访问客户端的请求细节,而 Nest 使用框架(默认是 express)的请求对象.因此,我们可以使用 @Req() 装饰器将请求对象注入处理程序.
为了在 express 中使用 Typescript (如 request: Request 上面的参数示例所示),请安装 @types/express .
- @Request() req
- @Response() res
- @Next() next
- @Session() req.session
- @Param(key?: string) req.params / req.params[key]
- @Body(key?: string) req.body / req.body[key]
- @Query(key?: string) req.query / req.query[key]
- @Headers(name?: string) req.headers / req.headers[name]
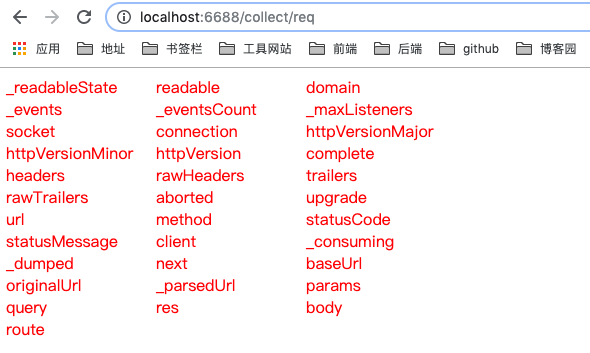
为了与底层 HTTP 平台(如 Express 和 Fastify)之间的类型兼容,Nest 提供了 @Res()和 @Response() 装饰器.@Res()只是 @Response()的别名.两者都直接公开底层响应对象接口.在使用它们时,您还应该导入底层库的类型(例如:@types/express)以充分利用它们.注意,在方法处理程序中注入 @Res()或 @Response() 时,将 Nest 置于该处理程序的特定于库的模式中,并负责管理响应.这样做时,必须通过调用响应对象(例如,res.json(…)或 res.send(…))发出某种响应,否则 HTTP 服务器将挂起.
import { Response, Request } from 'express';

......
  @Get('req')
  handleRequest(@Req() request: Request, @Res() response: Response): void {
    let string = '<p style="width:450px;word-break:break-word;">';
    Object.keys(request).forEach(key => {
      string += `<text style="display:inline-block;width:150px;">${key}</text>`;
    });
    string += '</p>';
    response.status(200).send(`<div style="color:red">${string}</div>`);
  }
......
输入http://localhost:6688/collect/req
HTTP 请求装饰器
之前的代码使用 @Get 装饰器,nest 还有一些其它 HTTP 请求装饰器.例如:@Post:
修改根路由
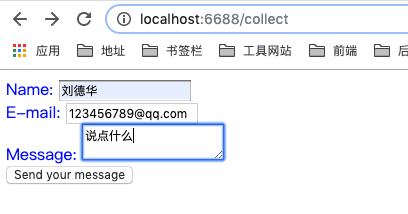
  @Get()
  findAll(): string {
    return `<div style="color:blue">
        <form action="/collect/create" method="post">
            <div>
                <label for="name">Name:</label>
                <input name="name" type="text" id="name">
            </div>
            <div>
                <label for="mail">E-mail:</label>
                <input name="email" type="email" id="mail">
            </div>
            <div>
                <label for="msg">Message:</label>
                <textarea name="msg" id="msg"></textarea>
            </div>
            <button type="submit">Send your message</button>
        </form>
    </div>`;
  }
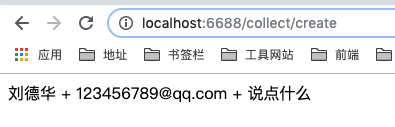
添加 post 请求
  @Post('/create')
  createNewCollect(@Body()
  createData: {
    name: string;
    email: string;
    msg: string;
  }): string {
    return `<div>${createData.name} + ${createData.email} + ${createData.msg}</div>`;
  }
Nest 请求装饰器
- @Get()
- @Post()
- @Put()
- @Delete()
- @Patch()
- @Options()
- @Head()
- @All()
HTTP 没有 All 方法,这是一个快捷方法用来接收任何类型的 HTTP 请求。
路由通配符
路由同样支持模式匹配.例如,*被用作通配符,将匹配任何字符组合.路由地址将匹配 abcd 、 ab_cd 、 abecd 等.字符 ? 、 + 、 * 以及 () 是它们的正则表达式对应项的子集.连字符 (-) 和点 (.) 按字符串路径解析.
  @Get('/match*')
  matchRoute() {
    return '能够匹配上';
  }
输入http://localhost:6688/collect/matchaaa和http://localhost:6688/collect/matchddd,路由都能正常展示页面
状态码
默认情况下,响应的状态码总是 200,而 POST 是 201,我们可以使用@HttpCode(...)装饰器来更改状态码.
  @Post('/create')
  @HttpCode(500)
  createNewCollect(@Body()
  createData: {
    name: string;
    email: string;
    msg: string;
  }): string {
    return `<div>${createData.name} + ${createData.email} + ${createData.msg}</div>`;
  }
然后创建一个 create 请求,会发现尽管 response 正常返回数据,Status Code 依据状态码显示 500 Internal Server Error
通常,状态码不是固定的,而是取决于各种因素.在这种情况下,使用类库特有的的响应(通过@Res()注入 )对象(或者,在出现错误时,抛出异常).
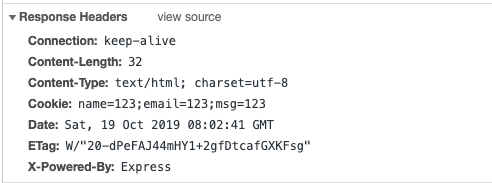
响应头 Headers
要指定自定义响应头,可以使用 @header() 修饰器或框架(express) response.header().
修改 post
@Post('/create')
@HttpCode(500)
@Header('Cookie', 'name=123;email=123;msg=123')
createNewCollect(@Body()
createData: {
  name: string;
  email: string;
  msg: string;
}): string {
  return `<div>${createData.name} + ${createData.email} + ${createData.msg}</div>`;
}
Redirection (重定向)
要将响应重定向到特定的 URL,可以使用 @Redirect()装饰器或特定于库的响应对象(并直接调用 res.redirect()).
@Redirect() 带有必需的 url 参数和可选的 statusCode 参数. 如果省略,则 statusCode 默认为 302.
  @Get('/redirect')
  @Redirect('https://www.baidu.com', 301)
  go() {
    return 'go';
  }
输入http://localhost:6688/collect/redirect之后我们就去了百度
动态确定 HTTP 状态代码或重定向 URL.通过从路由处理程序方法返回一个形状为以下形式的对象
{
  "url": string,
  "statusCode": number
}
返回的值将覆盖传递给 @Redirect()装饰器的所有参数
  @Get('/redirect')
  @Redirect('https://www.baidu.com', 301)
  go(@Query('version') version) {
    if (version && version === '5') {
      return { url: 'https://www.cnblogs.com/' };
    }
  }
输入http://localhost:6688/collect/redirect?version=5之后我们就去了博客园
路由参数
需要接受动态数据作为请求的一部分时,例如 Get'/collect/:id',可以使用 @Param() 装饰器访问以这种方式声明的路由参数
  @Get(':id')
  findOne(@Param() params: { id: string }): string {
    return `This action returns a #${params.id} cat`;
  }
输入http://localhost:6688/collect/10086之后
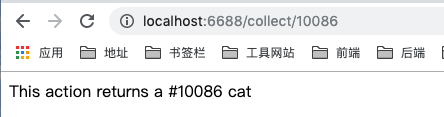
@Param()用于修饰方法参数(上面示例中的参数),并使路由参数可用作该修饰的方法参数在方法体内的属性. 如上面的代码所示,我们可以通过引用 params.id 来访问 id 参数. 您还可以将特定的参数标记传递给装饰器,然后在方法主体中按名称直接引用路由参数.
  @Get(':id/:order')
  findOne(@Param('id') id: string, @Param('order') order: string): string {
    return `This action returns a #${id} cat order by ${order} `;
  }
输入http://localhost:6688/collect/10086/desc之后
- req.params => Get("/user/:id")
- req.body =>Post("/user/create")
- req.query => GET("/user?order=desc&id=id")
Async / await
Nest 支持异步函数和 RxJS Observable 流.
Async / await 来处理程序,每个异步函数都必须返回 Promise.
@Get()
async findAll(): Promise<any[]> {
  return [];
}
使用 RxJS observable 流,Nest 将自动订阅下面的源并获取最后发出的值(在流完成后)
@Get()
findAll(): Observable<any[]> {
  return of([]);
}
数据传输对象
首先(如果您使用 TypeScript),我们需要确定 DTO(数据传输对象)模式.DTO 是一个对象,它定义了如何通过网络发送数据.我们可以通过使用 TypeScript 接口或简单的类来完成.令人惊讶的是,我们在这里推荐使用类.为什么?类是 JavaScript ES6 标准的一部分,因此它们在编译后的 JavaScript 中保留为实际实体.另一方面,由于 TypeScript 接口在转换过程中被删除,所以 Nest 不能在运行时引用它们.这一点很重要,因为诸如管道之类的特性在运行时能够访问变量的元类型时提供更多的可能性.
之前是在处理函数中直接声明参数的类型
......
createNewCollect(@Body()
  createCollect: {
    name: string;
    email: string;
    msg: string;
  }): string {
    return `<div>${createCollect.name} + ${createCollect.email} + ${createCollect.msg}</div>`;
  }
......
现在使用数据对象模式
新建 createCollect.dto.ts
export class CreateCollectDto {
  readonly name: string;
  readonly email: string;
  readonly msg: string;
}
修改 post
  @Post('/create')
  createNewCollect(
    @Body()
    createCollect: CreateCollectDto,
  ): string {
    return `<div>${createCollect.name} + ${createCollect.email} + ${createCollect.msg}</div>`;
  }
一样的效果

模块引入控制器
控制器已经准备就绪,可以使用,但是 Nest 不知道 CatsController 是否存在,所以它不会创建这个类的一个实例.
控制器属于模块,我们将 controllers 数组保存在 @module() 装饰器中. 由于除了根 ApplicationModule,我们没有其他模块,所以我们将使用它来介绍 CollectController
import { Module } from '@nestjs/common';
import { CollectController } from './collect.controller';

@Module({
  controllers: [CollectController],
})
export class CollectModule {}
使用 cli 创建的会自动将 controllers 添加到 module 中
其他
Doc
官方完整示例
Nest 标准
import { Controller, Get, Query, Post, Body, Put, Param, Delete } from '@nestjs/common';
import { CreateCatDto, UpdateCatDto, ListAllEntities } from './dto';

@Controller('cats')
export class CatsController {
  @Post()
  create(@Body() createCatDto: CreateCatDto) {
    return 'This action adds a new cat';
  }

  @Get()
  findAll(@Query() query: ListAllEntities) {
    return `This action returns all cats (limit: ${query.limit} items)`;
  }

  @Get(':id')
  findOne(@Param('id') id: string) {
    return `This action returns a #${id} cat`;
  }

  @Put(':id')
  update(@Param('id') id: string, @Body() updateCatDto: UpdateCatDto) {
    return `This action updates a #${id} cat`;
  }

  @Delete(':id')
  remove(@Param('id') id: string) {
    return `This action removes a #${id} cat`;
  }
}
类库(express)特有方式
import { Controller, Get, Post, Res, HttpStatus } from '@nestjs/common';
import { Response } from 'express';

@Controller('cats')
export class CatsController {
  @Post()
  create(@Res() res: Response) {
    res.status(HttpStatus.CREATED).send();
  }

  @Get()
  findAll(@Res() res: Response) {
     res.status(HttpStatus.OK).json([]);
  }
}
虽然这种方法有效,并且事实上通过提供响应对象的完全控制(标准操作,库特定的功能等)在某些方面允许更多的灵活性,但应谨慎使用.这种方式非常不清晰,并且有一些缺点. 主要是失去了与依赖于 Nest 标准响应处理的 Nest 功能的兼容性,例如拦截器和 @HttpCode() 装饰器.此外,您的代码可能变得依赖于平台(因为底层库可能在响应对象上有不同的 API),并且更难测试(您必须模拟响应对象等).
因此,在可能的情况下,应始终首选 Nest 标准方法.

 浙公网安备 33010602011771号