


35、商品服务--品牌管理--OSS前后联调测试上传
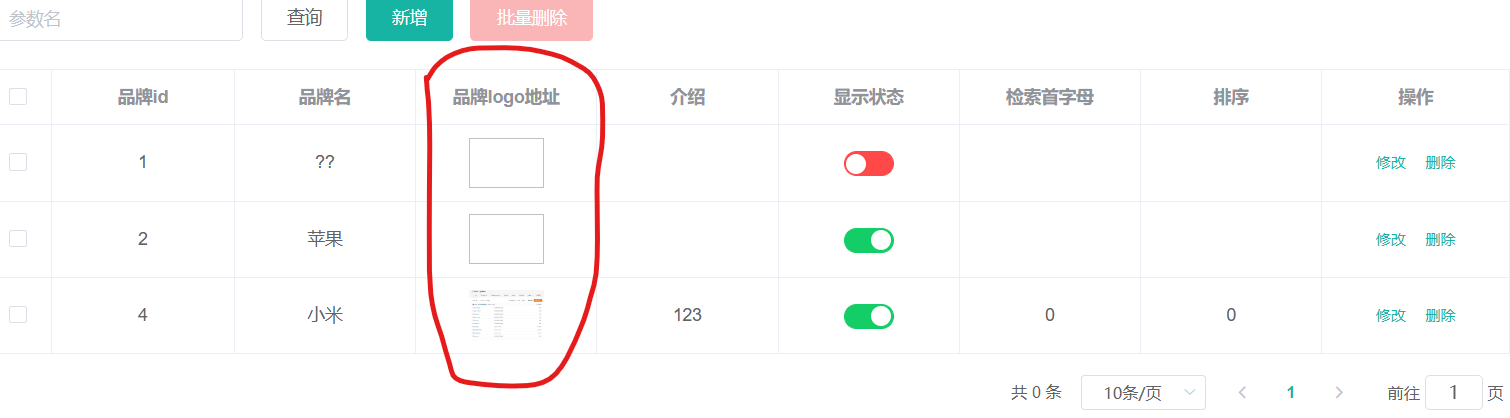
效果如下

1、首先编写下面两个控件,一个发送请求,一个是提交数据
发送请求
import http from '@/utils/httpRequest.js'
export function policy() {
   return  new Promise((resolve,reject)=>{
        http({
            url: http.adornUrl("/thirdparty/oss/policy"),
            method: "get",
            params: http.adornParams({})
        }).then(({ data }) => {
            resolve(data);
        })
    });
}
提交数据
<template>
  <div>
    <el-upload
      action="http://dqh-gulimall.oss-cn-qingdao.aliyuncs.com"
      :data="dataObj"
      list-type="picture"
      :multiple="false" :show-file-list="showFileList"
      :file-list="fileList"
      :before-upload="beforeUpload"
      :on-remove="handleRemove"
      :on-success="handleUploadSuccess"
      :on-preview="handlePreview">
      <el-button size="small" type="primary">点击上传</el-button>
      <div slot="tip" class="el-upload__tip">只能上传jpg/png文件,且不超过10MB</div>
    </el-upload>
    <el-dialog :visible.sync="dialogVisible">
      <img width="100%" :src="fileList[0].url" alt="">
    </el-dialog>
  </div>
</template>
<script>
   import {policy} from './policy'
   import { getUUID } from '@/utils'

  export default {
    name: 'singleUpload',
    props: {
      value: String
    },
    computed: {
      imageUrl() {
        return this.value;
      },
      imageName() {
        if (this.value != null && this.value !== '') {
          return this.value.substr(this.value.lastIndexOf("/") + 1);
        } else {
          return null;
        }
      },
      fileList() {
        return [{
          name: this.imageName,
          url: this.imageUrl
        }]
      },
      showFileList: {
        get: function () {
          return this.value !== null && this.value !== ''&& this.value!==undefined;
        },
        set: function (newValue) {
        }
      }
    },
    data() {
      return {
        dataObj: {
          policy: '',
          signature: '',
          key: '',
          ossaccessKeyId: '',
          dir: '',
          host: '',
          // callback:'',
        },
        dialogVisible: false
      };
    },
    methods: {
      emitInput(val) {
        this.$emit('input', val)
      },
      handleRemove(file, fileList) {
        this.emitInput('');
      },
      handlePreview(file) {
        this.dialogVisible = true;
      },
      beforeUpload(file) {
        let _self = this;
        return new Promise((resolve, reject) => {
          policy().then(response => {
            console.log("相应的数据", response)
            _self.dataObj.policy = response.data.policy;
            _self.dataObj.signature = response.data.signature;
            _self.dataObj.ossaccessKeyId = response.data.accessId;
            _self.dataObj.key = response.data.dir +getUUID()+'_${filename}';
            _self.dataObj.dir = response.data.dir;
            _self.dataObj.host = response.data.host;
            console.log("相应的数据222", _self.dataObj)
            resolve(true)
          }).catch(err => {
            reject(false)
          })
        })
      },
      handleUploadSuccess(res, file) {
        console.log("上传成功...")
        this.showFileList = true;
        this.fileList.pop();
        this.fileList.push({name: file.name, url: this.dataObj.host + '/' + this.dataObj.key.replace("${filename}",file.name) });
        this.emitInput(this.fileList[0].url);
      }
    }
  }
</script>
<style>

</style>
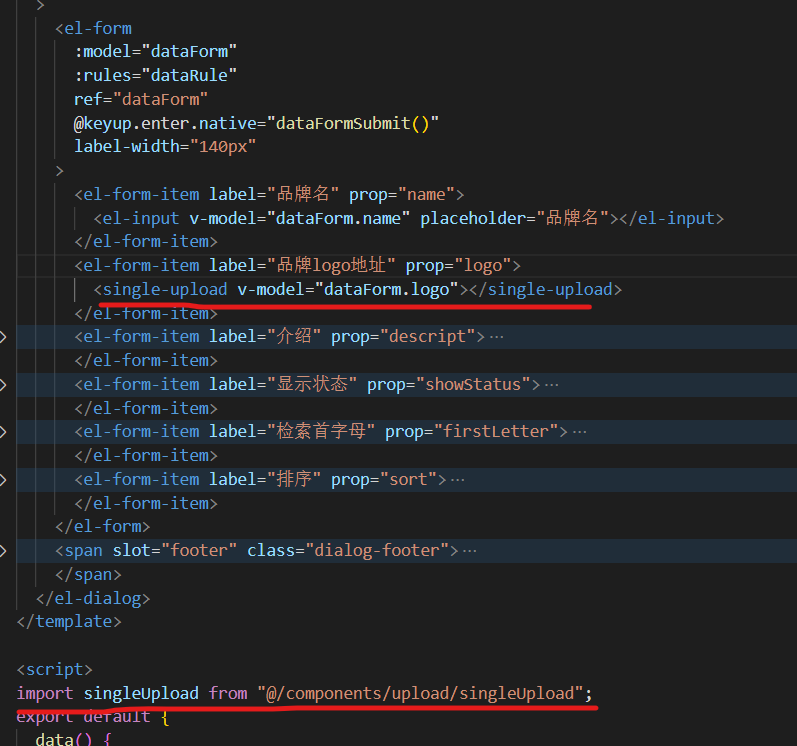
2、在我们的新增品牌对话框中注入提交数据的控件
3、细节优化
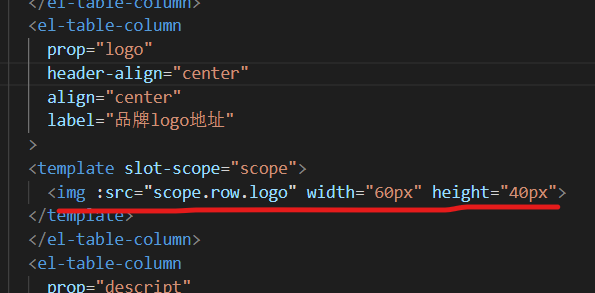
3.1)logo直接显示图片
3.2)新增对话框数据校验(参考elementui的form表单的自定义校验规则)
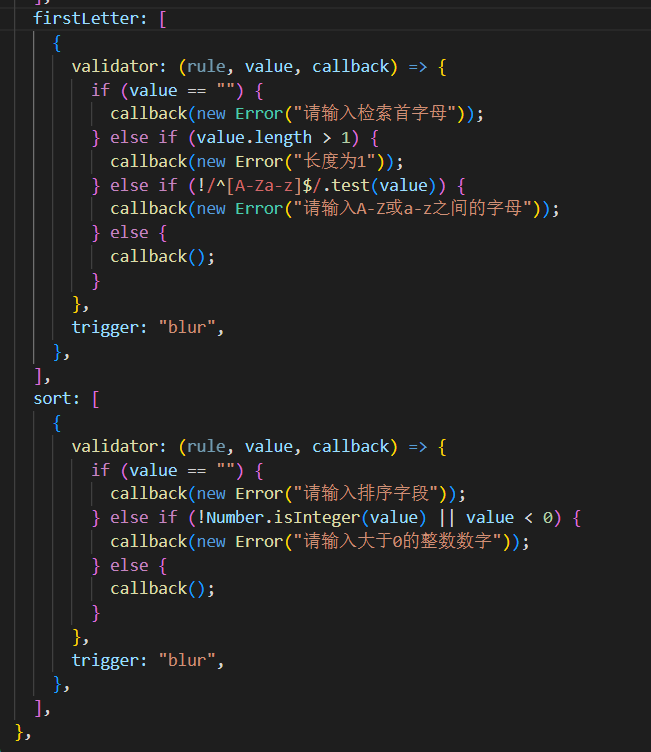
注意:不仅前端需要校验,后端接受数据之后也需要校验,因为如果知道我们的请求地址,完全可以绕过前端,直接给后端发送请求(就像我们使用Postman一样)

 浙公网安备 33010602011771号