【2019.11.20】SDN上机第4次作业
安装OpenDayLight控制器
配置JAVA环境
在官网进行下载OpenDayLight控制器
启动OpenDayLight控制器和安装插件
启动OpenDayLight控制器:
在命令行中打开OpenDayLight控制器
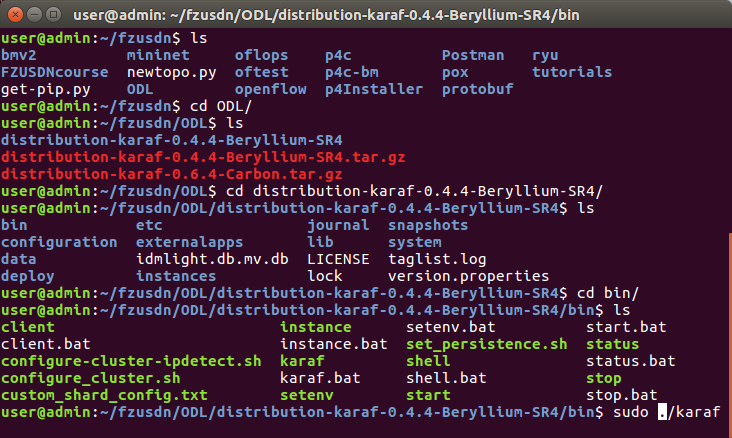

启动OpenDayLight 0.4.4-Beryllium-SR4:
安装插件:
输入以下命令,进行插件安装
feature:install odl-restconf
feature:install odl-l2switch-switch-ui
feature:install odl-openflowplugin-all
feature:install odl-mdsal-apidocs
feature:install odl-dlux-core
feature:install odl-dlux-node
feature:install odl-dlux-yangui

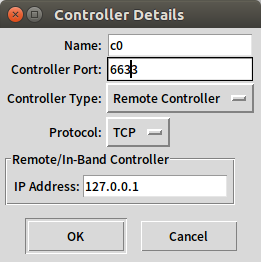
搭建拓扑
使用MiniEdit进行图形化搭建拓扑:
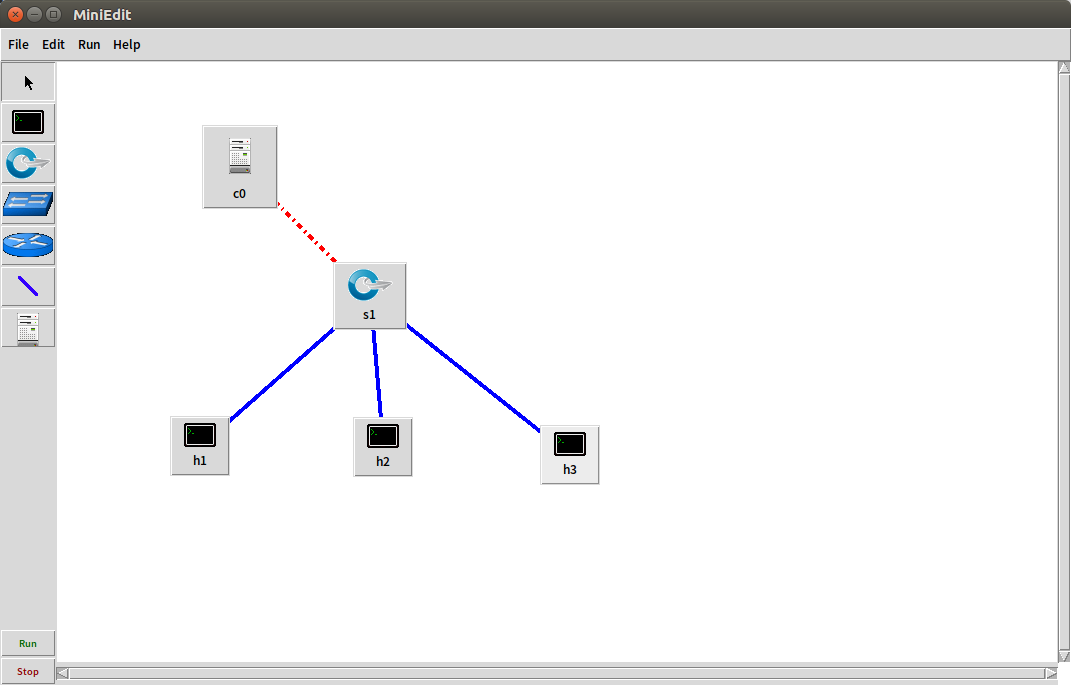
设置如下:

在网址内输入:http://127.0.0.1:8181/index.html#/login
进入OpenDayLight Dlux

#!/usr/bin/python

from mininet.net import Mininet
from mininet.node import Controller, RemoteController, OVSController
from mininet.node import CPULimitedHost, Host, Node
from mininet.node import OVSKernelSwitch, UserSwitch
from mininet.node import IVSSwitch
from mininet.cli import CLI
from mininet.log import setLogLevel, info
from mininet.link import TCLink, Intf
from subprocess import call

def myNetwork():

    net = Mininet( topo=None,
                   build=False,
                   ipBase='10.0.0.0/8')

    info( '*** Adding controller\n' )
    c0=net.addController(name='c0',
                      controller=RemoteController,
                      ip='127.0.0.1',
                      protocol='tcp',
                      port=6633)

    info( '*** Add switches\n')
    s1 = net.addSwitch('s1', cls=OVSKernelSwitch)

    info( '*** Add hosts\n')
    h3 = net.addHost('h3', cls=Host, ip='10.0.0.3', defaultRoute=None)
    h1 = net.addHost('h1', cls=Host, ip='10.0.0.1', defaultRoute=None)
    h2 = net.addHost('h2', cls=Host, ip='10.0.0.2', defaultRoute=None)

    info( '*** Add links\n')
    net.addLink(s1, h1)
    net.addLink(s1, h2)
    net.addLink(s1, h3)

    info( '*** Starting network\n')
    net.build()
    info( '*** Starting controllers\n')
    for controller in net.controllers:
        controller.start()

    info( '*** Starting switches\n')
    net.get('s1').start([c0])

    info( '*** Post configure switches and hosts\n')

    CLI(net)
    net.stop()

if __name__ == '__main__':
    setLogLevel( 'info' )
    myNetwork()
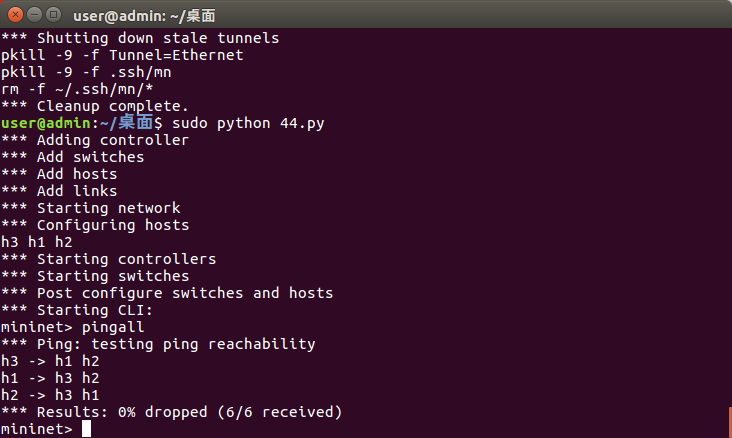
运行PY文件,并且PINGALL
在ODL进行reload

展示生成的拓扑图像
使用控制器发送下发流表
在控制器提供的WEB UI中下发流表使h2 20s内ping不通h3,10s后恢复
查看拓扑的端口连接:

可见
h2 连接 s1 端口 2
h3 连接 s1 端口 3
ODL内部设置:

具体设置如下:


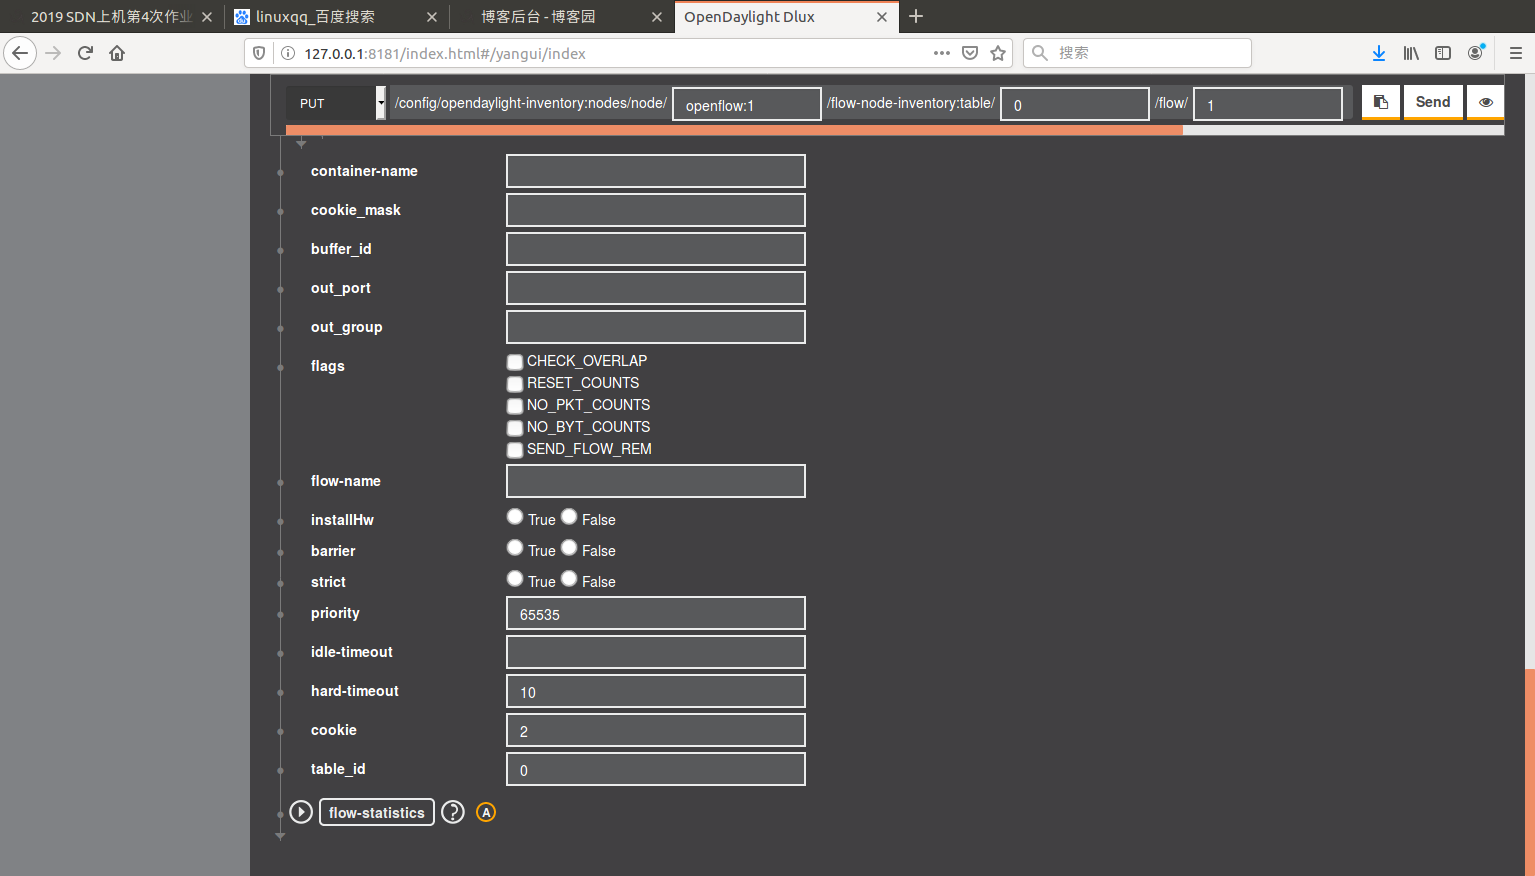
按图中设置后
终端内输入命令
h2 ping h3

在ODL中点击发送
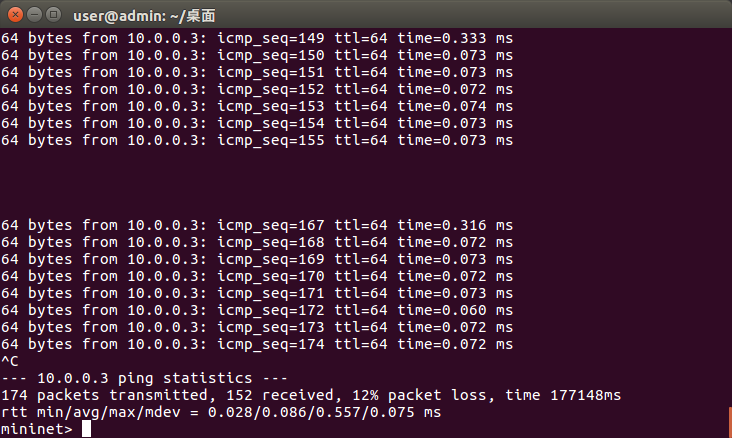
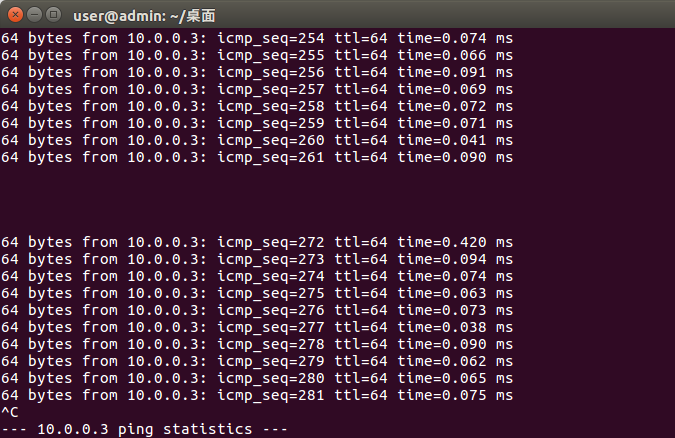
实验现象:h2 20s内ping不通h3,20s后恢复
浏览具体报文:
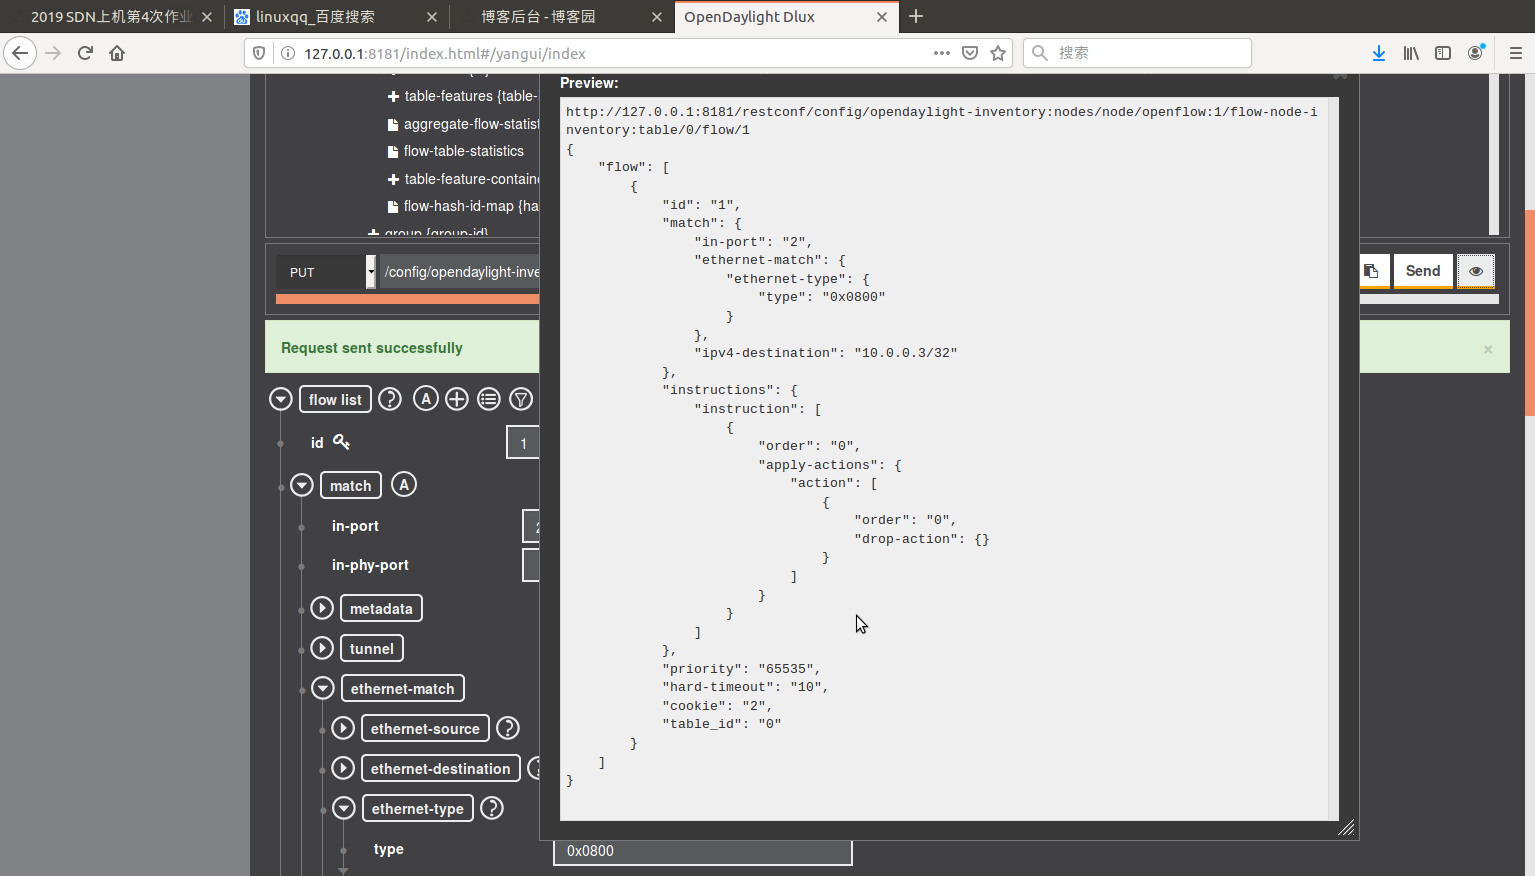
http://127.0.0.1:8181/restconf/config/opendaylight-inventory:nodes/node/openflow:1/flow-node-inventory:table/0/flow/1

{
    "flow": [
        {
            "id": "1",
            "match": {
                "in-port": "2",
                "ethernet-match": {
                    "ethernet-type": {
                        "type": "0x0800"
                    }
                },
                "ipv4-destination": "10.0.0.3/32"
            },
            "instructions": {
                "instruction": [
                    {
                        "order": "0",
                        "apply-actions": {
                            "action": [
                                {
                                    "order": "0",
                                    "drop-action": {}
                                }
                            ]
                        }
                    }
                ]
            },
            "priority": "65535",
            "hard-timeout": "10",
            "cookie": "2",
            "table_id": "0"
        }
    ]
}
用Postman进行测试
将浏览里的URL复制到地址栏,讲选择改为PUT,输入用户名与密码
http://127.0.0.1:8181/restconf/config/opendaylight-inventory:nodes/node/openflow:1/flow-node-inventory:table/0/flow/1

将JSON报文复制到Body内,将其Send

出现了在ODL内调试一样的效果
由URL获取刚才发送的报文


 浙公网安备 33010602011771号