k8s-部署-11-kubelet
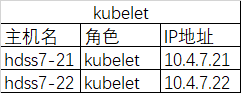
1、部署主机
2、准备pause基础镜像
# 1、在运维主机10.4.7.200上
# 拉取镜像
docker pull kubernetes/pause

# 给镜像打tag
docker tag f9d5de079539 harbor.od.com/public/pause:latest

# 将镜像上传到harbor仓库
docker push harbor.od.com/public/pause:latest
3、kubelet安装部署
# 1、创建生成证书签名请求(csr)的JSON配置文件 在10.4.7.200主机上
[root@hdss7-200 ~]# cat /opt/certs/kubelet-csr.json
{
    "CN": "k8s-kubelet",
    "hosts": [
    "127.0.0.1",
    "10.4.7.10",
    "10.4.7.21",
    "10.4.7.22",
    "10.4.7.23",
    "10.4.7.24",
    "10.4.7.25",
    "10.4.7.26",
    "10.4.7.27",
    "10.4.7.28"
    ],
    "key": {
        "algo": "rsa",
        "size": 2048
    },
    "names": [
        {
            "C": "CN",
            "ST": "beijing",
            "L": "beijing",
            "O": "od",
            "OU": "ops"
        }
    ]
}
[root@hdss7-200 ~]#

# 2、生成证书
cfssl gencert -ca=ca.pem -ca-key=ca-key.pem -config=ca-config.json -profile=server kubelet-csr.json | cfssl-json -bare kubelet

# 3、拷贝证书到对应的主机
scp -r kubelet.pem kubelet-key.pem hdss7-21://opt/kubernetes/server/bin/cert
scp -r kubelet.pem kubelet-key.pem hdss7-22://opt/kubernetes/server/bin/cert

# 4、在10.4.7.21 上生成kubelet.kubeconfig
kubectl config set-cluster myk8s   --certificate-authority=/opt/kubernetes/server/bin/cert/ca.pem   --embed-certs=true   --server=https://10.4.7.10:7443   --kubeconfig=kube-proxy.kubeconfig

kubectl config set-credentials kube-proxy   --client-certificate=/opt/kubernetes/server/bin/cert/kube-proxy-client.pem   --client-key=/opt/kubernetes/server/bin/cert/kube-proxy-client-key.pem   --embed-certs=true   --kubeconfig=kube-proxy.kubeconfig

kubectl config set-context myk8s-context   --cluster=myk8s   --user=kube-proxy   --kubeconfig=kube-proxy.kubeconfig

kubectl config use-context myk8s-context --kubeconfig=kube-proxy.kubeconfig

# 将生成的kubelet.kubeconfig文件拷贝到10.4.7.22
scp -r kube-proxy.kubeconfig hdss7-22:/opt/kubernetes/server/bin/conf/

# 5、打开主机的ipvs配置
[root@hdss7-22 ~]# cat /root/ipvs.sh
#!/bin/bash
ipvs_mods_dir="/usr/lib/modules/$(uname -r)/kernel/net/netfilter/ipvs"
for i in $(ls $ipvs_mods_dir|grep -o "^[^.]*")
do
   /sbin/modinfo -F filename $i &>/dev/null
   if [ $? -eq 0 ];then
     /sbin/modprobe $i
   fi
done

# 6、启动
chmod +x /root/ipvs.sh

/root/ipvs.sh

lsmod |grep ip_vs

# 7、将上述配置到开机自启动
[root@hdss7-22 ~]# cat /etc/rc.d/rc.local
#!/bin/bash
# THIS FILE IS ADDED FOR COMPATIBILITY PURPOSES
#
# It is highly advisable to create own systemd services or udev rules
# to run scripts during boot instead of using this file.
#
# In contrast to previous versions due to parallel execution during boot
# this script will NOT be run after all other services.
#
# Please note that you must run 'chmod +x /etc/rc.d/rc.local' to ensure
# that this script will be executed during boot.

touch /var/lock/subsys/local
/root/ipvs.sh
[root@hdss7-22 ~]#

# 赋予可执行权限
chmod +x /etc/rc.d/rc.local

# 安装ipvsadm工具
yum install -y ipvsadm

ipvsadm -Ln

# 8、创建k8s-node.yaml  文件
[root@hdss7-21 conf]# cat /opt/kubernetes/server/bin/conf/k8s-node.yaml
apiVersion: rbac.authorization.k8s.io/v1
kind: ClusterRoleBinding
metadata:
  name: k8s-node
roleRef:
  apiGroup: rbac.authorization.k8s.io
  kind: ClusterRole
  name: system:node
subjects:

- apiGroup: rbac.authorization.k8s.io
  kind: User
  name: k8s-node
[root@hdss7-21 conf]#

# 9、创建容器
kubectl create -f k8s-node.yaml

# 10、查看容器的配置文件
kubectl get clusterrolebinding k8s-node -o yaml
kubectl get clusterrolebinding k8s-node

# 11、创建kubelet启动脚本 标注的地方需要根据主机配置
[root@hdss7-21 conf]# cat /opt/kubernetes/server/bin/kubelet.sh
#!/bin/sh
./kubelet \
  --anonymous-auth=false \
  --cgroup-driver systemd \
  --cluster-dns 192.168.0.2 \
  --cluster-domain cluster.local \
  --runtime-cgroups=/systemd/system.slice \
  --kubelet-cgroups=/systemd/system.slice \
  --fail-swap-on="false" \
  --client-ca-file ./cert/ca.pem \
  --tls-cert-file ./cert/kubelet.pem \
  --tls-private-key-file ./cert/kubelet-key.pem \
  --hostname-override hdss7-21.host.com \
  --kubeconfig ./conf/kubelet.kubeconfig \
  --log-dir /data/logs/kubernetes/kube-kubelet \
  --pod-infra-container-image harbor.od.com/public/pause:latest \
  --root-dir /data/kubelet
[root@hdss7-21 conf]#

# 12、添加可执行权限并创建相关目录
chmod +x kubelet.sh
mkdir -p /data/logs/kubernetes/kube-kubelet /data/kubelet

# 13、加入守护进程,标注的地方需要针对不同的环境进行配置
[root@hdss7-21 conf]# cat /etc/supervisord.d/kube-kubelet.ini
[program:kube-kubelet-7-21]
command=/opt/kubernetes/server/bin/kubelet.sh     ; the program (relative uses PATH, can take args)
numprocs=1                                        ; number of processes copies to start (def 1)
directory=/opt/kubernetes/server/bin              ; directory to cwd to before exec (def no cwd)
autostart=true                                    ; start at supervisord start (default: true)
autorestart=true                                  ; retstart at unexpected quit (default: true)
startsecs=30                                      ; number of secs prog must stay running (def. 1)
startretries=3                                    ; max # of serial start failures (default 3)
exitcodes=0,2                                     ; 'expected' exit codes for process (default 0,2)
stopsignal=QUIT                                   ; signal used to kill process (default TERM)
stopwaitsecs=10                                   ; max num secs to wait b4 SIGKILL (default 10)
user=root                                         ; setuid to this UNIX account to run the program
redirect_stderr=true                              ; redirect proc stderr to stdout (default false)
stdout_logfile=/data/logs/kubernetes/kube-kubelet/kubelet.stdout.log   ; stderr log path, NONE for none; default AUTO
stdout_logfile_maxbytes=64MB                      ; max # logfile bytes b4 rotation (default 50MB)
stdout_logfile_backups=4                          ; # of stdout logfile backups (default 10)
stdout_capture_maxbytes=1MB                       ; number of bytes in 'capturemode' (default 0)
stdout_events_enabled=false                       ; emit events on stdout writes (default false)


# 14、启动服务并验证服务
supervisorctl update
supervisorctl status
kubectl get nodes

# 15、查看日志
tail -200f /data/logs/kubernetes/kube-kubelet/kubelet.stdout.log
4、给角色设定标签
# 查看nodes
kubectl get nodes

# 给nodes打标签
kubectl label node hdss7-21.host.com node-role.kubernetes.io/master=
kubectl label node hdss7-21.host.com node-role.kubernetes.io/node=

 浙公网安备 33010602011771号