基于nginx实现私有yum仓库
基于本地光盘的源
server端IP:10.0.0.79
nginx使用默认路径、端口
yum install nginx -y

#更改以root运行
sed -i '/^user/s/nginx/root/' /etc/nginx/nginx.conf

#开启目录列表显示
sed -i '/^http/a autoindex on;\nautoindex_exact_size off;\nautoindex_localtime on;'  /etc/nginx/nginx.conf

#启动nginx
systemctl enable nginx --now

#挂载本地iso文件
mkdir -pv /usr/share/nginx/html/centos/{7,8}
mount -o loop /home/CentOS-7-x86_64-Everything-2009.iso /usr/share/nginx/html/centos/7
mount -o loop /home/CentOS-8.4.2105-x86_64-dvd1.iso    /usr/share/nginx/html/centos/8

#防火墙放行80端口
iptables -I INPUT -p tcp --dport 80 -j ACCEPT

#开机挂载目录
cat >> /etc/fstab <<EOF
/home/CentOS-7-x86_64-Everything-2009.iso /usr/share/nginx/html/centos/7 iso9660 loop,defaults 0 0
/home/CentOS-8.4.2105-x86_64-dvd1.iso     /usr/share/nginx/html/centos/8 iso9660 loop,defaults 0 0
EOF

#客户端编辑repo文件
cat > /etc/yum.repos.d/local-iso.repo <<EOF
[local-iso]
name=local iso
baseurl=http://10.0.0.79/centos/\$releasever
gpgcheck=1
gpgkey=http://10.0.0.79/centos/\$releasever/RPM-GPG-KEY-\$releasever
enabled=1
EOF
nginx使用非默认目录、端口
#nginx配置10088端口、/data/www-iso目录
cat > /etc/nginx/conf.d/yumrepos.conf <<EOF
server {
listen 10088;
server_name _;
root /data/www-iso/;
}
EOF

systemctl restart nginx

#防火墙添加10088
iptables -I INPUT -p tcp --dport 10088 -j ACCEPT

#创建目录并挂载
mkdir -p /data/www-iso/centos/{7,8}
mount -o loop /home/CentOS-7-x86_64-Everything-2009.is  /data/www-iso/centos/7

客户端编辑repo文件
cat > /etc/yum.repos.d/local-iso-10088.repo <<EOF
[local-iso-10088]
name=local iso 10088
baseurl=http://10.0.0.79:10088/centos/\$releasever
gpgcheck=1
gpgkey=http://10.0.0.79:10088/centos/\$releasever/RPM-GPG-KEY-\$releasever
enabled=1
EOF
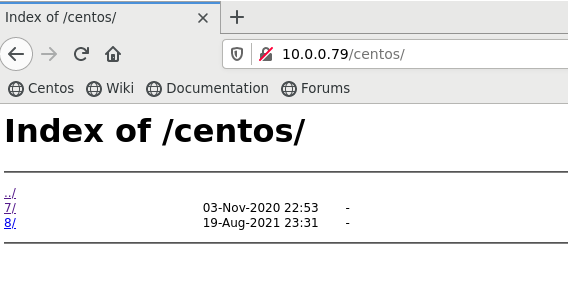
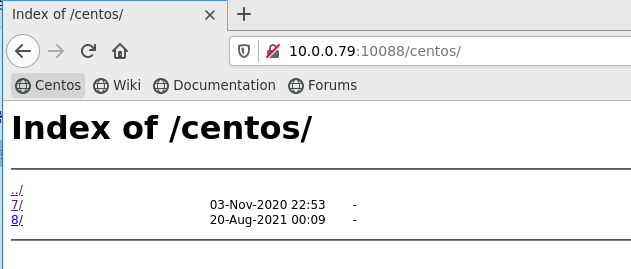
效果验证
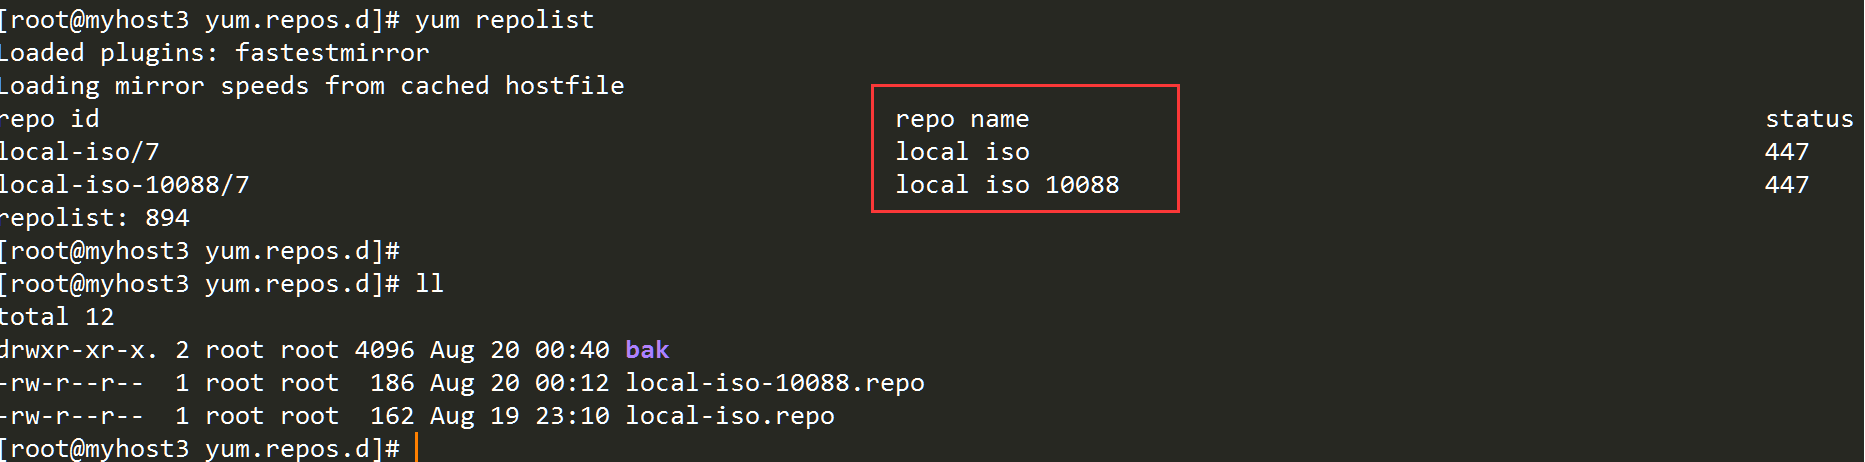
浏览器查看(80端口及10088端口)
基于互联网的源
在生产环境中无法连接外网的情况、系统镜像没有相关软件包时,我们可以事先在可以连接外网的主机使用reposync的方式同步互联网上的yum源到本地,使用createrepo命令制作一个本地内网yum仓库。
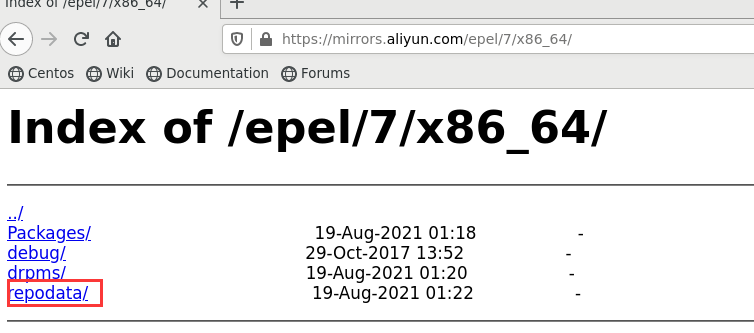
下载阿里云的EPEL源,制作私有yum源
epel互联网源地址
非默认nginx端口目录配置
(参见第一部分)
#CentOS 7 以前版本,reposync工具来自于yum-utils包
yum -y install yum-utils
#下载数据存放目录
mkdir -p /data/www-iso
服务端编辑epel互联网的源
cat > /etc/yum.repos.d/ali-epel.repo <<EOF
[ali-epel]
name=ali EPEL
baseurl=https://mirrors.aliyun.com/epel/7/x86_64/
gpgcheck=0
enabled=1
EOF
#默认只下载rpm包,不下载meta数据,需要指定--download-metadata 才能下载meta
reposync --repoid=ali-epel --download-metadata -p /data/www-iso
#若未下载meta数据,可在下载rpm包后使用createrepo创建
#createrepo -po 源目录 索引元数据的输出位置目录
yum install -y createrepo
createrepo -po /data/www-iso/ali-epel/ /data/www-iso/ali-epel/
#下载相关的key文件
wget -P /data/www-iso/ali-epel/ https://mirrors.aliyun.com/epel/RPM-GPG-KEY-EPEL-7
#客户端编辑
cat > /etc/yum.repos.d/ali-epel-client.repo <<EOF
[ali-epel]
name=ali EPEL
baseurl=http://10.0.0.79:10088/ali-epel
gpgcheck=1
gpgkey=http://10.0.0.79:10088/ali-epel/RPM-GPG-KEY-EPEL-7
enabled=1
EOF
效果验证


nginx代理yum(互联网源)
场景:10.0.0.79(能上外网)与10.0.0.3(无外网)互连,10.0.0.3需要使用yum安装软件。
代理端10.0.0.79操作
1)配置可使用的yum源,如阿里云
wget -O /etc/yum.repos.d/ali.repo https://mirrors.aliyun.com/repo/Centos-7.repo
2)配置nginx监听端口,如5000
# cat /etc/nginx/conf.d/yum.conf
server {
    listen 5000;
    server_name _;

    location / {
    proxy_pass http://mirrors.aliyun.com;
    }
}
3)重载nginx
systemctl reload nginx
客户端10.0.0.3操作
1)将阿里云的yum源repo文件复制到/etc/yum.repos.d/目录,并修改repo文件中mirrors.aliyun.com为代理端的地址及端口10.0.0.79:5000
sed -i 's/mirrors.aliyun.com/10.0.0.79:5000/g' /etc/yum.repos.d/ali.repo
2)修改/etc/yum.conf,增加proxy=http://10.0.0.79:5000
sed -i '/\[main\]/a\proxy=http://11.0.0.3:5000' /etc/yum.conf
nginx代理yum(本地源)
基于本文第一章节配置好本地源后,将服务端的
/etc/yum.repos.d/local-iso-10088.repo
复制到客户端/etc/yum.repos.d/

 浙公网安备 33010602011771号