
nfs 实时共享
一 、nfs实时共享
##### 1.环境准备

| 主机       | IP                       | 主机角色               | 条件                |
| ---------- | ------------------------ | ---------------------- | ------------------- |
| pingweb01  | 192.168.15.7  172.16.1.7 | nfs服务端、rsync客户端 | 关闭防火墙和selinux |
| pingweb02  | 192.168.15.8  172.16.1.8 | nfs服务端、rsync客户端 | 关闭防火墙和selinux |
| pingnfs    | 172.16.1.31              | nfs服务端、rsync客户端 | 关闭防火墙和selinux |
| pingbackup | 172.16.1.41              | rsync服务端            | 关闭防火墙和selinux |

##### 2.pingbackup服务器搭建rsync服务端

```bash
## 0.关闭selinux与firewalld防火墙

[root@pingbackup ~] systemctl disable --now firewalld
[root@pingbackup ~] setenforce 0
[root@pingbackup ~] sed -i '/^SELINUX=/c SELINUX=disabled' /etc/selinux/config

## 1、安装并配置rsync
[root@pingbackup ~] yum install -y rsync
[root@pingbackup ~] vim /etc/rsyncd.conf

uid = www
gid = www
port = 873
fake super = yes
use chroot = no
max connections = 200
timeout = 200
ignore errors
read only = false
list = true
auth users = rsync_mm
secrets file = /etc/rsync.passwd
log file = /var/log/rsyncd.log
#####################################
[data]
comment = "该备份文件是web端挂载到nfs服务器的文件"
path = /data

## 2、创建用户
[root@pingbackup ~] groupadd www -g 666
[root@pingbackup ~] useradd www -u 666 -g 666

## 3、创建密码文件并授权
[root@pingbackup ~] echo "rsync_mm:123" > /etc/rsync.passwd
[root@pingbackup ~] chmod 600 /etc/rsync.passwd #授权

## 4、创建真实目录并授权
[root@pingbackup ~] mkdir /data
[root@pingbackup ~] chown -R www.www /data

## 5、启动服务
[root@pingbackup ~] systemctl start rsyncd
[root@pingbackup ~] ps -ef |grep rsyncd #验证启动
root 25733 1 0 15:24 ? 00:00:00 /usr/bin/rsync --daemon --nodetach
3.NFS服务器搭建(NFS作为pingbackup的服务端)
## 0.关闭selinux与firewalld防火墙

[root@pingnfs ~] systemctl disable --now firewalld
[root@pingnfs ~] setenforce 0
[root@pingnfs ~] sed -i '/^SELINUX=/c SELINUX=disabled' /etc/selinux/config

## 1安装NFS、rpcbind服务
[root@pingnfs ~] yum install -y nfs-utils rpcbind

### 2、配置NFS

[root@pingnfs ~] vim /etc/exports
/data 172.16.1.0/24(rw,sync,all_squash,anonuid=666,anongid=666)

## 3、创建用户
[root@pingnfs ~] groupadd www -g 666
[root@nfs ~] useradd www -u 666 -g 666

## 4、创建目录并授权
[root@pingnfs ~] mkdir /data
[root@pingnfs ~] chown -R www.www /data

## 5、启动服务、验证配置
[root@pingnfs ~] systemctl start nfs rpbind  # rpcind Cenots默认已经启动且安装过
[root@pingnfs ~] cat /var/lib/nfs/etab
/data
172.16.1.0/24(rw,sync,wdelay,hide,nocrossmnt,secure,root_squash,all_squash,no_su
btree_check,secure_locks,acl,no_pnfs,anonuid=666,anongid=666,sec=sys,rw,secure,r
oot_squash,all_squash)
4.NFS服务器实时备份data目录到rsync
### 1、安装inotify-tools

[root@pingnfs ~] yum install -y inotify-tools

## 2、编写、启动脚本

[root@pingnfs ~] vim rsyn-inotify.sh
#!/bin/bash
export RSYNC_PASSWORD=123456
dir=/data
/usr/bin/inotifywait -mrq --format '%w %f' -e create,delete,attrib,close_write $dir | while read line;do
cd $dir && rsync -az -R --delete . rsync_mm@172.16.1.41::data
>/dev/null 2>&1
done &

========================================================
## 3.启动服务、验证配置
[root@pingnfs ~] sh rsyn-inotify.sh
[root@pingnfs ~] ps -ef |grep rsyn
root 9224 1 0 15:30 pts/0 00:00:00 sh rsyn-inotify.sh
5.Web 01 搭建上传作业代码 具体步骤
## 0.关闭防火墙与selinux
[root@pingweb01 ~]# systemctl disable --now firewalld
[root@pingweb01 ~]# setenforce 0
[root@pingweb01 ~]#  sed -i '/^SELINUX=/c SELINUX=disabled' /etc/selinux/config

## 1.编写nginxg官方源,并下载安装软件
[root@pingweb01 ~]# vim /etc/yum.repos.d/nginx.repo
[nginx-stable]
name=nginx stable repo
baseurl=http://nginx.org/packages/centos/7/$basearch/
gpgcheck=1
enabled=1
gpgkey=https://nginx.org/keys/nginx_signing.key
module_hotfixes=true
## 2.清空缓存与生成缓存
[root@pingweb01 ~]# yum clean all
[root@pingweb01 ~]# yum makecache

## 3.下载nginx软件
[root@web1 ~]# yum install -y nginx

## 4.配置网站代码
[root@pingweb01 ~] rz  #上传考试压缩包
[root@pingweb01 ~]     # 解压到nginx目录
[root@pingweb01 ~] unzip kaoshi.zip -d /usr/share/nginx/html/
[root@pingweb01 ~] ll
total 80
-rw-r--r--. 1 root root 38772 Apr 27 2018 bg.jpg
-rw-r--r--. 1 root root 2633 May 4 2018 index.html
-rw-r--r--. 1 root root 52 May 10 2018 info.php
-rw-r--r--. 1 root root 26995 Nov 22 16:47 kaoshi.zip
-rw-r--r--. 1 root root 1192 Jan 10 2020 upload_file.php
## 4. 创建用户
[root@pingweb01 ~] groupadd www -g 666
[root@pingweb01 ~] useradd www -u 666 -g 666

## 5. 修改站点目录权限
[root@web01 html] chown -R www.www /usr/share/nginx/html/

## 6.启动服务、验证配置
[root@pingweb01 ~] # systemctl start nginx
[root@pingweb01 ~]  ps -ef | grep nginx

=====================================================================

## 7、安装rpcbind、nfs并查看挂载点
[root@pingweb01 ~] yum install -y nfs-utils rpcbind
[root@pingweb01 ~] showmount -e 172.16.1.31
Export list for 172.16.1.31:
/data 172.16.1.0/24

## 8、挂载并验证
[root@pingweb01 ~] mount -t nfs 172.16.1.31:/data /usr/share/nginx/html

[root@pingweb01 ~] df -h #验证挂载
 172.16.1.31:/data   /usr/share/nginx/html
6.Web 02 搭建上传作业代码 具体步骤
## 0.关闭防火墙与selinux
[root@pingweb02 ~]# systemctl disable --now firewalld
[root@pingweb02 ~]# setenforce 0
[root@pingweb02 ~]#  sed -i '/^SELINUX=/c SELINUX=disabled' /etc/selinux/config

## 1.编写nginxg官方源,并下载安装软件
[root@pingweb02 ~]# vim /etc/yum.repos.d/nginx.repo
[nginx-stable]
name=nginx stable repo
baseurl=http://nginx.org/packages/centos/7/$basearch/
gpgcheck=1
enabled=1
gpgkey=https://nginx.org/keys/nginx_signing.key
module_hotfixes=true
## 2.清空缓存与生成缓存
[root@pingweb02 ~]# yum clean all
[root@pingweb02 ~]# yum makecache

## 3.下载nginx软件
[root@web2 ~]# yum install -y nginx

## 4.配置网站代码
[root@pingweb02 ~] rz  #上传考试压缩包
[root@pingweb02 ~]     # 解压到nginx目录
[root@pingweb02 ~] unzip kaoshi.zip -d /usr/share/nginx/html/
[root@pingweb02 ~] ll
total 80
-rw-r--r--. 1 root root 38772 Apr 27 2018 bg.jpg
-rw-r--r--. 1 root root 2633 May 4 2018 index.html
-rw-r--r--. 1 root root 52 May 10 2018 info.php
-rw-r--r--. 1 root root 26995 Nov 22 16:47 kaoshi.zip
-rw-r--r--. 1 root root 1192 Jan 10 2020 upload_file.php
## 4. 创建用户
[root@pingweb02 ~] groupadd www -g 666
[root@pingweb02 ~] useradd www -u 666 -g 666

## 5. 修改站点目录权限
[root@pingweb02 html] chown -R www.www /usr/share/nginx/html/

## 6.启动服务、验证配置
[root@pingweb02 ~] # systemctl start nginx
[root@pingweb02 ~]  ps -ef | grep nginx

=====================================================================

## 7、安装rpcbind、nfs并查看挂载点
[root@pingweb02 ~] yum install -y nfs-utils rpcbind
[root@pingweb02 ~] showmount -e 172.16.1.31
Export list for 172.16.1.31:
/data 172.16.1.0/24

## 8、挂载并验证
[root@pingweb02 ~] mount -t nfs 172.16.1.31:/data /usr/share/nginx/html

[root@pingweb02 ~] df -h #验证挂载
 172.16.1.31:/data   /usr/share/nginx/html
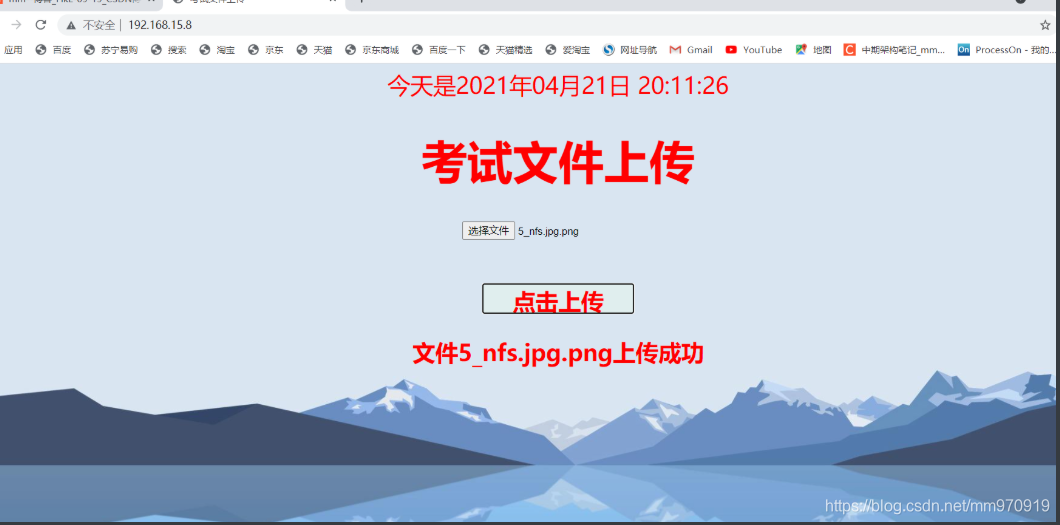
7.访问并测试
## 方式一:
# 1.直接输入IP测试交作业页面
192.168.15.7
192.168.15.8
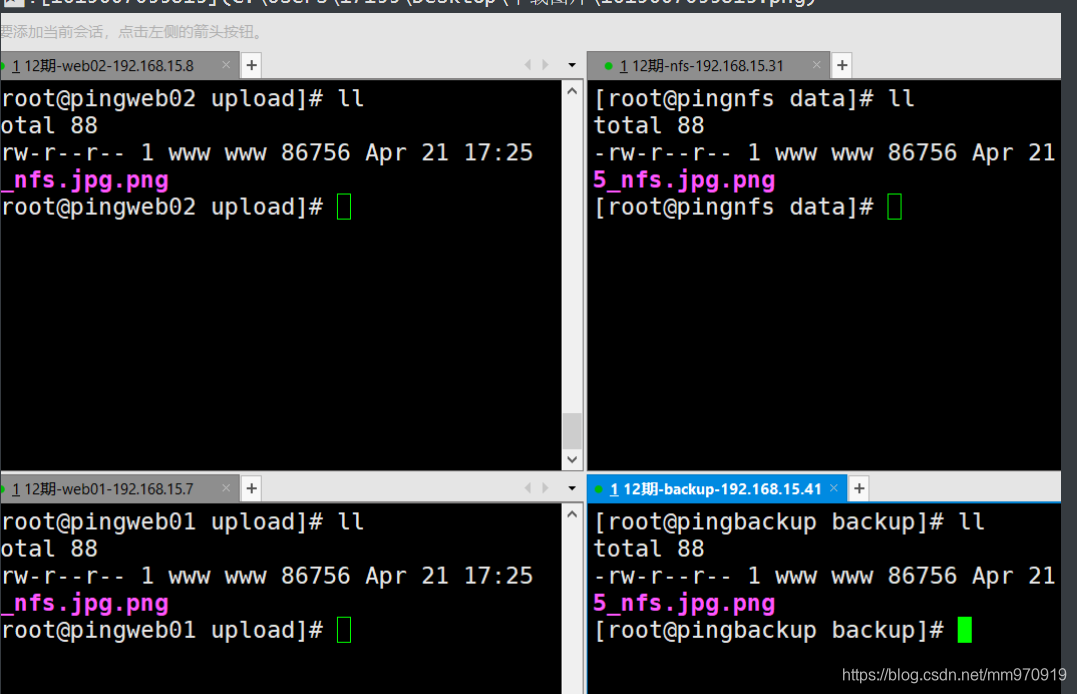
## 2、上传作业测试,页面成功
## 方式二:
## 1、访问交作业页面,可以配置Windows的hosts文件
C:\Windows\System32\drivers\etc #追加如:ip地址 自定义域名
192.168.15.7 www.zuoye.com
192.168.15.8 www.zuoye.com
## 2、上传作业测试,页面成功

 浙公网安备 33010602011771号