单机部署TiDB
一、准备环境
1、os版本确认
- 目前 TiUP Cluster 支持在 x86_64(AMD64)和 ARM 架构上部署 TiDB 集群
- 在 AMD64 架构下,建议使用 CentOS 7.3 及以上版本 Linux 操作系统
- 在 ARM 架构下,建议使用 CentOS 7.6 (1810) 版本 Linux 操作系统
-
仅centos版本
-
cat /etc/centos-release
-
通用脚本
-
#!/bin/bash
bash <<'EOF'
# 获取详细系统信息
echo "===== [System Info Collector] ====="
echo "=== Generated at: $(date '+%Y-%m-%d %H:%M:%S %Z') ==="

# OS详细信息
echo -e "\n===== OS Details ====="
if [ -f /etc/os-release ]; then
    cat /etc/os-release
else
    echo "WARNING: /etc/os-release not found!"
fi

# 发行版特定信息
echo -e "\n===== Version Details ====="
{
    # CentOS/RHEL
    if [ -f /etc/centos-release ]; then
        centos_ver=$(awk '{print $4}' /etc/centos-release 2>/dev/null)
        echo "CentOS Version: $centos_ver"
        rpm -q centos-release --queryformat 'Release Package: %{VERSION}-%{RELEASE}\n' 2>/dev/null

    elif [ -f /etc/redhat-release ]; then
        rhel_ver=$(awk '{print $(NF-1)}' /etc/redhat-release 2>/dev/null)
        echo "RHEL Version: $rhel_ver"
        rpm -q redhat-release-server --queryformat 'Release Package: %{VERSION}-%{RELEASE}\n' 2>/dev/null ||
        rpm -q redhat-release --queryformat 'Release Package: %{VERSION}-%{RELEASE}\n' 2>/dev/null
    fi

    # Ubuntu
    if [ -f /etc/lsb-release ]; then
        echo "Ubuntu Version: $(lsb_release -ds 2>/dev/null || grep DISTRIB_DESCRIPTION /etc/lsb-release | cut -d= -f2)"
    fi

    # Debian
    if [ -f /etc/debian_version ]; then
        debian_ver=$(cat /etc/debian_version 2>/dev/null)
        echo "Debian Version: $debian_ver"
    fi

    # Amazon Linux
    if grep -q "Amazon Linux" /etc/os-release 2>/dev/null; then
        echo "Amazon Linux Version: $(grep PRETTY_NAME /etc/os-release | cut -d'"' -f2)"
    fi

    # Alpine
    if [ -f /etc/alpine-release ]; then
        echo "Alpine Version: $(cat /etc/alpine-release)"
    fi
} 2>/dev/null

# 核心系统信息
echo -e "\n===== Core System Info ====="
echo "Kernel Version: $(uname -r)"
echo "System Arch: $(uname -m)"
echo "Hostname: $(hostname -f 2>/dev/null || hostname)"

# 增强版uptime信息
echo -n "Uptime: "
if uptime -p &>/dev/null; then
    uptime -p | sed 's/up //'
else
    awk '{printf "%d days, %d hours", int($1/86400), int(($1%86400)/3600)}' /proc/uptime
fi

# 内存信息
echo -e "\n===== Memory Usage ====="
free -h | awk '/Mem:/{printf "Total: %s, Used: %s, Free: %s (%.1f%% used)\n", $2, $3, $4, $3/$2*100}'

# 磁盘根分区信息
echo -e "\n===== Disk Usage (Root) ====="
df -h / | awk 'NR==2{printf "Total: %s, Used: %s, Avail: %s (%.1f%% used)\n", $2, $3, $4, $5}'

echo -e "\n===== [End of Report] ====="
EOF
2、关闭防火墙及SELinux
2.1、关闭防火墙服务
systemctl stop firewalld.service
systemctl disable firewalld.service
systemctl status firewalld.service
2.2、关闭SELinux
sed -i "s/SELINUX=enforcing/SELINUX=disabled/" /etc/selinux/config
getenforce

3、关闭大页内存
cat /sys/kernel/mm/transparent_hugepage/enabled
cat /sys/kernel/mm/transparent_hugepage/defrag
echo never > /sys/kernel/mm/transparent_hugepage/enabled
echo never > /sys/kernel/mm/transparent_hugepage/defrag
cat /sys/kernel/mm/transparent_hugepage/enabled
cat /sys/kernel/mm/transparent_hugepage/defrag

4、检测及关闭系统swap
echo "vm.swappiness = 0">> /etc/sysctl.conf
sysctl -p
swapoff -a && swapon -a
如果在部署时使用参数
--user root -p就可以忽略免密互信,对于有需求的可以参考免密互信
5、TiDB集群拓扑
最小规模的 TiDB 集群拓扑包含以下实例:
实际部署时IP即为本机实际IP
| 实例 | 个数 | IP | 配置 |
|---|---|---|---|
| TiKV | 3 | 127.0.0.1 | 使用递增的端口号以避免冲突 |
| TiDB | 1 | 127.0.0.1 | 使用默认端口和其他配置 |
| PD | 1 | 127.0.0.1 | 使用默认端口和其他配置 |
| TiFlash | 1 | 127.0.0.1 | 使用默认端口和其他配置 |
| Monitor | 1 | 127.0.0.1 | 使用默认端口和其他配置 |
6、内存推荐
最小化安装我尝试过的内存设置是至少8.6G,推荐本地测试集群内存设置为16G
二、实施部署
1、下载并安装TiUP
遇到 curl SSL 证书验证失败 的情况,在命令后面增加 --insecure 即可
curl --proto '=https' --tlsv1.2 -sSf https://tiup-mirrors.pingcap.com/install.sh | sh

2、声明全局环境变量
${your_shell_profile} 在安装TiUP输出的信息中有,对应着声明即可
source /root/.bash_profile
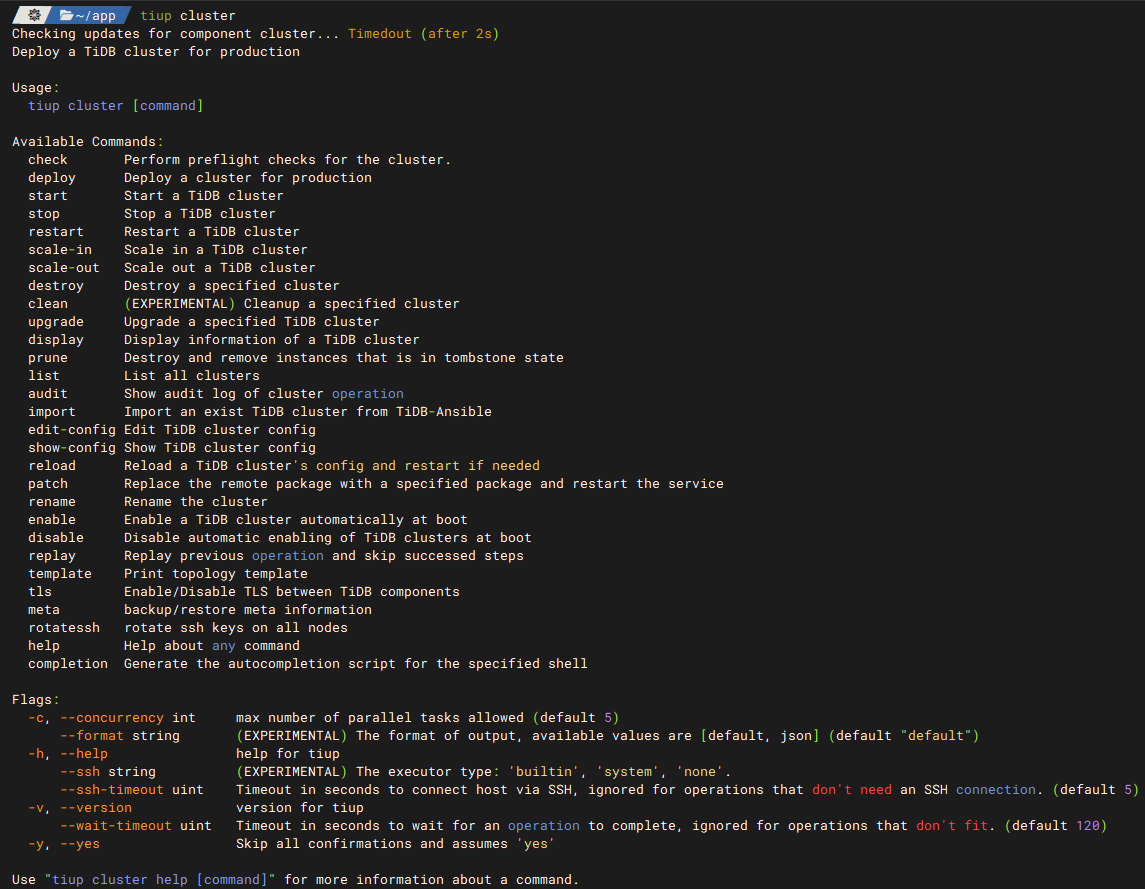
3、安装 TiUP 的 cluster 组件
tiup cluster

# 如果机器已经安装 TiUP cluster,需要更新软件版本:
tiup update --self && tiup update cluster
4、调大 sshd 服务的连接数限制
-
由于模拟多机部署,需要通过 root 用户调大 sshd 服务的连接数限制。修改
/etc/ssh/sshd_config将MaxSessions调至 20。 -
sed -i '/^#*MaxSessions[[:space:]]\+[0-9]\+/s/.*/MaxSessions 20/' /etc/ssh/sshd_config -
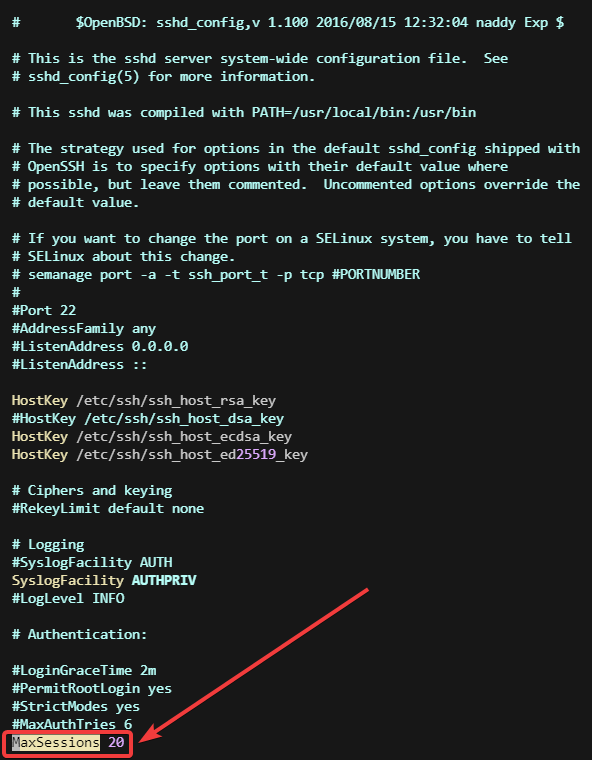
-
重启sshd服务
-
service sshd restart
5、创建拓扑配置文件
user: "tidb":表示通过tidb系统用户(部署会自动创建)来做集群的内部管理,默认使用 22 端口通过 ssh 登录目标机器replication.enable-placement-rules:设置这个 PD 参数来确保 TiFlash 正常运行host:设置为本部署主机的 IP,单机部署IP设置为127.0.0.1即可
global:
 user: "tidb"
 ssh_port: 22
 deploy_dir: "/tidb-deploy"
 data_dir: "/tidb-data"

monitored:
 node_exporter_port: 9100
 blackbox_exporter_port: 9115

server_configs:
 tidb:
   instance.tidb_slow_log_threshold: 300
 tikv:
   readpool.storage.use-unified-pool: false
   readpool.coprocessor.use-unified-pool: true
 pd:
   replication.enable-placement-rules: true
   replication.location-labels: ["host"]
 tiflash:
   logger.level: "info"

pd_servers:
 - host: 127.0.0.1

tidb_servers:
 - host: 127.0.0.1

tikv_servers:
 - host: 127.0.0.1
   port: 20160
   status_port: 20180
   config:
     server.labels: { host: "logic-host-1" }

 - host: 127.0.0.1
   port: 20161
   status_port: 20181
   config:
     server.labels: { host: "logic-host-2" }

 - host: 127.0.0.1
   port: 20162
   status_port: 20182
   config:
     server.labels: { host: "logic-host-3" }

tiflash_servers:
 - host: 127.0.0.1

monitoring_servers:
 - host: 127.0.0.1

grafana_servers:
 - host: 127.0.0.1
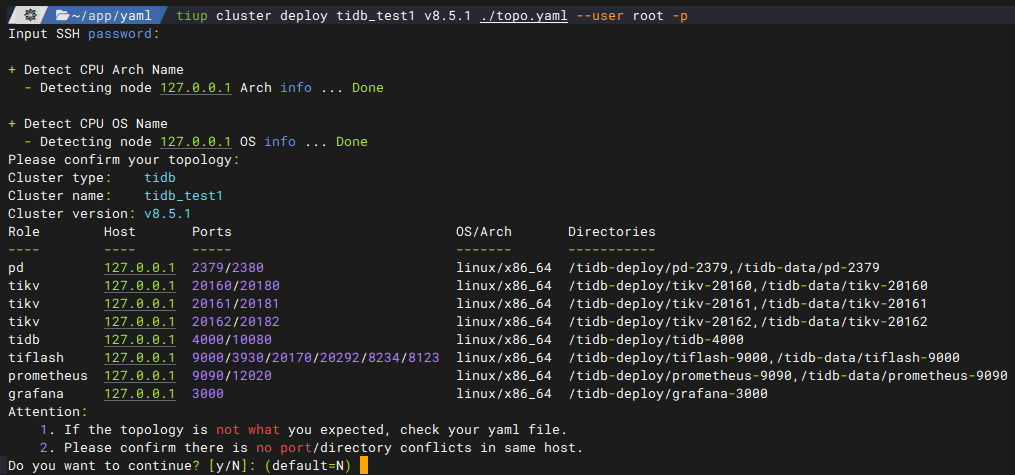
6、执行集群部署命令
tiup cluster deploy <cluster-name> <version> ./topo.yaml --user root -p
- 参数
<cluster-name>表示设置集群名称 - 参数
<version>表示设置集群版本,例如v8.5.1。可以通过tiup list tidb命令来查看当前支持部署的 TiDB 版本 - 参数
--user表示初始化环境的用户 - 参数
-p表示在连接目标机器时使用密码登录
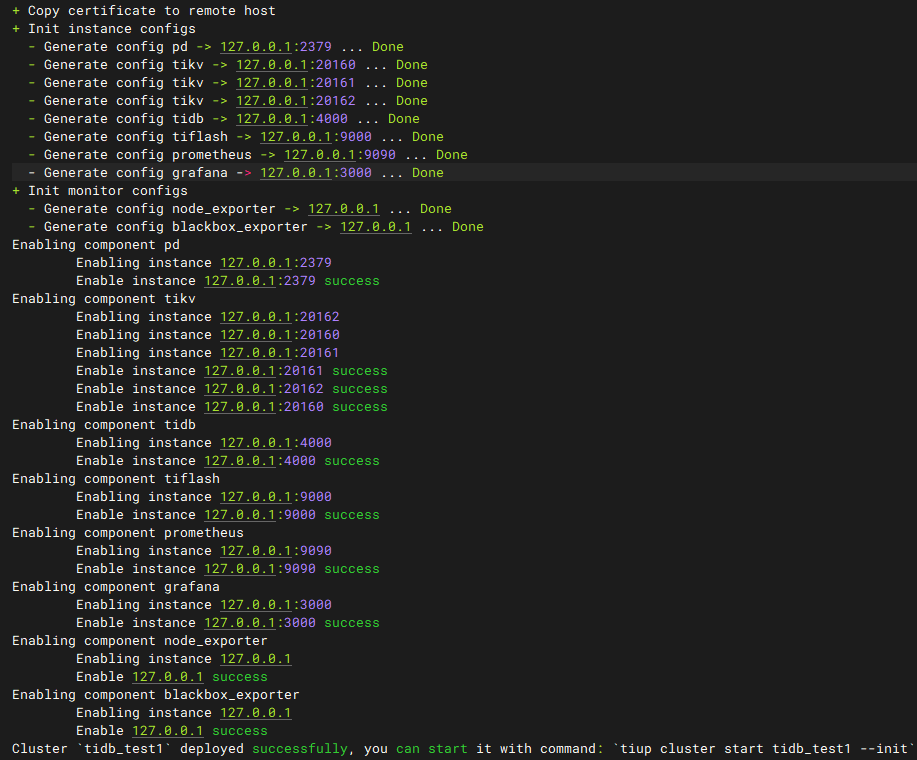
tiup cluster deploy tidb_test1 v8.5.1 ./topo.yaml --user root -p
6.1、交互式输入root用户密码和y继续
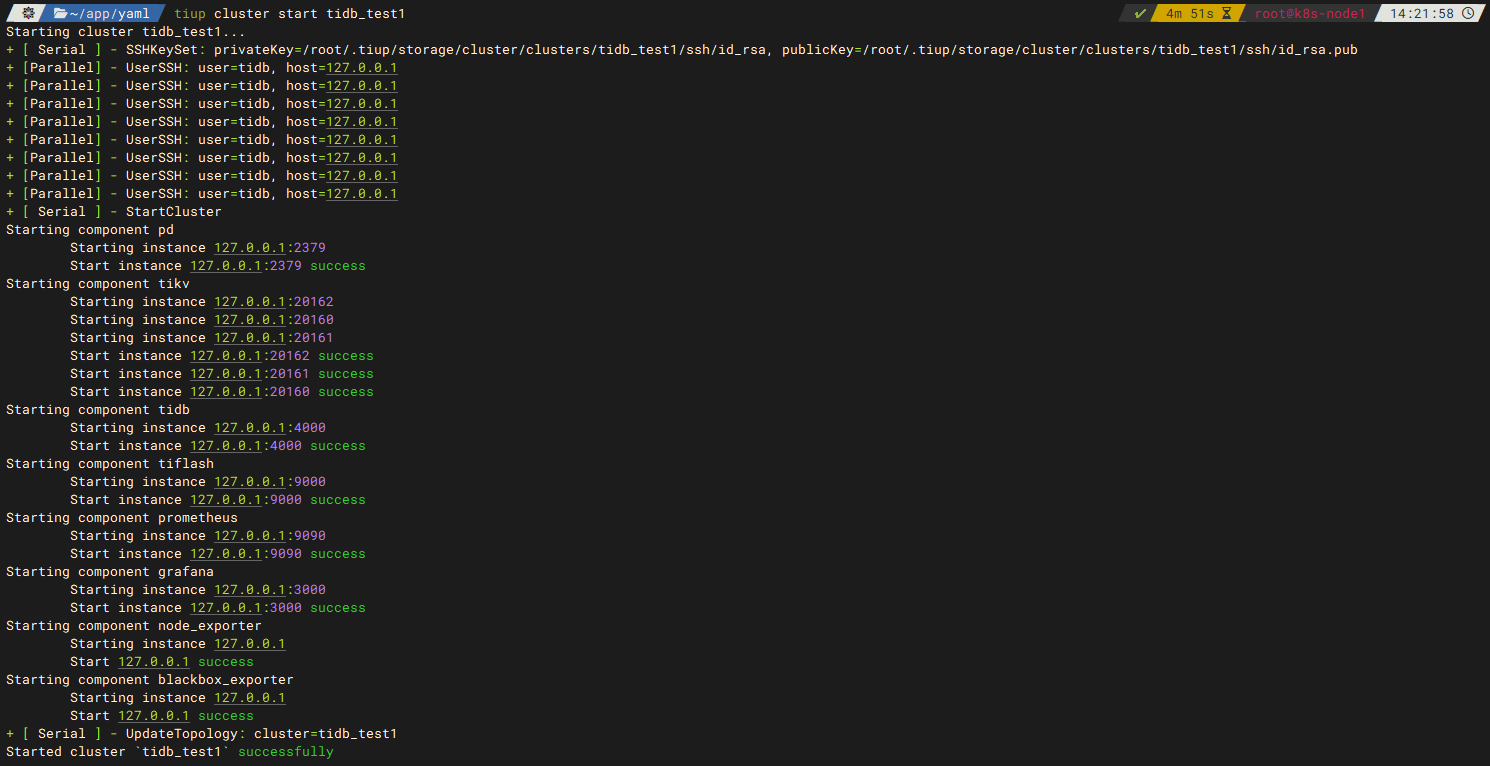
7、启动集群
tiup cluster start tidb_test1
8、查看集群列表和拓扑结构
8.1、查看已部署的集群列表
tiup cluster list

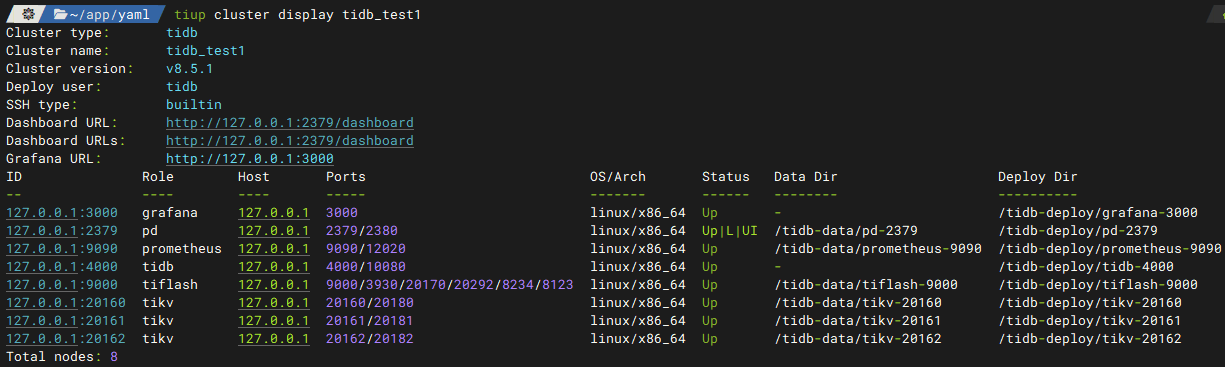
8.2、查看集群的拓扑结构和状态
tiup cluster display tidb_test1
9、访问集群端点
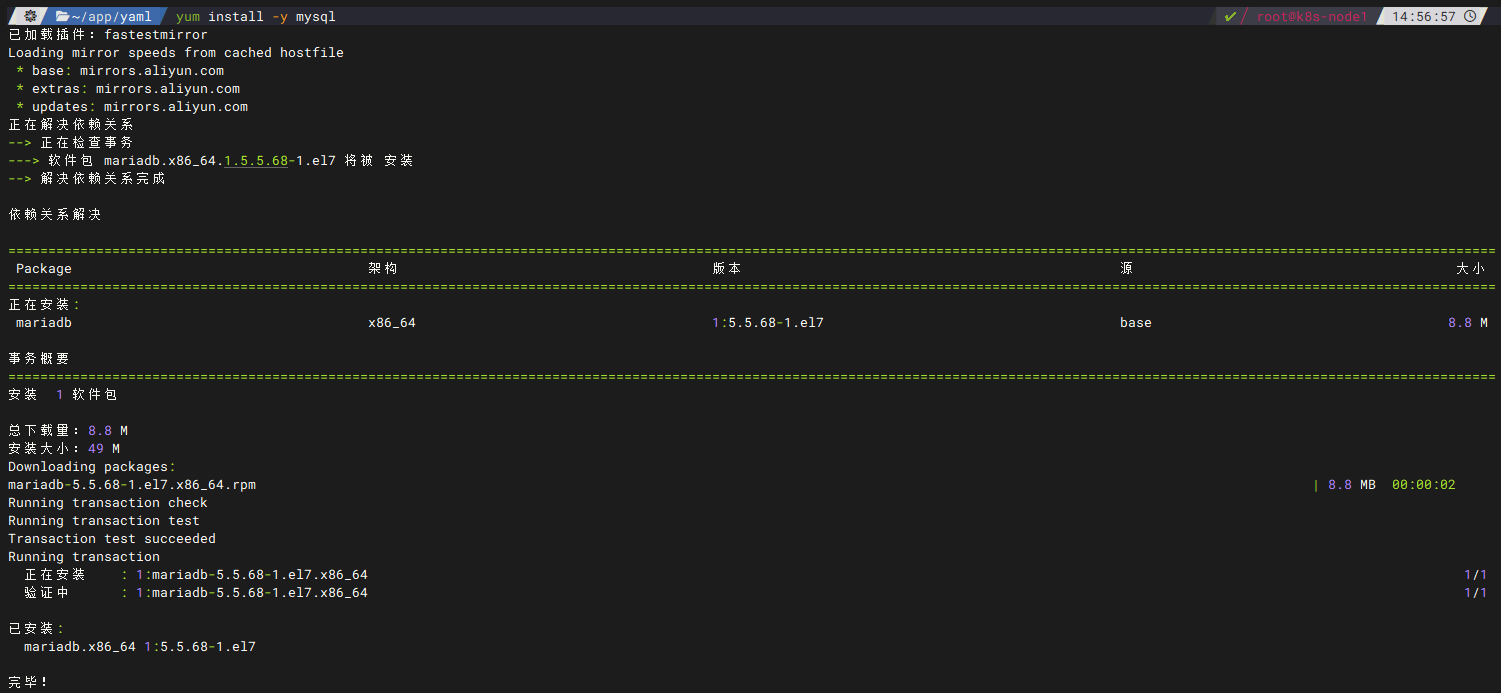
9.1、安装MySQL客户端
如果已安装,可以跳过这一步
yum install -y mysql
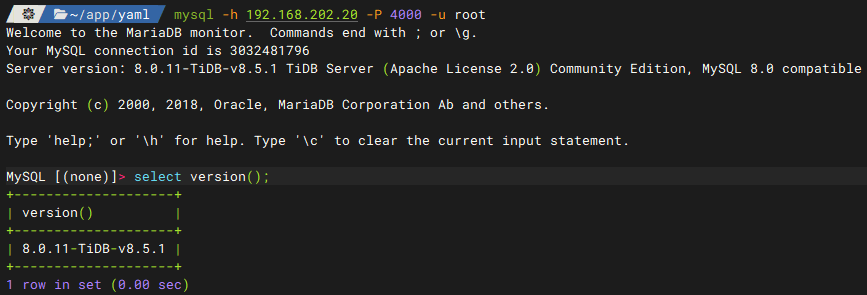
9.2、使用MySQL客户端访问TiDB数据库
密码为空
mysql -h 192.168.202.20 -P 4000 -u root
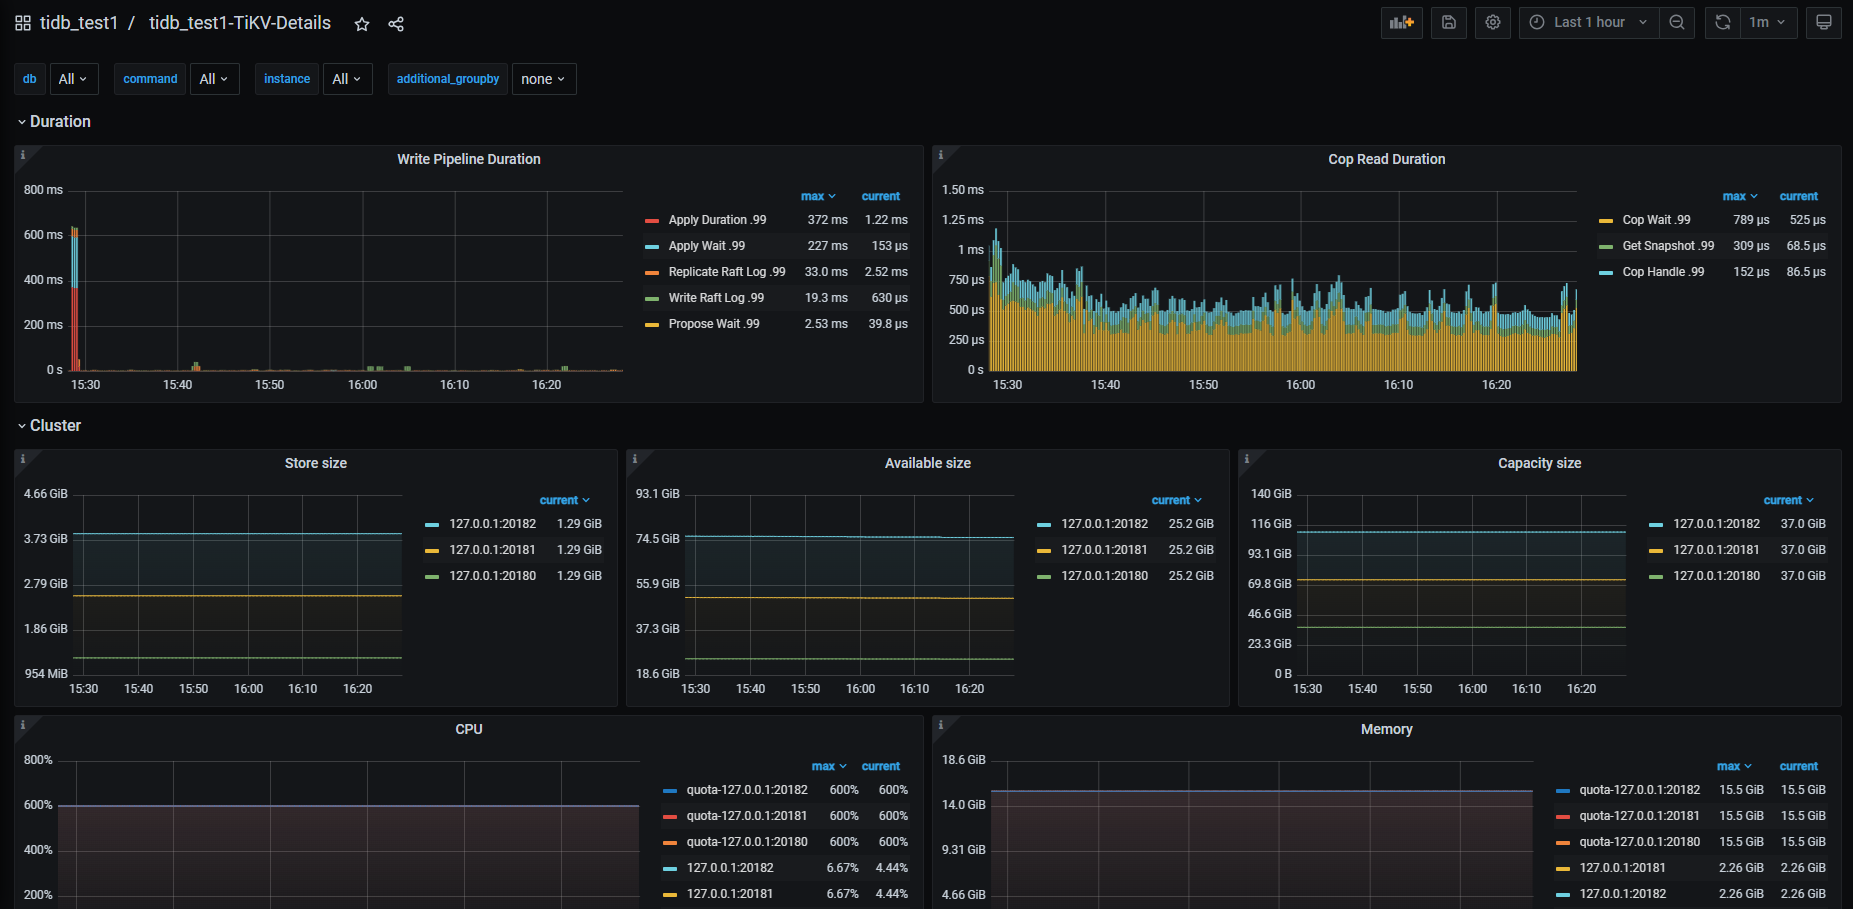
10、访问Grafana监控页面
默认用户名和密码都是admin
http://192.168.202.20:3000
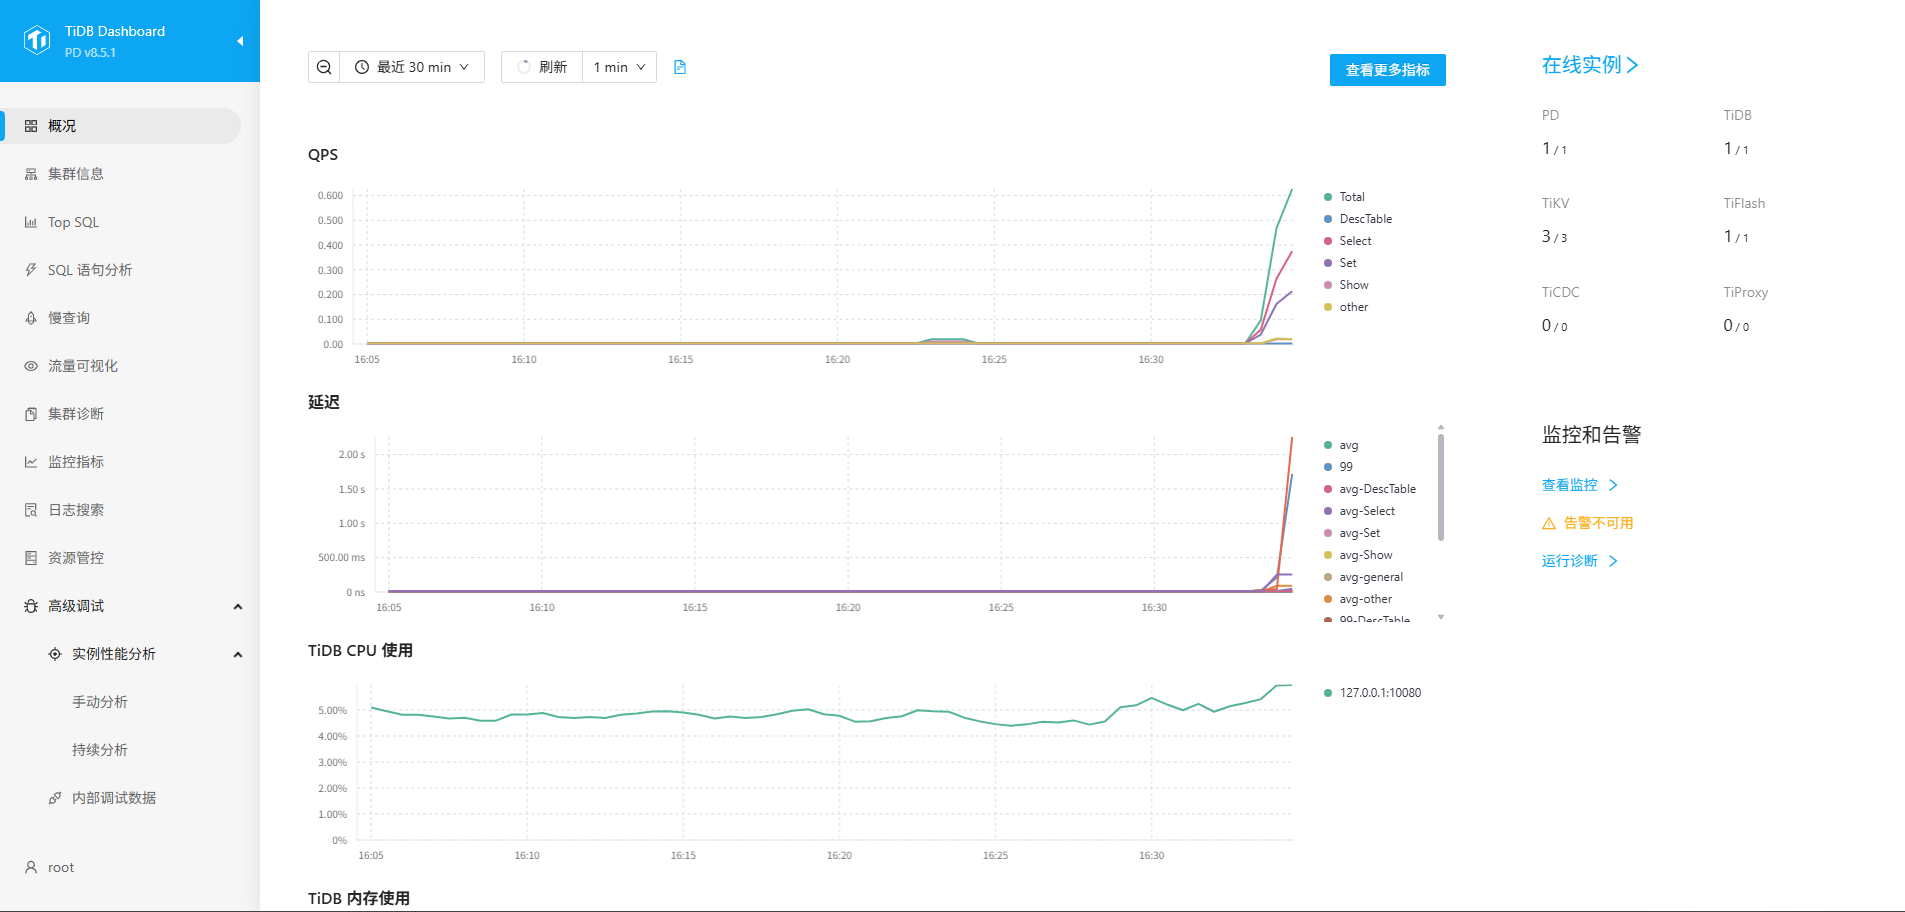
11、集群 TiDB Dashboard 监控页面
http://{pd-ip}:2379/dashboard

三、卸载TiDB
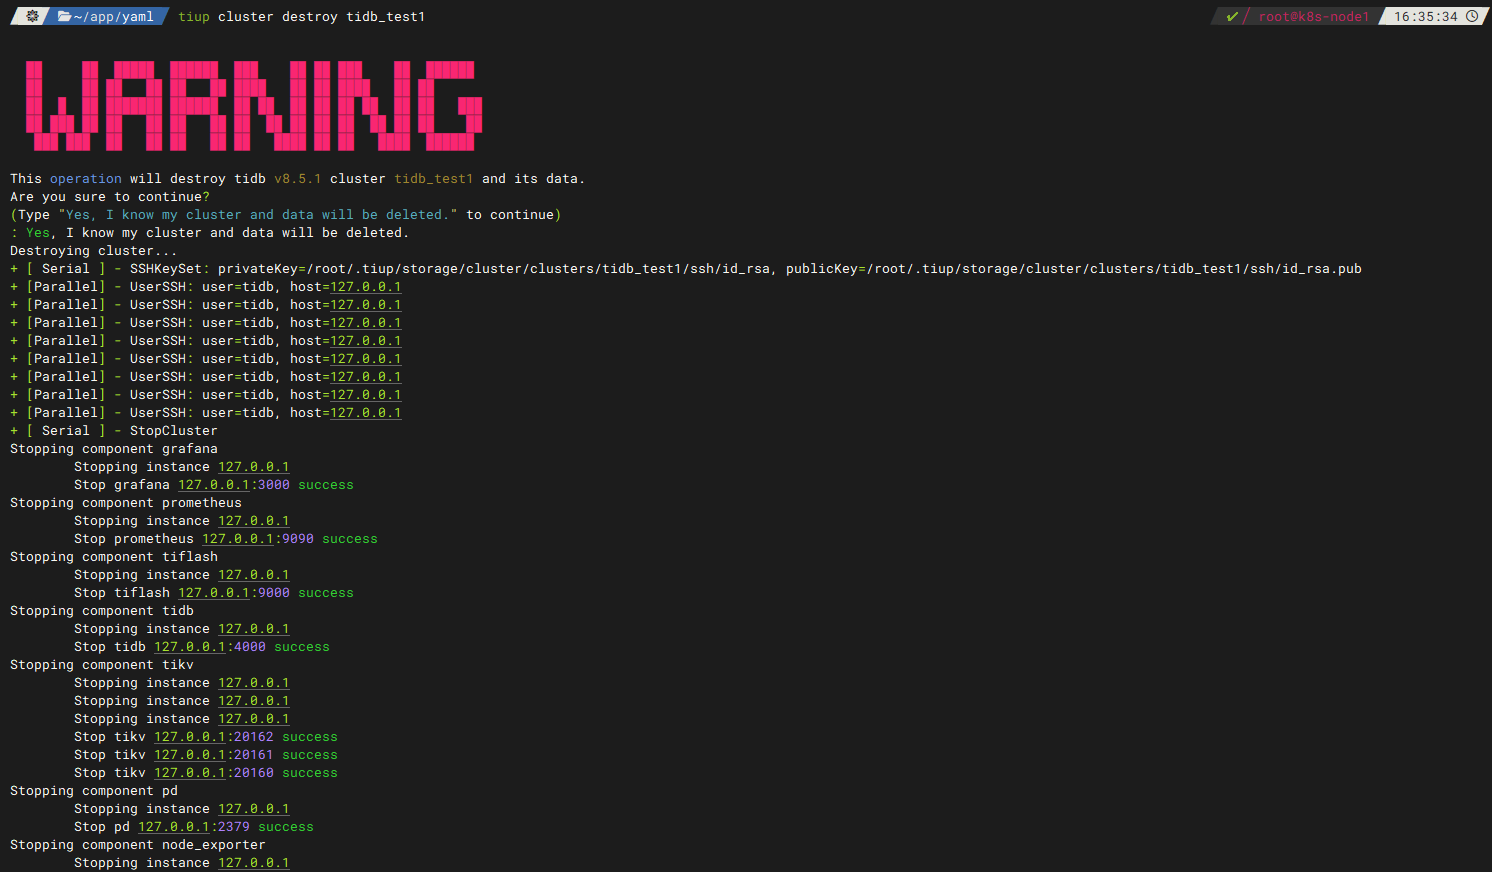
当业务下线之后,如果想将集群占有的机器释放出来让给其他业务使用,需要清理掉集群上的数据以及部署的二进制文件。tiup cluster destroy 命令会执行以下操作销毁集群:
- 停止集群
- 对于每个服务,删除其日志目录,部署目录,数据目录
- 如果各个服务的数据目录/部署目录的父目录是由 tiup-cluster 创建的,也一并删除
1、语法
tiup cluster destroy <cluster-name> [flags]
2、选项
--force
- 在某些情况下,有可能集群中的某些节点已经宕机,导致无法通过 SSH 连接到节点进行操作,这个时候可以通过
--force选项忽略这些错误。 - 数据类型:
BOOLEAN - 该选项默认关闭,默认值为
false。在命令中添加该选项,并传入true值或不传值,均可开启此功能。
--retain-node-data(StringArray,默认为空)
指定需要保留数据的节点,如需指定多个,重复使用多次该选项:--retain-node-data <node-A> --retain-node-data <node-B>。
--retain-role-data(StringArray,默认为空)
指定需要保留数据的角色,如需指定多个,重复使用多次该选项:--retain-role-data <role-A> --retain-role-data <role-B>。

 浙公网安备 33010602011771号