在winform中如何实现双向数据绑定?
什么是双向数据绑定?
双向数据绑定是一种允许我们创建持久连接的技术,使模型数据和用户界面(UI)之间的交互能够自动同步。这意味着当模型数据发生变化时,UI会自动更新,反之亦然。这种双向数据绑定极大地简化了UI和模型数据之间的同步,使开发者可以更专注于业务逻辑,而不是手动处理UI和数据的同步。
今天我想通过winform中DataGridView控件为例,介绍在winform中如何实现双向数据绑定。
一般在winform中使用DataGridView控件时,我们可能是这样使用的:
创建数据源
以Person类为例:
  public class Person
  {
      public string? Name { get; set; }
      public string? Home { get; set; }
  }
创建Person对象列表:
  // 创建一个Person对象的列表
  List<Person> people = new List<Person>()
  {
      new Person {Name = "张三",Home = "武汉" },
      new Person {Name = "李四",Home = "南昌" },
      new Person {Name = "王五",Home = "福州" },
  };
绑定数据源:
dataGridView1.DataSource = people;
这个时候的效果如下所示:
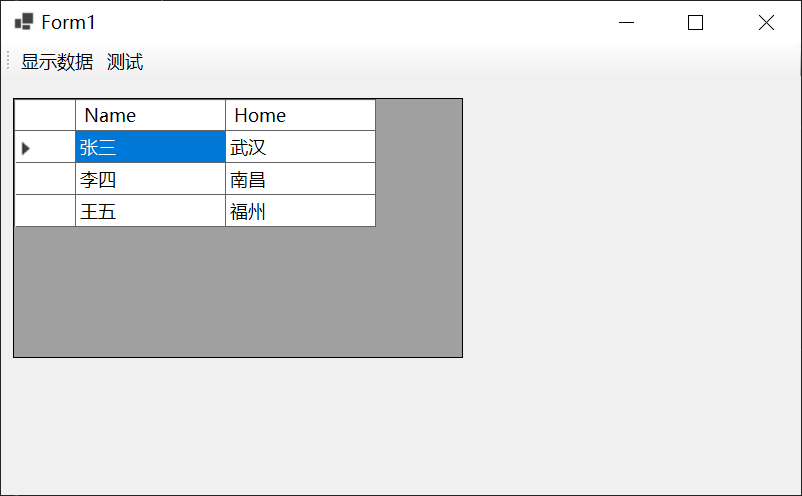
当我们进行修改之后,如下所示:
现在打印people列表第一个和第二个person对象的Home属性值看看:
  Debug.WriteLine(people[0].Home);
  Debug.WriteLine(people[1].Home);
结果如下图所示:
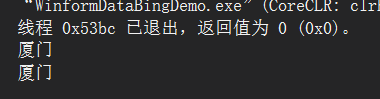
说明在dataGridView1上修改数据,people列表也被修改了。
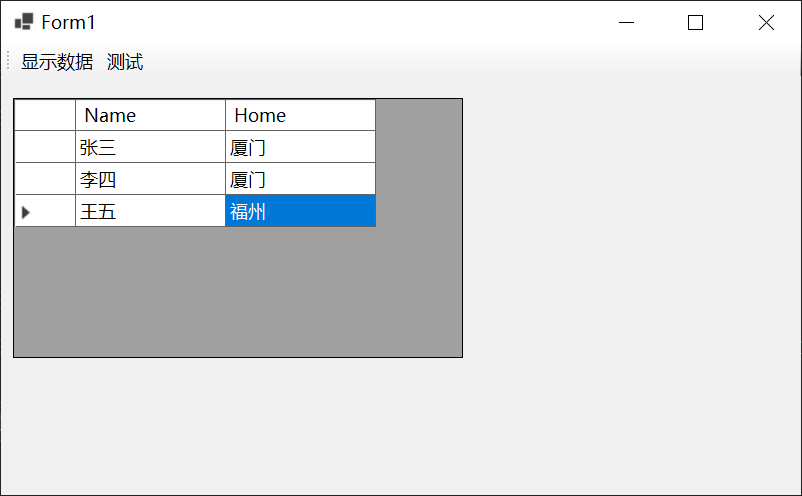
现在反过来测试一下,修改people列表第一个和第二个person对象的Home属性值:
 people[0].Home = "厦门";
 people[1].Home = "厦门";
会发现dataGridView1上的数据不会发生变化,需要我们点击对应的空格之后才会发生改变,如下所示:

如果我们这样写的话:
 people[0].Home = "厦门";
 people[1].Home = "厦门";
 dataGridView1.UpdateCellValue(1,1);
 dataGridView1.UpdateCellValue(1,2);
效果如下所示:

只改变了一个空格的值,另一个还是需要点击一下,才更新。
在winform中实现双向数据绑定示例
首先创建一个Student类,如下所示:
 public class Student : INotifyPropertyChanged
 {

     private string? _name;

     public string Name
     {
         get { return _name; }
         set
         {
             _name = value;
             // Call OnPropertyChanged whenever the property is updated
             OnPropertyChanged("Name");
         }
     }
     private string? _home;

     public string Home
     {
         get { return _home; }
         set
         {
             _home = value;
             // Call OnPropertyChanged whenever the property is updated
             OnPropertyChanged("Home");
         }
     }

     // Declare the event
     public event PropertyChangedEventHandler? PropertyChanged;
     // Create the OnPropertyChanged method to raise the event
     protected void OnPropertyChanged(string name)
     {
         var handler = PropertyChanged;
         handler?.Invoke(this, new PropertyChangedEventArgs(name));
     }
 }
实现了INotifyPropertyChanged接口。
创建数据源:
 // 创建一个Student对象的列表
 BindingList<Student> students = new BindingList<Student>()
 {
         new Student { Name = "张三", Home = "武汉" },
         new Student { Name = "李四", Home = "南昌"  },
         new Student { Name = "王五", Home = "福州"  },
 };
注意这里使用的是BindingList<T>而不是List<T>。

BindingList<T>与List<T>的区别
BindingList
- 数据绑定支持:BindingList
是为数据绑定设计的,它实现了 IBindingList 接口。这意味着当 BindingList 中的数据发生更改时(例如,添加、删除或修改项),它会自动通知绑定到它的任何 UI 控件。这对于 Windows Forms 或 WPF 这样的 UI 框架非常有用,因为它们可以自动更新以反映数据的更改。相比之下,List 不支持数据绑定。 - 事件通知:BindingList
提供了一些额外的事件,如 ListChanged,这可以让你知道列表何时被修改。List 没有这样的事件。 - 性能:由于 BindingList
提供了额外的功能,所以在某些情况下,它可能比 List 慢一些。如果你不需要数据绑定或更改通知,那么 List 可能会提供更好的性能。
绑定数据源:
dataGridView1.DataSource = students;
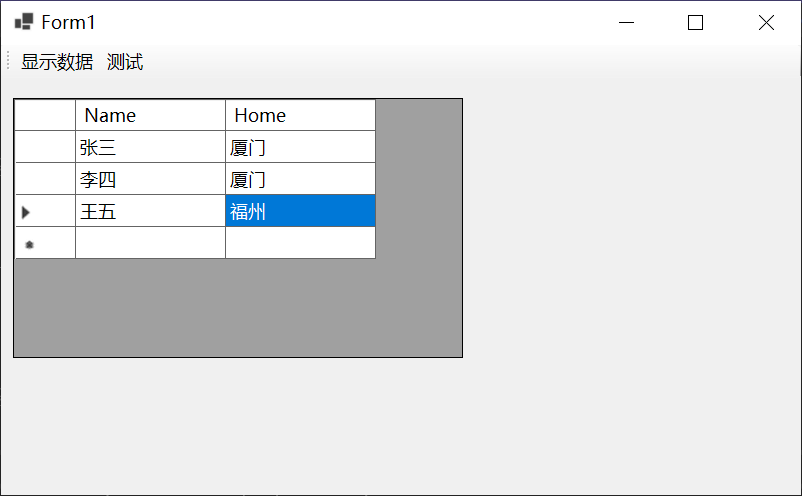
更改数据源的值,查看UI是否会自动改变:
 students[0].Home = "厦门";
 students[1].Home = "厦门";
实现的效果如下所示:
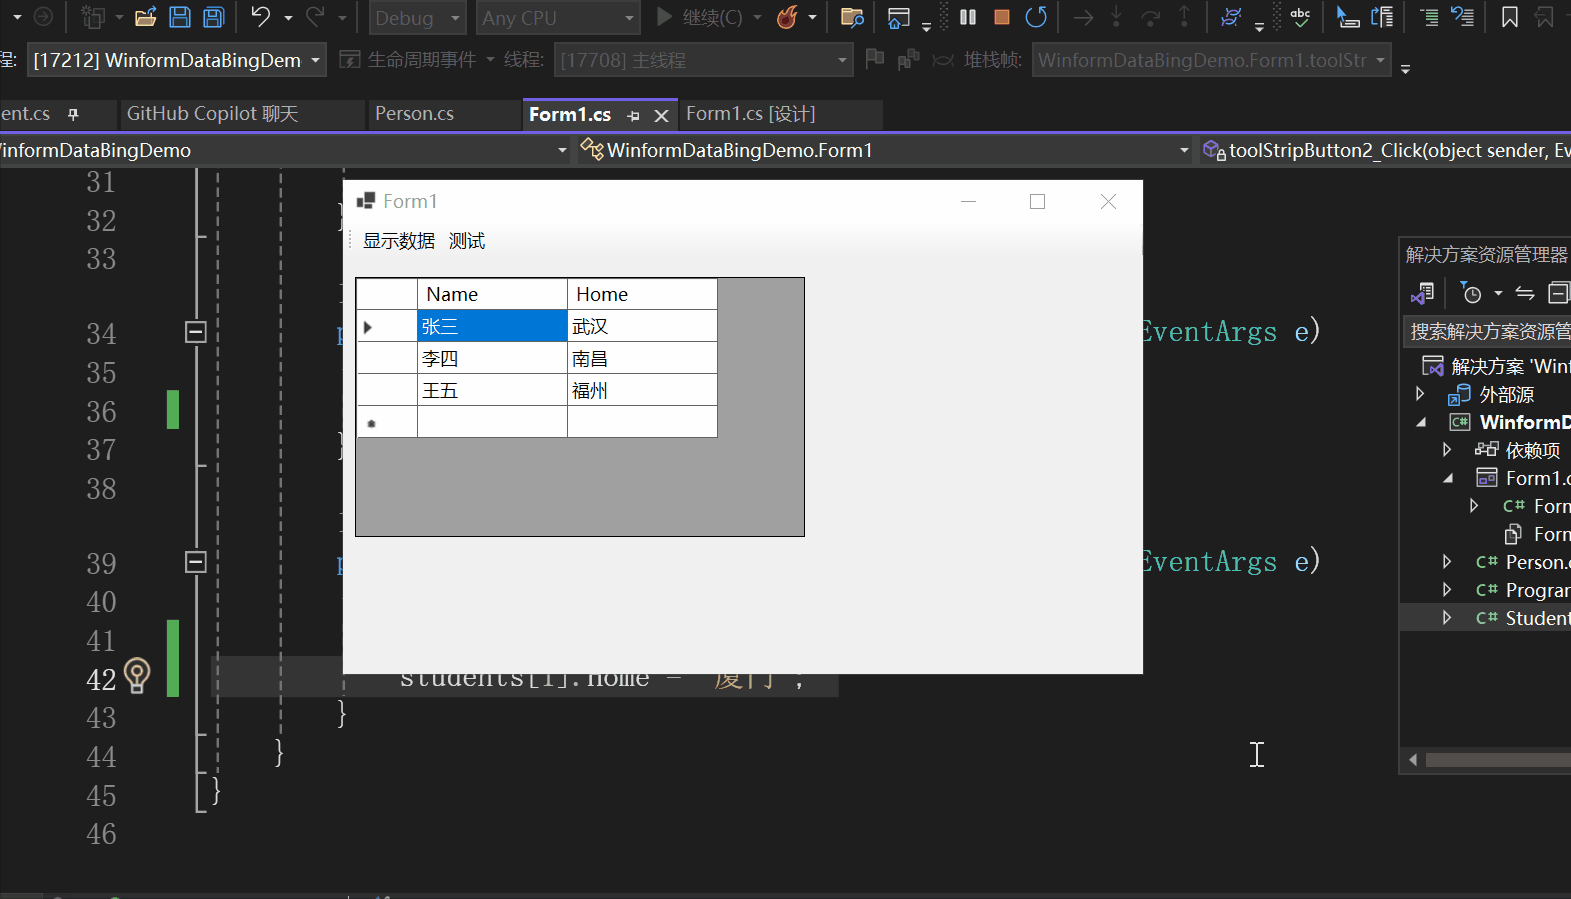
发现当数据的值发生改变时,dataGridView1会自动进行更新。
编辑dataGridView1查看数据源是否会发生改变,编辑之后如下图所示:
查看结果:
 Debug.WriteLine(students[0].Home);
 Debug.WriteLine(students[1].Home);
结果如下图所示:
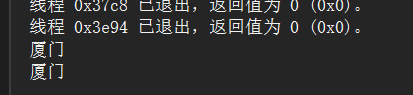
说明编辑dataGridView1产生的更改也会导致数据源的更改。
总结
以上就是在winform中实现双向数据绑定的一次实践,要点有两个,第一个是类实现INotifyPropertyChanged,第二个是用BindingList<T>代替List<T>,希望对你有所帮助。

 浙公网安备 33010602011771号