jenkins流水线项目发布流程
环境
| 主机 | ip地址 | 安装 | 环境 |
| node5 | 192.168.170.134 | tomcat,jenkins | centos8 |
| node4 | 192.168.170.133 | tomcat | centos8 |
替换源为国内源
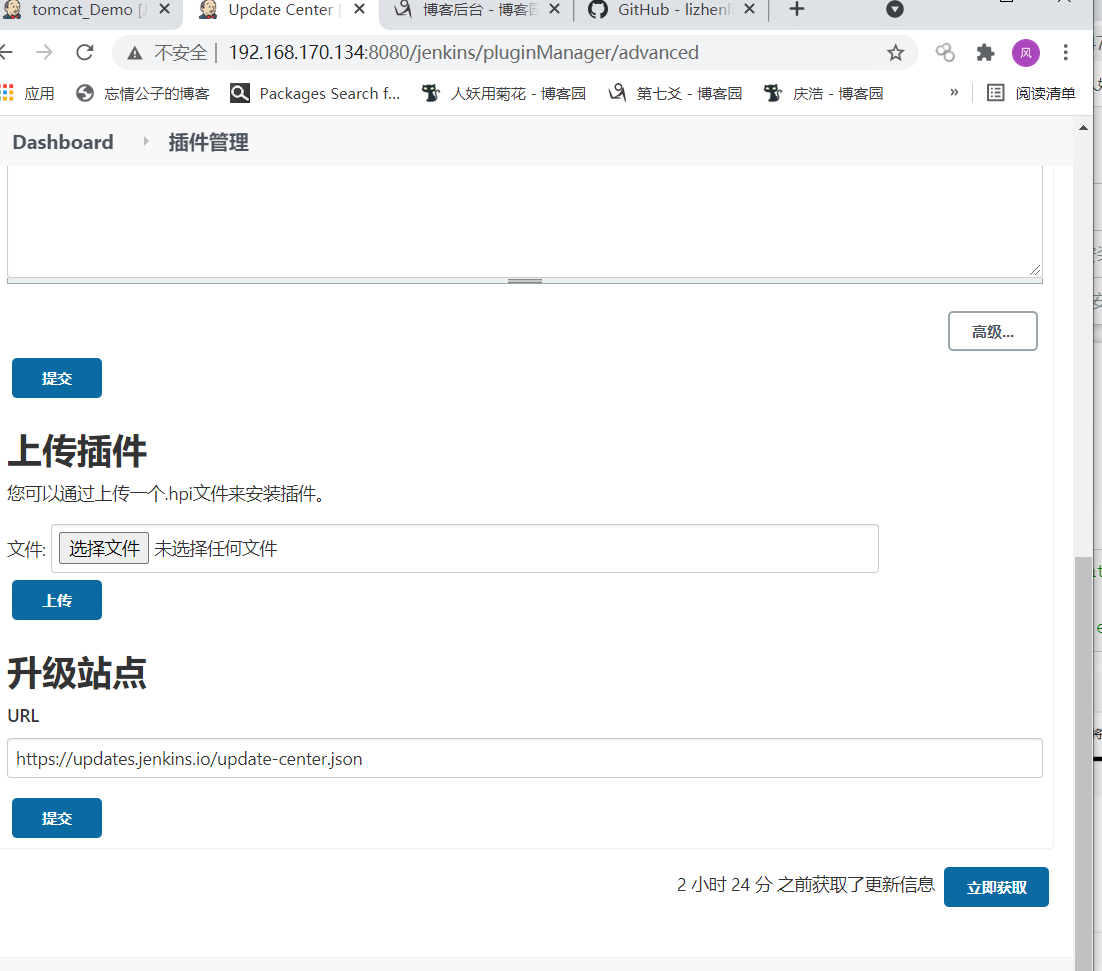
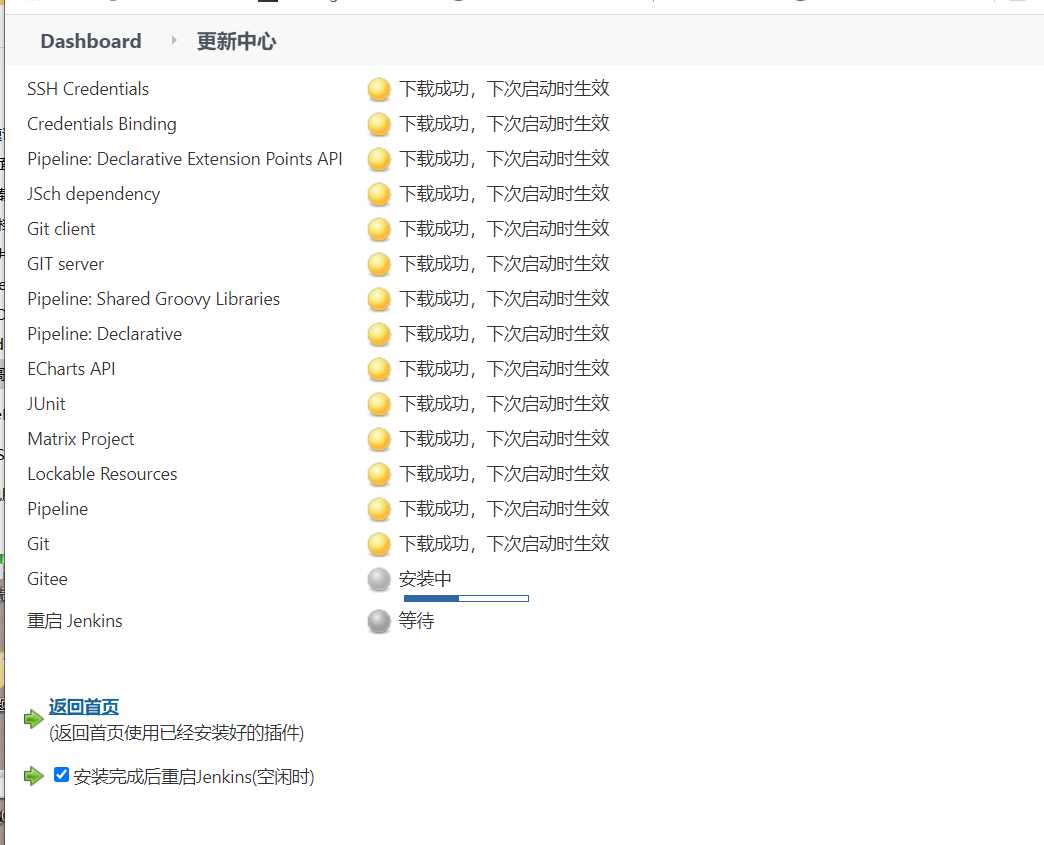
安装插件(如果装不好,可以尝试使用推荐安装)
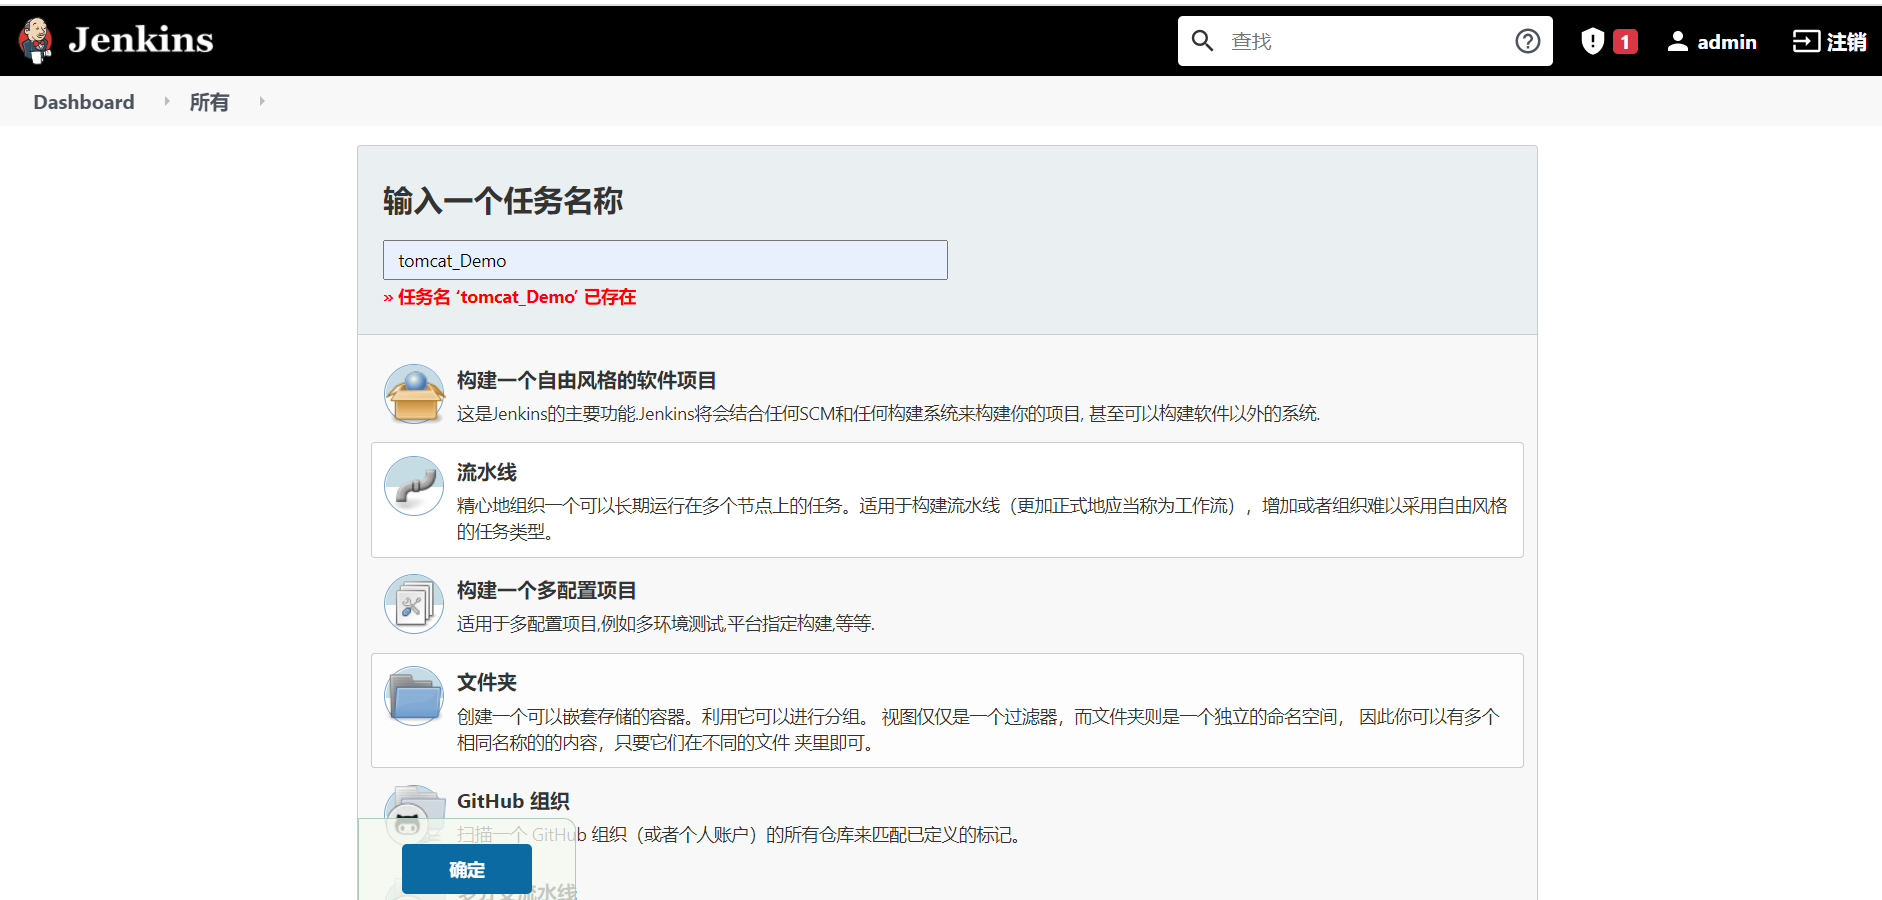
安装了pipeline后就有了流水线,创建一个流水线项目
安装
[root@node5 ~]# yum install -y git
[root@node5 ~]# yum install  -y maven
拉代码
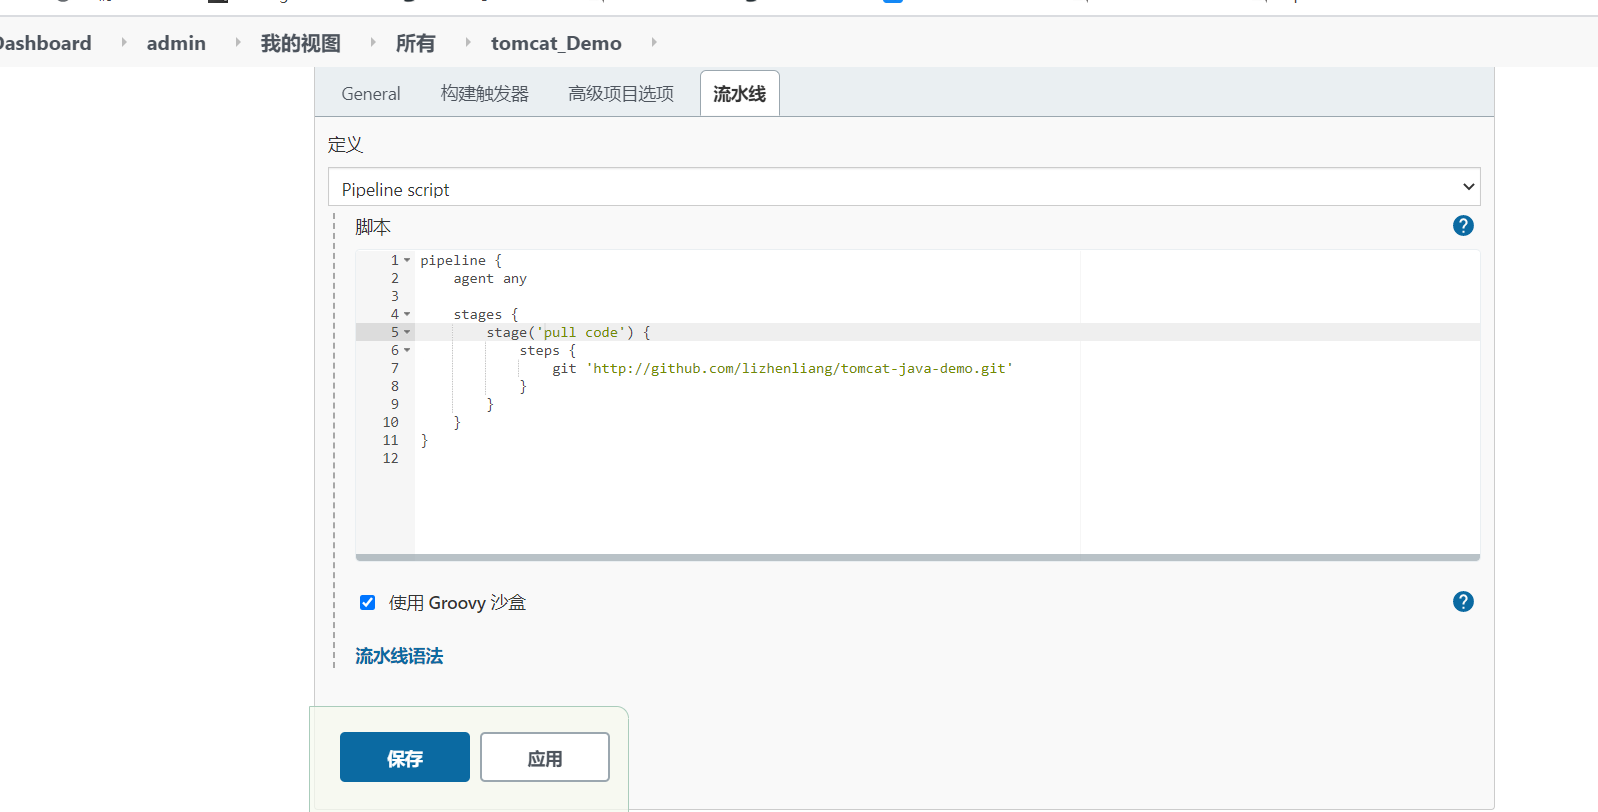
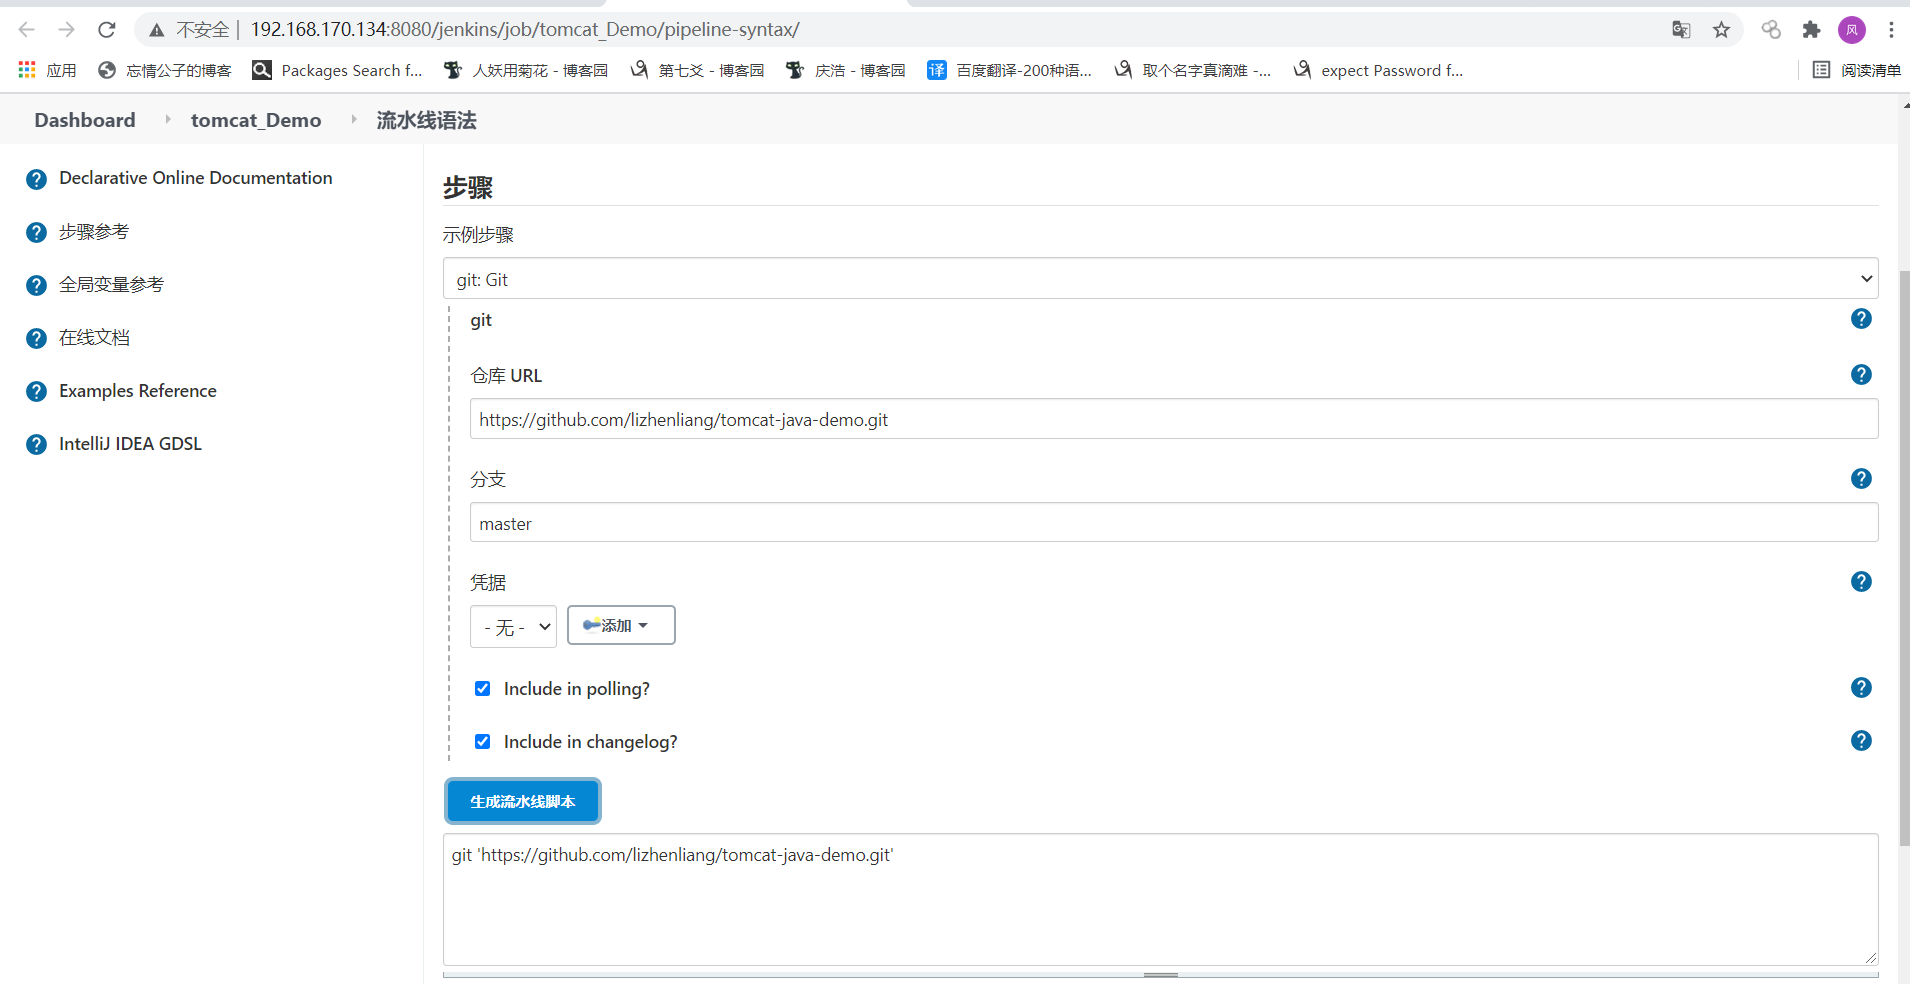
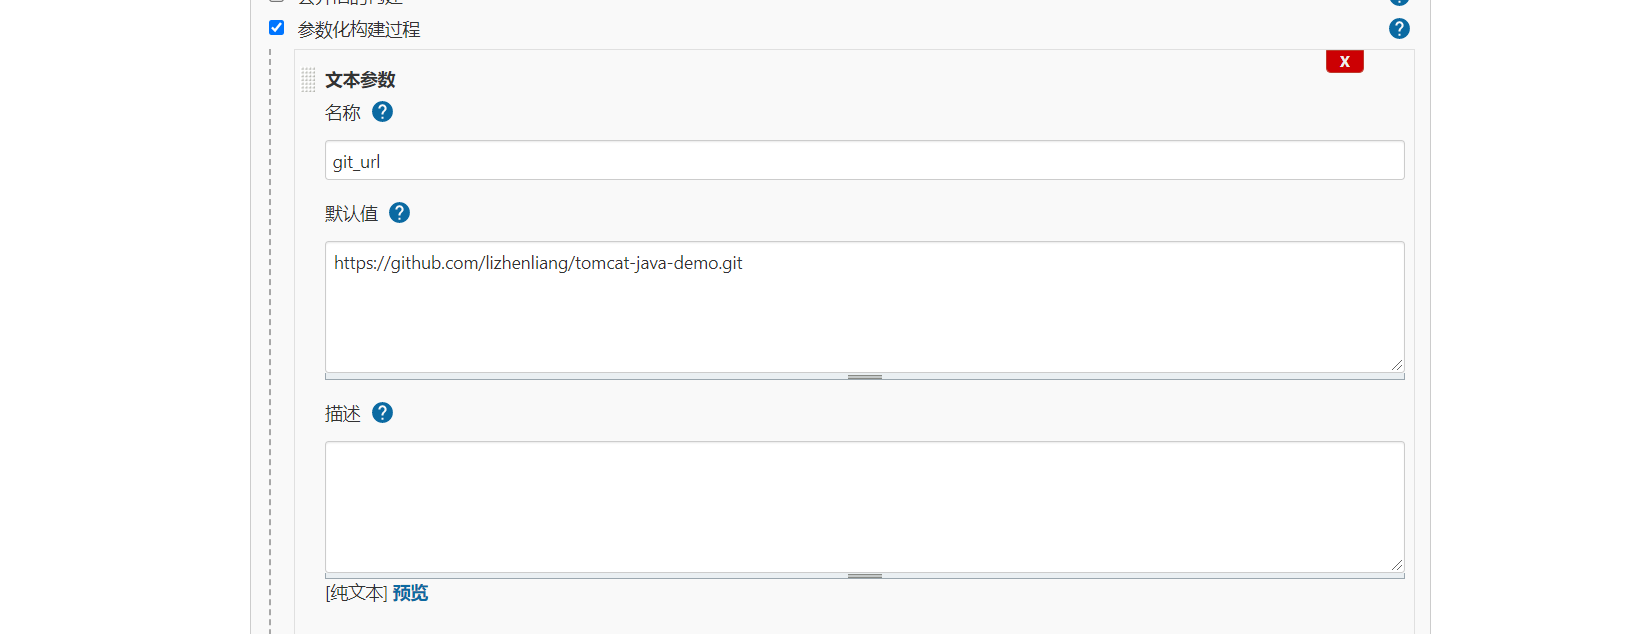
拉代码(脚本语法,url地址)
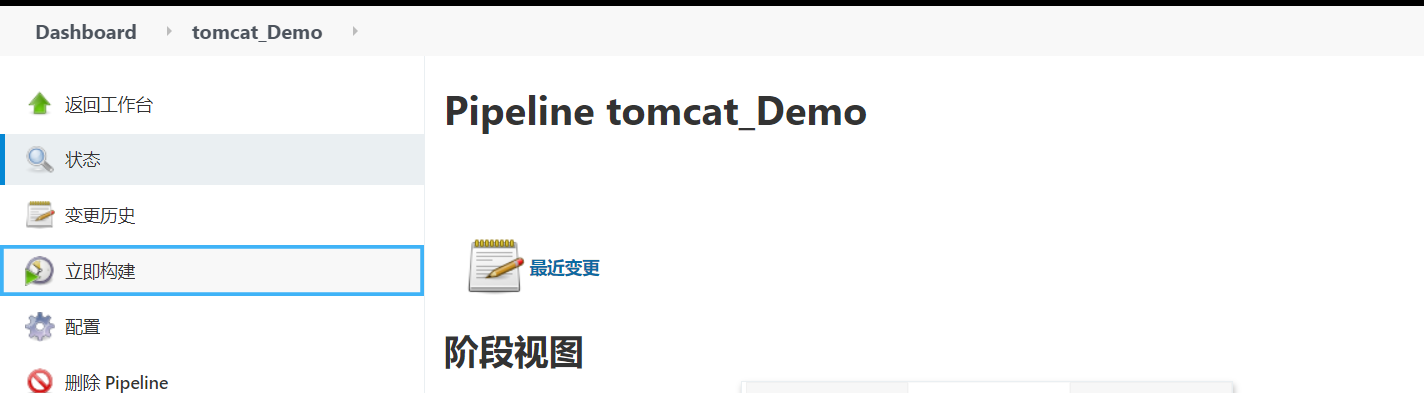
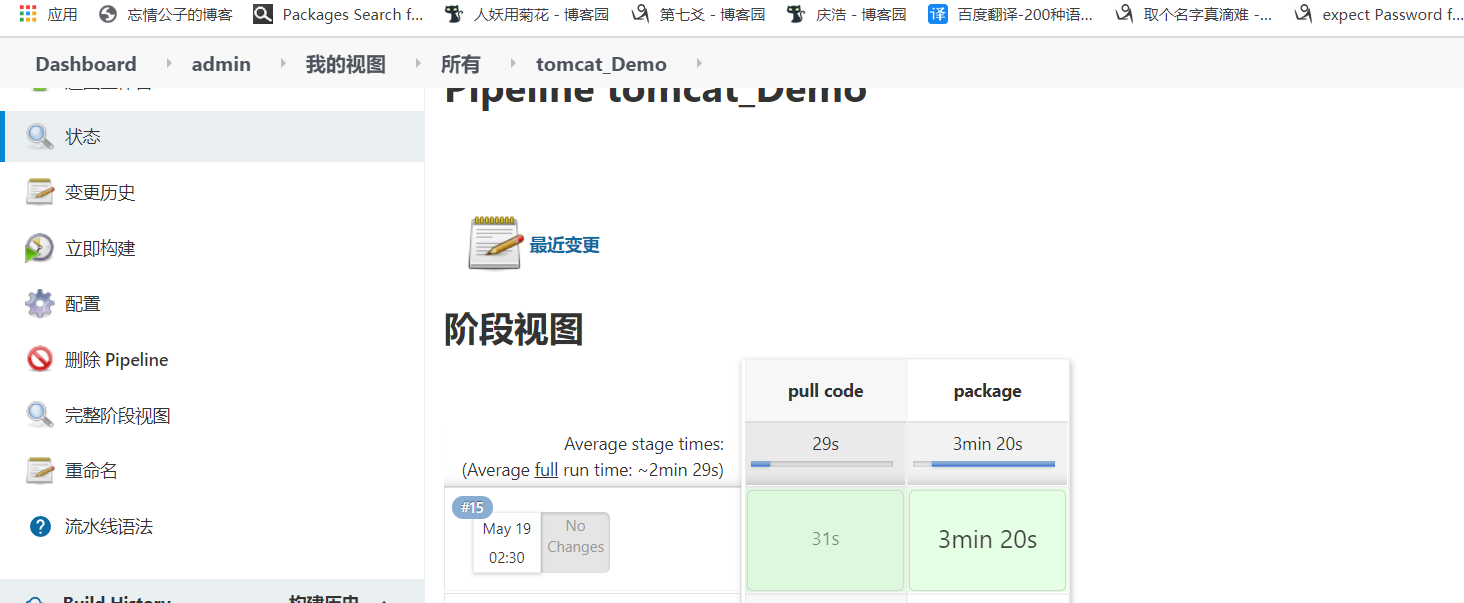
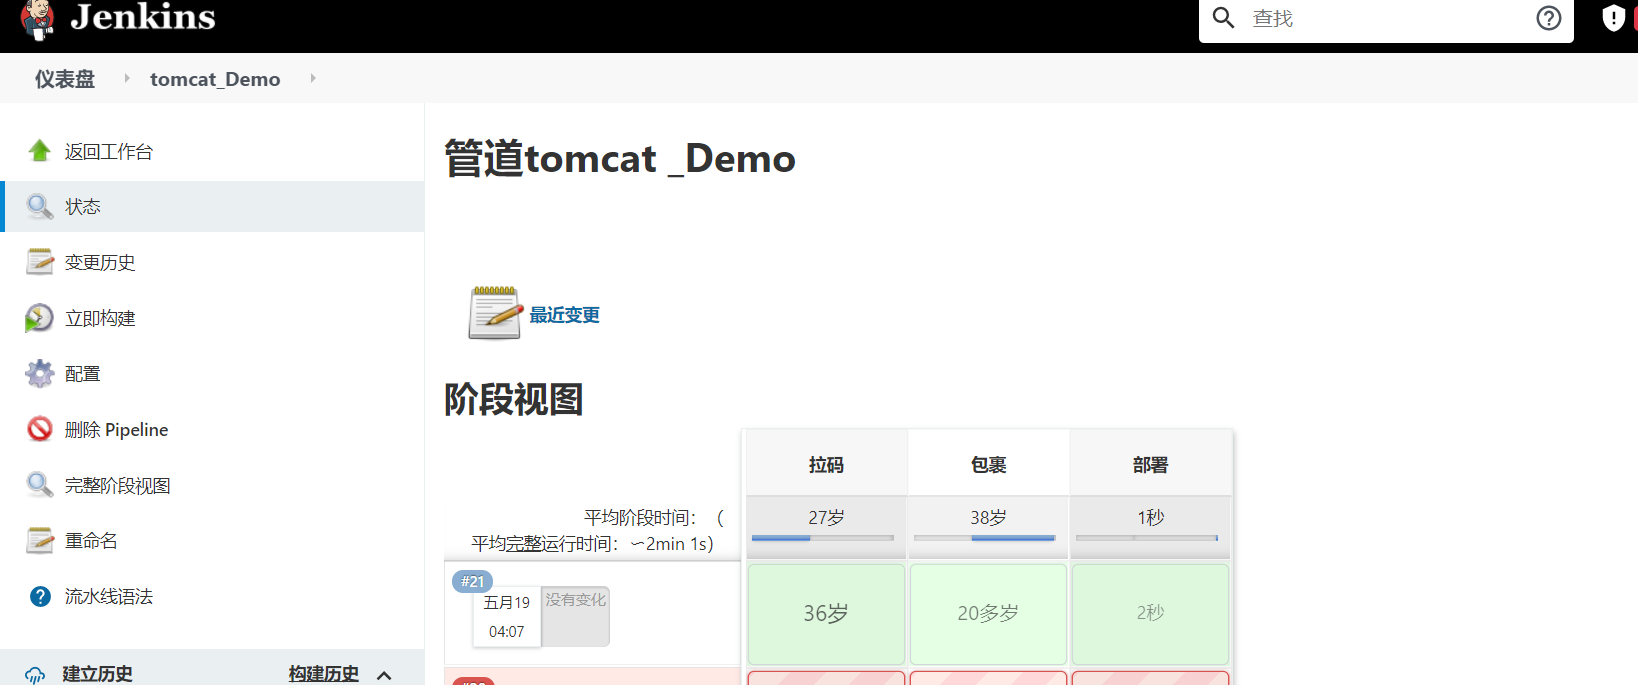
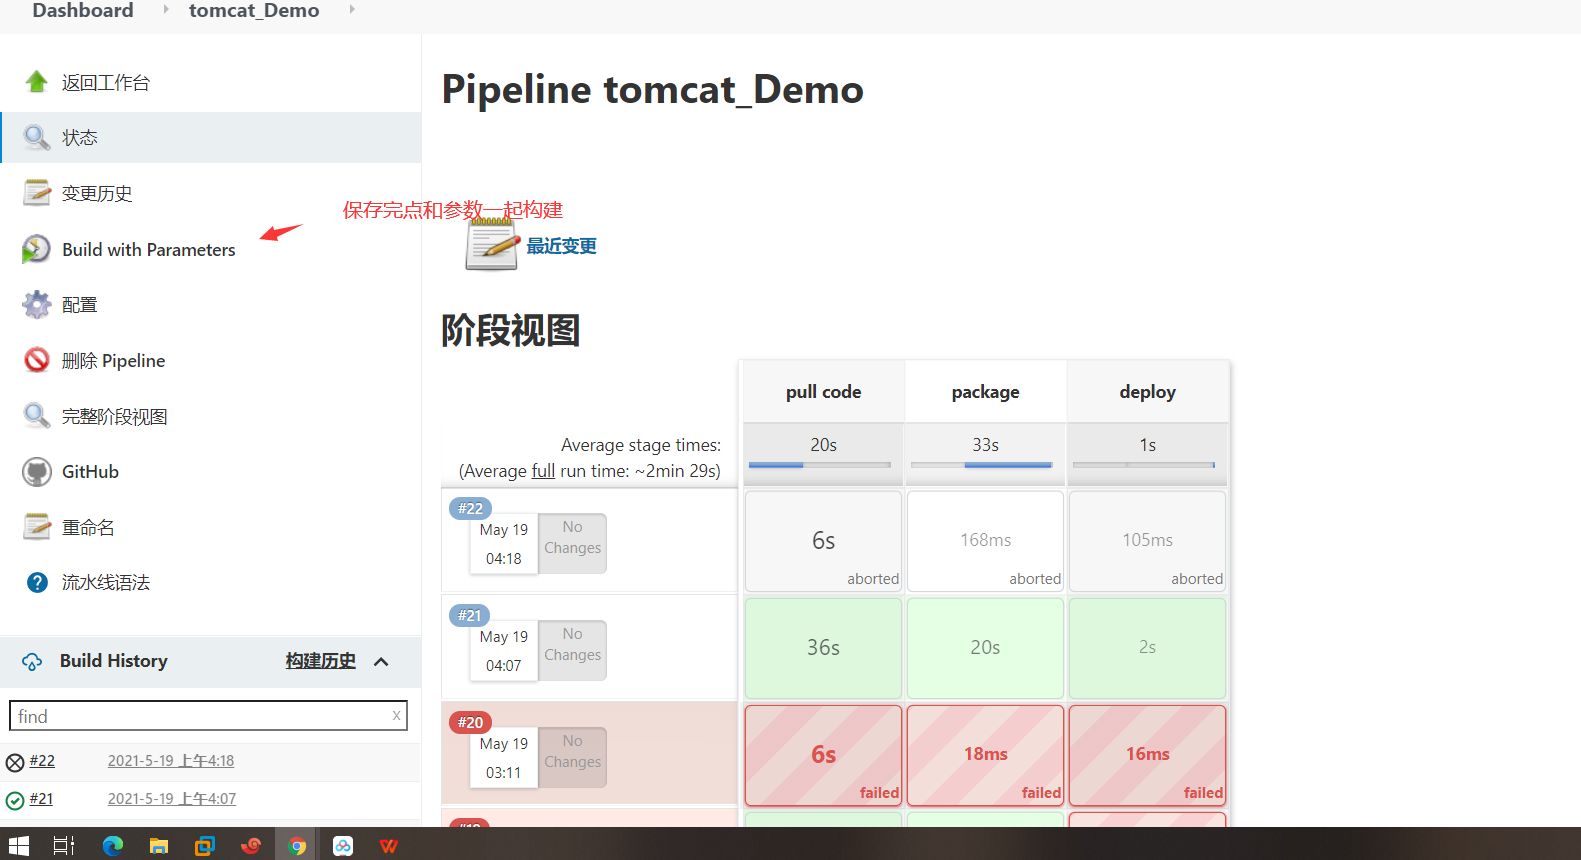
点击立即构建就可以开始工作
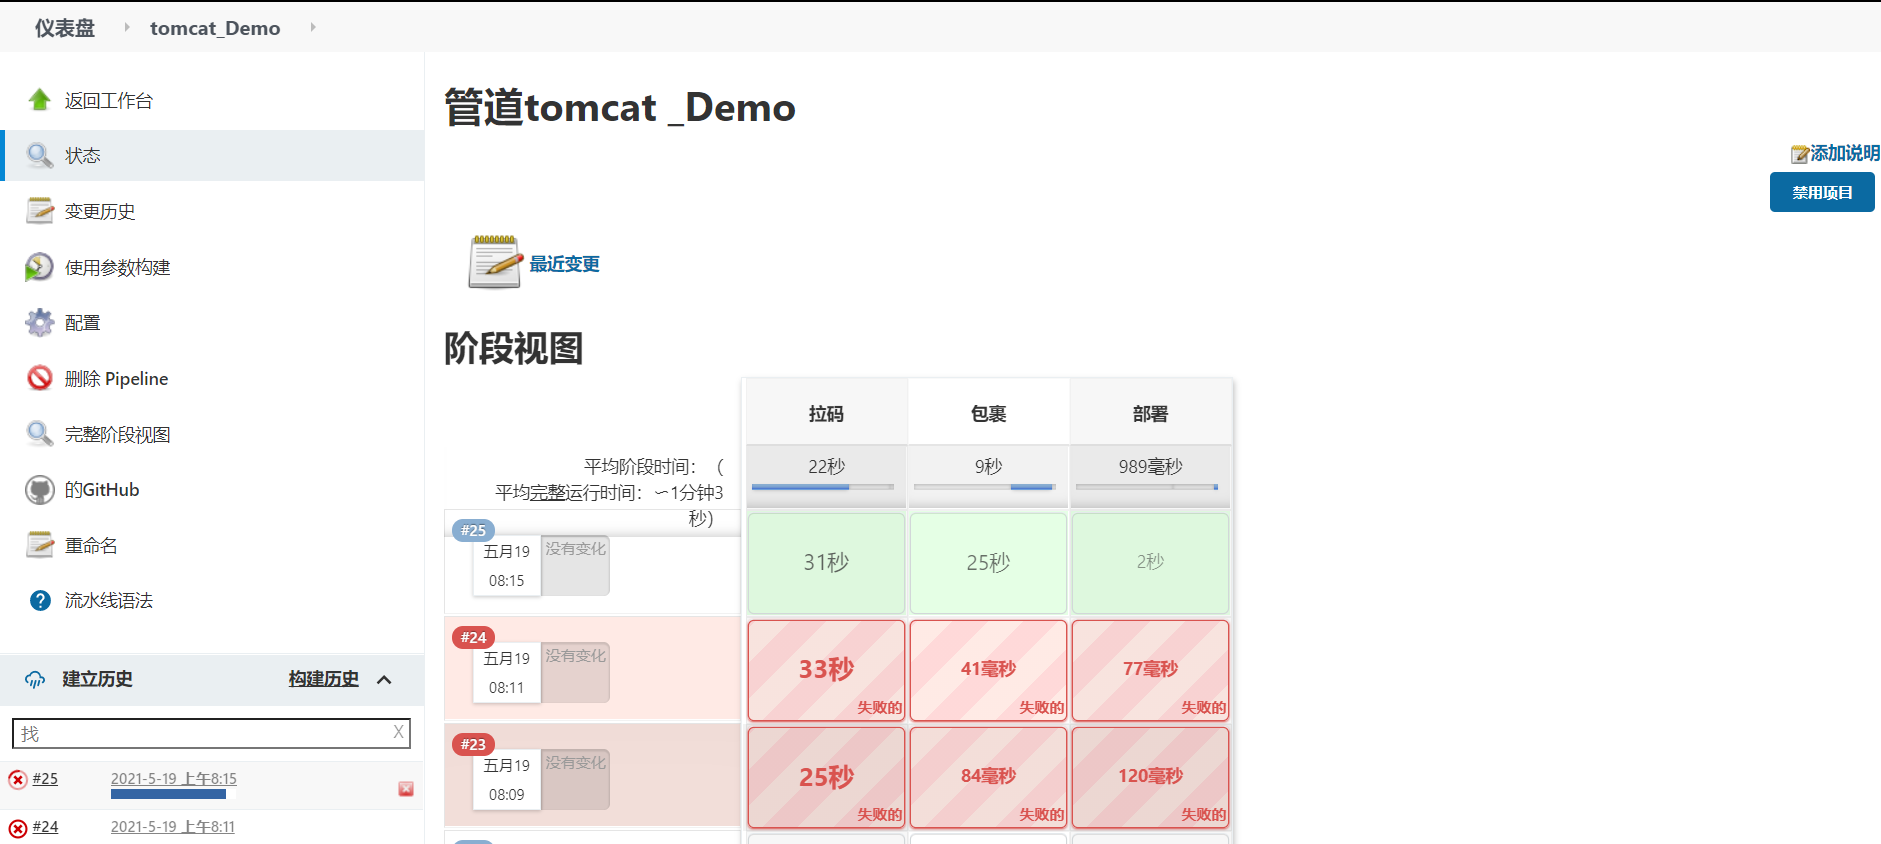
项目开始工作,绿色代表成功,红色代表失败。

打包,都是绿色的代表成功。
查看工作日志,点击项目绿色上面的logs
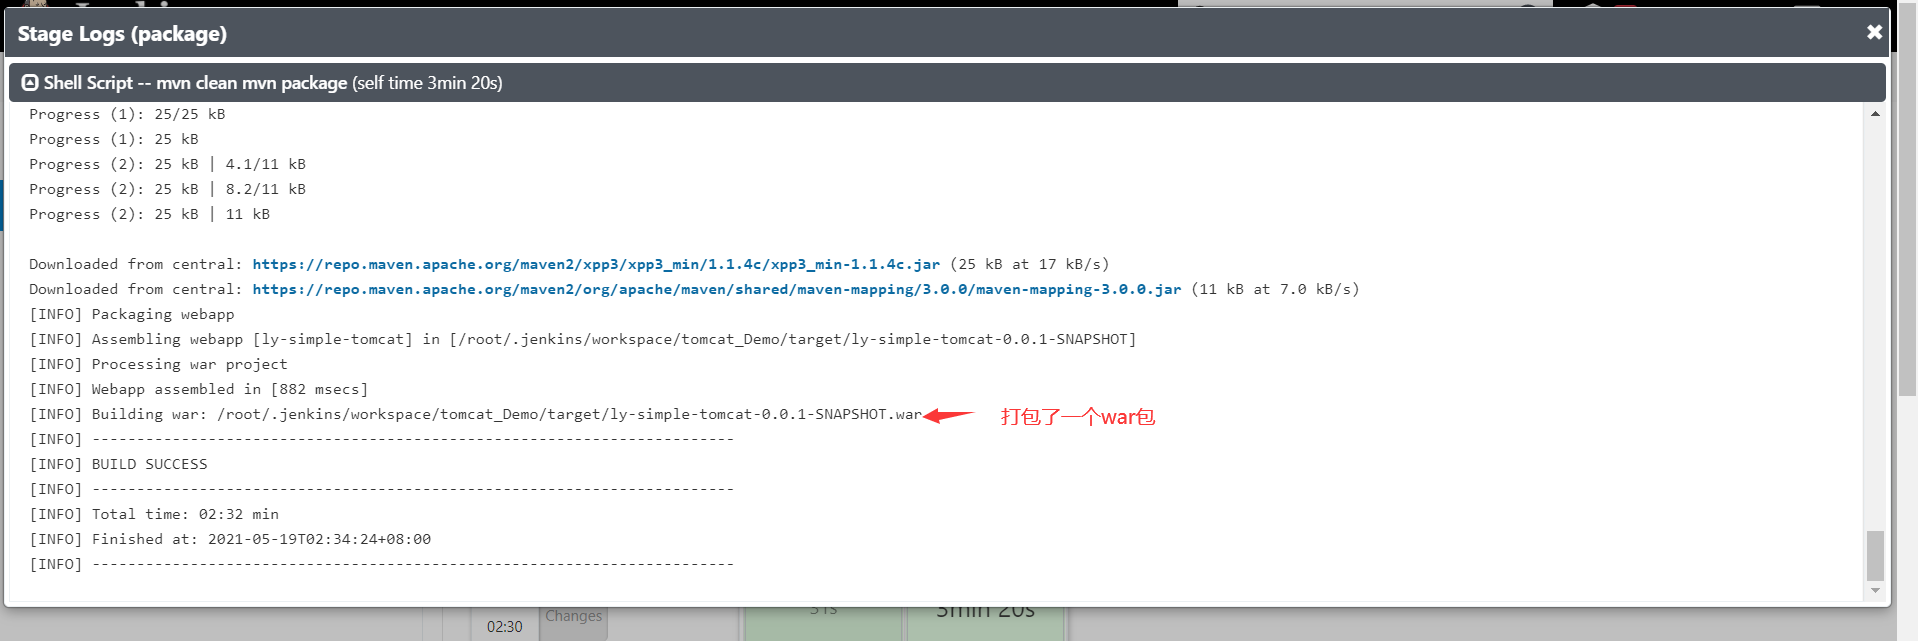
发现打包了一个war包在该目录,去终端查看一下
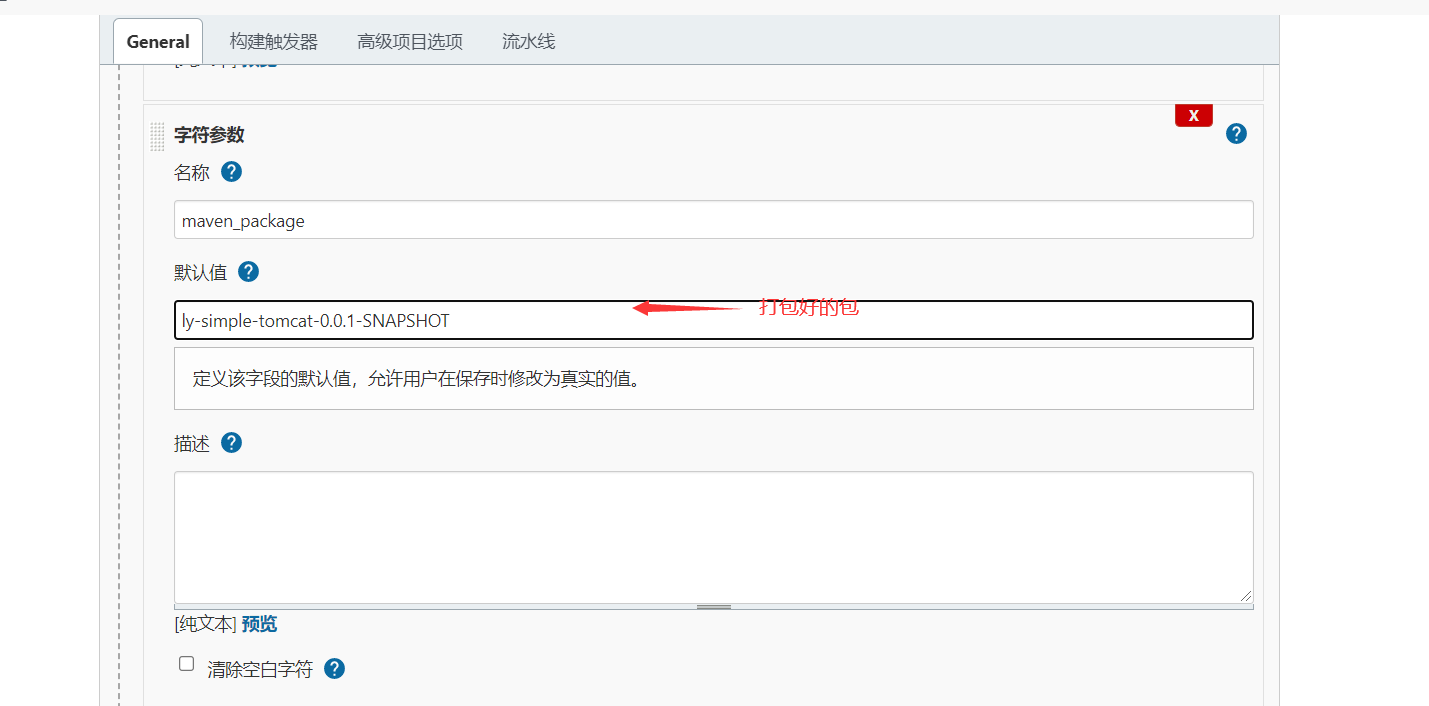
[root@node5 ~]# ls /root/.jenkins/workspace/tomcat_Demo/target/
classes            ly-simple-tomcat-0.0.1-SNAPSHOT      maven-archiver
generated-sources  ly-simple-tomcat-0.0.1-SNAPSHOT.war  maven-status
给node4做免密认证
[root@node5 ~]#  ssh-keygen -t rsa
Generating public/private rsa key pair.
Enter file in which to save the key (/root/.ssh/id_rsa):
Created directory '/root/.ssh'.
Enter passphrase (empty for no passphrase):
Enter same passphrase again:
Your identification has been saved in /root/.ssh/id_rsa.
Your public key has been saved in /root/.ssh/id_rsa.pub.
The key fingerprint is:
SHA256:lhBl4RQdlPXcEeTjULgWIkSKc9RE6RzCX0av5G3B4mE root@node5
The key's randomart image is:
+---[RSA 3072]----+
|      oo%X==. o=.|
|      oB.=o+o=o..|
|     o.o* =E.==o.|
|      o. == =o+ .|
|        S  +.o . |
|       .    .    |
|                 |
|                 |
|                 |
+----[SHA256]-----+
[root@node5 ~]# ssh-copy-id  root@192.168.170.133
/usr/bin/ssh-copy-id: INFO: Source of key(s) to be installed: "/root/.ssh/id_rsa.pub"
The authenticity of host '192.168.170.133 (192.168.170.133)' can't be established.
ECDSA key fingerprint is SHA256:jVnkkd9Xi4gyvKGo6MZuf+RYVysQmAcKhtY+kyMT+IU.
Are you sure you want to continue connecting (yes/no/[fingerprint])? yes
/usr/bin/ssh-copy-id: INFO: attempting to log in with the new key(s), to filter out any that are already installed
/usr/bin/ssh-copy-id: INFO: 1 key(s) remain to be installed -- if you are prompted now it is to install the new keys
root@192.168.170.133's password:

Number of key(s) added: 1

Now try logging into the machine, with:   "ssh 'root@192.168.170.133'"
and check to make sure that only the key(s) you wanted were added.
部署
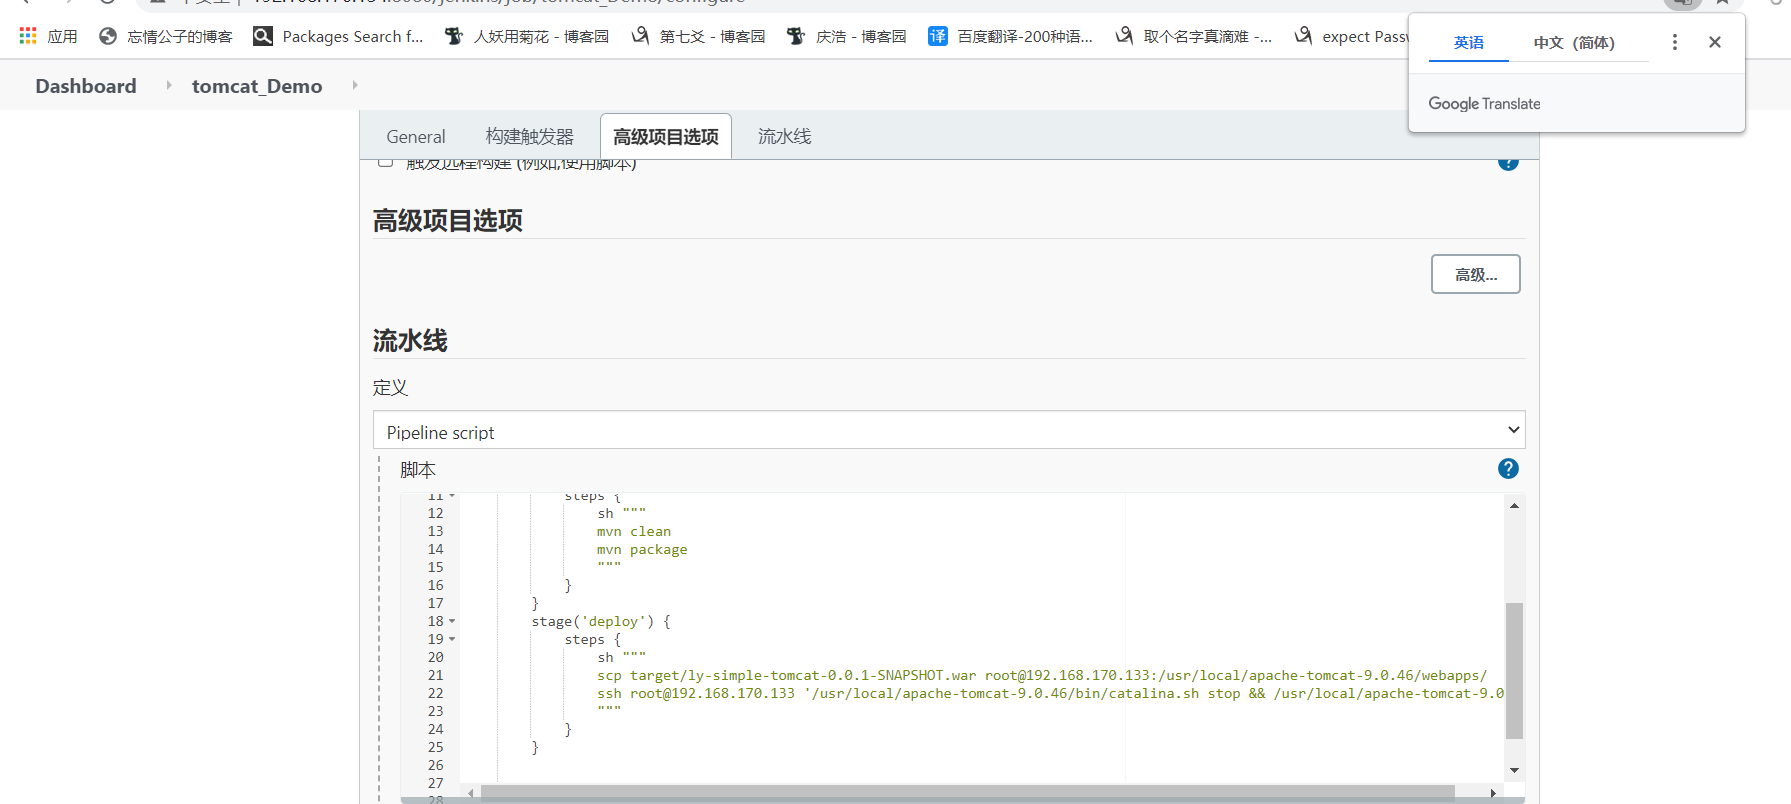
脚本
pipeline {
    agent any

    stages {
        stage('pull code') {
            steps {
                git 'http://github.com/lizhenliang/tomcat-java-demo.git'
            }
        }
        stage('package') {
            steps {
                sh """
                mvn clean
                mvn package
                """
            }
        }
        stage('deploy') {
            steps {
                sh """
                scp target/ly-simple-tomcat-0.0.1-SNAPSHOT.war root@192.168.170.133:/usr/local/apache-tomcat-9.0.46/webapps/
                ssh root@192.168.170.133 '/usr/local/apache-tomcat-9.0.46/bin/catalina.sh stop && /usr/local/apache-tomcat-9.0.46/bin/catalina.sh start'
                """
            }
        }


    }
}
验证
//在node4上
[root@node4 ~]# ls /usr/local/apache-tomcat-9.0.46/webapps/
docs          ly-simple-tomcat-0.0.1-SNAPSHOT      ROOT
examples      ly-simple-tomcat-0.0.1-SNAPSHOT.war
host-manager  manager
[root@node4 ~]# ss -antl
State    Recv-Q    Send-Q             Local Address:Port       Peer Address:Port
LISTEN   0         128                      0.0.0.0:22              0.0.0.0:*
LISTEN   0         100                            *:8080                  *:*
LISTEN   0         128                         [::]:22                 [::]:*
LISTEN   0         1             [::ffff:127.0.0.1]:8005                  *:*
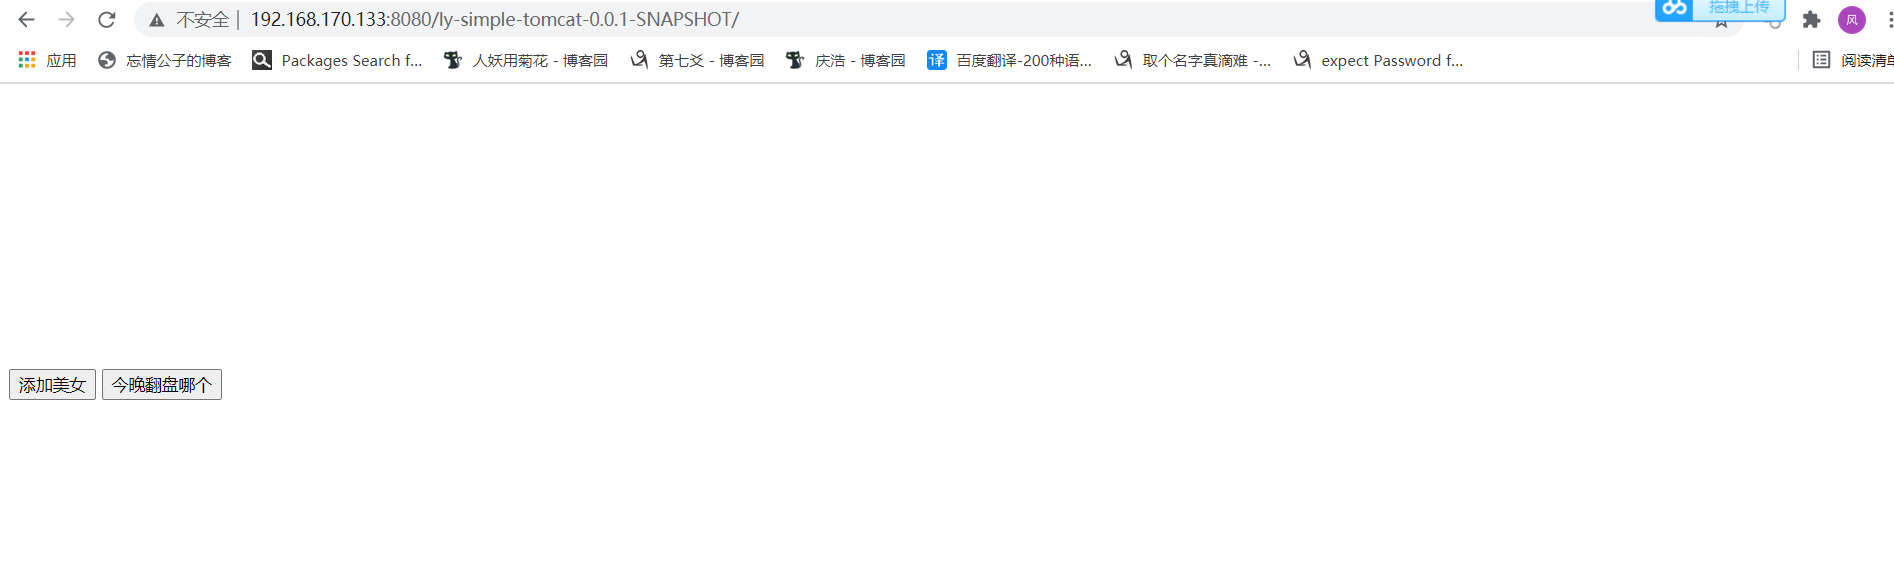
端口已经起来了,网页验证
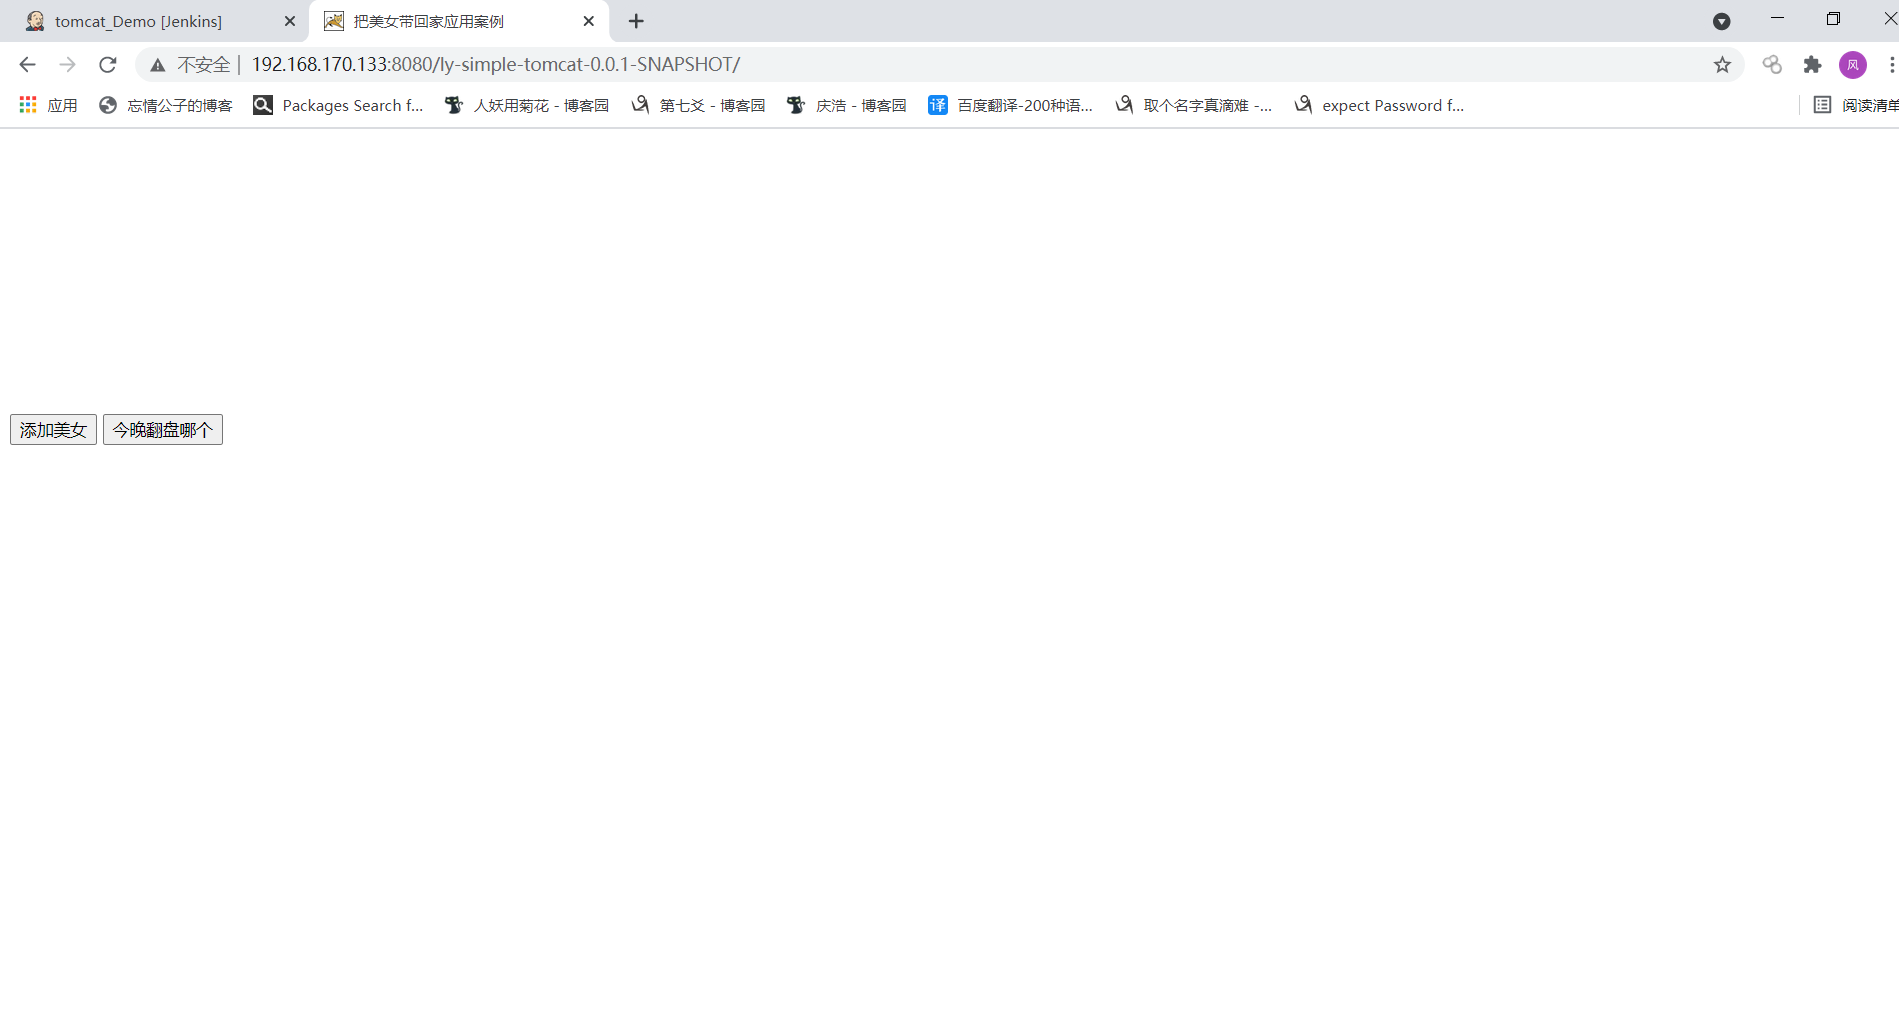
部署成功
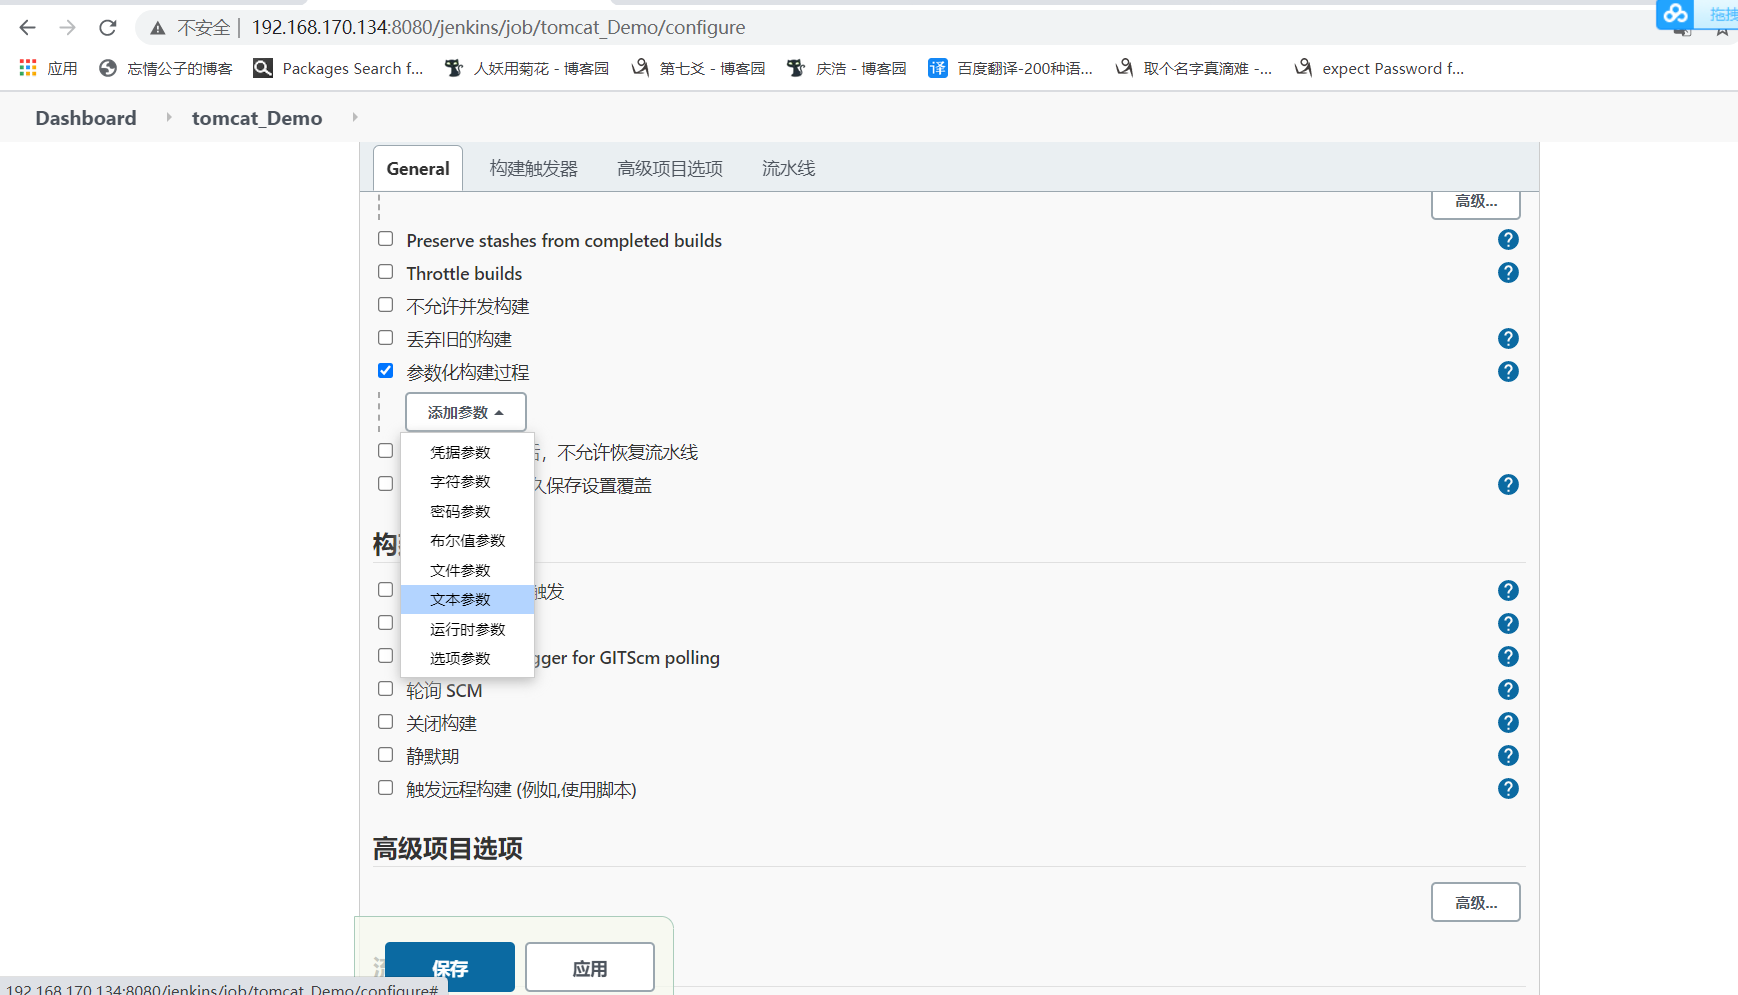
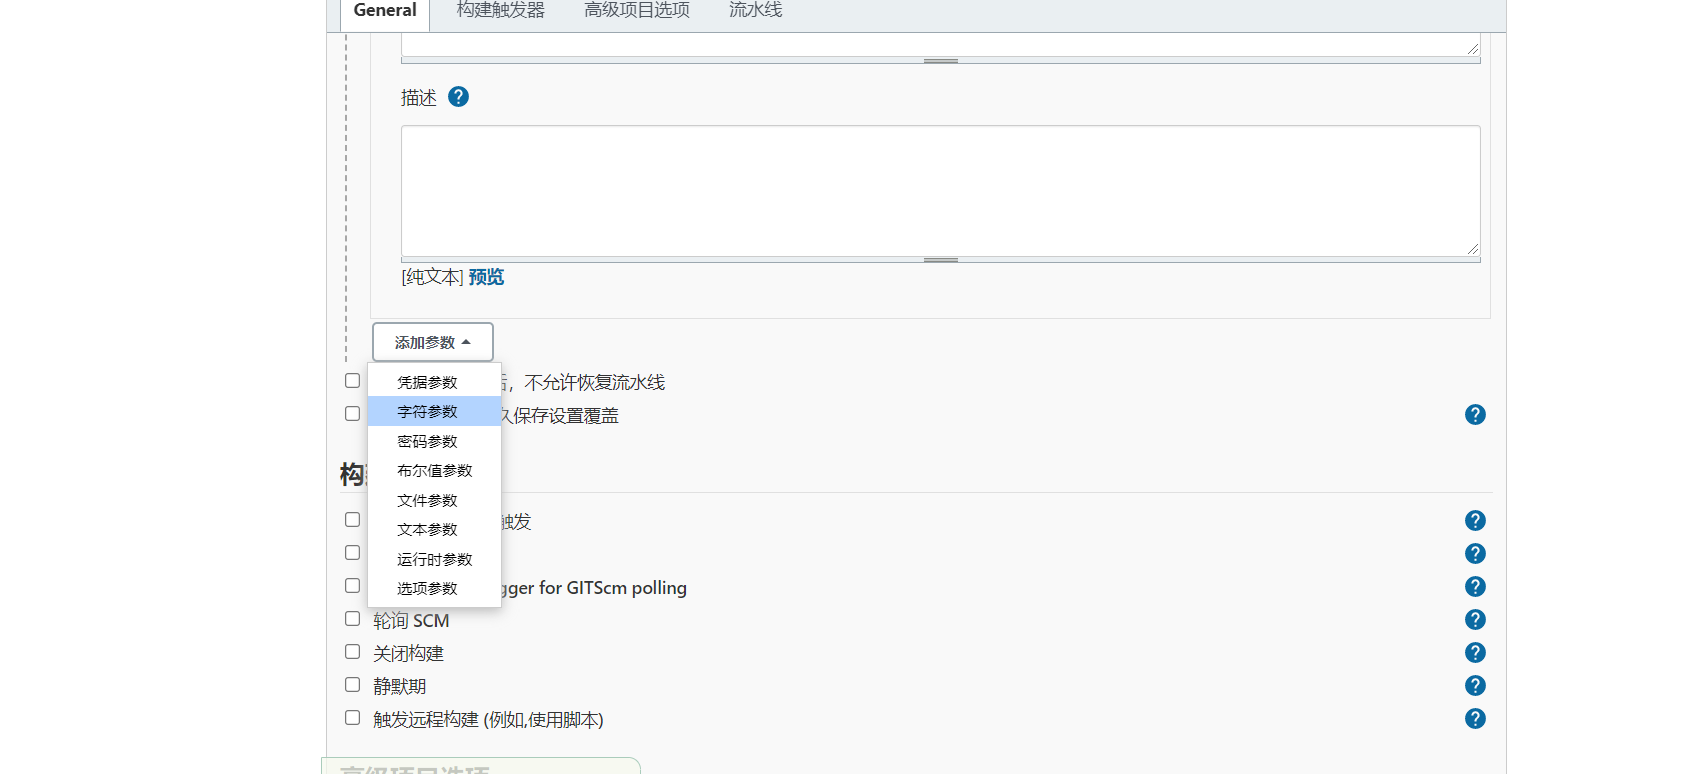
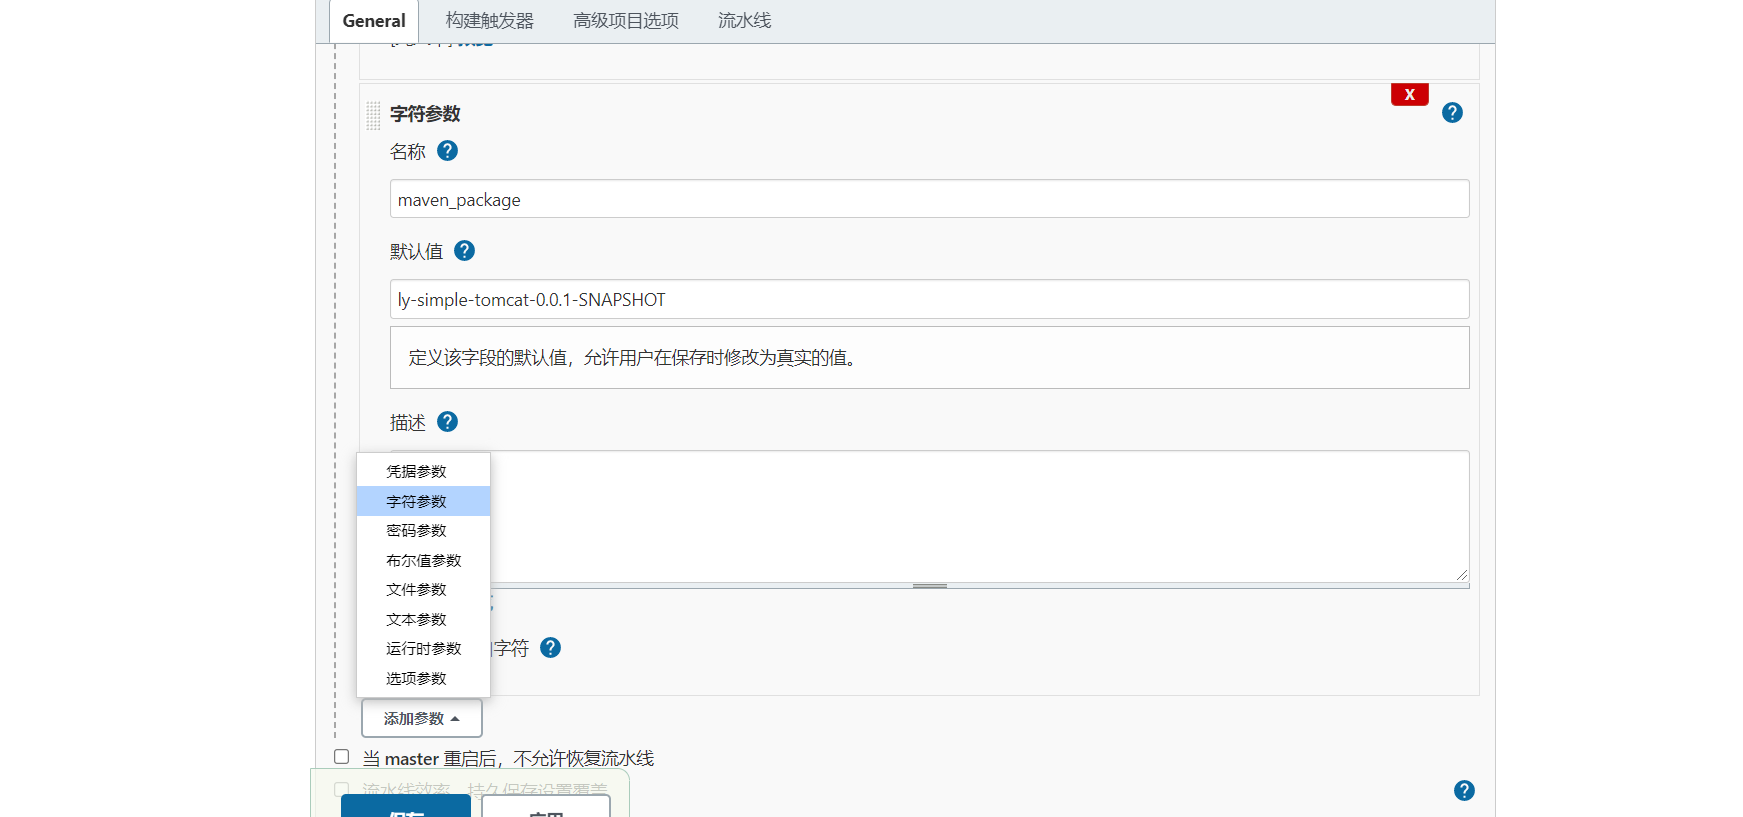
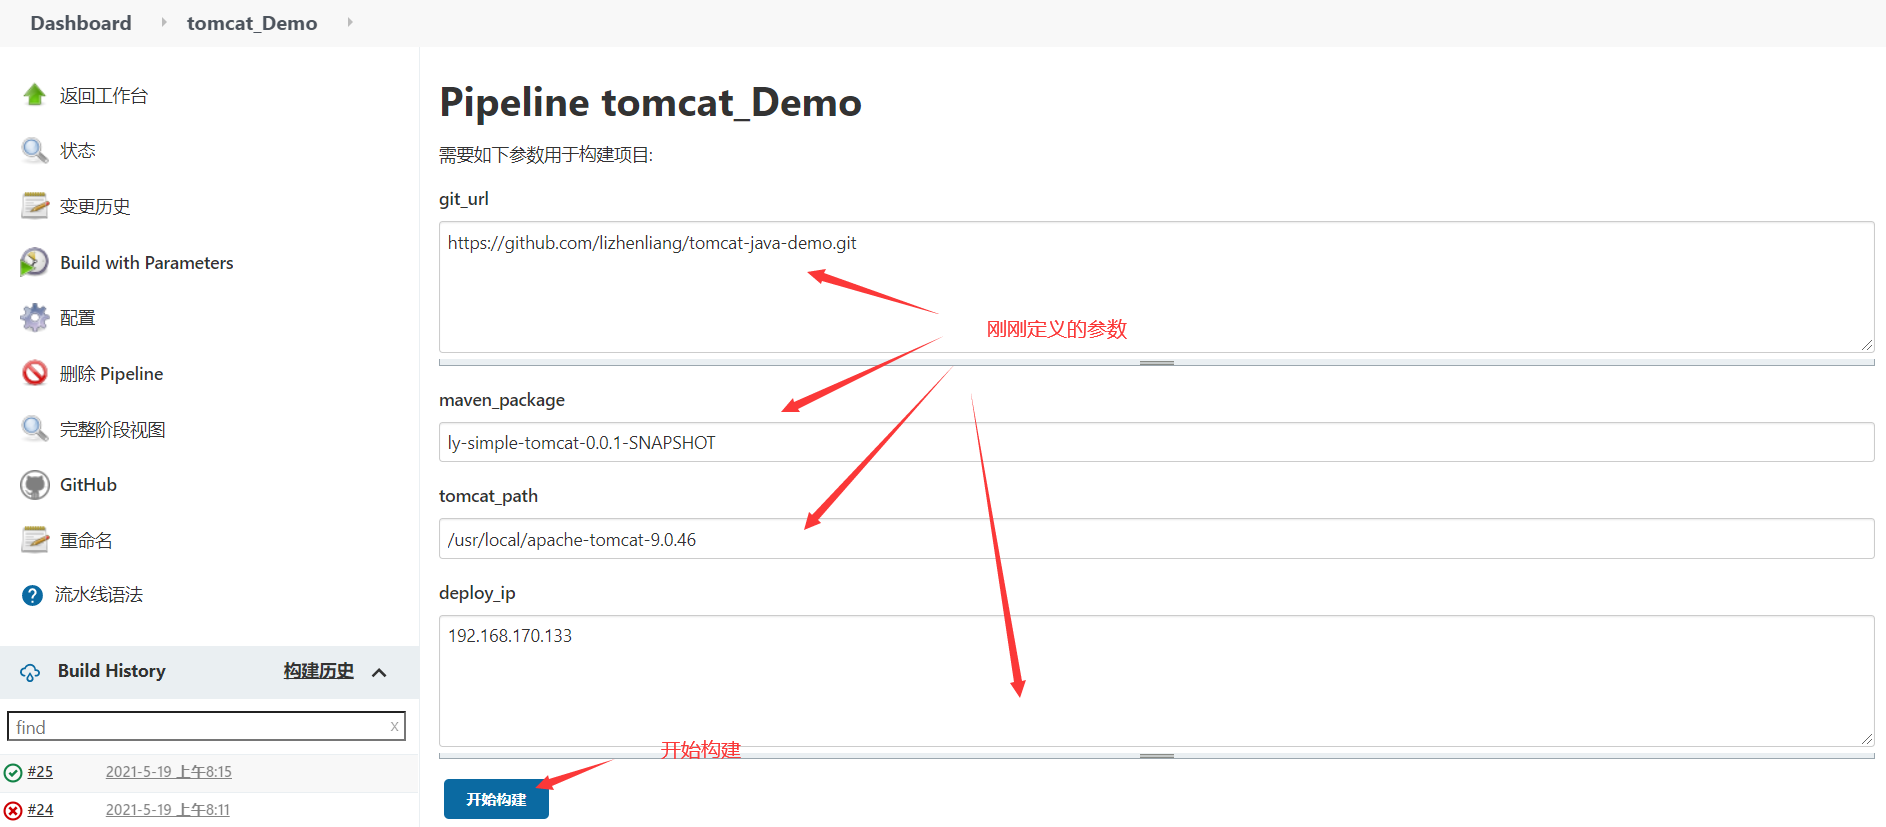
用参数构建
//先把node4上面的war包删掉

[root@node4 ~]# rm -rf /usr/local/apache-tomcat-9.0.46/webapps/ly-simple-tomcat-0.0.1-SNAPSHOT.war
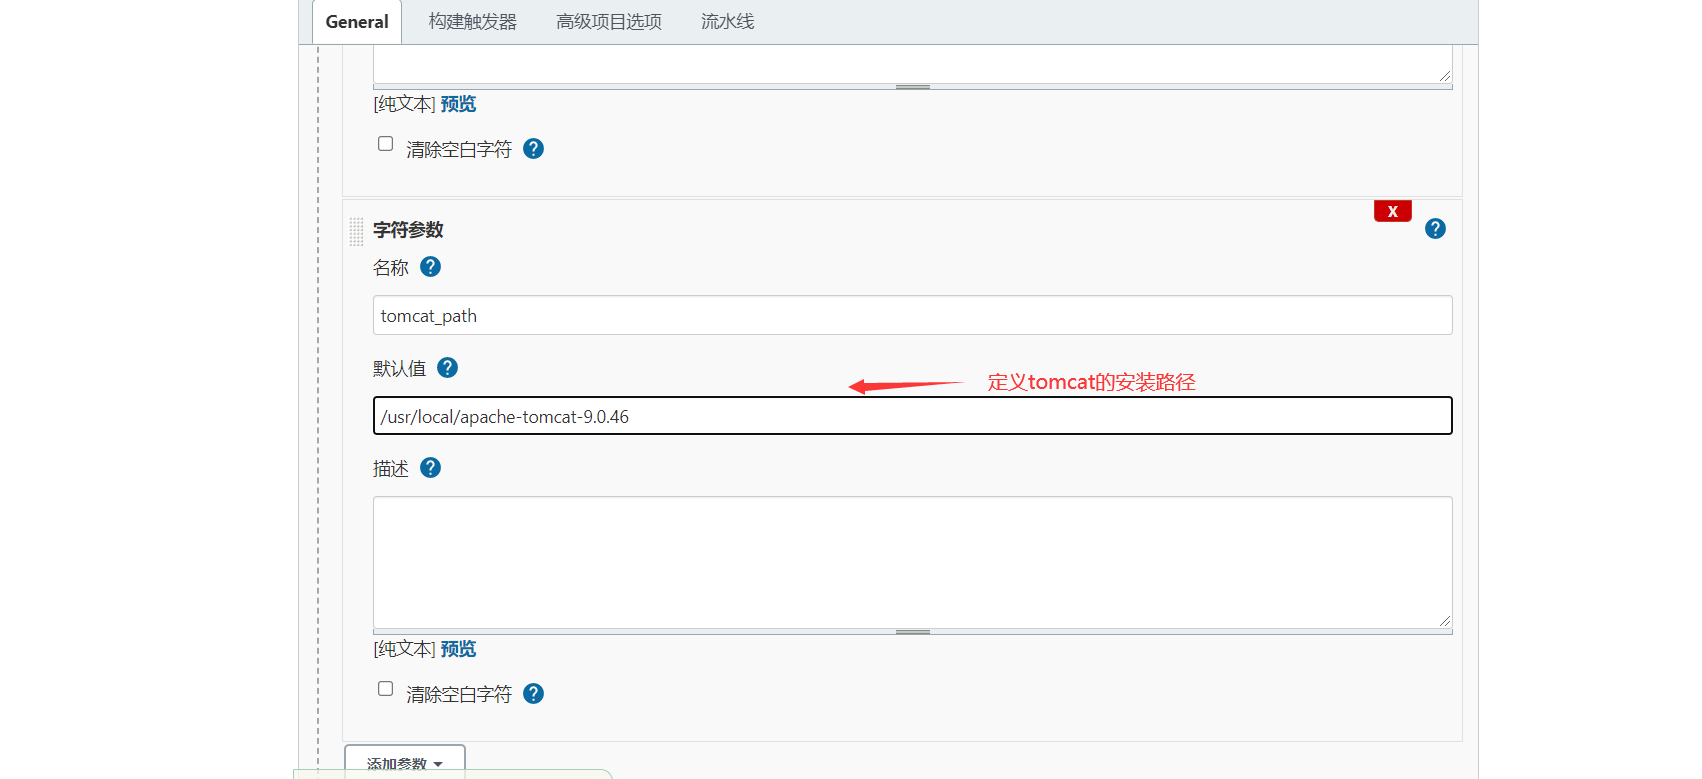


流水线脚本

pipeline {
    agent any

    stages {
        stage('pull code') {
            steps {
                git "${git_url}"
            }
        }
        stage('package') {
            steps {
                sh """
                mvn clean
                mvn package
                """
            }
        }
        stage('deploy') {
            steps {
                sh """
                scp target/${maven_package}.war root@${deploy_ip}:${tomcat_path}/webapps/
                ssh root@${deploy_ip} '${tomcat_path}/bin/catalina.sh stop && ${tomcat_path}/bin/catalina.sh start'
                """
            }
        }


    }
}
部署完成
网页访问


 浙公网安备 33010602011771号