博客网站wordpress+nginx
1、准备工作
1、关闭防火墙
systemctl stop firewalld
systemctl disable firewalld
2、设置 SELinux
setenforce 0
sed -i 's/^SELINUX=enforcing/SELINUX=disabled/' /etc/selinux/config
2、安装、并配置Nginx
1、安装nginx
yum -y install nginx
2、配置nginx
(1)创建目录
mkdir -p /var/www/wordpress
(2)创建虚拟主机文件
#vim /etc/nginx/conf.d/wordpress.conf
server {
    listen 80;
    server_name hengha.blogs.com; # 换成你域名/IP
    root /var/www/wordpress;
    index index.php index.html;

    # 伪静态
    location / {
        try_files $uri $uri/ /index.php?$args;
    }

    # 处理 PHP
    location ~ \.php$ {
        include fastcgi_params;
        fastcgi_pass 127.0.0.1:9000;
        fastcgi_param SCRIPT_FILENAME $document_root$fastcgi_script_name;
        fastcgi_index index.php;
    }

    # 缓存静态文件
    location ~* \.(css|js|jpg|jpeg|gif|png|svg|ico|webp)$ {
        expires 30d;
        access_log off;
    }

    # 隐藏 .ht*
    location ~ /\. {
        deny all;
    }
}
3、检查并启动nginx
nginx -t
systemctl enable nginx
systemctl start nginx
3、安装、并配置PHP-FPM
1、安装PHP-FPM
- CentOS 7 默认 PHP 版本过旧,这里用 Remi 仓库。
#装 EPEL + Remi
yum -y install epel-release
yum -y install https://rpms.remirepo.net/enterprise/remi-release-7.rpm

#启用 Remi PHP 8.1(或 8.2,可自选),若无此命令先装 yum-utils
yum-config-manager --enable remi-php81

#安装软件
yum -y install php-fpm php-mysqlnd php-opcache php-gd php-mbstring php-xml php-json php-curl php-zip
2、配置PHP-FPM
(1)配置PHP-FPM
#vim /etc/php-fpm.d/www.conf(核心行)
user = nginx
group = nginx
listen = 127.0.0.1:9000
listen.owner = nginx
listen.group = nginx
- 查看php-fpm配置


]# grep -Ev '^\s*([;#]|$)' /etc/php-fpm.d/www.conf
[www]
user = nginx
group = nginx
listen = 127.0.0.1:9000
listen.owner = nginx
listen.group = nginx
listen.allowed_clients = 127.0.0.1
pm = dynamic
pm.max_children = 50
pm.start_servers = 5
pm.min_spare_servers = 5
pm.max_spare_servers = 35
slowlog = /var/log/php-fpm/www-slow.log
php_admin_value[error_log] = /var/log/php-fpm/www-error.log
php_admin_flag[log_errors] = on
php_value[session.save_handler] = files
php_value[session.save_path]    = /var/lib/php/session
php_value[soap.wsdl_cache_dir]  = /var/lib/php/wsdlcache
(2)取消 php-fpm 的 expose header(安全)
echo "expose_php = Off" >> /etc/php.ini
3、启动PHP-FPM
systemctl enable php-fpm
systemctl start php-fpm
4、安装、并初始化数据库
1、安装、并启动数据库
- CentOS 7 自带 MariaDB 5.5,WordPress 也可用;若需高版可装 10.x。此处用默认:
# 安装数据库
yum -y install mariadb mariadb-server

# 启动数据库
systemctl enable mariadb
systemctl start mariadb

# 设置 root 密码、删除测试库等
mysql_secure_installation
2、初始化数据库
# 登录数据库
mysql -u root -p

# 创建 WordPress 数据库和用户
CREATE DATABASE wordpress DEFAULT CHARACTER SET utf8mb4 COLLATE utf8mb4_unicode_ci;
CREATE USER 'wpuser'@'localhost' IDENTIFIED BY 'StrongPassw0rd!';
GRANT ALL PRIVILEGES ON wordpress.* TO 'wpuser'@'localhost';
FLUSH PRIVILEGES;
EXIT;
5、下载、并部署 WordPress
1、下载WordPress
cd /var/www/

# 下载wordpress
curl -O https://wordpress.org/latest.tar.gz
2、部署 WordPress
# 解压wordpress
tar zxvf latest.tar.gz

# 修改wordpress目录的属主属组
chown -R nginx:nginx /var/www/wordpress
3、配置wordpress
# 复制配置文件模版:
cd /var/www/wordpress
cp wp-config-sample.php wp-config.php

# 配置文件模版
#vim wp-config.php
define( 'DB_NAME', 'wordpress' );
define( 'DB_USER', 'wpuser' );
define( 'DB_PASSWORD', 'StrongPassw0rd!' );
define( 'DB_HOST', 'localhost' );
define( 'DB_CHARSET', 'utf8mb4' );
define( 'DB_COLLATE', '' );
7、访问wordpress,并初始化
1、配置windows的hosts
- C:\Windows\System32\drivers\etc\hosts

2、通过域名访问wordpress,并初始化
- hengha.blogs.com

6、安装插件和主题
1、插件和主题
# 账密
hengha_user/root@123

# 主题
GeneratePress
# 插件
Code Block Pro			#代码块
Easy Table of Contents	#目录
2、配置目录

(1)配置css
- 外观 → 自定义 → 额外 CSS(或用子主题 style.css)粘贴
/* (目录)将容器固定在右侧中部 */
#ez-toc-container {
    position: fixed !important;
    right: 0;
    top: 100px;           /* 视需要调整 */
    width: 400px;         /* 展开后宽度 */
    max-height: 70vh;
    overflow-y: auto;
    z-index: 9999;
    box-shadow: 0 0 6px rgba(0,0,0,.15);
    transition: transform .3s;
    border-radius: 3px 0 0 3px;
    overscroll-behavior: contain; /* 避免滚到最顶后带动页面滚 */
}

/* (目录)起始状态隐藏在右侧,只留按钮宽度 */
#ez-toc-container.toc-hide {
    transform: translateX(400px);    /* 根据 width 调整 */
}

/* (目录)竖条按钮 */
#toc-toggle-bar {
    position: absolute;
    left: -25px;
    top: 0;
    width: 24px;
    height: 120px;
    writing-mode: vertical-rl;
    text-orientation: mixed;
    background: #988300;         /* 你想要的金色 */
    color: #fff;
    font-size: 14px;
    line-height: 24px;
    text-align: center;
    cursor: pointer;
    border-radius: 3px 3px 0 0;
}

/* (目录)目录项样式 */
#ez-toc-container ul.ez-toc-list li a {
    font-size: 14px;
    padding: 2px 2px;
}
#ez-toc-container ul.ez-toc-list li.active > a {
    color: #c59d00;              /* 当前章节高亮 */
}

/* (目录)隐藏默认标题行(可选)*/
#ez-toc-title-container { display:none }

/* (目录)如果你只想让列表部分滚,而标题 / 折叠按钮保持可见 */
#ez-toc-container .ez-toc-list{
    max-height: 70vh;
    overflow-y: auto;
}
/* ───── 目录缩进微调 ───── */

/* ① (目录)先把所有 margin / padding 清零 */
#ez-toc-container ul,
#ez-toc-container li{
    margin:0 !important;
    padding:0 !important;
}
/* ② (目录)再按层级给一点点左缩进(你可以调整 0.6em 这个值) */
#ez-toc-container .ez-toc-list          { margin-left:0 !important; }
#ez-toc-container .ez-toc-list ul       { margin-left:1.2em !important; } /* 二级开始 */
#ez-toc-container .ez-toc-list ul ul    { margin-left:1.2em !important; } /* 三级 */
#ez-toc-container .ez-toc-list ul ul ul { margin-left:1.2em !important; } /* 四级 */

/* ③ (目录)如果你想让数字和文字之间再紧一点 */
#ez-toc-container .ez-toc-list li a{
    text-indent:0;     /* 取消 Easy TOC 里的额外凹进 */
}

/* 调正文文字大小 */
body, .entry-content {
    font-size: 18px;      /* 可改 px / em / rem / % */
    line-height: 1;     /* 建议一并调整行高 */
}

/* 只改文章正文区域 */
.single-post .entry-content {
    font-size: 15px;
}

/* 修改各级标题 */
h1 { font-size: 1.75rem; }
h2 { font-size: 1.5rem; }
h3 { font-size: 1.25rem; }
h4 { font-size: 1rem; }
(2)配置JS
- 放到子主题 footer.php / 插件
<script>
document.addEventListener('DOMContentLoaded', function () {
  var toc = document.getElementById('ez-toc-container');
  if (!toc) return;

  // 创建竖条按钮
  var bar = document.createElement('div');
  bar.id = 'toc-toggle-bar';
  bar.innerText = '目录导航';
  toc.appendChild(bar);

  // 初始隐藏
  toc.classList.add('toc-hide');

  // 点击按钮展开/收起
  bar.addEventListener('click', function () {
      toc.classList.toggle('toc-hide');
  });

  // 滚动时高亮当前章节
  let links = toc.querySelectorAll('a');
  let sections = [...links].map(a => document.getElementById(a.getAttribute('href').substring(1)));
  window.addEventListener('scroll', throttle(highlight, 200));

  function highlight(){
      let i = sections.findIndex(sec => sec.getBoundingClientRect().top > 80);
      links.forEach(a => a.parentNode.classList.remove('active'));
      if(i===-1) i = sections.length-1; else if(i>0) i = i-1;
      links[i] && links[i].parentNode.classList.add('active');
  }
  function throttle(fn,delay){
      let t; return function(){clearTimeout(t);t=setTimeout(fn,delay);}
  }
});
</script>
(3)勾选掉

问题
问题1:php-fpm版本低
1、访问时,浏览器报错

2、nginx的error.log中有错误日志
- 2025/08/06 00:11:34 [error] 2759#2759: *1 FastCGI sent in stderr: "PHP message: PHP Parse error: syntax error, unexpected ':', expecting '{' in /var/www/wordpress/wp-includes/compat.php on line 498" while reading response header from upstream, client: 192.168.230.1, server: hengha.blogs.com, request: "GET / HTTP/1.1", upstream: "fastcgi://127.0.0.1:9000", host: "hengha.blogs.com"
3、查看php版本,可以看到版本是5.4,不是8.1+
# php -v
PHP 5.4.16 (cli) (built: Apr  1 2020 04:07:17)
4、重新安装php,并配置
5、重启nginx
问题2:需要使用域名搭建网站
1、虚拟机(VMware)ip变了,导致wordpress访问有问题
2、登录界面看着就有问题

3、点击任意文件,IP就变成了之前搭建时的IP。
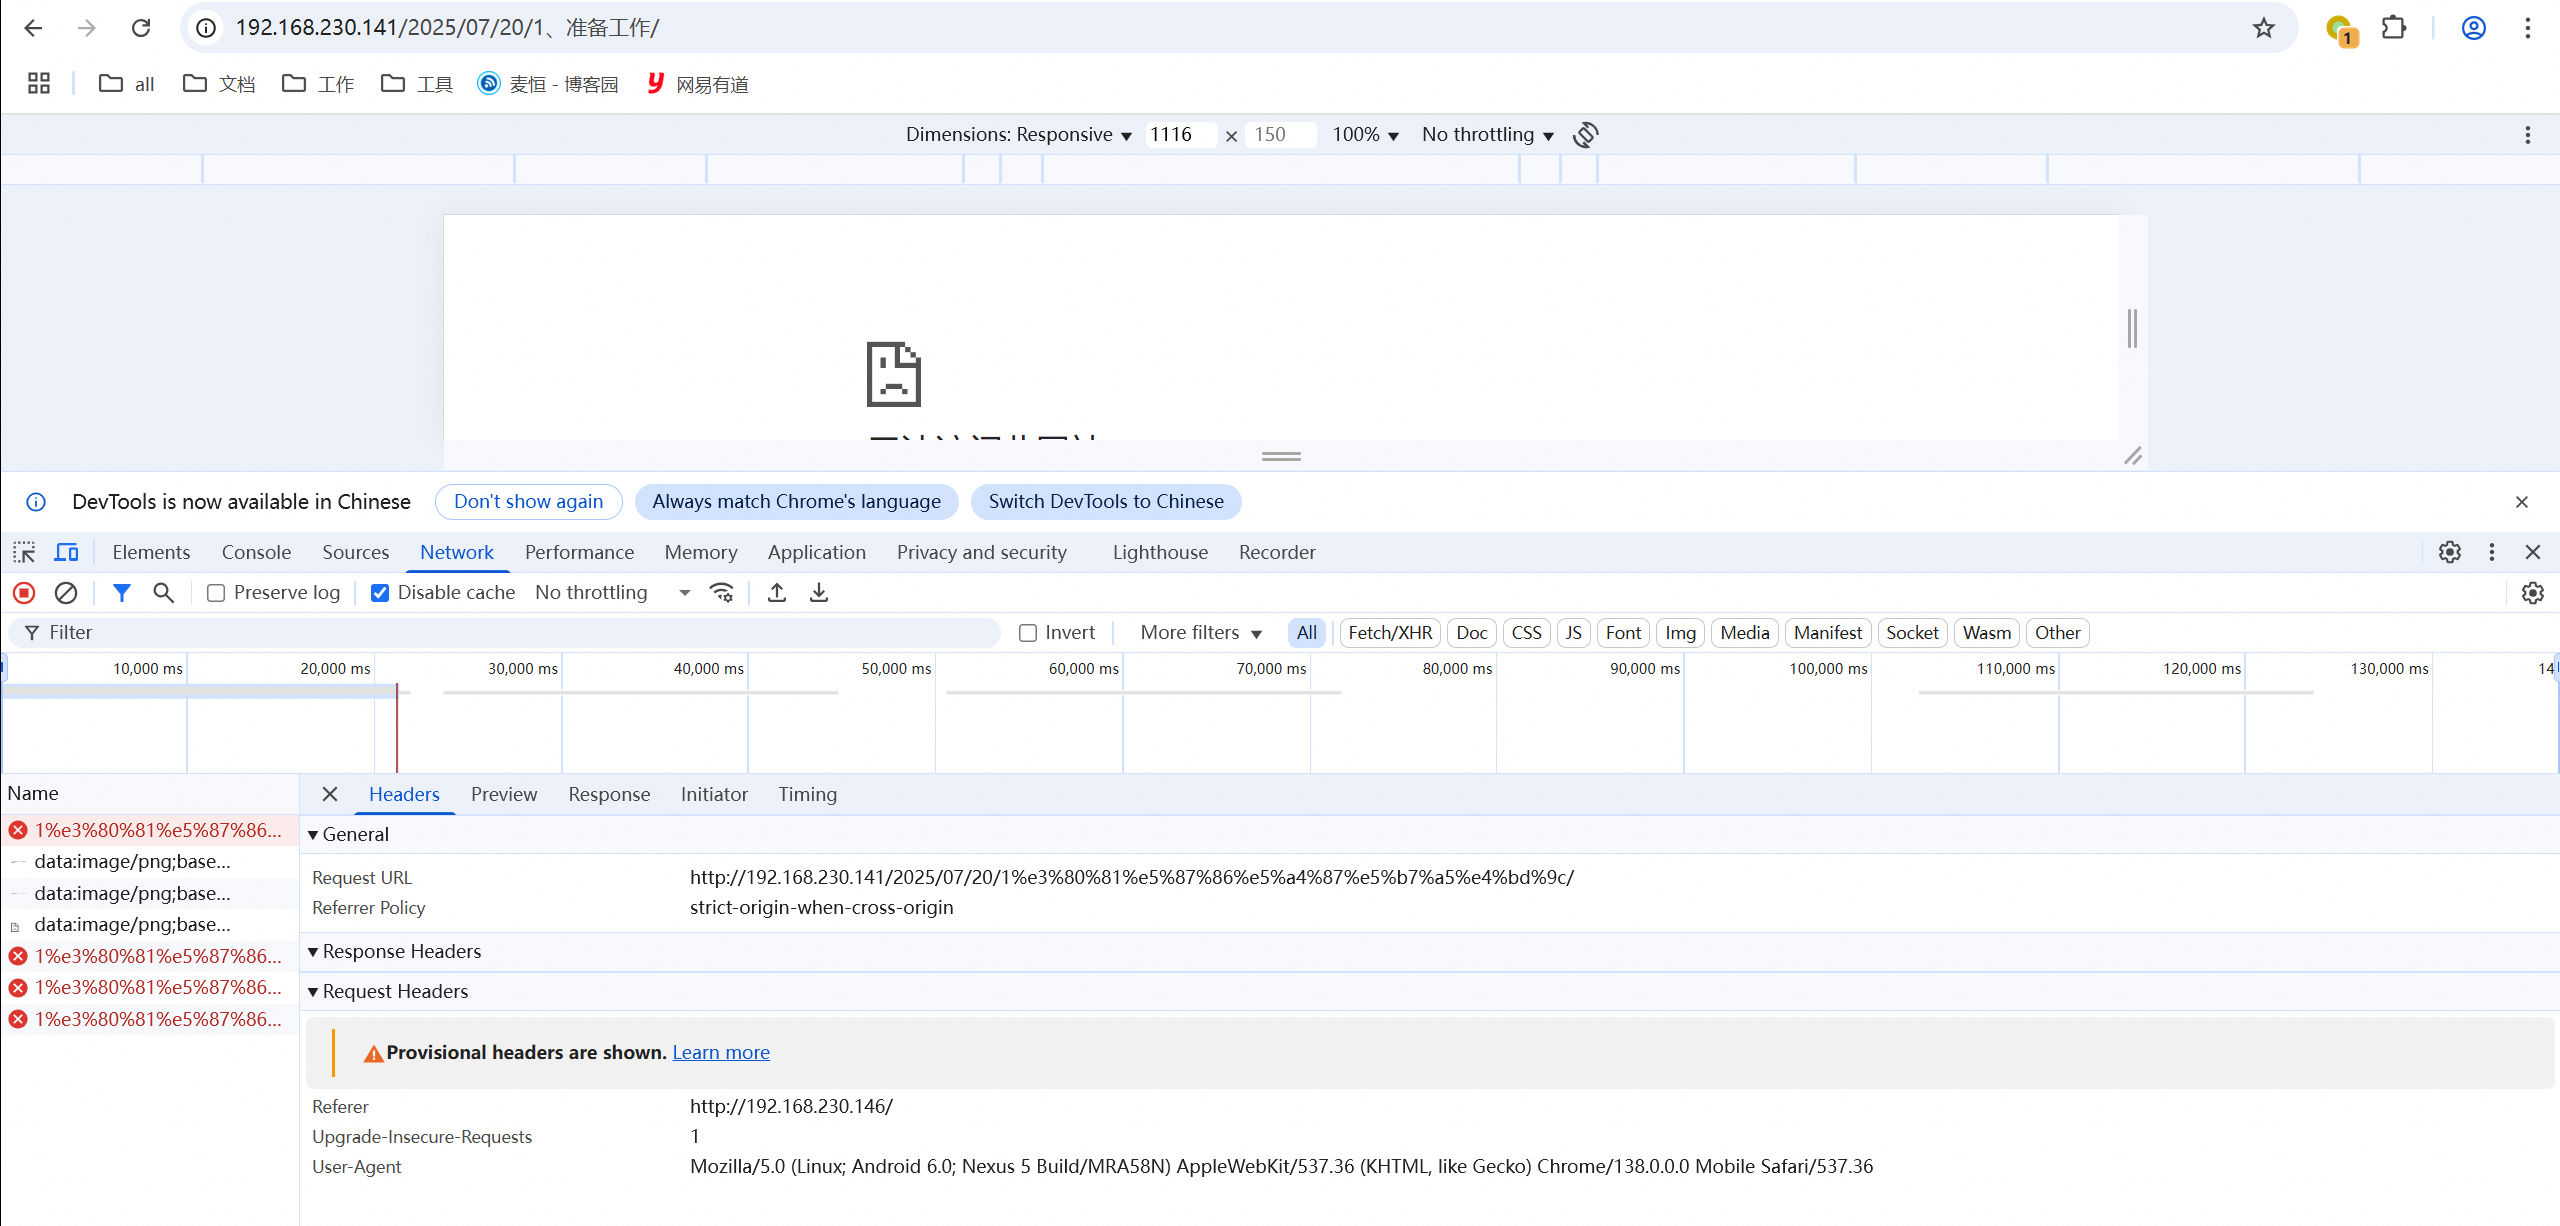
4、刚开始以为是缓存的问题,但将浏览器缓存清掉(nginx没有缓缓),还是有相同的问题。

5、根据浏览器的返回信息,怀疑是哪里的ip被写死了
- 把 WordPress 站点从 192.168.230.141 迁到了 192.168.230.146,只改了站点 URL(home、siteurl 或 nginx vhost),但文章正文里、特色图片、附件等仍然保存的是旧 IP 的绝对链接。
- 浏览器解析 HTML 时照着写死的 http://192.168.230.141/xxx 去发请求,于是产生了这些红叉。
6、查看数据库 ,可以看到192.168.230.141

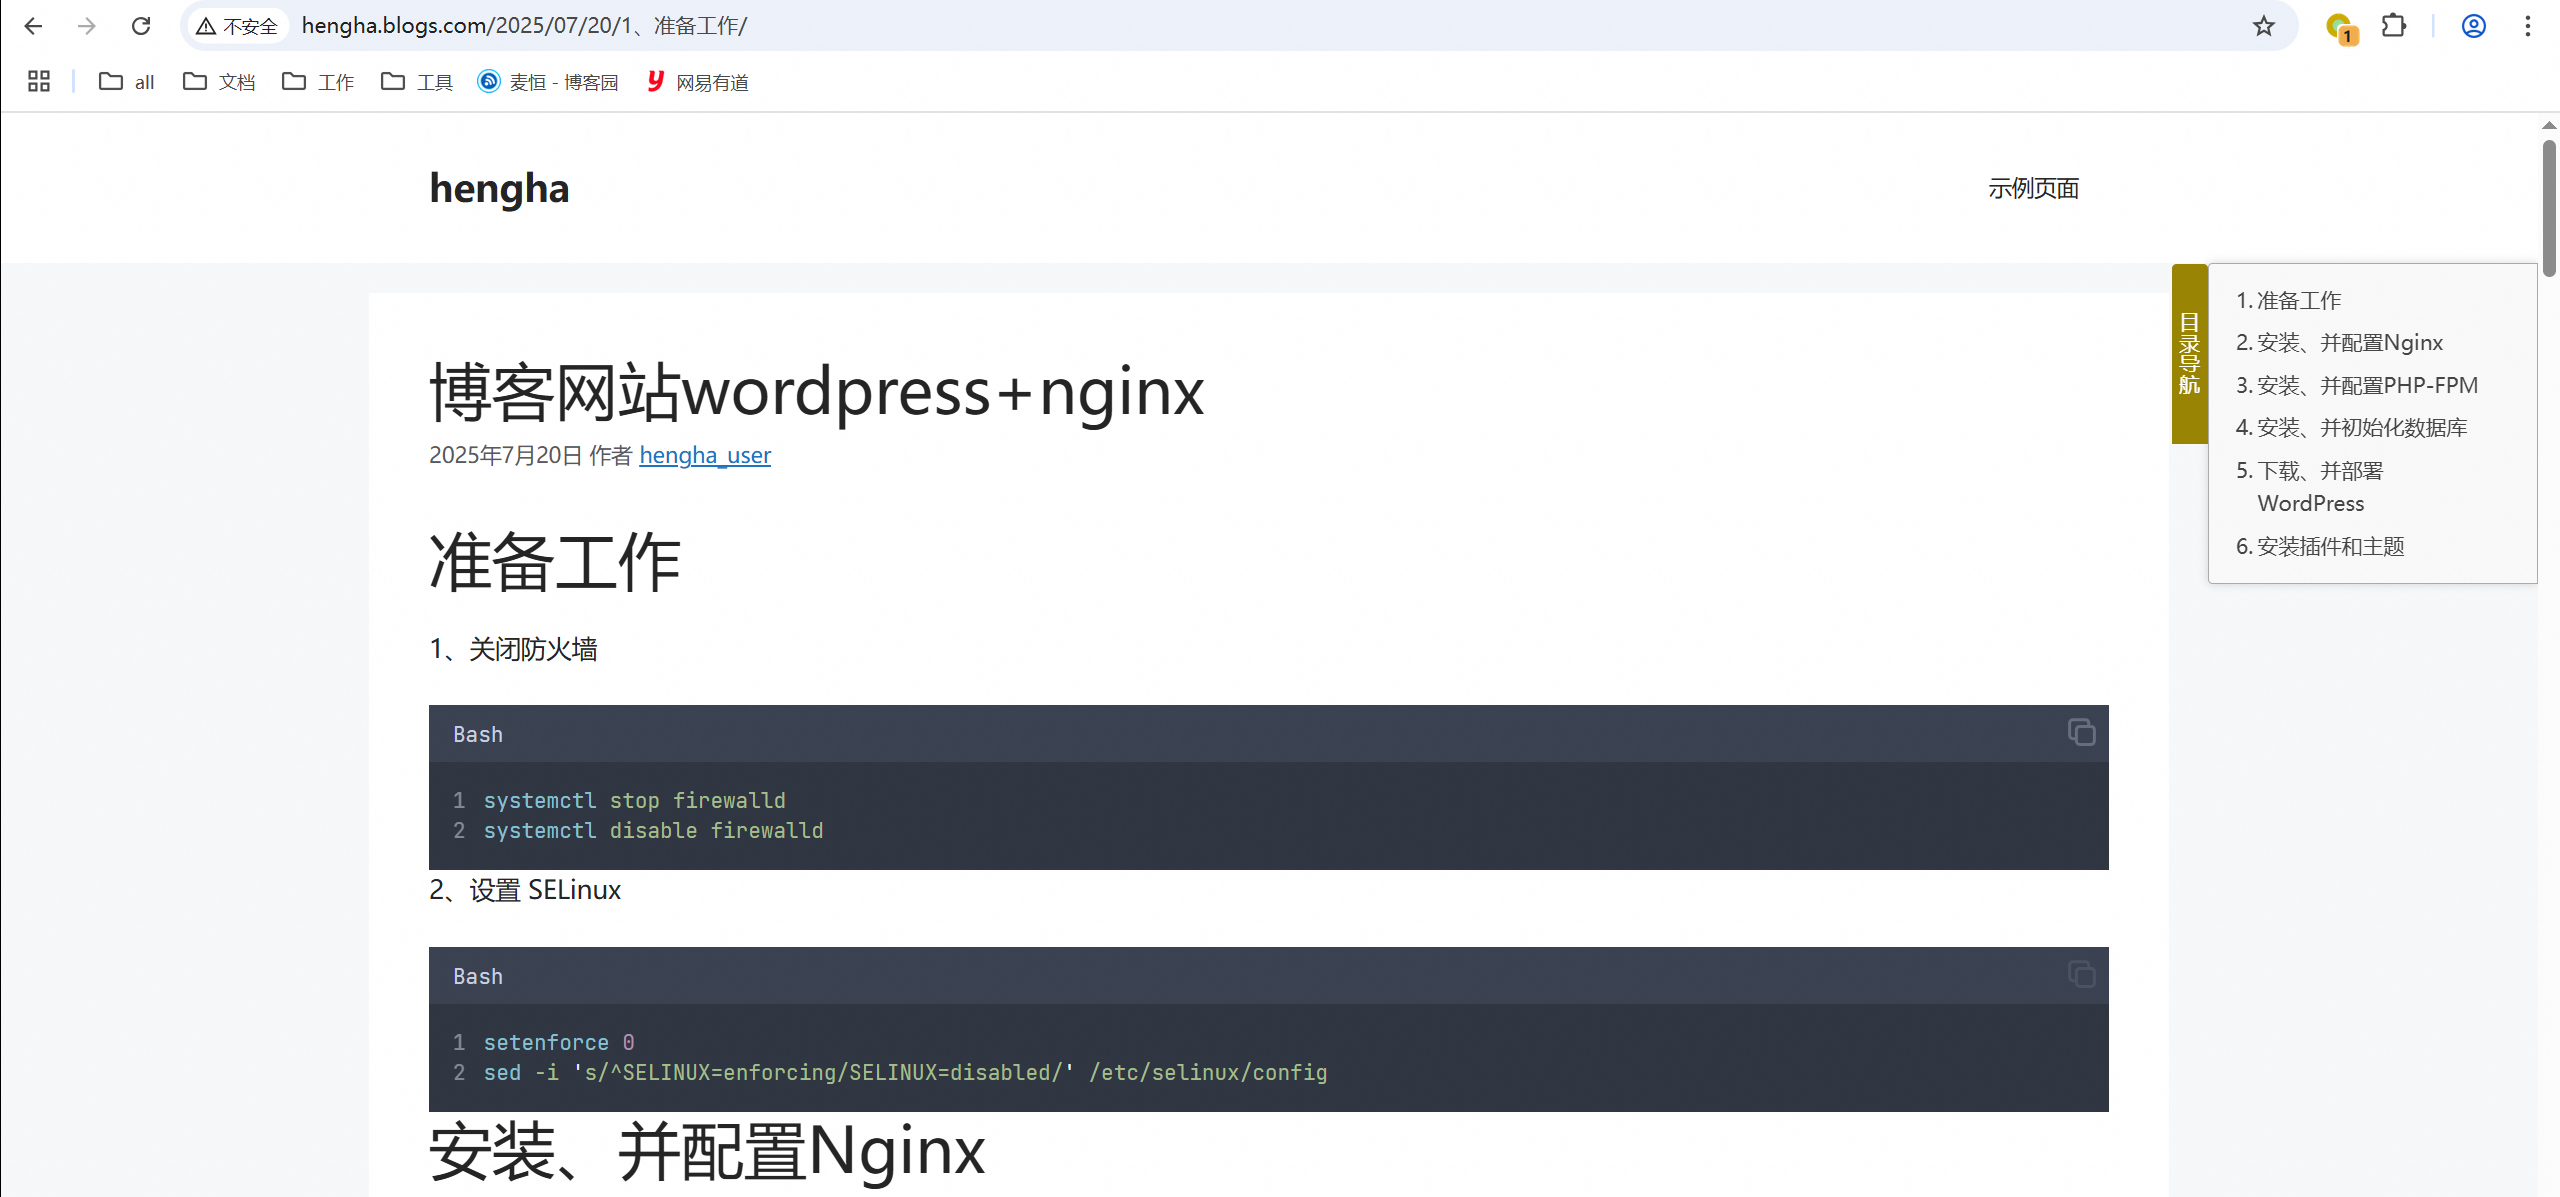
7、解决问题
(1)使用域名访问博客,修改nginx配置

(2)修改数据库
USE wordpress;
UPDATE wp_posts SET post_content = REPLACE(post_content, 'http://192.168.230.141', 'http://hengha.blogs.com');
UPDATE wp_postmeta SET meta_value = REPLACE(meta_value, 'http://192.168.230.141', 'http://hengha.blogs.com');
UPDATE wp_options SET option_value = REPLACE(option_value, 'http://192.168.230.141', 'http://hengha.blogs.com');
UPDATE wp_usermeta SET meta_value = REPLACE(meta_value, 'http://192.168.230.141', 'http://hengha.blogs.com');
8、访问正常了
问题3:配置js时报错
1、添加js文件时报错

2、问题排查
]# curl -I http://hengha.blogs.com
HTTP/1.1 301 Moved Permanently
Date: Wed, 23 Jul 2025 10:18:20 GMT
Content-Type: text/html
Content-Length: 167
Connection: keep-alive
Cache-Control: max-age=3600
Expires: Wed, 23 Jul 2025 11:18:20 GMT
Location: https://hengha.blogs.com/
Set-Cookie: __cf_bm=nkz84h1JtfsxW1UNpJV1twnduDjoDQUPXXOMKEh_KP8-1753265900-1.0.1.1-d4csggaieYgrpXtDwzhZh0WrUUtth3LO4XfmyXlicnAGNJf0xOlma1Amn4.U5DssVyq2iMKIbyXZD3pMsbZd4o6NH6D_Cu594rB8BN9VX8Y; path=/; expires=Wed, 23-Jul-25 10:48:20 GMT; domain=.blogs.com; HttpOnly
Server: cloudflare
CF-RAY: 963a6ee70e40d03d-SJC

]# curl -I http://127.0.0.1
HTTP/1.1 200 OK
Server: nginx/1.20.1
Date: Wed, 23 Jul 2025 10:18:30 GMT
Content-Type: text/html; charset=UTF-8
Connection: keep-alive
X-UA-Compatible: IE=edge
Link: <http://hengha.blogs.com/index.php?rest_route=/>; rel="https://api.w.org/"
- 服务器访问 http://hengha.blogs.com 时,请求被 Cloudflare 接管并 301 跳到 https;
- 服务器访问 http://127.0.0.1 可以直接拿到 WordPress 正常页面;
- WordPress 的 loop-back 请求默认用「站点地址(https://hengha.blogs.com)」去访问自己,于是:服务器 → Cloudflare → 再回到服务器。
- 这条链路既慢又可能被 Cloudflare 的安全规则拦截,任何 403/5xx/WAF 质询都会让 WordPress 误以为“通信失败”,从而把文件回滚。
- 所以重点是:让服务器在本地就完成 loop-back,而不要兜一圈 Cloudflare。
3、解决问题

问题4:文章过大时:更新失败。 此响应不是合法的 JSON 响应。
- PHP 本身的输入/内存限制
- Web 服务器对请求体的限制(nginx)
- 对大篇幅文章而言,最常见的触发点是 MySQL 的数据包或事务日志大小不足。
1、问题描述
(1)报错1:更新失败。 此响应不是合法的 JSON 响应。


- nginx日志:
- 2025/07/30 19:30:48 [error] 1127#1127: *5456 client intended to send too large body: 1144286 bytes, client: 192.168.230.1, server: hengha.blogs.com, request: "POST /index.php?rest_route=%2Fwp%2Fv2%2Fposts%2F243&_locale=user HTTP/1.1", host: "hengha.blogs.com", referrer: "http://hengha.blogs.com/wp-admin/post.php?post=243&action=edit"
(2)报错2:更新失败。 无法在数据库中更新文章

2、解决问题
(1)修改php.ini,并重启fmp
#vi /etc/php.ini
upload_max_filesize = 64M
post_max_size = 64M ; 必须 ≥ upload_max_filesize
max_input_vars = 10000 ; Gutenberg 会把整篇文章序列化成一个巨大的字段,建议 5 000 – 20 000
max_input_time = 300
max_execution_time = 300
memory_limit = 256M ; 若你的主机内存足够,可设更高

(2)修改nginx配置文件,并重启nginx
client_max_body_size 64m; # 放到 http{} 或 server{} 里

(3)修改MySQL 配置文件,并重启数据库
#vi /etc/my.cnf.d/server.cnf
[mysqld]
max_allowed_packet = 64M
问题5、centos9安装wordpress
#更换yum源
tee /etc/yum.repos.d/CentOS-Stream-9.repo > /dev/null <<'EOF'
[baseos]
name=CentOS Stream 9 - BaseOS
baseurl=http://mirrors.aliyun.com/centos-stream/9-stream/BaseOS/$basearch/os/
enabled=1
gpgcheck=1
gpgkey=file:///etc/pki/rpm-gpg/RPM-GPG-KEY-centosofficial

[appstream]
name=CentOS Stream 9 - AppStream
baseurl=http://mirrors.aliyun.com/centos-stream/9-stream/AppStream/$basearch/os/
enabled=1
gpgcheck=1
gpgkey=file:///etc/pki/rpm-gpg/RPM-GPG-KEY-centosofficial
EOF
清理并重新生成缓存:
sudo dnf clean all
sudo rm -rf /var/cache/dnf
sudo dnf makecache

#安装 EPEL 和 Remi 源,及 dnf 插件:
dnf install -y https://dl.fedoraproject.org/pub/epel/epel-release-latest-9.noarch.rpm
dnf install -y https://rpms.remirepo.net/enterprise/remi-release-9.rpm
#重置并启用 PHP 的 remi-8.1 模块流:
sudo dnf module reset php -y
sudo dnf module enable php:remi-8.1 -y
1
# #

 浙公网安备 33010602011771号