Linux利用OneinStack搭建环境
OneinStack官方网站:https://oneinstack.com
介绍
OneinStack支持以下数种环境组合:
-
LNMP(Linux + Nginx+ MySQL+ PHP)
-
LAMP(Linux + Apache+ MySQL+ PHP)
-
LNMPA(Linux + Nginx+ MySQL+ PHP+ Apache):Nginx处理静态,Apache(mod_php)处理动态PHP
-
LNMT(Linux + Nginx+ MySQL+ Tomcat):Nginx处理静态,Tomcat(JDK)处理JAVA
-
LNMH(Linux + Nginx+ MySQL+ HHVM)
支持以下数种系统:
-
CentOS 6~7(包括redhat)
-
Debian 6~9
-
Ubuntu 12~16
-
Aliyun Linux 15.1
安装步骤
1.
yum -y install wget screen curl python #for CentOS/Redhat- 1
2.选择源(以下源选一即可)
wget http://aliyun-oss.linuxeye.com/oneinstack-full.tar.gz #阿里云内网下载 wget http://mirrors.linuxeye.com/oneinstack-full.tar.gz #包含源码,国内外均可下载 wget http://mirrors.linuxeye.com/oneinstack.tar.gz #不包含源码,建议仅国外主机下载- 1
- 2
- 3
- 4
- 5
- 6
3.解压压缩包
tar -zxvf oneinstack-full.tar.gz- 1
4.进入文件夹
cd oneinstack #如果需要修改目录(安装、数据存储、Nginx日志),请修改options.conf文件- 1
5.
screen -S oneinstack #如果网路出现中断,可以执行命令`screen -R oneinstack`重新连接安装窗口- 1
环境配置
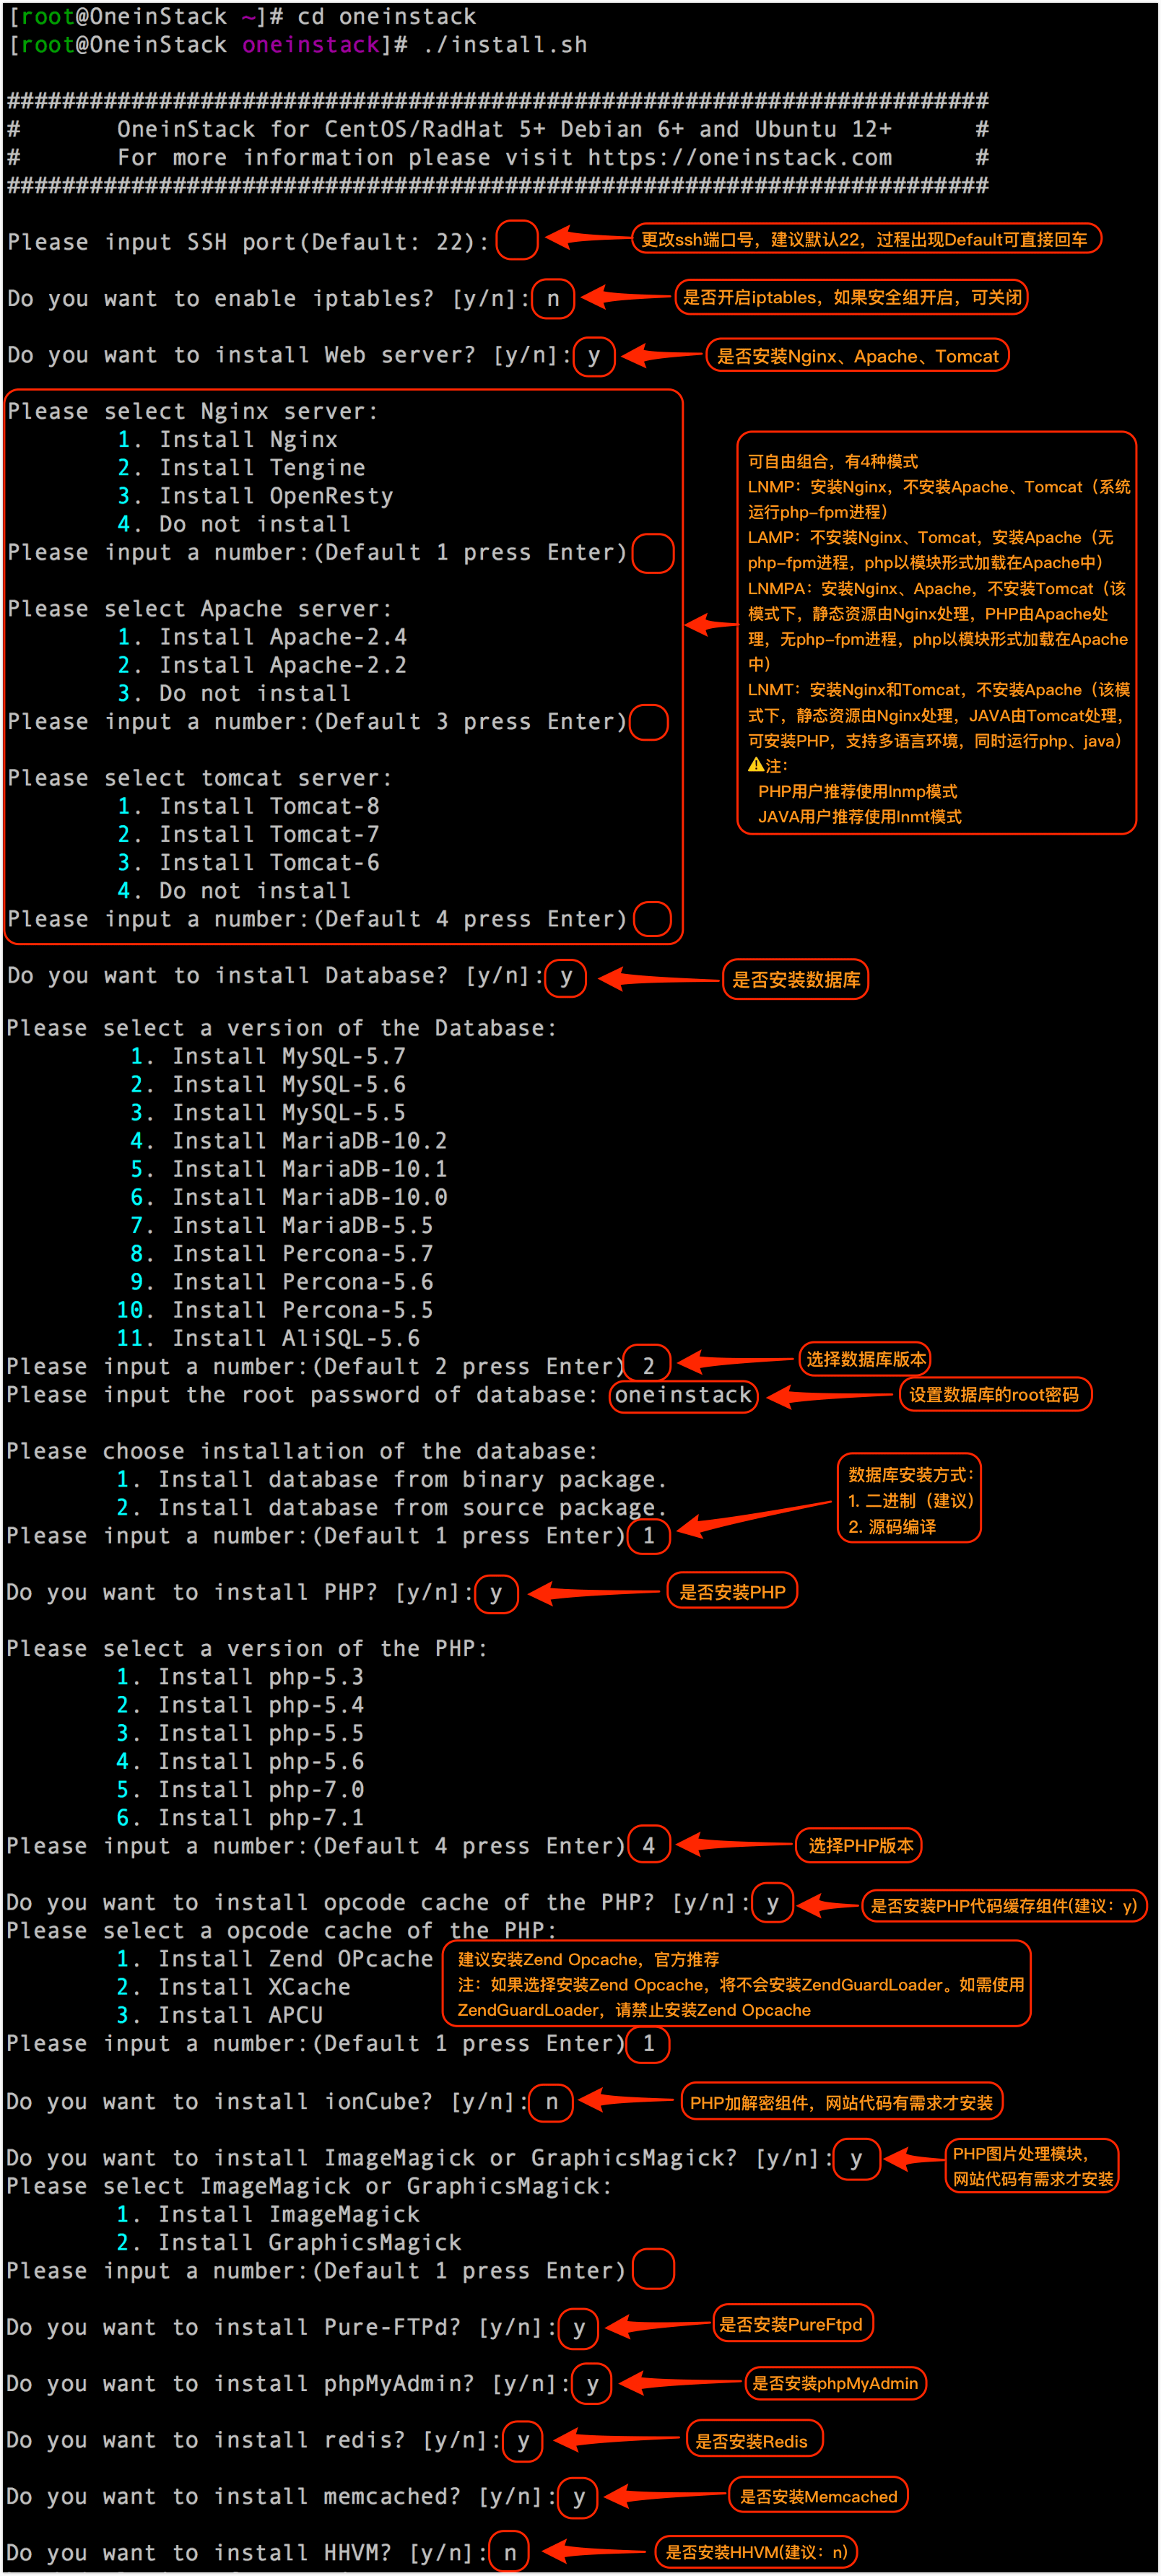
执行命令:
./install.sh #注:请勿sh install.sh或者bash install.sh这样执行- 1
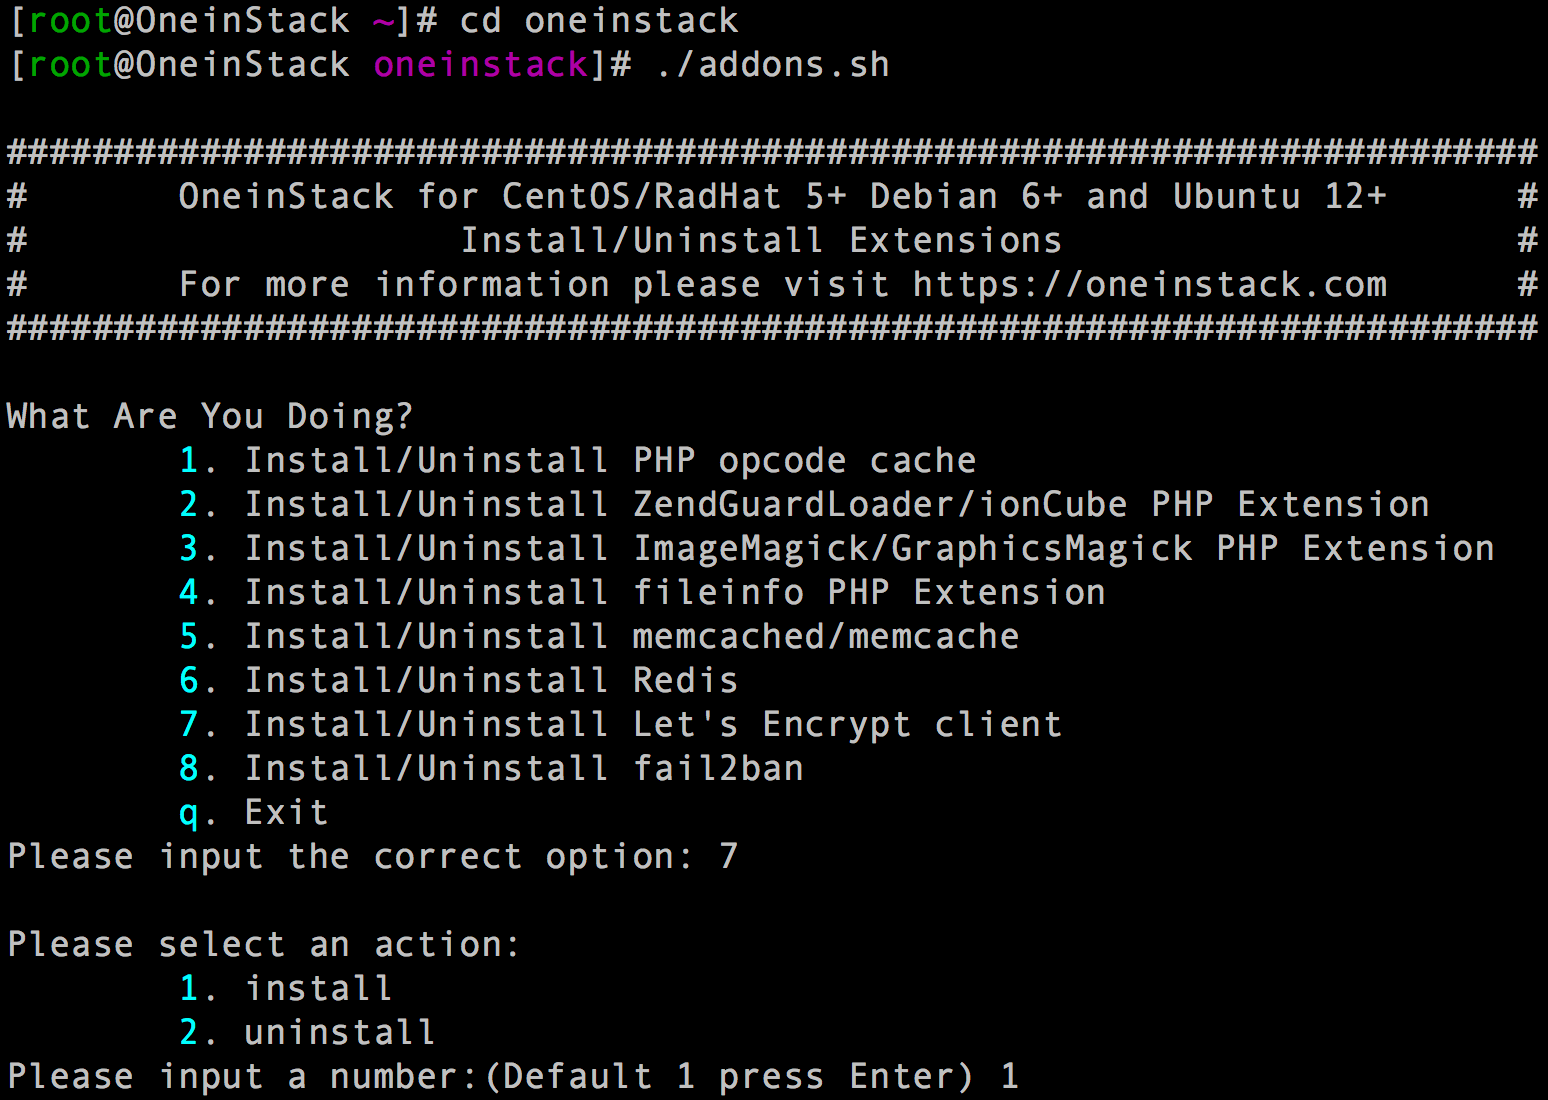
添加附加组件
执行命令:
./addons.sh- 1
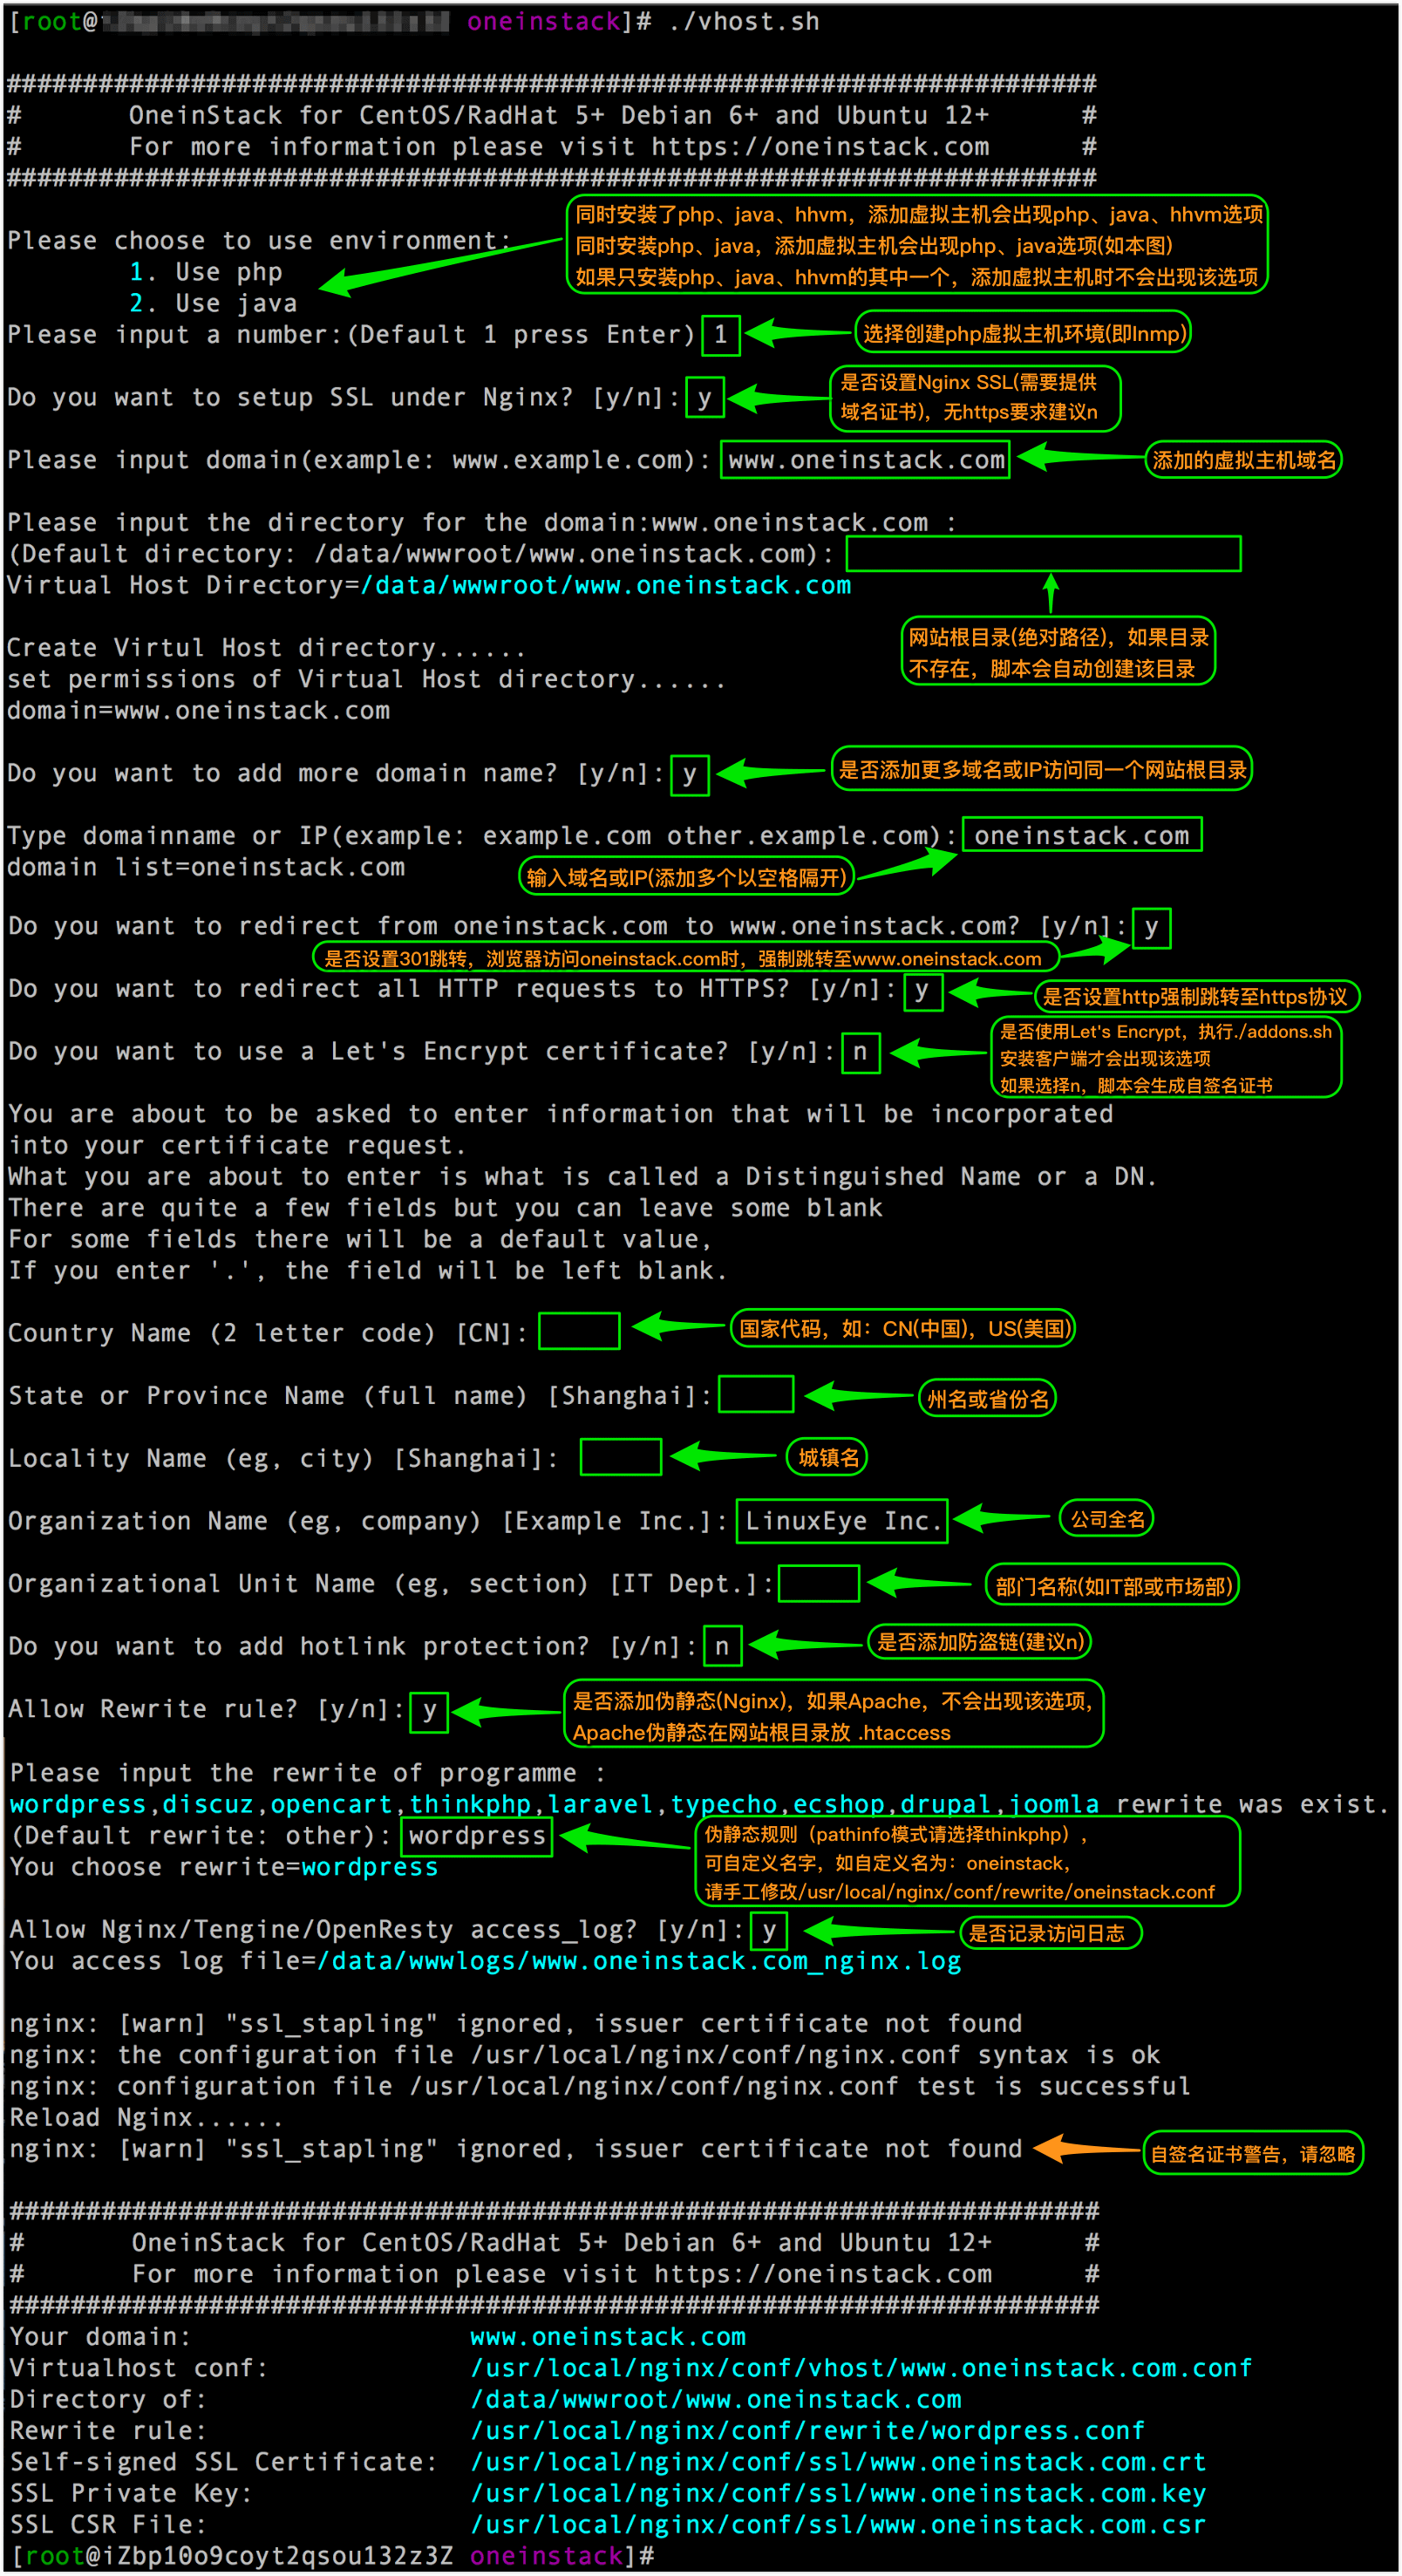
添加虚拟主机
执行命令:
./vhost.sh- 1
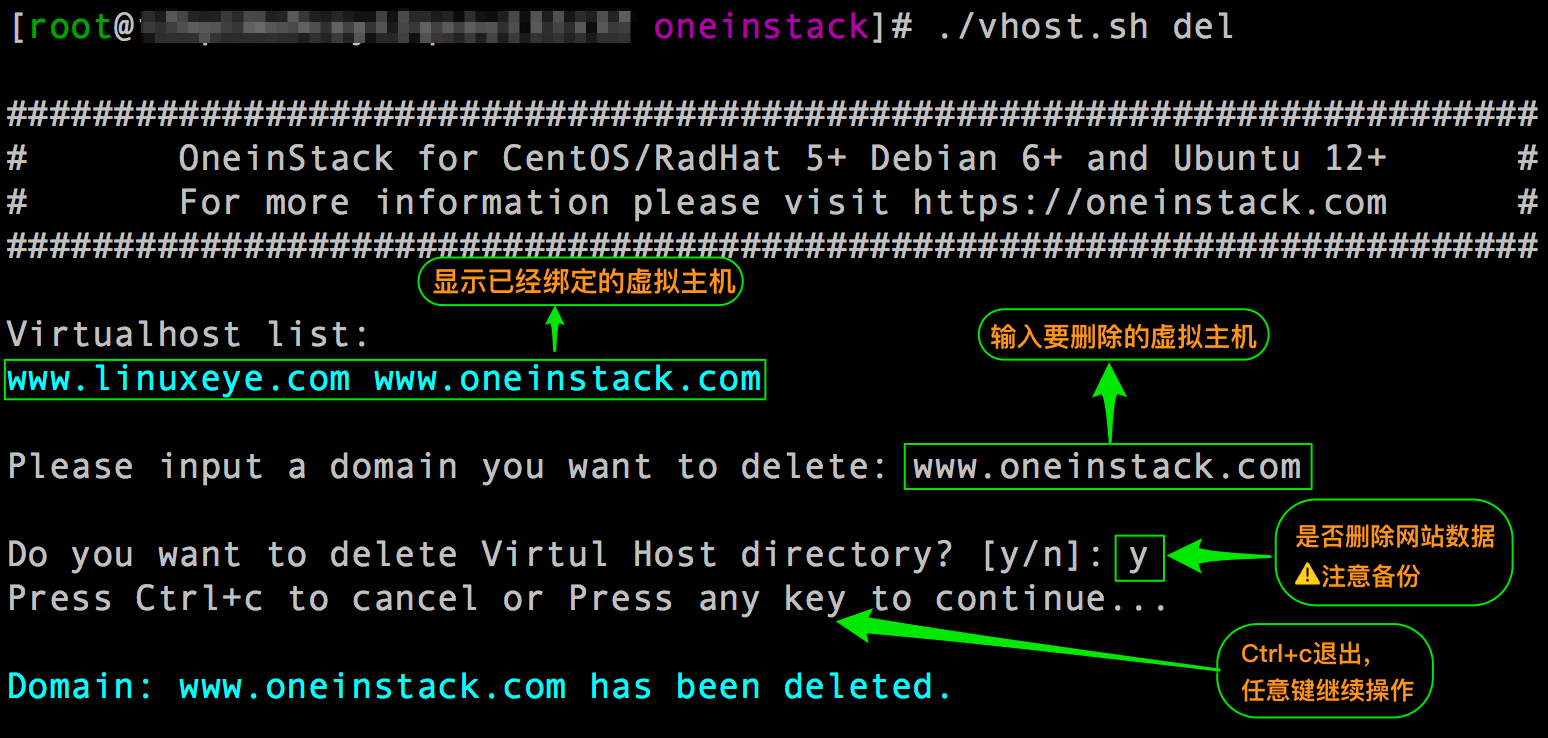
删除虚拟主机
执行命令:
./vhost.sh del- 1
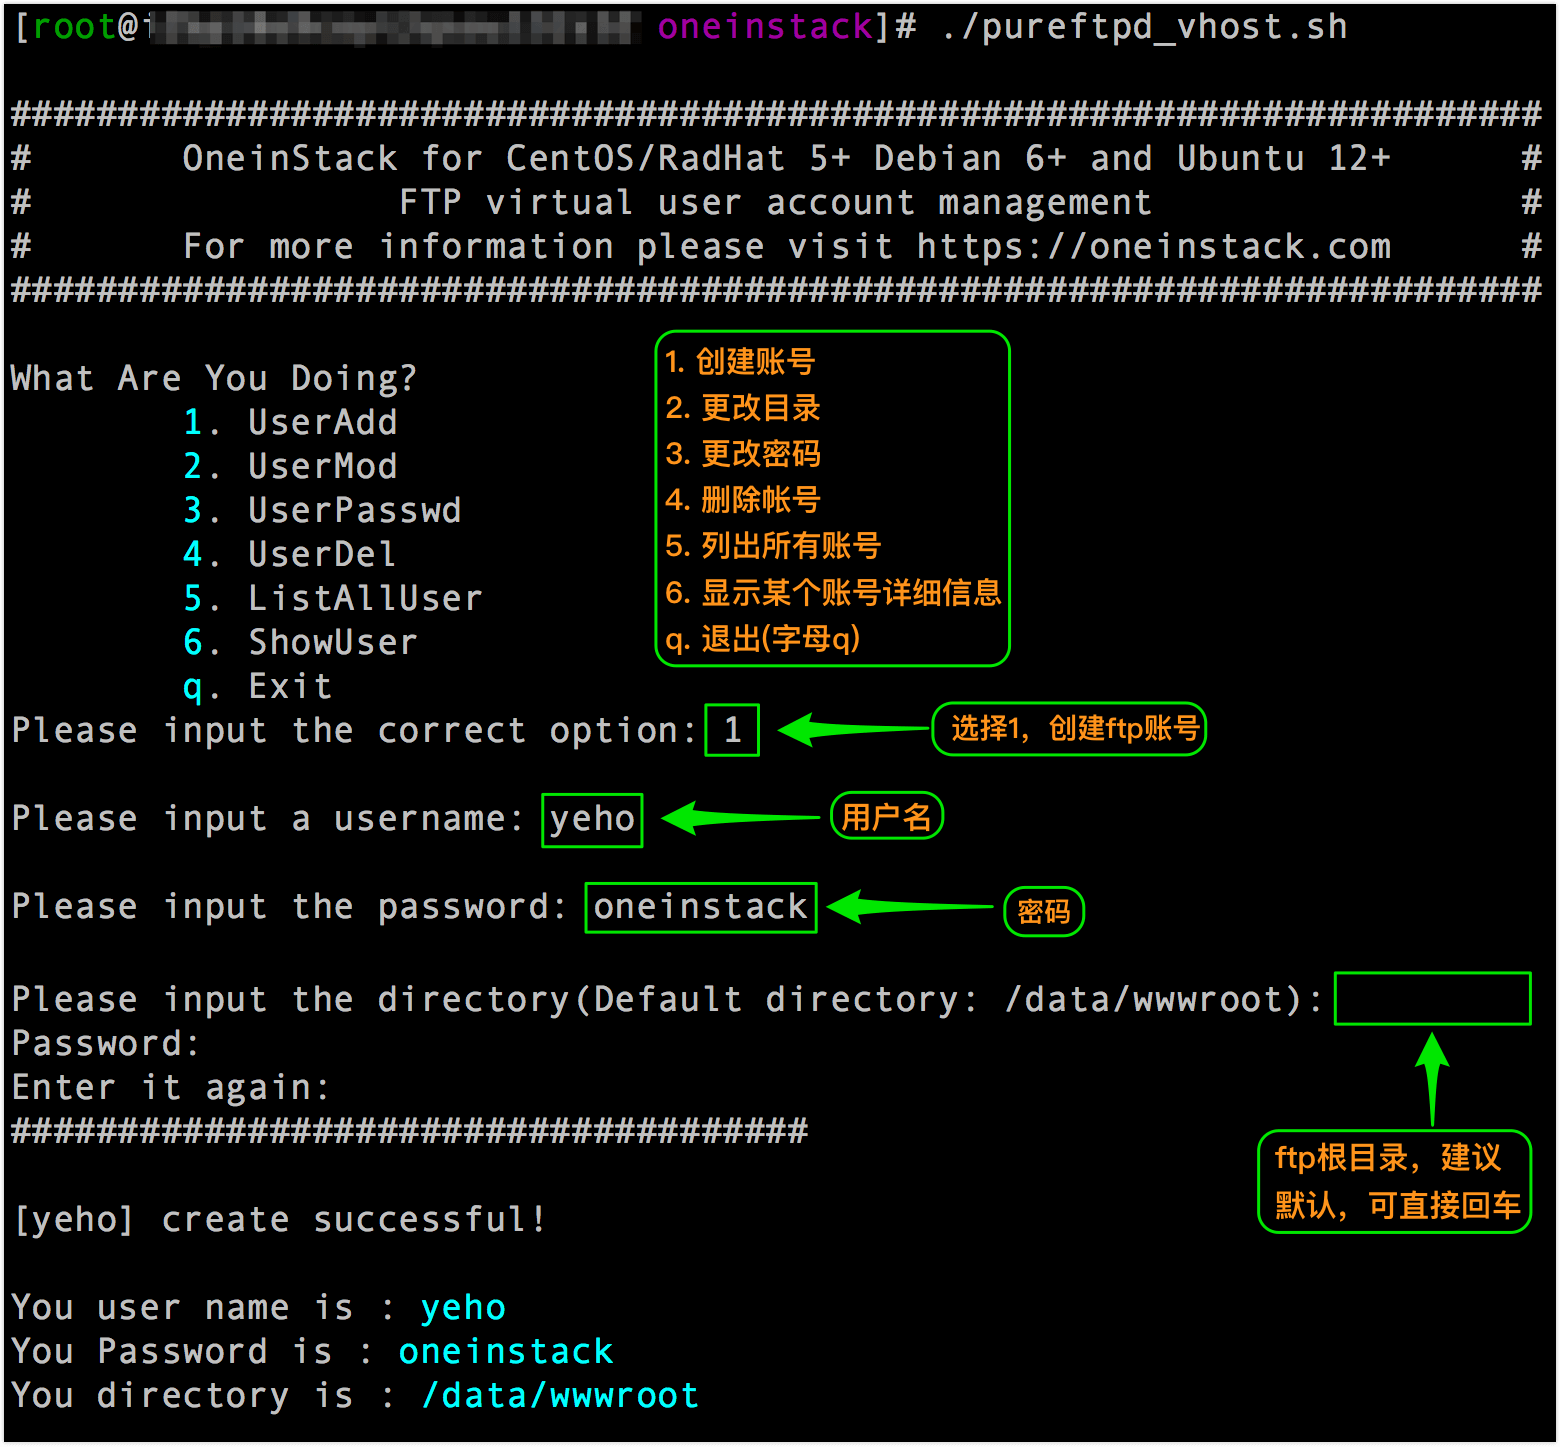
管理ftp账号
执行命令:
./pureftpd_vhost.sh- 1
备份数据
执行命令:
./backup_setup.sh # Set backup options - 1
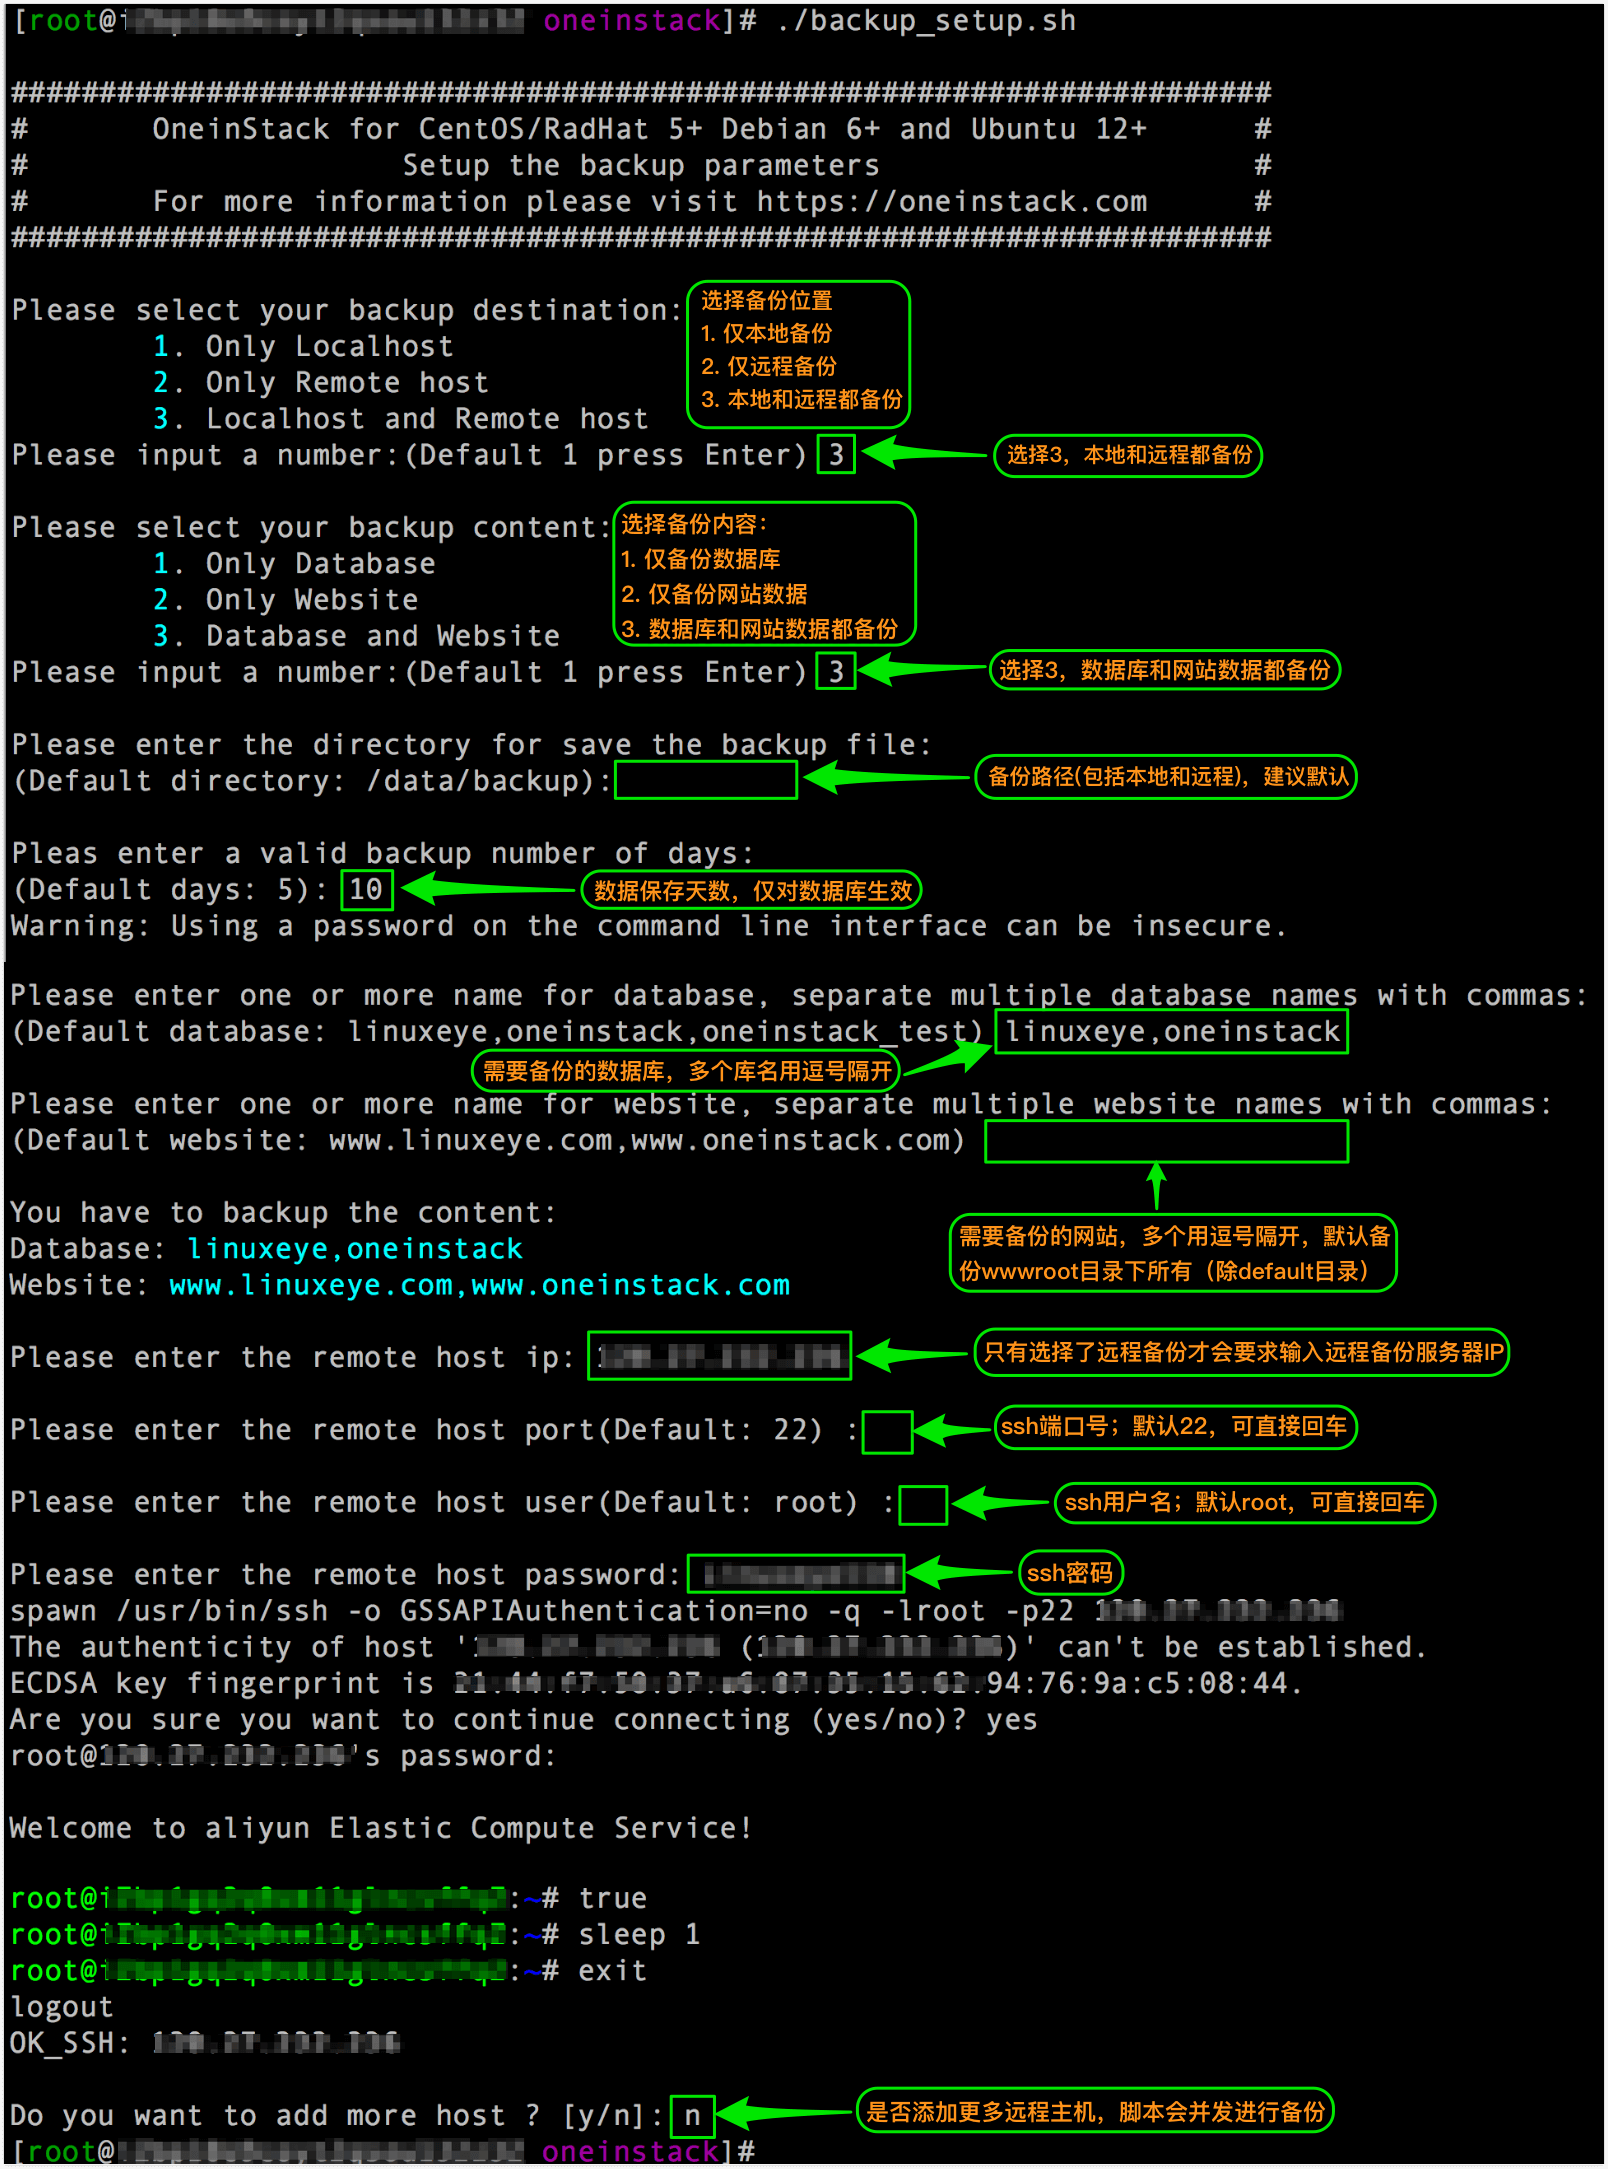
 ./backup.sh # Start backup, You can add cron jobs
  # crontab -l # Examples
0 1 * * * cd ~/oneinstack;./backup.sh > /dev/null 2>&1 &- 1
- 2
- 3
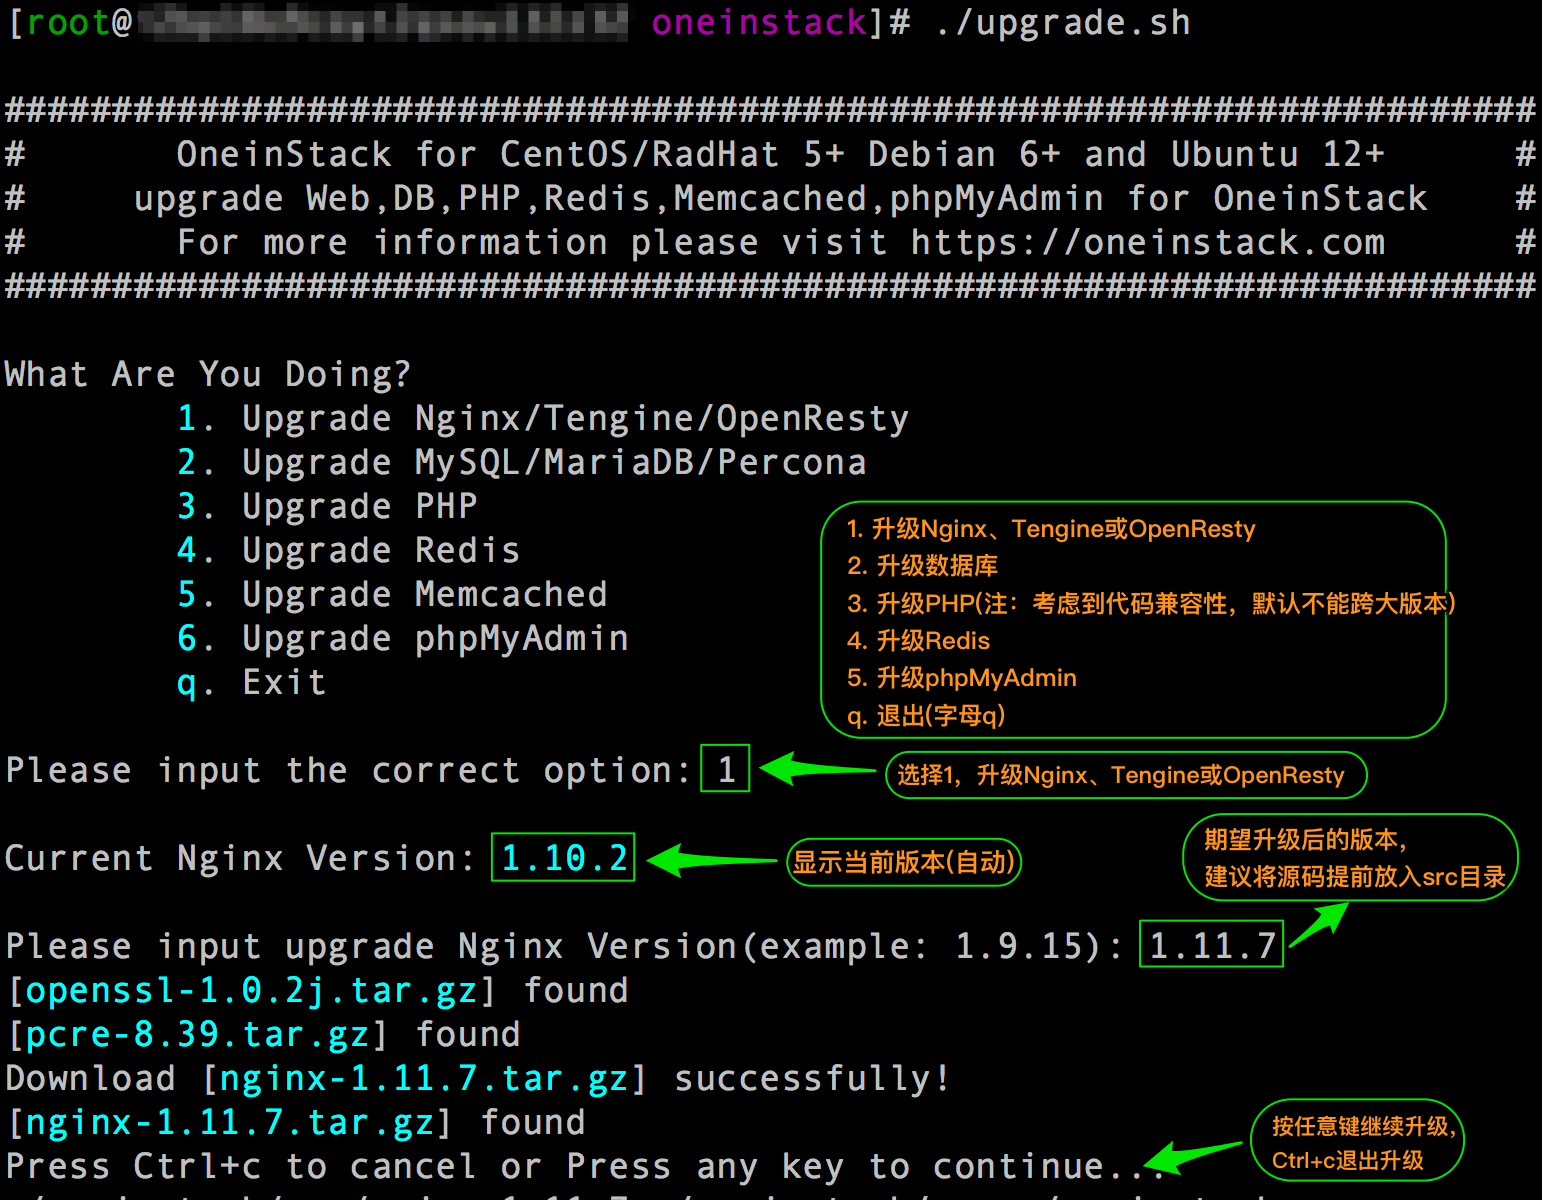
更新版本
执行命令:
./upgrade.sh
- 1
- 2
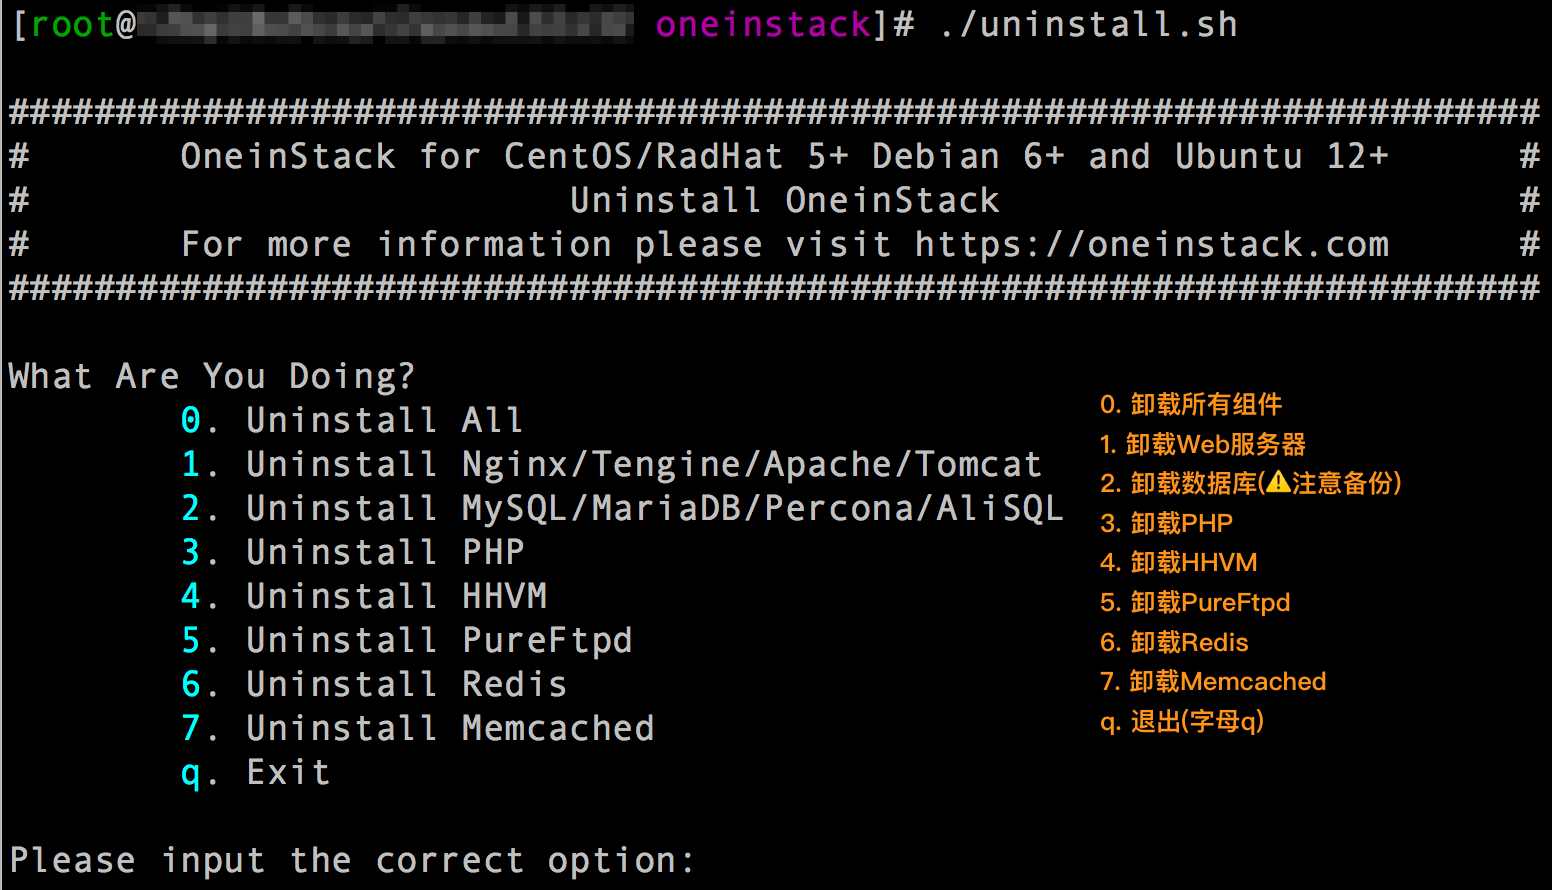
卸载OneinStack
执行命令
./uninstall.sh- 1
管理服务
Nginx/Tengine/OpenResty:
service nginx {start|stop|status|restart|reload|configtest}- 1
MySQL/MariaDB/Percona:
service mysqld {start|stop|restart|reload|status}- 1
PHP:
service php-fpm {start|stop|restart|reload|status}- 1
HHVM(hhvm进程交给supervisord管理):
service supervisord {start|stop|status|restart|reload}- 1
Apache:
service httpd {start|restart|stop}- 1
Tomcat:
service tomcat {start|stop|status|restart}- 1
Pure-Ftpd:
service pureftpd {start|stop|restart|status}- 1
Redis:
service redis-server {start|stop|status|restart|reload}- 1
Memcached:
service memcached {start|stop|status|restart|reload}- 1
可能遇到的问题
1.ftp权限问题
问题描述:
创建ftp账户后,远程连接出现550错误,提示没有权限。
问题解决:
网站根目录权限遵循:
文件644 文件夹755 权限用户和用户组www
如出现文件权限问题时,请执行下面3条命令:
chown -R www.www /data/wwwroot/
find /data/wwwroot/ -type d -exec chmod 755 {} \; find /data/wwwroot/ -type f -exec chmod 644 {} \;- 1
- 2
- 3
2.LNMT模式部署JAVA应用
问题解决:
如果安装lnmt模式,即同时安装nginx、mysql、tomcat,默认是做了动静分离,即nginx处理静态资源(jss、ccc、图片等),其余的交给tomcat处理。
默认(未绑定域名)对应网站根目录/data/wwwroot/default(不是webapps),部署代码时建议将war包解压(比如example.war,解压命令:jar xf example.war ,注意权限必须为www),将其中代码放到对应网站根目录。
-
如果上传代码之后目录结构为:/data/wwwroot/default/WEB-INF,访问地址为:http://IP
-
如果上传代码之后目录结构为:/data/wwwroot/default/example/WEB-INF,访问网站地址为:http://IP/example。
注意:
war包也可以不解压即上传到对应网站根目录,但必须注意访问路径和静态资源目录问题。如果访问网站时,静态资源加载不了,可能是原因是做了动静分离静态资源直接有nginx处理,请确认nginx是否能找到相关静态资源(nginx网站根目录:/data/wwwroot/default)
如果vhost.sh绑定了域名,如www.example.com,工具会自动生成对应根目录:/data/wwwroot/www.example.com ,请将代码放入此目录。
3.切换php版本
问题解决:
./uninstall.sh php  #卸载
./install.sh #php选择y,其余选择n,即可- 1
- 2
4.配置MySQL远程连接
问题解决:
(1)开启iptables 3306端口
如果您的操作系统为CentOS系列:
iptables -I INPUT 4 -p tcp -m state --state NEW -m tcp --dport 3306 -j ACCEPT service iptables save #保存iptables规则- 1
- 2
如下图:

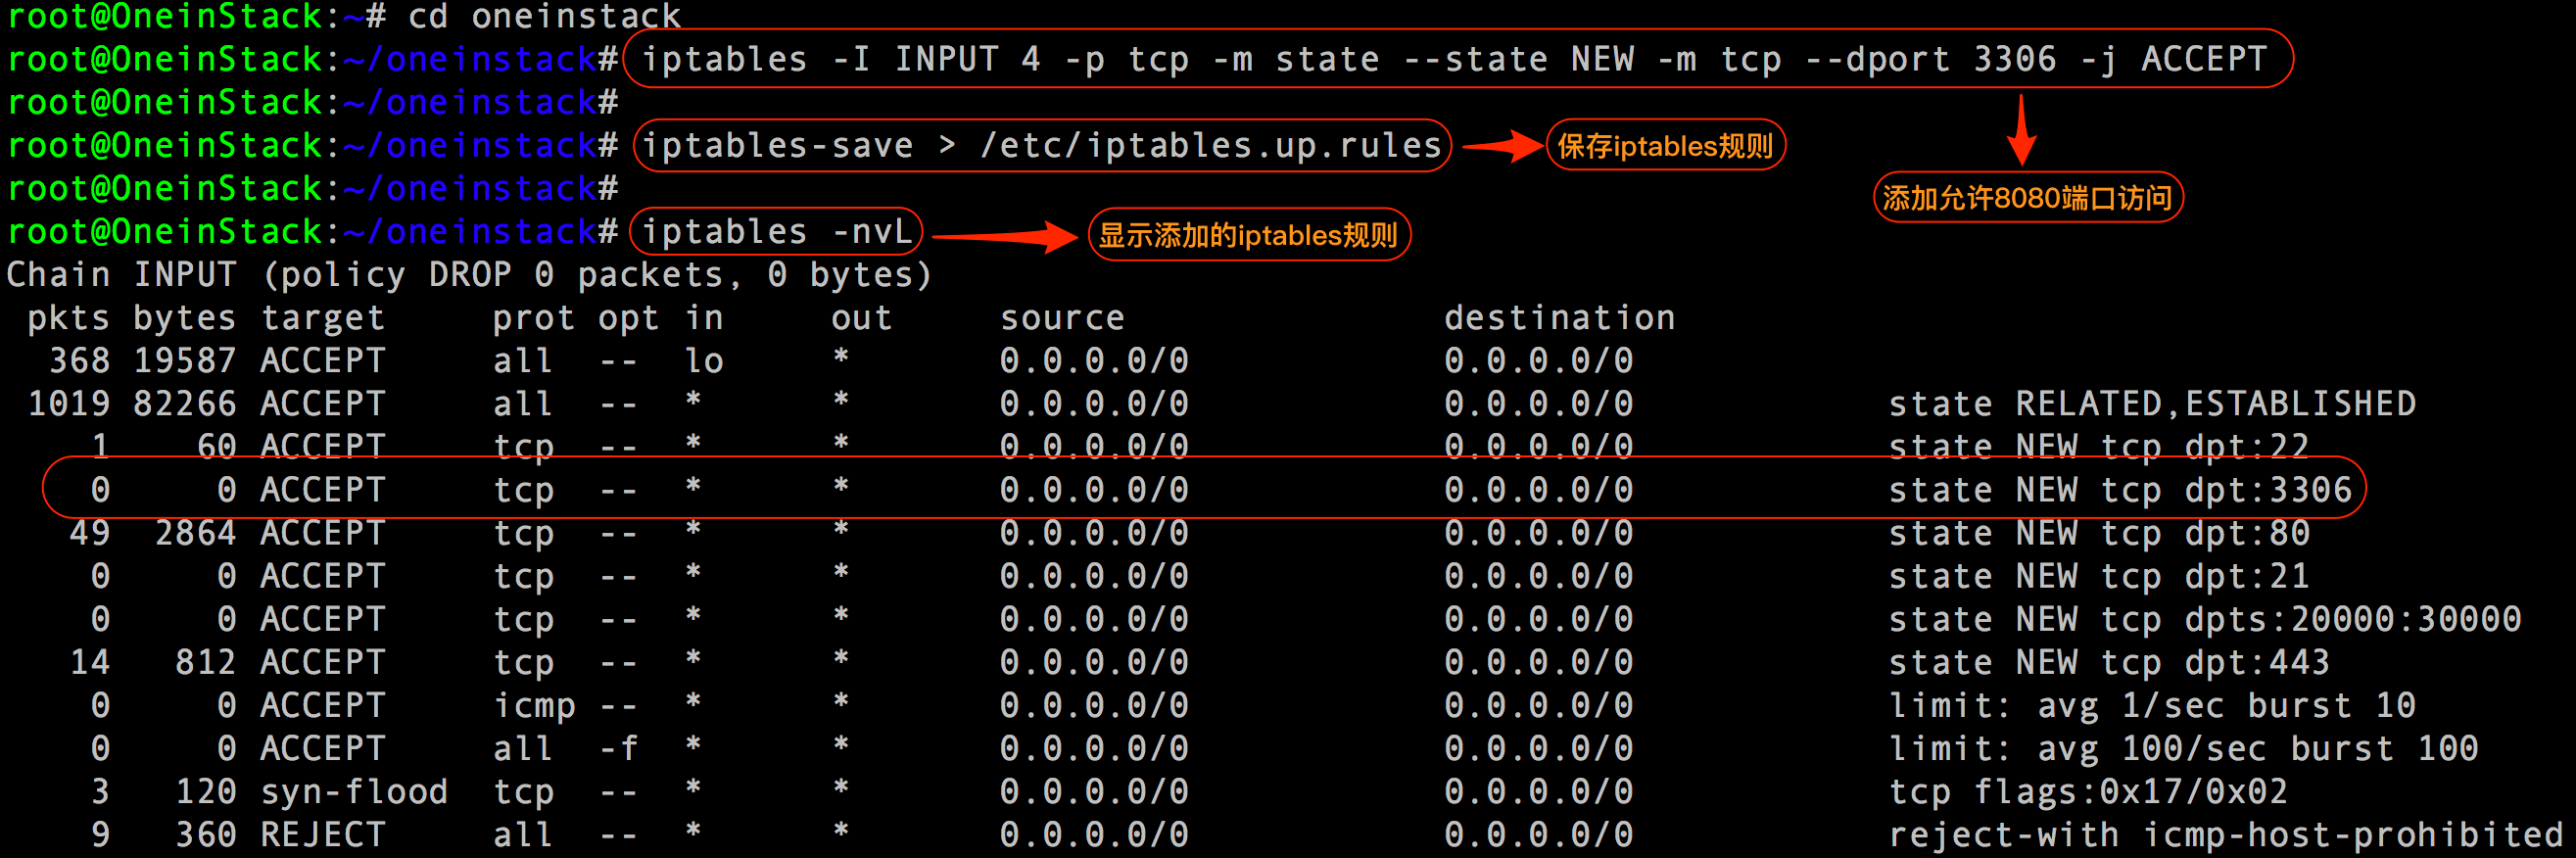
如果您的操作系统为Ubuntu/Debian系列:
iptables -I INPUT 4 -p tcp -m state --state NEW -m tcp --dport 3306 -j ACCEPT iptables-save > /etc/iptables.up.rules #保存iptables规则- 1
- 2
如下图:
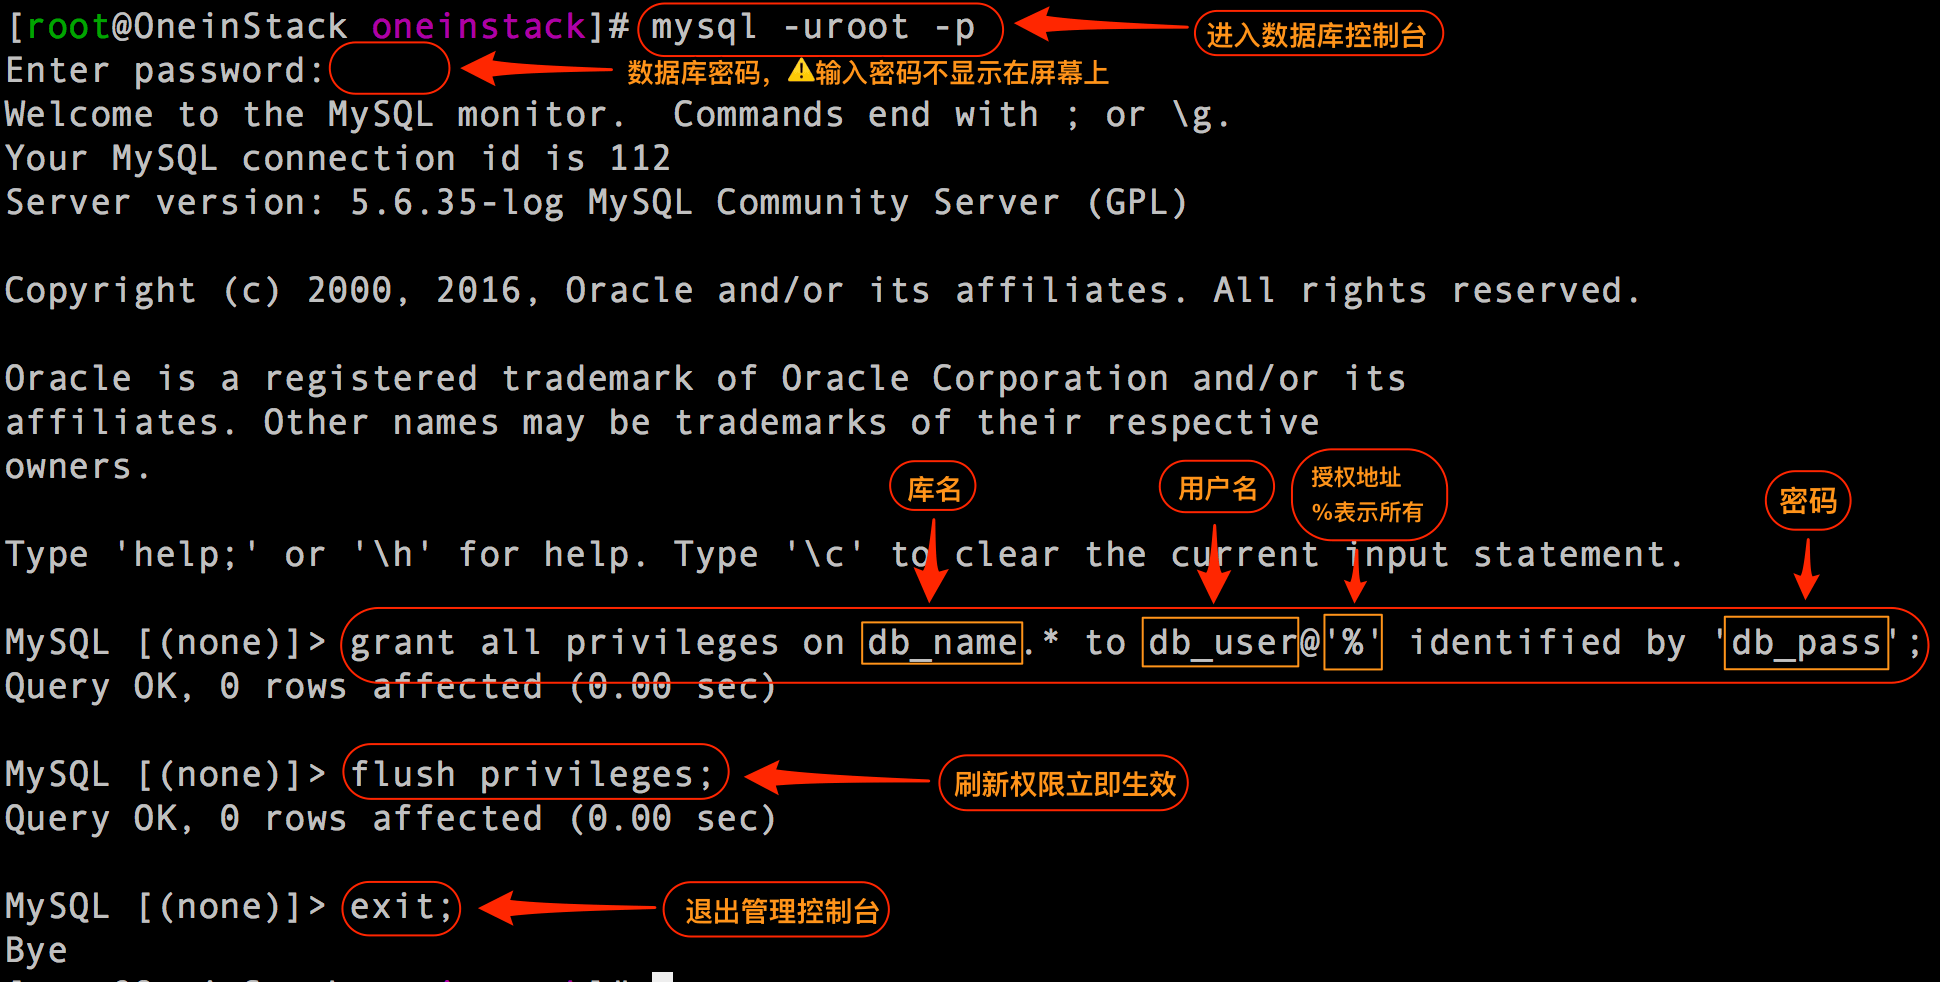
(2)授权数据库
远程连接新建一个帐号(帐号名不能为root)。
如:添加一个用户名为db_user,密码为db_pass,授权为% (%表示所有外围IP能连接)对db_name数据库所有权限,命令如下
# mysql -uroot -p
MySQL [(none)]> grant all privileges on db_name.* to db_user@’%’ identified by ‘db_pass’; #授权语句,特别注意有分号 MySQL [(none)]> flush privileges; MySQL [(none)]> exit; #退出数据库控制台,特别注意有分号- 1
- 2
- 3
- 4
如下图:
赞赏码


非学,无以致疑;非问,无以广识

 浙公网安备 33010602011771号