
OpenStack之Ocata单控部署测试
本着学以致用的原则,学习到新的东西一定要亲自去实践操作,就像别人回来给你描述那里的风景是多么多么美好,你如果不亲自去走一遭看一遍是体会不到的,要不然你大爷永远还是你大爷!P话!^_^O(∩_∩)O哈哈~~~~~
(仅供参考)
简介:
Ocata与以往版本主要区别在于引入了cell(单元格),cell v2 自 Newton 版本引入 ,Ocata 版本变为必要组件,以后默认部署都会初始化一个单 cell 的架构。
OpenStack 在控制平面上的性能瓶颈主要在 Message Queue 和 Database 。尤其是 Message Queue , 随着计算节点的增加,性能变的越来越差,因为openstack里每个资源和接口都是通过消息队列来通信的
引入Cells功能主要是以解决OpenStack集群的扩展性问题。
与以往版本部署区别主要在nova 这块,会多出nova_cell 数据库的创建,以及placement参与调度服务的配置等。以下开始部署测试:
一、环境准备
1. 前提准备
三台虚拟机配置至少CPU 4c MEM 4G的虚拟机(控制节点 + 计算几点 + Cinder节点)
安装CentOS7.2系统(最小化安装, + 关闭防火墙 + 关闭selinux + 主机互信 + hosts文件)
# systemctl stop firewalld.service
# systemctl disable firewalld.service
配置使用公司O 版内部源
# curl -O 172.30.120.147/repo.files/ocataCentOS74.x86_64.repo
安装相关基础工具
# yum install net-tools wget vim ntpdate bash-completion -y
2. 更改hostname
# hostnamectl set-hostname controller1
然后每个节点配置/etc/hosts文件如下
172.30.126.4 controller1
172.30.126.5 cinder
172.30.126.6 compute1
3. 安装NTP同步系统时间或者chrony
# ntpdate cn.pool.ntp.org
然后查看运行date命令查看时间是否同步成功,注意,openstack是分布式架构的,每个节点都不能有时间差!另外,也把这个命令加到开机启动里面去
# echo "ntpdate cn.pool.ntp.org" >> /etc/rc.d/rc.local
# chmod +x /etc/rc.d/rc.local
#vi /etc/ntp.conf
#ntpq -p
二、 搭建Mariadb
1. 安装mariadb数据库
#yum install mariadb-server mariadb-client
2. 配置mariadb
# vim /etc/my.cnf.d/mariadb-server.cnf
在mysqld区块添加如下内容:
[mysqld]
default-storage-engine = innodb
innodb_file_per_table
collation-server = utf8_general_ci
init-connect = 'SET NAMES utf8'
character-set-server = utf8
bind-address = 172.30.126.4
3、启动数据库及设置mariadb开机启动
# systemctl enable mariadb.service
# systemctl restart mariadb.service
# systemctl status mariadb.service
# systemctl list-unit-files |grep mariadb.service

4. 配置mariadb,给mariadb设置密码
# mysql_secure_installation
三、安装RabbitMQ
1. 每个节点都安装erlang
# yum install -y erlang
2. 每个节点都安装RabbitMQ
# yum install -y rabbitmq-server
3. 每个节点都启动rabbitmq及设置开机启动
# systemctl enable rabbitmq-server.service
# systemctl restart rabbitmq-server.service
# systemctl status rabbitmq-server.service
# systemctl list-unit-files |grep rabbitmq-server.service

- 创建openstack
# rabbitmqctl add_user openstack passw0rd
5. 将openstack用户赋予权限
# rabbitmqctl set_permissions openstack ".*" ".*" ".*"
# rabbitmqctl set_user_tags openstack administrator
# rabbitmqctl list_users

6. 看下监听端口 rabbitmq用的是5672端口
# netstat -ntlp |grep 5672

7. 查看RabbitMQ插件
# /usr/lib/rabbitmq/bin/rabbitmq-plugins list
8. 打开RabbitMQ相关插件
# /usr/lib/rabbitmq/bin/rabbitmq-plugins enable rabbitmq_management mochiweb webmachine rabbitmq_web_dispatch
amqp_client rabbitmq_management_agent
打开相关插件后,重启下rabbitmq服务
systemctl restart rabbitmq-server
浏览器输入:http://172.30.126.4:15672 默认用户名密码:guest/guest
通过这个界面,可以能很直观的看到rabbitmq的运行和负载情况

9. 查看rabbitmq状态
用浏览器登录http://172.30.126.4:15672 输入openstack/passw0rd也可以查看状态信息:
四、安装配置Keystone
1、创建keystone数据库
MariaDB [(none)]>create database keystone;
2、创建数据库keystone用户&root用户及赋予权限
MariaDB [(none)]> grant all privileges on keystone.* to 'keystone'@'localhost' identified by 'passw0rd';
MariaDB [(none)]> grant all privileges on keystone.* to 'keystone'@'%' identified by 'passw0rd';
MariaDB [(none)]>flush privileges;
3、安装keystone和memcached
# yum -y install openstack-keystone httpd mod_wsgi python-openstackclient memcached python-memcached openstack-utils
4、启动memcache服务并设置开机自启动
# systemctl enable memcached.service
# systemctl restart memcached.service
# systemctl status memcached.service

5、配置/etc/keystone/keystone.conf文件
# cp /etc/keystone/keystone.conf /etc/keystone/keystone.conf.bak 做好备份
# >/etc/keystone/keystone.conf 清空源配置文件 从新写入
#
openstack-config --set /etc/keystone/keystone.conf DEFAULT transport_url rabbit://openstack:passw0rd@controller1
openstack-config --set /etc/keystone/keystone.conf database connection mysql://keystone:passw0rd@controller1/keystone
openstack-config --set /etc/keystone/keystone.conf cache backend oslo_cache.memcache_pool
openstack-config --set /etc/keystone/keystone.conf cache enabled true
openstack-config --set /etc/keystone/keystone.conf cache memcache_servers controller1:11211
openstack-config --set /etc/keystone/keystone.conf memcache servers controller1:11211
openstack-config --set /etc/keystone/keystone.conf token expiration 3600
openstack-config --set /etc/keystone/keystone.conf token provider fernet
6、配置httpd.conf文件&memcached文件 配置前先看看原文件
# sed -i "s/#ServerName www.example.com:80/ServerName controller/" /etc/httpd/conf/httpd.conf
# sed -i 's/OPTIONS*.*/OPTIONS="-l 127.0.0.1,::1,172.30.126.4"/' /etc/sysconfig/memcached
7、配置keystone与httpd结合
# ln -s /usr/share/keystone/wsgi-keystone.conf /etc/httpd/conf.d/
8、数据库同步
# su -s /bin/sh -c "keystone-manage db_sync" keystone 同步完一定要查看keystone 数据库是否有表存在
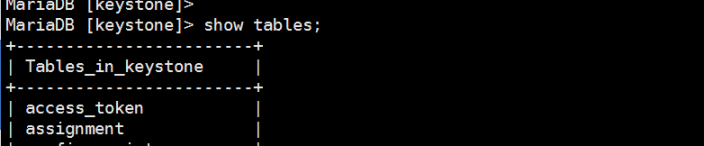
有说明同步成功
9、初始化fernet
# keystone-manage fernet_setup --keystone-user keystone --keystone-group keystone
# keystone-manage credential_setup --keystone-user keystone --keystone-group keystone
10、启动httpd,并设置httpd开机启动
# systemctl enable httpd.service
# systemctl restart httpd.service
# systemctl status httpd.service
# systemctl list-unit-files |grep httpd.service

11、创建 admin 用户角色
keystone-manage bootstrap \
> --bootstrap-password passw0rd \
> --bootstrap-username admin \
> --bootstrap-project-name admin \
> --bootstrap-role-name admin \
> --bootstrap-service-name keystone \
> --bootstrap-region-id RegionOne \
> --bootstrap-admin-url http://controller1:35357/v3 \
> --bootstrap-internal-url http://controller1:35357/v3 \
> --bootstrap-public-url http://controller1:5000/v3
验证一下:
# openstack project list --os-username admin --os-project-name admin --os-user-domain-id default --os-project-domain-id
default --os-identity-api-version 3 --os-auth-url http://controller1:5000 --os-password passw0rd

12. 创建admin用户环境变量,创建/root/admin-openrc 文件并写入如下内容:
# vim /root/admin-openrc
添加以下内容:
export OS_USER_DOMAIN_ID=default
export OS_PROJECT_DOMAIN_ID=default
export OS_USERNAME=admin
export OS_PROJECT_NAME=admin
export OS_PASSWORD=passw0rd
export OS_IDENTITY_API_VERSION=3
export OS_IMAGE_API_VERSION=2
export OS_AUTH_URL=http://controller1:35357/v3
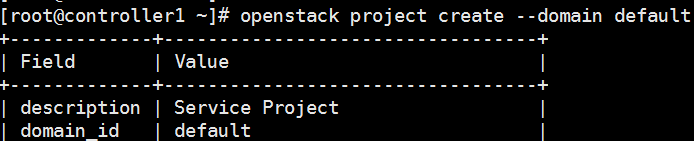
13、创建service项目
# source /root/admin-openrc
# openstack project create --domain default --description "Service Project" service
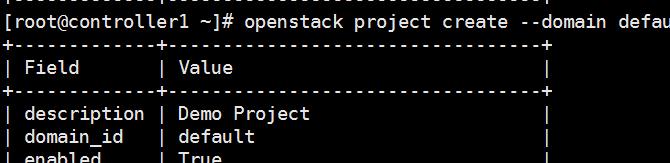
14、创建demo项目
# openstack project create --domain default --description "Demo Project" demo
15、创建demo用户
# openstack user create --domain default demo --password passw0rd
注意:passw0rd为demo用户密码
16、创建user角色将demo用户赋予user角色
# openstack role create user
# openstack role add --project demo --user demo user
17、验证keystone
# unset OS_TOKEN OS_URL
# openstack --os-auth-url http://controller1:35357/v3 --os-project-domain-name default --os-user-domain-name default --
os-project-name admin --os-username admin token issue --os-password passw0rd

# openstack --os-auth-url http://controller1:5000/v3 --os-project-domain-name default --os-user-domain-name default --
os-project-name demo --os-username demo token issue --os-password passw0rd
五、安装配置glance
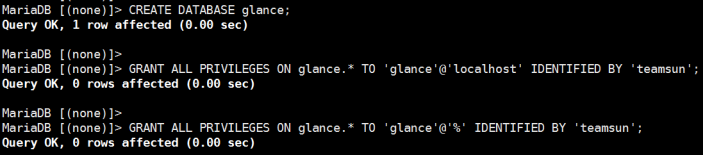
1、创建glance数据库
MariaDB [(none)]>CREATE DATABASE glance;
2、创建数据库用户并赋予权限
MariaDB [(none)]>GRANT ALL PRIVILEGES ON glance.* TO 'glance'@'localhost' IDENTIFIED BY 'passw0rd';
MariaDB [(none)]>GRANT ALL PRIVILEGES ON glance.* TO 'glance'@'%' IDENTIFIED BY 'passw0rd';
3、创建glance用户及赋予admin权限
# source /root/admin-openrc
# openstack user create --domain default glance --password passw0rd
# openstack role add --project service --user glance admin
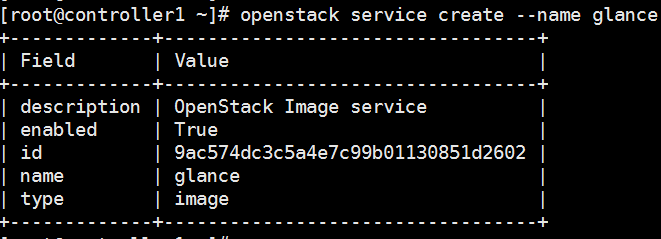
4、创建image服务
# openstack service create --name glance --description "OpenStack Image service" image
5、创建glance的endpoint 分别为 public internal admin
# openstack endpoint create --region RegionOne image public http://controller1:9292
# openstack endpoint create --region RegionOne image internal http://controller1:9292
# openstack endpoint create --region RegionOne image admin http://controller1:9292
6、安装glance相关rpm包
# yum install openstack-glance -y
7、修改glance配置文件/etc/glance/glance-api.conf
# cp /etc/glance/glance-api.conf /etc/glance/glance-api.conf.bak
# >/etc/glance/glance-api.conf
#openstack-config --set /etc/glance/glance-api.conf DEFAULT transport_url rabbit://openstack:passw0rd@controller1
openstack-config --set /etc/glance/glance-api.conf database connection mysql+pymysql://glance:passw0rd@controller1/glance
openstack-config --set /etc/glance/glance-api.conf keystone_authtoken auth_uri http://controller1:5000
openstack-config --set /etc/glance/glance-api.conf keystone_authtoken auth_url http://controller1:35357
openstack-config --set /etc/glance/glance-api.conf keystone_authtoken memcached_servers controller1:11211
openstack-config --set /etc/glance/glance-api.conf keystone_authtoken auth_type password
openstack-config --set /etc/glance/glance-api.conf keystone_authtoken project_domain_name default
openstack-config --set /etc/glance/glance-api.conf keystone_authtoken user_domain_name default
openstack-config --set /etc/glance/glance-api.conf keystone_authtoken username glance
openstack-config --set /etc/glance/glance-api.conf keystone_authtoken password passw0rd
openstack-config --set /etc/glance/glance-api.conf keystone_authtoken project_name service
openstack-config --set /etc/glance/glance-api.conf paste_deploy flavor keystone
openstack-config --set /etc/glance/glance-api.conf glance_store stores file,http
openstack-config --set /etc/glance/glance-api.conf glance_store default_store file
openstack-config --set /etc/glance/glance-api.conf glance_store filesystem_store_datadir /var/lib/glance/images/
8、修改glance配置文件/etc/glance/glance-registry.conf:
# cp /etc/glance/glance-registry.conf /etc/glance/glance-registry.conf.bak
# >/etc/glance/glance-registry.conf
配置如下:
[DEFAULT]
transport_url = rabbit://openstack:passw0rd@controller1
[database]
connection = mysql+pymysql://glance:passw0rd@controller1/glance
[keystone_authtoken]
auth_uri = http://controller1:5000
auth_url = http://controller1:35357
memcached_servers = controller1:11211
auth_type = password
project_domain_name = default
user_domain_name = default
project_name = service
username = glance
password = passw0rd
[paste_deploy]
flavor = keystone
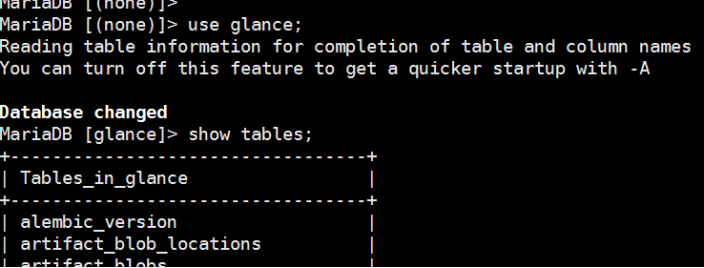
9、同步glance数据库
# su -s /bin/sh -c "glance-manage db_sync" glance
10、启动glance及设置开机启动
# systemctl enable openstack-glance-api.service openstack-glance-registry.service
# systemctl restart openstack-glance-api.service openstack-glance-registry.service
# systemctl status openstack-glance-api.service openstack-glance-registry.service
12、上传个小镜像到glance
# source /root/admin-openrc
# glance image-create --name "cirros-0.3.4-x86_64" --file cirros-0.3.4-x86_64-disk.img --disk-format qcow2 --containerformat bare --visibility public --progress

查看镜像列表:
# glance image-list

六、安装配置nova
1、创建nova数据库
MariaDB [(none)]> create database nova;
MariaDB [(none)]> create database nova_api;
MariaDB [(none)]> create database nova_cell0;
2、创建数据库用户并赋予权限
grant all privileges on nova.* to 'nova'@'localhost' identified by 'passw0rd';
MariaDB [(none)]>grant all privileges on nova.* to 'nova'@'%' identified by 'passw0rd';
MariaDB [(none)]> grant all privileges on nova_api.* to 'nova'@'localhost' identified by 'passw0rd';
MariaDB [(none)]> grant all privileges on nova_api.* to 'nova'@'%' identified by 'passw0rd';
MariaDB [(none)]> grant all privileges on nova_cell0.* to 'nova'@'localhost' identified by 'passw0rd';
MariaDB [(none)]> grant all privileges on nova_cell0.* to 'nova'@'%' identified by 'passw0rd';
MariaDB [(none)]> grant all privileges on *.* to 'root'@'controller1' identified by 'passw0rd';
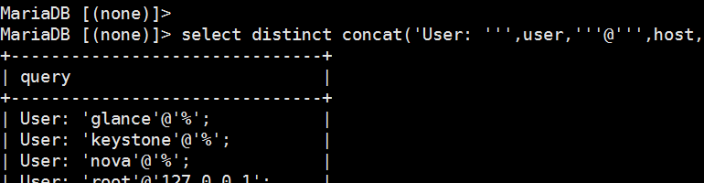
注:查看授权列表信息:
MariaDB [(none)]> select distinct concat('User: ''',user,'''@''',host,''';') as query from mysql.user;
取消之前某个授权MariaDB [(none)]> revoke alter on *.* to 'root'@'controller1' identified by'passw0rd';
3、创建nova用户及赋予admin权限
# source /root/admin-openrc
# openstack user create --domain default nova --password passw0rd
# openstack role add --project service --user nova admin
4、创建computer服务
# openstack service create --name nova --description "OpenStack Compute" compute
5、创建nova的endpoint
# openstack endpoint create --region RegionOne compute public http://controller1:8774/v2.1/%\(tenant_id\)s
# openstack endpoint create --region RegionOne compute internal http://controller1:8774/v2.1/%\(tenant_id\)s
#openstack endpoint create --region RegionOne compute admin http://controller1:8774/v2.1/%\(tenant_id\)s
6、安装nova相关软件
# yum install -y openstack-nova-api openstack-nova-conductor openstack-nova-cert openstack-nova-console openstack-nova-novncproxy openstack-nova-scheduler
7、配置nova的配置文件/etc/nova/nova.conf
# cp /etc/nova/nova.conf /etc/nova/nova.conf.bak
# >/etc/nova/nova.conf
#vi /etc/nova/nova.conf
[DEFAULT]
enabled_apis = osapi_compute,metadata
auth_strategy = keystone
my_ip = 172.30.126.4
use_neutron = True
firewall_driver = nova.virt.firewall.NoopFirewallDriver
transport_url = rabbit://openstack:passw0rd@controller1
[database]
connection = mysql+pymysql://nova:passw0rd@controller1/nova
[api_database]
connection = mysql+pymysql://nova:passw0rd@controller1/nova_api
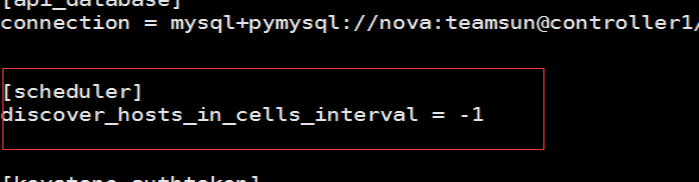
[scheduler]
discover_hosts_in_cells_interval = -1
[keystone_authtoken]
auth_uri = http://controller1:5000
auth_url = http://controller1:35357
memcached_servers = controller1:11211
auth_type = password
project_domain_name = default
user_domain_name = default
project_name = service
username = nova
password = passw0rd
service_token_roles_required = True
[vnc]
vncserver_listen = 172.30.126.4
vncserver_proxyclient_address = 172.30.126.4
[glance]
api_servers = http://controller1:9292
[oslo_concurrency]
lock_path = /var/lib/nova/tmp
8、设置cell(单元格)
同步下nova数据库
# su -s /bin/sh -c "nova-manage api_db sync" nova
# su -s /bin/sh -c "nova-manage db sync" nova

设置cell_v2关联上创建好的数据库nova_cell0
# nova-manage cell_v2 map_cell0 --database_connection mysql+pymysql://root:passw0rd@controller1/nova_cell0
创建一个常规cell,名字叫cell1,这个单元格里面将会包含计算节点
# nova-manage cell_v2 create_cell --verbose --name cell1 --database_connection
mysql+pymysql://root:passw0rd@controller1/nova_cell0 --transport-url rabbit://openstack:passw0rd@controller1:5672/

检查部署是否正常,后面再执行
# nova-status upgrade check (如果还没有计算节点检查肯定会报错)
创建和映射cell0,并将现有计算主机和实例映射到单元格中 最后在执行
# nova-manage cell_v2 simple_cell_setup 没有主机会报错
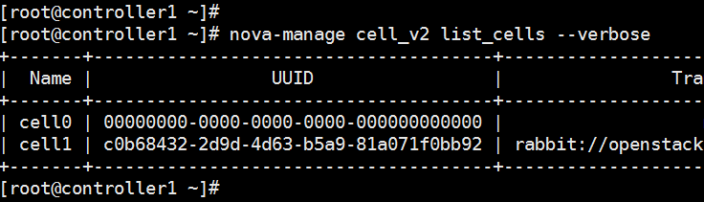
查看已经创建好的单元格列表
# nova-manage cell_v2 list_cells --verbose
注意,如果有新添加的计算节点,需要运行下面命令来发现,并且添加到单元格中
# nova-manage cell_v2 discover_hosts
可以在控制节点的nova.conf文件里[scheduler]模块下添加 discover_hosts_in_cells_interval=-1 这个设置来自动发现
9、安装placement
注意:从Ocata开始,需要安装配置placement参与nova调度了,不然虚拟机将无法创建!
# yum install -y openstack-nova-placement-api
创建placement用户和placement 服务
# openstack user create --domain default placement --password passw0rd
# openstack role add --project service --user placement admin
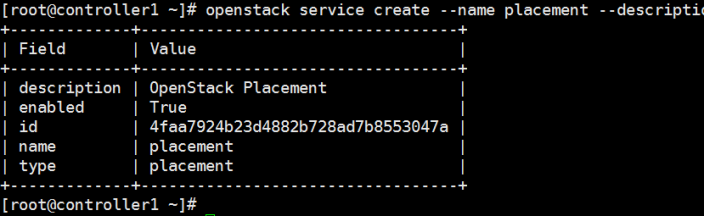
# openstack service create --name placement --description "OpenStack Placement" placement
创建placement的 endpoint
# openstack endpoint create --region RegionOne placement public http://controller1:8778
# openstack endpoint create --region RegionOne placement admin http://controller1:8778
# openstack endpoint create --region RegionOne placement internal http://controller1:8778
把placement 整合到nova.conf里
[placement]
auth_url = http://controller1:35357
memcached_servers = controller1:11211
auth_type = password
project_domain_name = default
user_domain_name = default
project_name = service
username = nova
password = passw0rd
os_region_name = RegionOne
配置修改00-nova-placement-api.conf文件,这步没做创建虚拟机的时候会出现禁止访问资源的问题
# cd /etc/httpd/conf.d/
# cp 00-nova-placement-api.conf 00-nova-placement-api.conf.bak
# >00-nova-placement-api.conf
# vim 00-nova-placement-api.conf
添加以下内容:
Listen 8778
<VirtualHost *:8778>
WSGIProcessGroup nova-placement-api
WSGIApplicationGroup %{GLOBAL}
WSGIPassAuthorization On
WSGIDaemonProcess nova-placement-api processes=3 threads=1 user=nova group=nova
WSGIScriptAlias / /usr/bin/nova-placement-api
<Directory "/">
Order allow,deny
Allow from all
Require all granted
</Directory>
<IfVersion >= 2.4>
ErrorLogFormat "%M"
</IfVersion>
ErrorLog /var/log/nova/nova-placement-api.log
</VirtualHost>
Alias /nova-placement-api /usr/bin/nova-placement-api
<Location /nova-placement-api>
SetHandler wsgi-script
Options +ExecCGI
WSGIProcessGroup nova-placement-api
WSGIApplicationGroup %{GLOBAL}
WSGIPassAuthorization On
</Location>
重启下httpd服务
# systemctl restart httpd
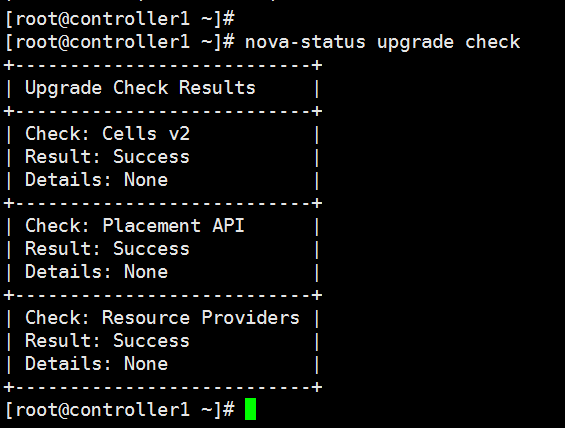
检查下是否配置成功
# nova-status upgrade check
10、设置nova相关服务开机启动
# systemctl enable openstack-nova-api.service openstack-nova-cert.service openstack-nova-consoleauth.service openstack-nova-scheduler.service openstack-nova-conductor.service openstack-nova-novncproxy.service
启动nova服务:
# systemctl restart openstack-nova-api.service openstack-nova-cert.service openstack-nova-consoleauth.service openstack-nova-scheduler.service openstack-nova-conductor.service openstack-nova-novncproxy.service
查看nova服务:
# systemctl status openstack-nova-api.service openstack-nova-cert.service openstack-nova-consoleauth.service openstack-nova-scheduler.service openstack-nova-conductor.service openstack-nova-novncproxy.service
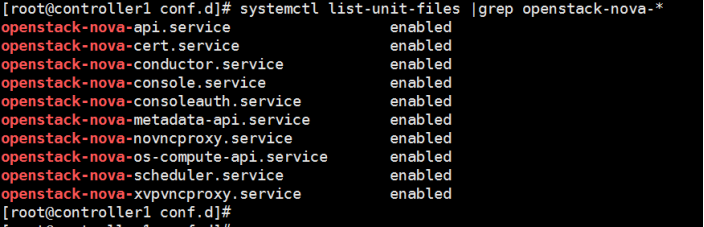
# systemctl list-unit-files |grep openstack-nova-*
11、验证nova服务
# unset OS_TOKEN OS_URL
# source /root/admin-openrc
# nova service-list

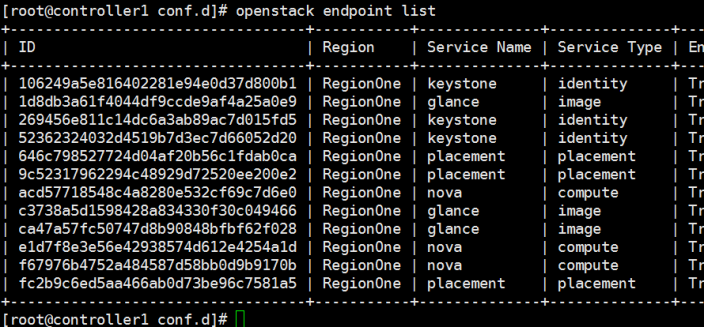
# openstack endpoint list 查看是否有结果正确输出
七、安装配置neutron
网络架构参考: 图片来源于网络宝哥的OCATA单控部署文档


1、创建neutron数据库
MariaDB [(none)]> create database neutron;
2、创建数据库用户并赋予权限
MariaDB [(none)]> grant all privileges on neutron.* to 'neutron'@'localhost' identified by 'passw0rd';
MariaDB [(none)]> grant all privileges on neutron.* to 'neutron'@'%' identified by 'passw0rd';
3、创建neutron用户及赋予admin权限
# source /root/admin-openrc
# openstack user create --domain default neutron --password passw0rd
# openstack role add --project service --user neutron admin
4、创建network服务
# openstack service create --name neutron --description "OpenStack Networking" network
5、创建endpoint
# openstack endpoint create --region RegionOne network public http://controller1:9696
# openstack endpoint create --region RegionOne network internal http://controller1:9696
# openstack endpoint create --region RegionOne network admin http://controller1:9696
6、安装neutron相关软件
# yum install openstack-neutron openstack-neutron-ml2 openstack-neutron-linuxbridge ebtables -y
7、配置neutron配置文件/etc/neutron/neutron.conf
# cp /etc/neutron/neutron.conf /etc/neutron/neutron.conf.bak
# >/etc/neutron/neutron.conf
#/etc/neutron/neutron.conf
[DEFAULT]
core_plugin = ml2
service_plugins = router
allow_overlapping_ips = True
auth_strategy = keystone
transport_url = rabbit://openstack:passw0rd@controller1
notify_nova_on_port_status_changes = True
notify_nova_on_port_data_changes = True
[keystone_authtoken]
auth_uri = http://controller1:5000
auth_url = http://controller1:35357
memcached_servers = controller1:11211
auth_type = password
project_domain_name = default
user_domain_name = default
project_name = service
username = neutron
password = passw0rd
[database]
connection = mysql+pymysql://neutron:passw0rd@controller1/neutron
[nova]
auth_url = http://controller1:35357
auth_type = password
project_domain_name = default
user_domain_name = default
region_name = RegionOne
project_name = service
username = nova
password = passw0rd
[oslo_concurrency]
lock_path = /var/lib/neutron/tmp
8、配置/etc/neutron/plugins/ml2/ml2_conf.ini
[DEFAULT]
[ml2]
type_drivers = flat,vlan,vxlan
mechanism_drivers = linuxbridge,l2population
extension_drivers = port_security
tenant_network_types = vxlan
path_mtu = 1500
[ml2_type_flat]
flat_networks = provider
[ml2_type_geneve]
[ml2_type_gre]
[ml2_type_vlan]
[ml2_type_vxlan]
vni_ranges = 1:1000
[securitygroup]
enable_ipset = True
9、配置/etc/neutron/plugins/ml2/linuxbridge_agent.ini
[DEFAULT]
debug = false
[agent]
prevent_arp_spoofing = True
[linux_bridge]
physical_interface_mappings = provider:eno50338560
[securitygroup]
enable_security_group = True
firewall_driver = neutron.agent.linux.iptables_firewall.IptablesFirewallDriver
[vxlan]
enable_vxlan = True
local_ip = 172.30.125.4
l2_population = True
注意eno50338560是定义的外网网卡,这里是125网段,做floating_ip 用
local_ip 定义的是隧道网络,vxLan下 vm-linuxbridge->vxlan ------tun-----vxlan->linuxbridge-vm
10、配置 /etc/neutron/l3_agent.ini
[DEFAULT]
interface_driver = neutron.agent.linux.interface.BridgeInterfaceDriver
external_network_bridge =
debug = false
11、配置/etc/neutron/dhcp_agent.ini
[DEFAULT]
interface_driver = neutron.agent.linux.interface.BridgeInterfaceDriver
dhcp_driver = neutron.agent.linux.dhcp.Dnsmasq
enable_isolated_metadata = True
verbose = True
debug = false
12、重新配置/etc/nova/nova.conf,配置这步的目的是让compute节点能使用上neutron网络
[neutron]
url = http://controller1:9696
auth_url = http://controller1:35357
auth_plugin = password
project_domain_id = default
user_domain_id = default
region_name = RegionOne
project_name = service
username = neutron
password = passw0rd
service_metadata_proxy = True
metadata_proxy_shared_secret = passw0rd
13、将dhcp-option-force=26,1450写入/etc/neutron/dnsmasq-neutron.conf
# echo "dhcp-option-force=26,1450" >/etc/neutron/dnsmasq-neutron.conf
14、配置/etc/neutron/metadata_agent.ini
[DEFAULT]
nova_metadata_ip = controller1
metadata_proxy_shared_secret = passw0rd
metadata_workers = 4
verbose = True
debug = false
nova_metadata_protocol = http
15、创建硬链接
# ln -s /etc/neutron/plugins/ml2/ml2_conf.ini /etc/neutron/plugin.ini
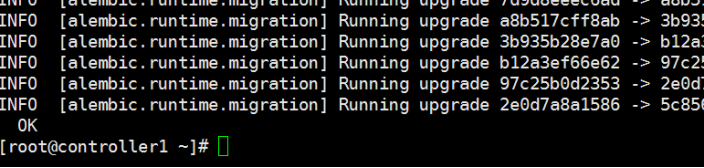
16、同步数据库
# su -s /bin/sh -c "neutron-db-manage --config-file /etc/neutron/neutron.conf --config-file
/etc/neutron/plugins/ml2/ml2_conf.ini upgrade head" neutron
17、重启nova服务,因为刚才改了nova.conf
# systemctl restart openstack-nova-api.service
# systemctl status openstack-nova-api.service
18、重启neutron服务并设置开机启动
# systemctl enable neutron-server.service neutron-linuxbridge-agent.service neutron-dhcp-agent.service neutron-metadata-agent.service
# systemctl restart neutron-server.service neutron-linuxbridge-agent.service neutron-dhcp-agent.service neutron-metadata-agent.service
# systemctl status neutron-server.service neutron-linuxbridge-agent.service neutron-dhcp-agent.service neutron-metadata-agent.service
19、启动neutron-l3-agent.service并设置开机启动
# systemctl enable neutron-l3-agent.service
# systemctl restart neutron-l3-agent.service
# systemctl status neutron-l3-agent.service
20、执行验证
# source /root/admin-openrc
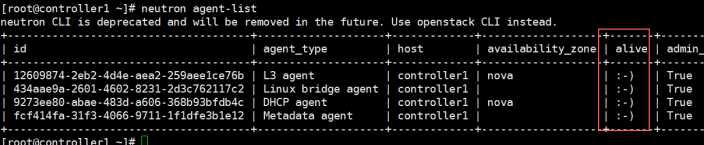
# neutron ext-list
# neutron agent-list
21、创建vxLan模式网络,让虚拟机能外出
A. 首先先执行环境变量
# source /root/admin-openrc
B. 创建flat模式的public网络,注意这个public是外出网络,必须是flat模式的
# neutron --debug net-create --shared provider --router:external True --provider:network_type flat --
provider:physical_network provider
# neutron subnet-create provider 172.30.125.0/24 --name provider-sub --allocation-pool start=172.30.125.7,end=172.30.125.14
-dns-nameserver 8.8.8.8 --gateway 172.30.125.254
C. 创建名为private的私有网络, 网络模式为vxlan
# neutron net-create private --provider:network_type vxlan --router:external False --shared
D. 创建名为private-subnet的私有网络子网,网段为192.168.1.0, 这个网段就是虚拟机获取的私有的IP地址
# neutron subnet-create private --name private-subnet --gateway 192.168.1.1 192.168.1.0/24
F. 创建路由,在界面上操作
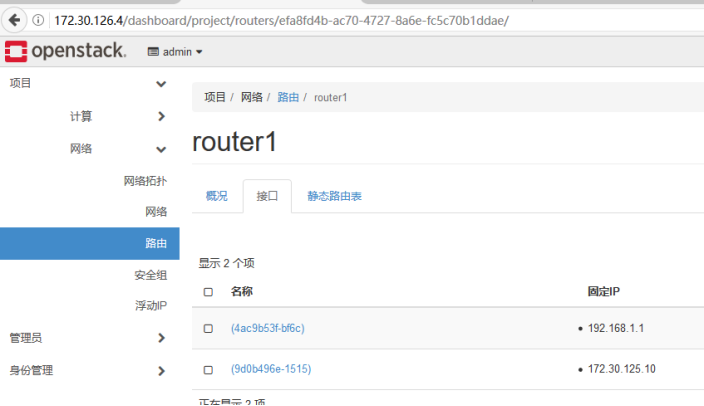
路由名称随便命名,这里写"router1", 管理员状态,选择"上"(up),外部网络选择"provider"
八、安装Dashboard
1、安装dashboard相关软件包
# yum install openstack-dashboard -y
2、修改配置文件/etc/openstack-dashboard/local_settings
# vim /etc/openstack-dashboard/local_settings
3、启动dashboard服务并设置开机启动
# systemctl restart httpd.service memcached.service
# systemctl status httpd.service memcached.service
到此,Controller节点搭建完毕,打开浏览器即可访问horizon界面

九、安装配置cinder
1、创建数据库用户并赋予权限
MariaDB [(none)]> create database cinder;
MariaDB [(none)]> grant all privileges on cinder.* to 'cinder'@'localhost' identified by 'passw0rd';
MariaDB [(none)]> grant all privileges on cinder.* to 'cinder'@'%' identified by 'passw0rd';
2、创建cinder用户并赋予admin权限
# source /root/admin-openrc
# openstack user create --domain default cinder --password passw0rd
# openstack role add --project service --user cinder admin
3、创建volume服务
# openstack service create --name cinder --description "OpenStack Block Storage" volume
# openstack service create --name cinderv2 --description "OpenStack Block Storage" volumev2
4、创建endpoint
# openstack endpoint create --region RegionOne volume public http://controller1:8776/v1/%\(tenant_id\)s
# openstack endpoint create --region RegionOne volume internal http://controller1:8776/v1/%\(tenant_id\)s
# openstack endpoint create --region RegionOne volume admin http://controller1:8776/v1/%\(tenant_id\)s
# openstack endpoint create --region RegionOne volumev2 public http://controller1:8776/v2/%\(tenant_id\)s
# openstack endpoint create --region RegionOne volumev2 internal http://controller1:8776/v2/%\(tenant_id\)s
# openstack endpoint create --region RegionOne volumev2 admin http://controller1:8776/v2/%\(tenant_id\)s
5、安装cinder相关服务
# yum install openstack-cinder -y
6、配置cinder配置文件
# cp /etc/cinder/cinder.conf /etc/cinder/cinder.conf.bak
# >/etc/cinder/cinder.conf
[DEFAULT]
my_ip = 172.30.126.4
auth_strategy = keystone
transport_url = rabbit://openstack:passw0rd@controller1
[database]
connection = mysql+pymysql://cinder:passw0rd@controller1/cinder
[keystone_authtoken]
auth_uri = http://controller1:5000
auth_url = http://controller1:35357
memcached_servers = controller1:11211
auth_type = password
project_domain_name = default
user_domain_name = default
project_name = service
username = cinder
password = passw0rd
[oslo_concurrency]
lock_path = /var/lib/cinder/tmp
7、上同步数据库
# su -s /bin/sh -c "cinder-manage db sync" cinder #同步完一定要查看数据库中是否有表存在

8、在controller上启动cinder服务,并设置开机启动
# systemctl enable openstack-cinder-api.service openstack-cinder-scheduler.service
# systemctl restart openstack-cinder-api.service openstack-cinder-scheduler.service
# systemctl status openstack-cinder-api.service openstack-cinder-scheduler.service
9、
10、安装Cinder节点 从新创建一个节点
Cinder节点这里我们需要额外的添加一个硬盘(/dev/sdb)用作cinder的存储服务 (这一步是在cinder节点
操作的)
# yum install lvm2 -y
10、启动服务并设置为开机自启 (注意!这一步是在cinder节点操作的)
# systemctl enable lvm2-lvmetad.service
# systemctl start lvm2-lvmetad.service
# systemctl status lvm2-lvmetad.service
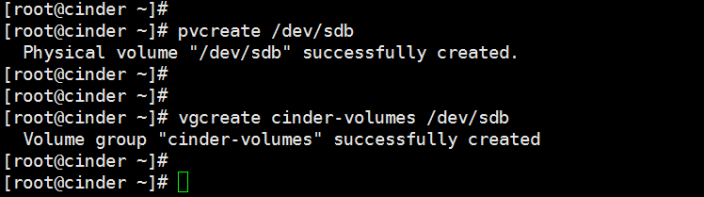
11、创建lvm, 这里的/dev/sdb就是额外添加的硬盘 (注意!这一步是在cinder节点操作的)
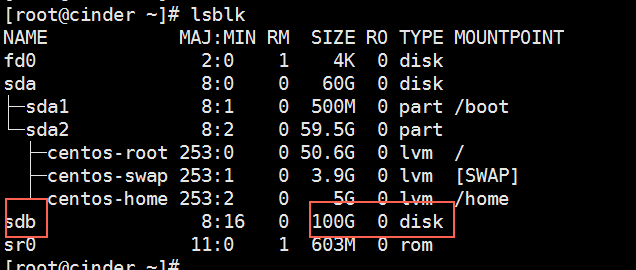
# fdisk -l
# pvcreate /dev/sdb
# vgcreate cinder-volumes /dev/sdb
12. 编辑存储节点lvm.conf文件 (注意!这一步是在cinder节点操作的)
# vim /etc/lvm/lvm.conf
在devices 下面添加 filter = [ "a/sda/", "a/sdb/", "r/.*/"] ,130行 ,如图:

然后重启下lvm2服务:
# systemctl restart lvm2-lvmetad.service
# systemctl status lvm2-lvmetad.service
13、安装openstack-cinder、targetcli (注意!这一步是在cinder节点操作的)
# yum install openstack-cinder openstack-utils targetcli python-keystone ntpdate -y
14、配置cinder配置文件 (注意!这一步是在cinder节点操作的)
# cp /etc/cinder/cinder.conf /etc/cinder/cinder.conf.bak
# >/etc/cinder/cinder.conf
[DEFAULT]
auth_strategy = keystone
my_ip = 172.30.126.5
enabled_backends = lvm
glance_api_servers = http://controller1:9292
glance_api_version = 2
enable_v1_api = True
enable_v2_api = True
enable_v3_api = True
storage_availability_zone = nova
default_availability_zone = nova
os_region_name = RegionOne
api_paste_config = /etc/cinder/api-paste.ini
transport_url = rabbit://openstack:passw0rd@controller1
[database]
connection = mysql+pymysql://cinder:passw0rd@controller1/cinder
[keystone_authtoken]
auth_uri = http://controller1:5000
auth_url = http://controller1:35357
memcached_servers = controller1:11211
auth_type = password
project_domain_name = default
user_domain_name = default
project_name = service
username = cinder
password = passw0rd
[lvm]
volume_driver = cinder.volume.drivers.lvm.LVMVolumeDriver
volume_group = cinder-volumes
iscsi_protocol = iscsi
iscsi_helper = lioadm
[oslo_concurrency]
lock_path = /var/lib/cinder/tmp
15、启动openstack-cinder-volume和target并设置开机启动 (注意!这一步是在cinder节点操作的)
# systemctl enable openstack-cinder-volume.service target.service
# systemctl restart openstack-cinder-volume.service target.service
# systemctl status openstack-cinder-volume.service target.service
16、验证cinder服务是否正常
# source /root/admin-openrc
# cinder service-list

Compute节点部署
一、安装相关依赖包 (centos7.2系统会有几个包版本冲突,自行下载升级解决)
# yum install openstack-selinux python-openstackclient yum-plugin-priorities openstack-nova-compute openstack-utils

1. 配置nova.conf
# cp /etc/nova/nova.conf /etc/nova/nova.conf.bak
# >/etc/nova/nova.conf
# openstack-config --set /etc/nova/nova.conf DEFAULT auth_strategy keystone
# openstack-config --set /etc/nova/nova.conf DEFAULT my_ip 172.30.126.6
# openstack-config --set /etc/nova/nova.conf DEFAULT use_neutron True
# openstack-config --set /etc/nova/nova.conf DEFAULT firewall_driver nova.virt.firewall.NoopFirewallDriver
# openstack-config --set /etc/nova/nova.conf DEFAULT transport_url rabbit://openstack:passw0rd@controller1
# openstack-config --set /etc/nova/nova.conf keystone_authtoken auth_uri http://controller1:5000
# openstack-config --set /etc/nova/nova.conf keystone_authtoken auth_url http://controller1:35357
# openstack-config --set /etc/nova/nova.conf keystone_authtoken memcached_servers controller1:11211
# openstack-config --set /etc/nova/nova.conf keystone_authtoken auth_type password
# openstack-config --set /etc/nova/nova.conf keystone_authtoken project_domain_name default
# openstack-config --set /etc/nova/nova.conf keystone_authtoken user_domain_name default
# openstack-config --set /etc/nova/nova.conf keystone_authtoken project_name service
# openstack-config --set /etc/nova/nova.conf keystone_authtoken username nova
# openstack-config --set /etc/nova/nova.conf keystone_authtoken password passw0rd
# openstack-config --set /etc/nova/nova.conf placement auth_uri http://controller1:5000
# openstack-config --set /etc/nova/nova.conf placement auth_url http://controller1:35357
# openstack-config --set /etc/nova/nova.conf placement memcached_servers controller1:11211
# openstack-config --set /etc/nova/nova.conf placement auth_type password
# openstack-config --set /etc/nova/nova.conf placement project_domain_name default
# openstack-config --set /etc/nova/nova.conf placement user_domain_name default
# openstack-config --set /etc/nova/nova.conf placement project_name service
# openstack-config --set /etc/nova/nova.conf placement username nova
# openstack-config --set /etc/nova/nova.conf placement password passw0rd
# openstack-config --set /etc/nova/nova.conf placement os_region_name RegionOne
# openstack-config --set /etc/nova/nova.conf vnc enabled True
# openstack-config --set /etc/nova/nova.conf vnc keymap en-us
# openstack-config --set /etc/nova/nova.conf vnc vncserver_listen 0.0.0.0
# openstack-config --set /etc/nova/nova.conf vnc vncserver_proxyclient_address 172.30.126.6
# openstack-config --set /etc/nova/nova.conf vnc novncproxy_base_url http://172.30.126.4:6080/vnc_auto.html
# openstack-config --set /etc/nova/nova.conf glance api_servers http://controller1:9292
# openstack-config --set /etc/nova/nova.conf oslo_concurrency lock_path /var/lib/nova/tmp
# openstack-config --set /etc/nova/nova.conf libvirt virt_type qemu #如果是物理机记得改为kvm
2018-1-9-20:39
2. 设置libvirtd.service 和openstack-nova-compute.service开机启动
# systemctl enable libvirtd.service openstack-nova-compute.service
# systemctl restart libvirtd.service openstack-nova-compute.service
# systemctl status libvirtd.service openstack-nova-compute.service
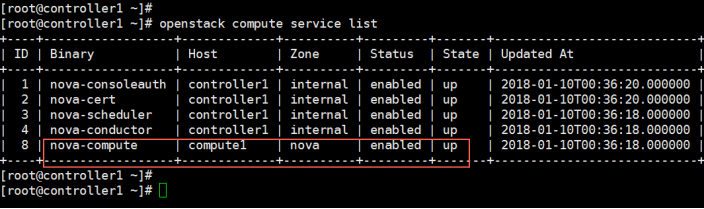
3. 到controller上执行验证
# source /root/admin-openrc
# openstack compute service list
二、安装Neutron
1. 安装相关软件包
# yum install openstack-neutron-linuxbridge ebtables ipset -y
2. 配置neutron.conf
# cp /etc/neutron/neutron.conf /etc/neutron/neutron.conf.bak
# >/etc/neutron/neutron.conf
# openstack-config --set /etc/neutron/neutron.conf DEFAULT auth_strategy keystone
# openstack-config --set /etc/neutron/neutron.conf DEFAULT advertise_mtu True
# openstack-config --set /etc/neutron/neutron.conf DEFAULT dhcp_agents_per_network 2
# openstack-config --set /etc/neutron/neutron.conf DEFAULT control_exchange neutron
# openstack-config --set /etc/neutron/neutron.conf DEFAULT nova_url http://controller1:8774/v2
# openstack-config --set /etc/neutron/neutron.conf DEFAULT transport_url rabbit://openstack:passw0rd@controller1
# openstack-config --set /etc/neutron/neutron.conf keystone_authtoken auth_uri http://controller1:5000
# openstack-config --set /etc/neutron/neutron.conf keystone_authtoken auth_url http://controller1:35357
# openstack-config --set /etc/neutron/neutron.conf keystone_authtoken memcached_servers controller1:11211
# openstack-config --set /etc/neutron/neutron.conf keystone_authtoken auth_type password
# openstack-config --set /etc/neutron/neutron.conf keystone_authtoken project_domain_name default
# openstack-config --set /etc/neutron/neutron.conf keystone_authtoken user_domain_name default
# openstack-config --set /etc/neutron/neutron.conf keystone_authtoken project_name service
# openstack-config --set /etc/neutron/neutron.conf keystone_authtoken username neutron
# openstack-config --set /etc/neutron/neutron.conf keystone_authtoken password passw0rd
# openstack-config --set /etc/neutron/neutron.conf oslo_concurrency lock_path /var/lib/neutron/tmp
3. 配置/etc/neutron/plugins/ml2/linuxbridge_agent.ini
# openstack-config --set /etc/neutron/plugins/ml2/linuxbridge_agent.ini linux_bridge physical_interface_mappings
provider:eno50338560
# openstack-config --set /etc/neutron/plugins/ml2/linuxbridge_agent.ini vxlan enable_vxlan True
# openstack-config --set /etc/neutron/plugins/ml2/linuxbridge_agent.ini vxlan local_ip 172.30.126.6
# openstack-config --set /etc/neutron/plugins/ml2/linuxbridge_agent.ini vxlan l2_population True
# openstack-config --set /etc/neutron/plugins/ml2/linuxbridge_agent.ini securitygroup enable_security_group True
# openstack-config --set /etc/neutron/plugins/ml2/linuxbridge_agent.ini securitygroup firewall_driver
neutron.agent.linux.iptables_firewall.IptablesFirewallDriver
注意provider后面那个eno50338560网卡名做floating_ip 网卡的名称。
4. 配置nova.conf
# openstack-config --set /etc/nova/nova.conf neutron url http://controller1:9696
# openstack-config --set /etc/nova/nova.conf neutron auth_url http://controller1:35357
# openstack-config --set /etc/nova/nova.conf neutron auth_type password
# openstack-config --set /etc/nova/nova.conf neutron project_domain_name default
# openstack-config --set /etc/nova/nova.conf neutron user_domain_name default
# openstack-config --set /etc/nova/nova.conf neutron region_name RegionOne
# openstack-config --set /etc/nova/nova.conf neutron project_name service
# openstack-config --set /etc/nova/nova.conf neutron username neutron
# openstack-config --set /etc/nova/nova.conf neutron password passw0rd
5. 重启和enable相关服务
# systemctl restart libvirtd.service openstack-nova-compute.service
# systemctl enable neutron-linuxbridge-agent.service 计算节点只有neutron-agent服务
# systemctl restart neutron-linuxbridge-agent.service
# systemctl status libvirtd.service openstack-nova-compute.service neutron-linuxbridge-agent.service
三、计算节点结合Cinder
1.计算节点要是想用cinder,那么需要配置nova配置文件 (注意!这一步是在计算节点操作的)
# openstack-config --set /etc/nova/nova.conf cinder os_region_name RegionOne
# systemctl restart openstack-nova-compute.service
2.然后在controller上重启nova服务
# systemctl restart openstack-nova-api.service
# systemctl status openstack-nova-api.service
四. 在controler上执行验证
# source /root/admin-openrc
# neutron agent-list
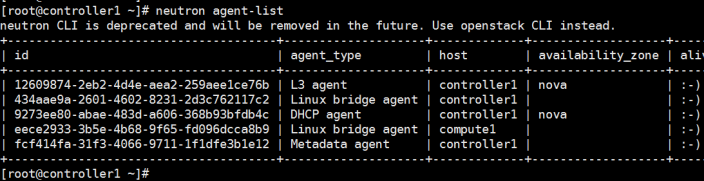
# nova-manage cell_v2 discover_hosts
到此,Compute节点搭建完毕,运行nova host-list可以查看新加入的compute1节点
如果需要再添加另外一个compute节点,只要重复下第二步即可,记得把计算机名和IP地址改下。
创建配额命令
# openstack flavor create m1.tiny --id 1 --ram 512 --disk 1 --vcpus 1
# openstack flavor list
.
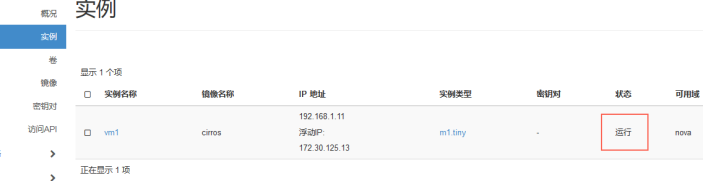
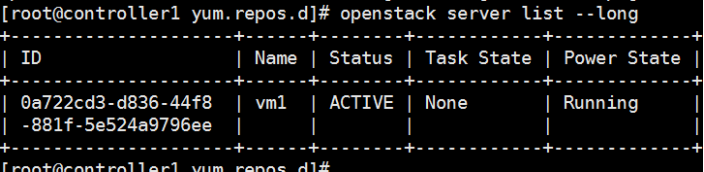
四,创建instance
thanks !
It’s over !!!

 浙公网安备 33010602011771号