MySQL 8.x 新版本特性赶紧学!!Linux 服务器上安装 MySQL 8.x
我是陈皮,一个在互联网 Coding 的 ITer,微信搜索「陈皮的JavaLib」第一时间阅读最新文章,回复【资料】,即可获得我精心整理的技术资料,电子书籍,一线大厂面试资料和优秀简历模板。
引言
众所周知,MySQL 8.x 版本做了一些比较大的改动优化,也希望大家能去了解下 MySQL 8 版本的一些新特性和优化点。工欲善其事必先利其器,那就必须要安装上 MySQL 8 版本的数据库才能体验学习,所以下面介绍如何在 Linux 服务器上安装 MySQL 8.X 版本数据库。
此次演示在 CentOS 7.x Linux 服务器上通过压缩包的方式安装 MySQL 8.x 数据库。
安装步骤
安装包官方下载地址:https://dev.mysql.com/downloads/mysql/
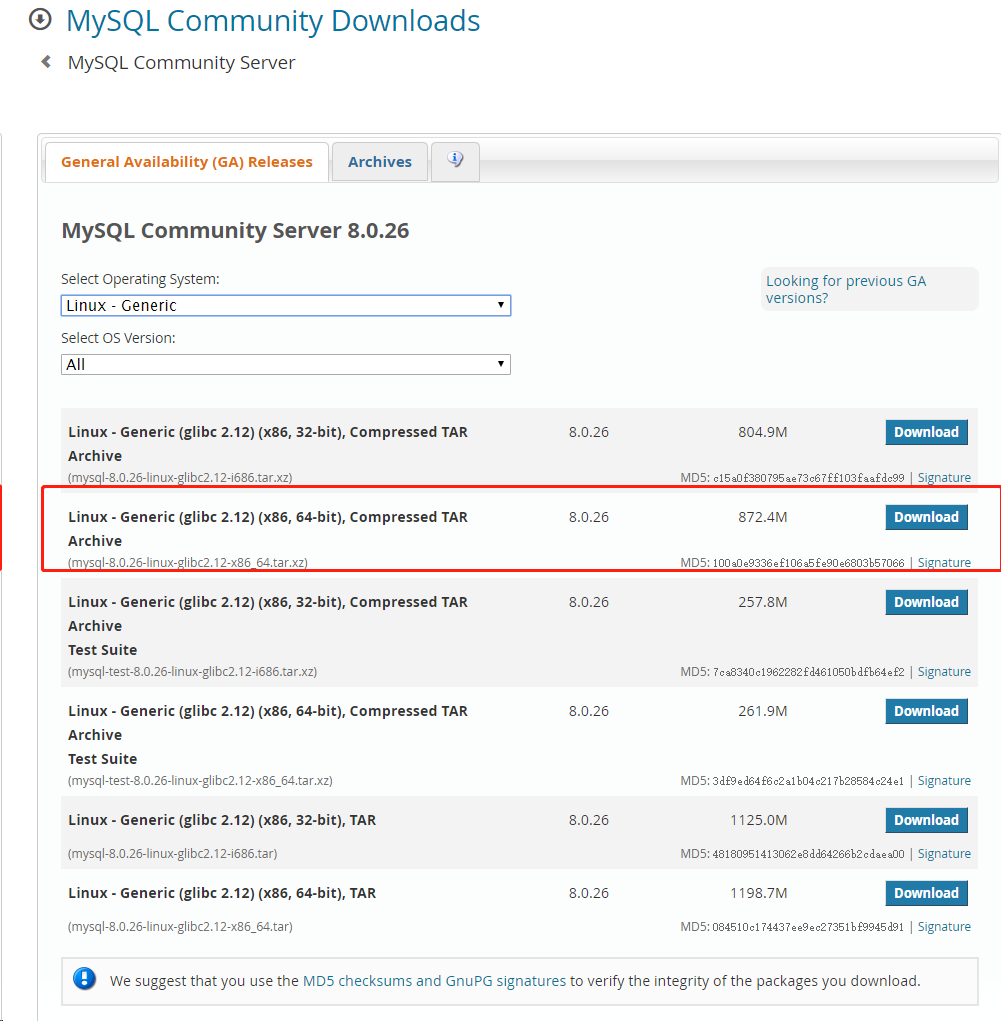

将下载后的压缩包上传到 Linux 服务器,解压缩。
tar -xvf mysql-8.0.26-linux-glibc2.12-x86_64.tar.xz
将解压后的文件夹重命名为 mysql,并且移动到 /usr/local/ 目录下。
mv mysql-8.0.26-linux-glibc2.12-x86_64 /usr/local/mysql
进入到 /usr/local/mysql 目录下,创建存放数据库数据的文件夹 data。
cd /usr/local/mysql/
mkdir data
在 mysql 目录下新建 tmp 文件夹,并修改文件夹的权限。
mkdir tmp
chmod 777 /tmp
创建 mysql 用户组和 mysql 用户,并且将 mysql 目录极其下面所有文件权限分配给 mysql 用户。
groupadd mysql
useradd -g mysql mysql
chown -R mysql.mysql /usr/local/mysql/
在 mysql 目录下执行以下命令,进行数据库初始化。初始化成功之后,会打印 root 用户的临时密码,记住后面需要用到。
bin/mysqld --initialize --user=mysql --basedir=/usr/local/mysql --datadir=/usr/local/mysql/data

修改 mysql 的配置信息,打开 my.cnf 配置文件。
vim /etc/my.cnf
my.cnf 配置文件的原始内容如下:
[mysqld]
datadir=/var/lib/mysql
socket=/var/lib/mysql/mysql.sock
# Disabling symbolic-links is recommended to prevent assorted security risks
symbolic-links=0
# Settings user and group are ignored when systemd is used.
# If you need to run mysqld under a different user or group,
# customize your systemd unit file for mariadb according to the
# instructions in http://fedoraproject.org/wiki/Systemd

[mysqld_safe]
log-error=/var/log/mariadb/mariadb.log
pid-file=/var/run/mariadb/mariadb.pid

#
# include all files from the config directory
#
!includedir /etc/my.cnf.d
将配置文件的内容修改为如下所示:
[mysqld]
basedir=/usr/local/mysql
datadir=/usr/local/mysql/data
socket=/usr/local/mysql/mysql.sock
character-set-server=utf8
port=3306
sql_mode=NO_ENGINE_SUBSTITUTION,STRICT_TRANS_TABLES
[client]
socket=/usr/local/mysql/mysql.sock
default-character-set=utf8
将 mysql 添加到开机自启项中,复制 mysql.server 文件到 /etc/init.d/ 目录下并且重命名为 mysql,赋予运行权限,从而我们就可以使用 service mysql xx 命令进行启停 mysql 服务。
cp ./support-files/mysql.server /etc//init.d/mysql
chmod +x /etc/init.d/mysql
将 mysql 注册为服务。
chkconfig --add mysql
使用 chkconfig --list mysql 命令查看是否注册成功。
[root@chenpi mysql]# chkconfig --list mysql

Note: This output shows SysV services only and does not include native
      systemd services. SysV configuration data might be overridden by native
      systemd configuration.

      If you want to list systemd services use 'systemctl list-unit-files'.
      To see services enabled on particular target use
      'systemctl list-dependencies [target]'.

mysql           0:off   1:off   2:on    3:on    4:on    5:on    6:off
启动服务,并查看服务状态。
[root@chenpi mysql]# service mysql start
Starting MySQL.Logging to '/usr/local/mysql/data/chenpi.err'.
. SUCCESS!

[root@chenpi mysql]# service mysql status
 SUCCESS! MySQL running (1622)
将 mysql 命令软连接到 /usr/bin 用户执行目录下。
ln -s /usr/local/mysql/bin/mysql /usr/bin
连接 mysql 服务,密码输入刚才安装时生成的临时密码。
mysql -uroot -p
修改密码。
ALTER USER 'root'@'localhost' IDENTIFIED WITH mysql_native_password BY '新密码';

mysql> ALTER USER 'root'@'localhost' IDENTIFIED WITH mysql_native_password BY '123456';
Query OK, 0 rows affected (0.02 sec)
设置允许使用 root 用户远程连接,至此,mysql 服务安装完成了。
use mysql
update user set host ='%' where user='root';
FLUSH PRIVILEGES;
退出 mysql 使用命令 exit。

 浙公网安备 33010602011771号