项目部署 : uwsgi + nginx
服务器环境准备阶段:
安装Python3:
    1、安装gcc,用于编译Python源码
        yum install gcc
    2、下载源码包,https://www.python.org/ftp/python/
    3、解压并进入源码文件
    4、编译安装
        ./configure
        make all
        make install
    模式:/usr/local/bin/python3

安装django:
    pip3 install django==2.0.1

报错:no module _sqlite3
    yum install sqlite-devel

    重新编译安装py3
    ./configure
    make
    make install
第一阶段:代码上线
将本地代码打包,拷贝到服务器上
mac/linux:
    scp    本地文件路径    root@192.168.13.200:/home/ubuntu/temp就这样就OK了
windows:
    用一些软件、Xshell,Xftp
    yum install lrzsz  # xhell上传文件需要
    yum install unzip   # 解压需要
    unzip ***.zip
第二阶段:
- 解压
- 配置:ALLOWED_HOSTS = ['*',]
- 配置:DEBUG = False
- 找到django程序中每一个app和全局的静态文件,放置到某处。

- python3 manage.py runserver 0.0.0.0:8000
当debug设置为False时,会出现静态文件找不到的情况
需要在settings.py 写这个
STATIC_ROOT = "allstatic"
python3 manage.py selectstatic # 收集静态文件,但是django对css的处理效果很差
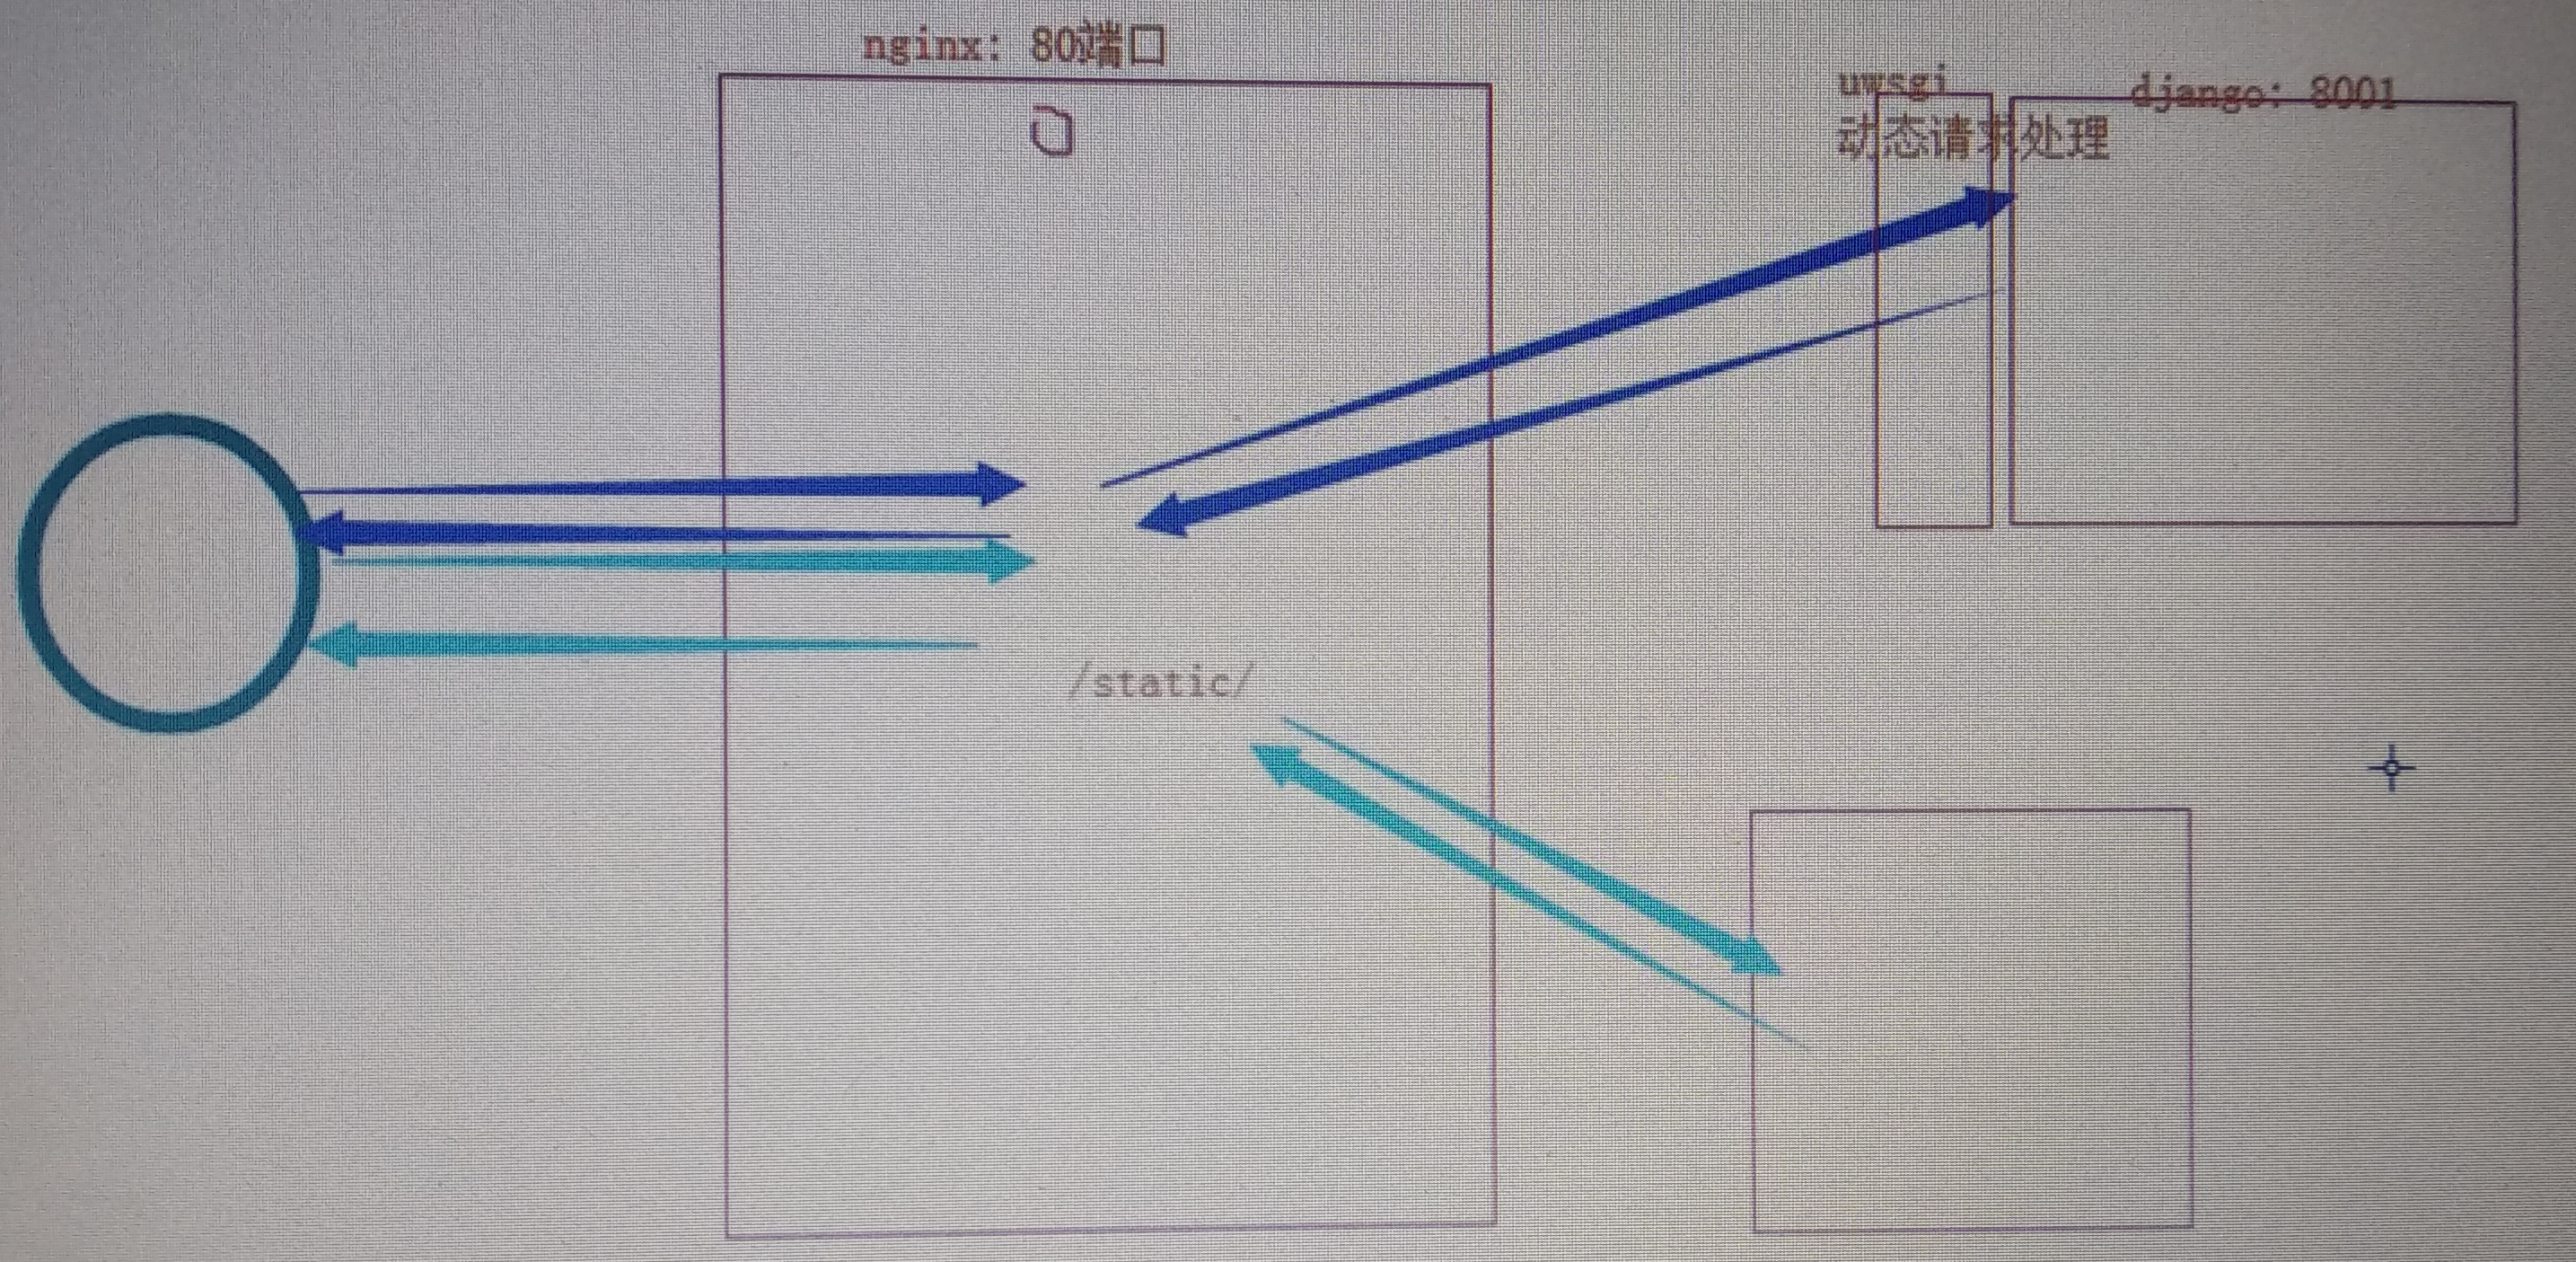
# 因此用nginx提高效率
yum install nginx
# 修改配置文件 /etc/nginx/nginx.conf
include /etc/nginx/my_django_nginx.conf;


###############################my_django_nginx.conf###############
upstream django {
    server 127.0.0.1:8008;
}

server {
    listen      80;
    server_name 193.112.27.150 ;
    charset     utf-8;
    client_max_body_size 75M;

  gzip on;    # 启用压缩,
  gzip_types  text/plain application/x-javascript text/css text/javascript application/x-httpd-php application/json text/json image/jpeg image/gif image/png application/octet-stream;

  error_page 404  /404.html;  # 错误页面
  error_page  500 502 503 504  /50x.html;# 错误页面


    location /static {
        alias /home/ubuntu/myblog/allstatic;
    }

    location /{
        uwsgi_pass  django;
        include     uwsgi_params;  # 导入uwsgi   和uWSGI进行通讯
    }
}
# nginx只做转发
[uwsgi]
chdir = /home/ubuntu/myblog/
http = 127.0.0.1:8008
wsgi-file = myblog/uwsgi.py
module = myblog.wsgi
post-buffering = 8192
max-requests = 5000
threads=8
processes       = 2
disable-logging = true
master=true
vacuum = true
# 日志记录
daemonize = /home/ubuntu/myblog/uwsgi.log
# 程序运行的记录
# logto= /home/ubuntu/myblog/error.log
systemctl start nginx
uwsgi替换原来的wsgiref
pip3 install uwsgi
uwsgi启动django : uwsgi --ini uwsgi_myblog.ini

 浙公网安备 33010602011771号