


NIO的缓冲区
继承体系
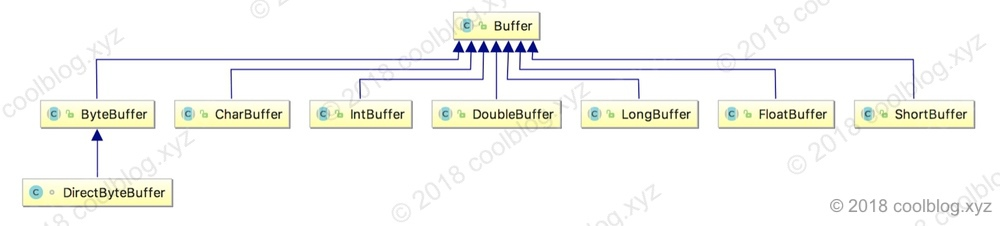
Buffer 的继承类比较多,用于存储各种类型的数据。包括 ByteBuffer、CharBuffer、IntBuffer、FloatBuffer 等等。这其中,ByteBuffer 最为常用。所以接下来将会主要分析 ByteBuffer 的实现。Buffer 的继承体系图如下:
属性及相关操作
Buffer 本质就是一个数组,只不过在数组的基础上进行适当的封装,方便使用。 Buffer 中有几个重要的属性,通过这几个属性来显示数据存储的信息。这个属性分别是:
| 属性 | 说明 |
|---|---|
| capacity 容量 | Buffer 所能容纳数据元素的最大数量,也就是底层数组的容量值。在创建时被指定,不可更改。 |
| position 位置 | 下一个被读或被写的位置 |
| limit 上界 | 可供读写的最大位置,用于限制 position,position < limit |
| mark 标记 | 位置标记,用于记录某一次的读写位置,可以通过 reset 重新回到这个位置 |
ByteBuffer 初始化
ByteBuffer 可通过 allocate、allocateDirect 和 wrap 等方法初始化,这里以 allocate 为例:
public static ByteBuffer allocate(int capacity) {
    if (capacity < 0)
        throw new IllegalArgumentException();
    return new HeapByteBuffer(capacity, capacity);
}

HeapByteBuffer(int cap, int lim) {
    super(-1, 0, lim, cap, new byte[cap], 0);
}

ByteBuffer(int mark, int pos, int lim, int cap, byte[] hb, int offset) {
    super(mark, pos, lim, cap);
    this.hb = hb;
    this.offset = offset;
}
上面是 allocate 创建 ByteBuffer 的过程,ByteBuffer 是抽象类,所以实际上创建的是其子类 HeapByteBuffer。HeapByteBuffer 在构造方法里调用父类构造方法,将一些参数值传递给父类。最后父类再做一次中转,相关参数最终被传送到 Buffer 的构造方法中了。我们再来看一下 Buffer 的源码:
public abstract class Buffer {

    // Invariants: mark <= position <= limit <= capacity
    private int mark = -1;
    private int position = 0;
    private int limit;
    private int capacity;

    Buffer(int mark, int pos, int lim, int cap) {       // package-private
        if (cap < 0)
            throw new IllegalArgumentException("Negative capacity: " + cap);
        this.capacity = cap;
        limit(lim);
        position(pos);
        if (mark >= 0) {
            if (mark > pos)
                throw new IllegalArgumentException("mark > position: ("+ mark + " > " + pos + ")");
            this.mark = mark;
        }
    }
}
Buffer 创建完成后,底层数组的结构信息如下:

ByteBuffer 读写操作
ByteBuffer 读写操作时通过 get 和 put 完成的,这两个方法都有重载,我们只看其中一个。
// 读操作
public byte get() {
    return hb[ix(nextGetIndex())];
}

final int nextGetIndex() {
    if (position >= limit)
        throw new BufferUnderflowException();
    return position++;
}

// 写操作
public ByteBuffer put(byte x) {
    hb[ix(nextPutIndex())] = x;
    return this;
}

final int nextPutIndex() {
    if (position >= limit)
        throw new BufferOverflowException();
    return position++;
}
读写操作都会修改 position 的值,每次读写的位置是当前 position 的下一个位置。通过修改 position,我们可以读取指定位置的数据。当然,前提是 position < limit。Buffer 中提供了position(int) 方法用于修改 position 的值。
public final Buffer position(int newPosition) {
    if ((newPosition > limit) || (newPosition < 0))
        throw new IllegalArgumentException();
    position = newPosition;
    if (mark > position) mark = -1;
    return this;
}
当我们向一个刚初始化好的 Buffer 中写入一些数据时,数据存储示意图如下:

如果我们想读取刚刚写入的数据,就需要修改 position 的值。否则 position 将指向没有存储数据的空间上,读取空白空间是没意义的。如上图,我们可以将 position 设置为 0,这样就能从头读取刚刚写入的数据。

仅修改 position 的值是不够的,如果想正确读取刚刚写入的数据,还需修改 limit 的值,不然还是会读取到空白空间上的内容。我们将 limit 指向数据区域的尾部,即可避免这个问题。修改 limit 的值通过 limit(int) 方法进行。
public final Buffer limit(int newLimit) {
    if ((newLimit > capacity) || (newLimit < 0))
        throw new IllegalArgumentException();
    limit = newLimit;
    if (position > limit) position = limit;
    if (mark > limit) mark = -1;
    return this;
}
修改后,数据存储示意图如下:

上面为了正确读取写入的数据,需要两步操作。Buffer 中提供了一个便利的方法,将这两步操作合二为一,即 flip 方法。
public final Buffer flip() {
    // 1. 设置 limit 为当前位置
    limit = position;
    // 1. 设置 position 为0
    position = 0;
    mark = -1;
    return this;
}
ByteBuffer 标记
在读取或写入的过程中,可以在感兴趣的位置打上一个标记,这样我们可以通过这个标记再次回到这个位置。Buffer 中,打标记的方法是 mark,回到标记位置的方法时 reset。简单看下源码吧。
public final Buffer mark() {
    mark = position;
    return this;
}

public final Buffer reset() {
    int m = mark;
    if (m < 0)
        throw new InvalidMarkException();
    position = m;
    return this;
}
打标记及回到标记位置的流程如下:

DirectByteBuffer
在 ByteBuffer 初始化一节中,我介绍了 ByteBuffer 的 allocate 方法,该方法实际上创建的是 HeapByteBuffer 对象。除了 allocate 方法,ByteBuffer 还有一个方法 allocateDirect。这个方法创建的是 DirectByteBuffer 对象。两者有什么区别呢?简单的说,allocate 方法所请求的空间是在 JVM 堆内进行分配的,而 allocateDirect 请求的空间则是在 JVM 堆外的,这部分空间不被 JVM 所管理。那么堆内空间和堆空间在使用上有什么不同呢?用一个表格列举一下吧。
| 空间类型 | 优点 | 缺点 |
|---|---|---|
| 堆内空间 | 分配速度快 | JVM 整理内存空间时,堆内空间的位置会被搬动,比较笨重 |
| 堆外空间 | 1. 空间位置固定,不用担心空间被 JVM 随意搬动 2. 降低堆内空间的使用率 |
1. 分配速度慢 2. 回收策略比较复杂 |
参考:
http://www.tianxiaobo.com/2018/03/04/Java-NIO%E4%B9%8B%E7%BC%93%E5%86%B2%E5%8C%BA/


 浙公网安备 33010602011771号