MPR121 Breakout 更改 I2C 地址
MPR121 Breakout 是一个 接近 电容式 触摸传感器,连接到arduino、esp32等单片机,可以用来做一些 触摸 感应的小玩意。
他有12个触摸点,使用 i2c 协议来操控,非常方便。
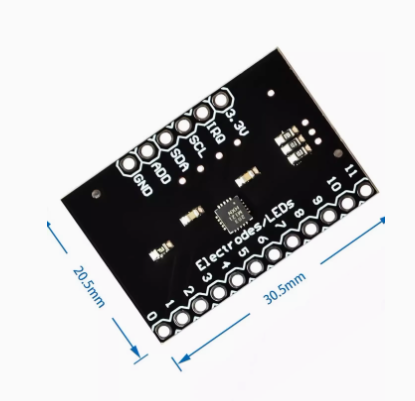

默认情况下,Add 引脚 接地了,板子的i2c地址是 0x5A,如果你要同时连接多个 板子,那么 i2c 地址就冲突了。你只能使用i2c复用板来解决了。
但是,但是。。。。。板子的设计师考虑的很周到,可以短接引脚获取不同的地址,点赞!
1 The MPR121 ADDR pin is pulled to ground and has a default I2C address of 0x5A
2 You can adjust the I2C address by connecting ADDR to other pins:
3
4 ADDR not connected: 0x5A
5 ADDR tied to 3V: 0x5B
6 ADDR tied to SDA: 0x5C
7 ADDR tied to SCL: 0x5D
简单说,add连到3v3后地址是0x5b,add连到sda后地址是0x5c,add连到scl后地址是0x5d
具体怎么操作呢,看下图,箭头处就是add引脚跳线的地方。
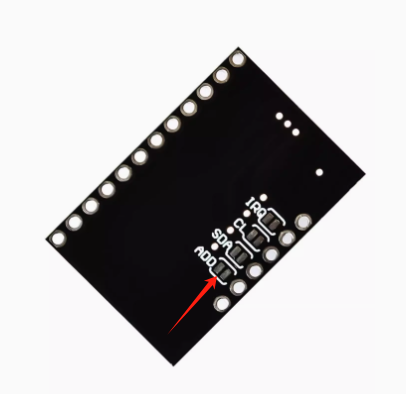
将下图箭头所指横线切断,可以用小刀、美工刀,动作慢点,切割后用万用表测试一下,两端不通电即可。

然后将add的右侧,焊接一个飞线连接到3v3、sda、scl 三个中的一个即可。
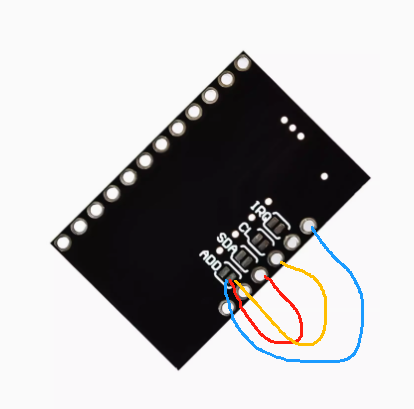
不焊接也行,直接在add引脚插一个杜邦线,另外一端插到3v3、sda、scl 三个中的一个即可。
下面是arduino获取2个板子i2c地址的测试代码:
#include <Wire.h>

void setup() {
  Wire.begin();
  Serial.begin(9600);
  Serial.println("\nI2C Scanner");


  Serial.println("Scanning...");
  delay(2000);


}

void loop() {
  int nDevices;
  nDevices = 0;
  byte error, address;
  for (address = 1; address < 127; address++ ) {
    Wire.beginTransmission(address);
    error = Wire.endTransmission();
    if (error == 0) {
      Serial.print("I2C device found at address 0x");
      if (address < 16) {
        Serial.print("0");
      }
      Serial.println(address, HEX);
      nDevices++;
    }
    else if (error == 4) {
      Serial.print("Unknown error at address 0x");
      if (address < 16) {
        Serial.print("0");
      }
      Serial.println(address, HEX);
    }
  }
  if (nDevices == 0) {
    Serial.println("No I2C devices found\n");
  }
  else {
    Serial.println("done\n");
  }

  Serial.print("i2c devices found:");
  Serial.println(nDevices);

  delay(5000);
}
运行结果:
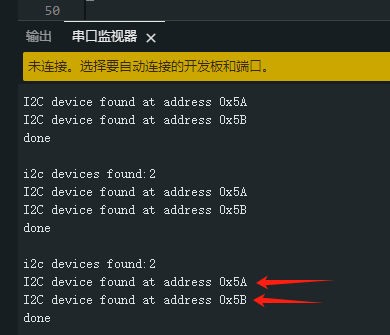
完美!最多可接4个板子,够了够了!

 浙公网安备 33010602011771号