Web3D编程入门总结——面向对象的基础Web3D框架
本篇主要通过分析Tony Parisi的sim.js库(原版代码托管于:https://github.com/tparisi/WebGLBook/tree/master/sim),总结基础Web3D框架的编写方法。在上一篇的基础上,要求读者具有简短英文阅读或者查字典的能力。
限于水平和时间,本文难免出现错误与遗漏,您在阅读过程中如果遇到错误或者疑问请在评论区中指出,我将尽快回复。
为提高JavaScript编程效率,建议使用WebStorm工具进行网页程序编写,WebStorm官网:http://www.jetbrains.com/webstorm/。
上一篇中,我们把程序的所有文件放在同一个目录下,这种文件组织方式适用于简单的功能测试,但当文件数量更多时则会变得混乱不堪,我们在编写一般规模的Web3D程序时可参考下图进行文件组织:

该组织方式把JavaScript文件分为LIB和PAGE两部分,LIB保存一般不做修改的库文件,PAGE保存为特定页面编写的js文件,如果页面js较多可在PAGE中再分离出子文件夹。
MODEL下的每个文件夹都是一个JSON类型的模型,可以看到其中有保存纹理信息的jpg文件和保存顶点数组、法线向量、纹理坐标的文本文件。
上一篇的代码中,我们把所有需要多次调用的对象设为了全局变量和全局函数,当代码量增多时这种“全局管理”方式将面临巨大的挑战,随然我们可以用规范的变量命名或者变量数组来尽可能避免变量名重复,但全局管理方式仍缺少对变量间关系的描述方法,这时使用“面向对象”的变量管理方法似乎是唯一的选择。
下面进入正题:
  1 //代码截取自https://github.com/tparisi/WebGLBook/tree/master/sim,在那里Tony Parisi的Sim库依照旧版Three.js库编写,为了使用新版本Three.js库我对Sim.js进行了部分修改,修改点附近以“@@”标记
  2 // Sim.js - A Simple Simulator for WebGL (based on Three.js)
  3 //Sim.js是一个基于Three.js的WebGL简单框架
  4 Sim = {};//Sim是一个自包含对象,库中的其他变量和函数都是这个自包含对象的属性,可以在库的外部通过“Sim.”的方式调用库内的方法。
  5
  6 // Sim.Publisher - base class for event publishers
  7 //Publish/Subscribe消息通信,用来优化多个对象之间的消息传递,事实上Tony Parisi的WebGL著作里并没有真正使用这种消息传递方法,关于Publish/Subscribe的简单例程可以参考:http://www.mamicode.com/info-detail-502782.html
  8 Sim.Publisher = function() {
  9     this.messageTypes = {};
 10 }
 11
 12 Sim.Publisher.prototype.subscribe = function(message, subscriber, callback) {
 13     var subscribers = this.messageTypes[message];
 14     if (subscribers)
 15     {
 16         if (this.findSubscriber(subscribers, subscriber) != -1)
 17         {
 18             return;
 19         }
 20     }
 21     else
 22     {
 23         subscribers = [];
 24         this.messageTypes[message] = subscribers;
 25     }
 26
 27     subscribers.push({ subscriber : subscriber, callback : callback });
 28 }
 29
 30 Sim.Publisher.prototype.unsubscribe =  function(message, subscriber, callback) {
 31     if (subscriber)
 32     {
 33         var subscribers = this.messageTypes[message];
 34
 35         if (subscribers)
 36         {
 37             var i = this.findSubscriber(subscribers, subscriber, callback);
 38             if (i != -1)
 39             {
 40                 this.messageTypes[message].splice(i, 1);
 41             }
 42         }
 43     }
 44     else
 45     {
 46         delete this.messageTypes[message];
 47     }
 48 }
 49
 50 Sim.Publisher.prototype.publish = function(message) {
 51     var subscribers = this.messageTypes[message];
 52
 53     if (subscribers)
 54     {
 55         for (var i = 0; i < subscribers.length; i++)
 56         {
 57             var args = [];
 58             for (var j = 0; j < arguments.length - 1; j++)
 59             {
 60                 args.push(arguments[j + 1]);
 61             }
 62             subscribers[i].callback.apply(subscribers[i].subscriber, args);
 63         }
 64     }
 65 }
 66
 67 Sim.Publisher.prototype.findSubscriber = function (subscribers, subscriber) {
 68     for (var i = 0; i < subscribers.length; i++)
 69     {
 70         if (subscribers[i] == subscriber)
 71         {
 72             return i;
 73         }
 74     }
 75
 76     return -1;
 77 }
 78
 79 // Sim.App - application class (singleton)
 80 //Sim.App属性对“绘制环境”的封装(这里认为一个canvas里只有一个绘制环境)
 81 Sim.App = function()
 82 {
 83     Sim.Publisher.call(this);
 84     //call表示this(Sim.App)继承自Sim.Publisher,意指在Sim.App的上下文环境使用Sim.Publisher的“构造方法”,也就是使用Sim.App与Sim.Publisher重叠的属性(这里没有)执行了this.messageTypes = {};语句,为App对象建立了消息一个队列。
 85
 86     this.renderer = null;
 87     this.scene = null;
 88     this.camera = null;
 89     this.objects = [];
 90     //可见App对象包含了canvas的上下文、与显卡的交互接口、相机设置、物体数组
 91 }
 92
 93 Sim.App.prototype = new Sim.Publisher;
 94 //prototype表示Sim.App扩展自new Sim.Publisher,当调用Sim.App中的某个未定义的方法时,编译器会尝试到prototype中去寻找,如App.subscribe
 95 //prototype.init表示使用init方法对Sim.App进行原型拓展,这样所有的var myApp=new Sim.App都会自动具有init方法(找不到时去prototype中找);这与"Sim.App.init"是不同的,如果后着的init不在App的“构造方法”中定义,myApp是不会具有init方法的。
 96 Sim.App.prototype.init = function(param)//绘图环境初始化
 97 {
 98     param = param || {};
 99     var container = param.container;
100     var canvas = param.canvas;
101
102     // Create the Three.js renderer, add it to our div
103     //@@这一段是我自己改的,加入了没有显卡时的软件渲染选择,可惜CanvasRenderer只支持部分的Three.js功能,并且没有找到去除图元边线的方法。
104
105     function webglAvailable()//是否可用webgl
106     {
107         try{
108             var canvas=document.createElement("canvas");
109             return !!(window.WebGLRenderingContext
110             &&(canvas.getContext("webgl")||canvas.getContext("experimental-webgl"))
111             );
112         }catch(e){
113             return false;
114         }
115     }
116     if(webglAvailable()){
117         var renderer=new THREE.WebGLRenderer({ antialias: true, canvas: canvas });
118     }else{
119         var renderer=new THREE.CanvasRenderer({ antialias: true, canvas: canvas });//对于支持html5但不支持webgl的情况,使用更慢一些的2Dcanvas来软件实现webgl的效果
120     }
121     //var renderer = new THREE.WebGLRenderer( { antialias: true, canvas: canvas } );
122     //@@
123
124     renderer.setClearColor( 0xffffff );//@@旧版本中这个是默认的
125     renderer.setSize(container.offsetWidth, container.offsetHeight);
126     container.appendChild( renderer.domElement );
127     container.onfocus=function(){
128         renderer.domElement.focus();//@@保持焦点!!
129     }
130     //在部分浏览器中canvas不具备保持焦点的能力,点击canvas时焦点会被设置在外面的container上,影响交互效果
131
132     // Create a new Three.js scene
133     var scene = new THREE.Scene();
134     scene.add( new THREE.AmbientLight( 0x505050 ) );
135     scene.data = this;
136
137     // Put in a camera at a good default location
138     camera = new THREE.PerspectiveCamera( 45, container.offsetWidth / container.offsetHeight, 1, 10000 );
139     camera.position.set( 0, 0, 3.3333 );
140
141     scene.add(camera);
142
143     // Create a root object to contain all other scene objects
144     //建立了一个“根物体”,来存放场景中的其他物体,也就是根物体移动时所有其他物体会和它一同移动
145     var root = new THREE.Object3D();
146     scene.add(root);
147
148     // Create a projector to handle picking
149     //建立一个“投影器”来处理三维空间中的点选,@@新版本中去掉了这个属性,这里的定义是多余的
150     var projector = new THREE.Projector();
151
152     // Save away a few things
153     //把上面的属性设为App对象的“公有”属性,var则是App对象的“私有”属性
154     this.container = container;
155     this.renderer = renderer;
156     this.scene = scene;
157     this.camera = camera;
158     this.projector = projector;
159     this.root = root;
160
161     // Set up event handlers
162     //启动事件响应功能
163     this.initMouse();
164     this.initKeyboard();
165     this.addDomHandlers();
166 }
167
168 //Core run loop
169 //核心循环
170 Sim.App.prototype.run = function()
171 {
172     this.update();
173     this.renderer.render( this.scene, this.camera );
174     var that = this;//之所以使用that是为了保存此时的this状态,requestAnimationFrame会在“浏览器认为合适”的时候重调,而那时的“this”可能已经发生变化了。
175     //requestAnimationFrame(function() { that.run(); });
176     requestAnimFrame(function() { that.run(); });//@@换用了另一个帧动画库
177 }
178
179 // Update method - called once per tick
180 //场景更新方法,这里的代码逻辑运行在浏览器端,是CPU资源的主要消耗者
181 Sim.App.prototype.update = function()
182 {
183     var i, len;
184     len = this.objects.length;
185     for (i = 0; i < len; i++)
186     {//将App的update转化为其所包含的objects的update
187         this.objects[i].update();
188     }
189 }
190
191 // Add/remove objects
192 //在场景中添加或删除一个物体
193 //添加
194 Sim.App.prototype.addObject = function(obj)
195 {
196     this.objects.push(obj);//将物体对象添加到前面建立的物体数组里
197
198     // If this is a renderable object, add it to the root scene
199     //Three.js对于场景中object3D类型的对象提供了“parent/children ”式的关联链,Sim.js封装了这一关联
200     if (obj.object3D)
201     {
202         this.root.add(obj.object3D);
203     }
204 }
205 //删除
206 Sim.App.prototype.removeObject = function(obj)
207 {
208     var index = this.objects.indexOf(obj);
209     if (index != -1)
210     {
211         this.objects.splice(index, 1);
212         // If this is a renderable object, remove it from the root scene
213
214         if (obj.object3D)
215         {
216             this.root.remove(obj.object3D);
217         }
218     }
219 }
220
221 // Event handling
222 //事件处理
223 //初始化鼠标响应
224 Sim.App.prototype.initMouse = function()
225 {
226     var dom = this.renderer.domElement;//取得canvas
227
228     //添加监听
229     var that = this;
230     dom.addEventListener( 'mousemove',
231             function(e) { that.onDocumentMouseMove(e); }, false );
232     dom.addEventListener( 'mousedown',
233             function(e) { that.onDocumentMouseDown(e); }, false );
234     dom.addEventListener( 'mouseup',
235             function(e) { that.onDocumentMouseUp(e); }, false );
236
237     //中键滚动
238     $(dom).mousewheel(
239             function(e, delta) {
240                 that.onDocumentMouseScroll(e, delta);
241             }
242         );
243
244     //鼠标悬停的物体
245     this.overObject = null;
246     //被点击到的物体
247     this.clickedObject = null;
248 }
249 //初始化键盘响应
250 Sim.App.prototype.initKeyboard = function()
251 {
252     var dom = this.renderer.domElement;
253
254     var that = this;
255     dom.addEventListener( 'keydown',
256             function(e) { that.onKeyDown(e); }, false );
257     dom.addEventListener( 'keyup',
258             function(e) { that.onKeyUp(e); }, false );
259     dom.addEventListener( 'keypress',
260             function(e) { that.onKeyPress(e); }, false );
261
262     // so it can take focus
263     //这样设置之后canvas可以通过Tab键获得焦点,@@但这个设置并不完美,仍需要修改
264     dom.setAttribute("tabindex", 1);
265     dom.style.outline='none';
266     dom.focus();
267 }
268
269 Sim.App.prototype.addDomHandlers = function()
270 {
271     var that = this;
272     //监听浏览器窗口大小的变化
273     window.addEventListener( 'resize', function(event) { that.onWindowResize(event); }, false );
274 }
275
276 //如果监听到鼠标移动
277 Sim.App.prototype.onDocumentMouseMove = function(event)
278 {
279     event.preventDefault();//阻止浏览器的默认响应
280
281     if (this.clickedObject && this.clickedObject.handleMouseMove)
282     {//如果已经有选中的物体,并且被选中的物体具有自己的handleMouseMove方法
283         var hitpoint = null, hitnormal = null;//三维空间中的“点击点”和“点击法线”(鼠标在3D物体上的点击方向)设为空
284         var intersected = this.objectFromMouse(event.pageX, event.pageY);
285         //在三维空间中通过浏览器中的二维坐标,找到鼠标所在的物体,稍后详细分析该方法
286         if (intersected.object == this.clickedObject)
287         {//如果鼠标所在的物体确实是被选中的物体,
288             hitpoint = intersected.point;
289             hitnormal = intersected.normal;
290         }
291         this.clickedObject.handleMouseMove(event.pageX, event.pageY, hitpoint, hitnormal);
292         //执行这个被选中的物体的鼠标移动方法,比如拖拽变形之类
293     }
294     else
295     {//如果没有被选中的物体
296         var handled = false;
297
298         var oldObj = this.overObject;//暂存旧的“悬停物体”
299         var intersected = this.objectFromMouse(event.pageX, event.pageY);
300         this.overObject = intersected.object;//将悬停物体设为鼠标所在的物体
301
302         if (this.overObject != oldObj)//如果这是一个新物体,也就是说鼠标从一个物体上移到另一物体上
303         {
304             if (oldObj)
305             {//如果存在旧的物体,则要触发旧物体的“鼠标移出”事件
306                 this.container.style.cursor = 'auto';//取巧用CSS来处理光标变化,是2D网页和3Dcanvas的结合运用
307
308                 if (oldObj.handleMouseOut)
309                 {
310                     oldObj.handleMouseOut(event.pageX, event.pageY);
311                 }
312             }
313
314             if (this.overObject)
315             {
316                 if (this.overObject.overCursor)
317                 {
318                     this.container.style.cursor = this.overObject.overCursor;//光标设置
319                 }
320
321                 if (this.overObject.handleMouseOver)
322                 {
323                     this.overObject.handleMouseOver(event.pageX, event.pageY);
324                 }
325             }
326
327             handled = true;//表示物体的handleMouseOver执行完毕
328         }
329
330         if (!handled && this.handleMouseMove)
331         {
332             this.handleMouseMove(event.pageX, event.pageY);
333             //如果物体没有执行handleMouseOver,且环境(App)能够响应handleMouseOver,则执行环境的鼠标移动响应,在应用中可体现为移动视角之类
334         }
335     }
336 }
337 //鼠标按下
338 Sim.App.prototype.onDocumentMouseDown = function(event)
339 {
340     event.preventDefault();
341
342     var handled = false;
343
344     var intersected = this.objectFromMouse(event.pageX, event.pageY);
345     if (intersected.object)
346     {
347         if (intersected.object.handleMouseDown)
348         {
349             intersected.object.handleMouseDown(event.pageX, event.pageY, intersected.point, intersected.normal);
350             this.clickedObject = intersected.object;
351             handled = true;
352         }
353     }
354
355     if (!handled && this.handleMouseDown)
356     {
357         this.handleMouseDown(event.pageX, event.pageY);
358     }
359 }
360
361 Sim.App.prototype.onDocumentMouseUp = function(event)
362 {
363     event.preventDefault();
364
365     var handled = false;
366
367     var intersected = this.objectFromMouse(event.pageX, event.pageY);
368     if (intersected.object)
369     {
370         if (intersected.object.handleMouseUp)
371         {
372             intersected.object.handleMouseUp(event.pageX, event.pageY, intersected.point, intersected.normal);
373             handled = true;
374         }
375     }
376
377     if (!handled && this.handleMouseUp)
378     {
379         this.handleMouseUp(event.pageX, event.pageY);
380     }
381
382     this.clickedObject = null;
383 }
384
385 Sim.App.prototype.onDocumentMouseScroll = function(event, delta)
386 {
387     event.preventDefault();
388
389     if (this.handleMouseScroll)
390     {
391         this.handleMouseScroll(delta);
392     }
393 }
394
395 Sim.App.prototype.objectFromMouse = function(pagex, pagey)
396 {
397     // Translate page coords to element coords
398     //把浏览器页面中的位置转化为canvas中的坐标
399     var offset = $(this.renderer.domElement).offset();
400     var eltx = pagex - offset.left;
401     var elty = pagey - offset.top;
402
403     // Translate client coords into viewport x,y
404     //把canvas中的坐标转化为3D场景中的坐标
405     var vpx = ( eltx / this.container.offsetWidth ) * 2 - 1;
406     var vpy = - ( elty / this.container.offsetHeight ) * 2 + 1;
407
408     var vector = new THREE.Vector3( vpx, vpy, 0.5 );//补充一个z轴坐标,形成三维空间中靠原点外侧的一个点(在Three.js中“点”分为Points和Vector两种,前者具有颜色、大小、材质是真正可以被显示出来的物体,后着是数学意义上的点或者向量)
409
410     //this.projector.unprojectVector( vector, this.camera );
411     vector.unproject(this.camera);//@@新版本中去掉投影矩阵影响的方法,不要忘记3D场景中看到的东西都是经过投影矩阵变形过的,所以要先把“看到的位置”转化为“实际的位置”再进行位置计算
412
413     //@@这里是Sim.js中版本差异最大的地方
414     //在三维空间中取得物体的原理:从相机到“鼠标所在的点”画一条射线,通过Three.js封装的方法取得这条射线穿过的所有物体,第一个穿过的物体被认为是“鼠标所在的物体”
415
416     //var ray = new THREE.Ray( this.camera.position, vector.subSelf( this.camera.position ).normalize() );
417     //var intersects = ray.intersectScene( this.scene );
418     var raycaster = new THREE.Raycaster(this.camera.position,vector.subVectors(vector,this.camera.position).normalize());
419     //@@Raycaster是新版Three.js专门为“穿过检测”定义的一种对象,与Ray分别开来,第一个参数是射线的端点,第二个参数是一个标准化(长度为一)的向量
420     var intersects = raycaster.intersectObjects(this.scene.children,true);
421     //true表示考虑物体的子物体,这里必须加上,被“穿过到”的物体被存入了一个数组
422
423     if ( intersects.length > 0 ) {
424
425         /*var i = 0;
426         while(!intersects[i].object.visible)
427         {
428             i++;
429         }
430
431         var intersected = intersects[i];
432         var mat = new THREE.Matrix4().getInverse(intersected.object.matrixWorld);
433         var point = mat.multiplyVector3(intersected.point);
434
435         return (this.findObjectFromIntersected(intersected.object, intersected.point, intersected.face.normal)); */
436         //@@
437         for(var i=0;i<intersects.length;i++)
438         {
439             if(intersects[i].object.visible&&intersects[i].face)
440             {//物体可见并且”有面“(剔除了穿过线物体和点物体的情况)
441                 var intersected = intersects[i];
442                 var mat = new THREE.Matrix4().getInverse(intersected.object.matrixWorld);
443                 var point=intersected.point.applyMatrix4( mat );//可见intersected.point是相对坐标,加上物体所在的姿态矩阵之后变成了3D空间中的绝对坐标
444                 return (this.findObjectFromIntersected(intersected.object, intersected.point, intersected.face.normal));
445             }
446         }
447         return { object : null, point : null, normal : null };//没有找到符合条件的物体
448     }
449     else
450     {
451         return { object : null, point : null, normal : null };
452     }
453 }
454
455 Sim.App.prototype.findObjectFromIntersected = function(object, point, normal)
456 {//回溯子物体的parent/children链,找到距它最近的具有data属性的父物体,这样的物体是使用Sim.Object定义的。这种回溯保持了复杂物体的整体性:拉一个人的手使得整个人移动,而非手脱离了人自己移动。
457
458     if (object.data)
459     {
460         return { object: object.data, point: point, normal: normal };
461     }
462     else if (object.parent)
463     {
464         return this.findObjectFromIntersected(object.parent, point, normal);
465     }
466     else
467     {
468         return { object : null, point : null, normal : null };
469     }
470 }
471
472 //键盘按键被按下
473 Sim.App.prototype.onKeyDown = function(event)
474 {
475     // N.B.: Chrome doesn't deliver keyPress if we don't bubble... keep an eye on this
476     //作者说的是浏览器兼容性的问题,是否可用JQuery弥补?
477     event.preventDefault();
478
479     if (this.handleKeyDown)
480     {
481         this.handleKeyDown(event.keyCode, event.charCode);
482     }
483 }
484
485 Sim.App.prototype.onKeyUp = function(event)
486 {
487     // N.B.: Chrome doesn't deliver keyPress if we don't bubble... keep an eye on this
488     event.preventDefault();
489
490     if (this.handleKeyUp)
491     {
492         this.handleKeyUp(event.keyCode, event.charCode);
493     }
494 }
495
496 Sim.App.prototype.onKeyPress = function(event)
497 {
498     // N.B.: Chrome doesn't deliver keyPress if we don't bubble... keep an eye on this
499     event.preventDefault();
500
501     if (this.handleKeyPress)
502     {
503         this.handleKeyPress(event.keyCode, event.charCode);
504     }
505 }
506
507 //浏览器窗口大小变化
508 Sim.App.prototype.onWindowResize = function(event) {
509
510     this.renderer.setSize(this.container.offsetWidth, this.container.offsetHeight);
511
512     this.camera.aspect = this.container.offsetWidth / this.container.offsetHeight;//宽高比
513     this.camera.updateProjectionMatrix();//投影矩阵
514
515 }
516 //给环境定义了一个取得焦点的方法
517 Sim.App.prototype.focus = function()
518 {
519     if (this.renderer && this.renderer.domElement)
520     {
521         this.renderer.domElement.focus();
522     }
523 }
524
525
526 // Sim.Object - base class for all objects in our simulation
527 //物体的“基类”
528 Sim.Object = function()
529 {
530     Sim.Publisher.call(this);
531
532     this.object3D = null;
533     this.children = [];
534 }
535
536 Sim.Object.prototype = new Sim.Publisher;
537
538 Sim.Object.prototype.init = function()//物体本身没有init时,才会到“基类”里找
539 {
540 }
541
542 Sim.Object.prototype.update = function()
543 {
544     this.updateChildren();//驱动子物体的update
545 }
546
547 // setPosition - move the object to a new position
548 //把物体移到到另一个位置
549 Sim.Object.prototype.setPosition = function(x, y, z)
550 {
551     if (this.object3D)
552     {
553         this.object3D.position.set(x, y, z);
554     }
555 }
556
557 //setScale - scale the object
558 //成比例的放大缩小这个物体
559 Sim.Object.prototype.setScale = function(x, y, z)
560 {
561     if (this.object3D)
562     {
563         this.object3D.scale.set(x, y, z);
564     }
565 }
566
567 //setScale - scale the object
568 //用递归的方式设置物体及其子物体的可见性
569 Sim.Object.prototype.setVisible = function(visible)
570 {
571     function setVisible(obj, visible)
572     {
573         obj.visible = visible;
574         var i, len = obj.children.length;
575         for (i = 0; i < len; i++)
576         {
577             setVisible(obj.children[i], visible);
578         }
579     }
580
581     if (this.object3D)
582     {
583         setVisible(this.object3D, visible);
584     }
585 }
586 //@@写到这里作者也累了,所以附近出现了错误代码
587 // updateChildren - update all child objects
588 Sim.Object.prototype.updateChildren = function()
589 {
590     var i, len;
591     len = this.children.length;
592     for (i = 0; i < len; i++)
593     {
594         this.children[i].update();
595     }
596 }
597
598 Sim.Object.prototype.setObject3D = function(object3D)
599 {
600     object3D.data = this;//建立双向链表,可以相互调用
601     this.object3D = object3D;//将这个我们自己定义的Sim.Object和Three.js的object3D对象关联在一起
602 }
603
604 //Add/remove children
605 //添加/删除子物体
606 Sim.Object.prototype.addChild = function(child)
607 {
608     this.children.push(child);//Sim.js设置
609
610     // If this is a renderable object, add its object3D as a child of mine
611     if (child.object3D)//Three.js设置
612     {
613         this.object3D.add(child.object3D);
614     }
615 }
616
617 Sim.Object.prototype.removeChild = function(child)
618 {
619     var index = this.children.indexOf(child);
620     if (index != -1)
621     {
622         this.children.splice(index, 1);
623         // If this is a renderable object, remove its object3D as a child of mine
624         if (child.object3D)
625         {
626             this.object3D.remove(child.object3D);
627         }
628     }
629 }
630
631 // Some utility methods
632 //从物体返回到场景,如果没有这个方法就只能用全局变量去引用camera了
633 Sim.Object.prototype.getScene = function()
634 {
635     var scene = null;
636     if (this.object3D)
637     {
638         var obj = this.object3D;
639         while (obj.parent)
640         {
641             obj = obj.parent;
642         }
643
644         scene = obj;
645     }
646
647     return scene;
648 }
649
650 Sim.Object.prototype.getApp = function()
651 {
652     var scene = this.getScene();
653     return scene ? scene.data : null;//如果scene不具备data属性,说明scene不对应App
654 }
655
656 // Some constants
657
658 /* key codes
659 37: left
660 38: up
661 39: right
662 40: down
663 */
664 Sim.KeyCodes = {};
665 Sim.KeyCodes.KEY_LEFT  = 37;
666 Sim.KeyCodes.KEY_UP  = 38;
667 Sim.KeyCodes.KEY_RIGHT  = 39;
668 Sim.KeyCodes.KEY_DOWN  = 40;
669 //几个常用按键的键值
下面通过部分示例代码演示Sim框架的使用方法。原始示例引用自(T)的第三章,时间有限,我并没有对全部代码进行Three.js新版本修改,选取的两个JS文件主要用来体现这种面向对象的调用方法。如果需要旧版本的完整示例代码请到(T)的github下载(https://github.com/tparisi/WebGLBook),如果想研究新版本方法请到Three.js官网阅读官方文档(http://threejs.org/docs/index.html#Manual/Introduction/Creating_a_scene)。
Sim.App的示例代码:
  1 //这是一个模拟太阳系的3D场景,这里是solarSystem2.js文件
  2 // Constructor
  3 SolarSystemApp = function()
  4 {
  5     Sim.App.call(this);//用Sim.App构造SolarSystemApp
  6 }
  7
  8 // Subclass Sim.App
  9 SolarSystemApp.prototype = new Sim.App();//原型扩展
 10
 11 // Our custom initializer
 12 //“太阳系对象”的初始化方法(“构造”是“初始化”的基础)
 13 SolarSystemApp.prototype.init = function(container)
 14 {
 15     // Call superclass init code to set up scene, renderer, default camera
 16     //在this的情况下调用Sim.js库中的Sim.App.prototype.init方法,实现了代码重用,container是init方法的参数
 17     Sim.App.prototype.init.call(this, container);
 18     //除了调用库中的init,初始化还要做这些:
 19     this.planets = [];//行星数组
 20     this.orbits = [];//行星轨道
 21     this.lastX = 0;
 22     this.lastY = 0;
 23     this.mouseDown = false;
 24     this.lastTime = 0;//上次渲染时间
 25     this.currentlyPressedKeys=[];//当前键盘数组
 26
 27     // Let there be light!
 28     var sun = new Sun();//建立Sun对象
 29     sun.init();//sun对象的初始化方法
 30     this.addObject(sun);//很自然的把Sun对象添加到SolarSystemApp的objects数组中
 31
 32     // Are the stars out tonight...?
 33     var stars = new Stars();//太阳系外的遥远恒星
 34     // Push the stars out past Pluto
 35     //括号里是到太阳的最小距离
 36     stars.init(Sun.SIZE_IN_EARTHS + SolarSystemApp.EARTH_DISTANCE * SolarSystemApp.PLUTO_DISTANCE_IN_EARTHS);
 37     this.addObject(stars);
 38
 39     // And on the third day...
 40     this.createPlanets();//建立行星
 41
 42     // Move the camera back so we can see our Solar System
 43     this.camera.position.set(0, 0, Sun.SIZE_IN_EARTHS * 8);//将相机向外移动一些,看到太阳系的全貌
 44
 45     var amb = new THREE.AmbientLight(0x676767);//环境光
 46     this.scene.add(amb);
 47
 48     // Tilt the whole solar system toward the camera a bit
 49     //将整个太阳系绕x轴旋转一些
 50     this.root.rotation.x = Math.PI / 8;
 51
 52
 53 }
 54
 55 //下面是对鼠标键盘的响应,其中的监听配置由Sim库完成
 56 //SolarSystemApp对象的鼠标移动处理
 57 SolarSystemApp.prototype.handleMouseMove = function(x, y)
 58 {
 59     if (this.mouseDown)//如果现在鼠标是按下的状态
 60     {
 61         var dx = x - this.lastX;//鼠标在x轴上相对于原位置的位移
 62         if (Math.abs(dx) > SolarSystemApp.MOUSE_MOVE_TOLERANCE)//这个位移大于一定程度才能够生效,避免了鼠标微小震动的影响
 63         {
 64             this.root.rotation.y -= (dx * 0.01);//太阳系绕y轴旋转一定角度
 65         }
 66         this.lastX = x;//更新x轴原位置
 67
 68         //return;
 69
 70         var dy = y - this.lastY;
 71         if (Math.abs(dy) > SolarSystemApp.MOUSE_MOVE_TOLERANCE)
 72         {
 73             this.root.rotation.x += (dy * 0.01);
 74
 75             // Clamp to some outer boundary values
 76             if (this.root.rotation.x < 0)
 77                 this.root.rotation.x = 0;
 78
 79             if (this.root.rotation.x > SolarSystemApp.MAX_ROTATION_X)//达到一定角度之后禁止继续旋转
 80                 this.root.rotation.x = SolarSystemApp.MAX_ROTATION_X;
 81
 82         }
 83         this.lastY = y;
 84
 85     }
 86 }
 87
 88 SolarSystemApp.prototype.handleMouseDown = function(x, y)
 89 {
 90     this.lastX = x;
 91     this.lastY = y;
 92     this.mouseDown = true;
 93 }
 94
 95 SolarSystemApp.prototype.handleMouseUp = function(x, y)
 96 {
 97     this.lastX = x;
 98     this.lastY = y;
 99     this.mouseDown = false;
100 }
101
102 SolarSystemApp.prototype.handleMouseScroll = function(delta)
103 {//鼠标滚轮控制相机远近
104     var dx = delta;
105
106     this.camera.position.z -= dx*10;
107
108     // Clamp to some boundary values
109     if (this.camera.position.z < SolarSystemApp.MIN_CAMERA_Z)
110         this.camera.position.z = SolarSystemApp.MIN_CAMERA_Z;
111     if (this.camera.position.z > SolarSystemApp.MAX_CAMERA_Z)
112         this.camera.position.z = SolarSystemApp.MAX_CAMERA_Z;
113 }
114 //用currentlyPressedKeys数组保存键盘所有按键的状态
115 SolarSystemApp.prototype.handleKeyDown= function(keyCode,charCode)
116 {
117     this.currentlyPressedKeys[keyCode] = true;
118 }
119 SolarSystemApp.prototype.handleKeyUp= function(keyCode,charCode)
120 {
121     this.currentlyPressedKeys[keyCode] = false;
122 }
123
124 SolarSystemApp.prototype.update = function()
125 {
126     showFocus();
127     var speed=0//前后速度
128     var adspeed=0//左右速度
129     if (this.currentlyPressedKeys[65]) {
130         // A键-横向左
131         adspeed = -0.009;
132     } else if ( this.currentlyPressedKeys[68]) {
133         // D键-横向右
134         adspeed = +0.009;
135     }
136
137     if (this.currentlyPressedKeys[87]) {
138         // W键-纵向上
139         speed = 0.003;
140     } else if ( this.currentlyPressedKeys[83]) {
141         // S键-纵向下
142         speed = -0.003;
143     }
144     var timeNow = new Date().getTime();
145     if (this.lastTime != 0) {
146         var elapsed = timeNow - this.lastTime;
147
148         if (speed != 0||adspeed!=0) {
149             this.camera.position.x+=adspeed* elapsed;
150             this.camera.position.y+=speed* elapsed;
151         }
152
153         // adjust yaw and pitch by their respective rates of change
154     }
155     this.lastTime = timeNow;
156
157     Sim.App.prototype.update.call(this);//驱动Sim中的“this.objects[i].update();”
158 }
159 //按照planet_specs数组批量生成行星
160 SolarSystemApp.prototype.createPlanets = function ()
161 {
162     var i, len = SolarSystemApp.planet_specs.length;
163     for (i = 0; i < len; i++)
164     {
165         var spec = SolarSystemApp.planet_specs[i];//这个行星的参数
166         var planet = spec.type ? new spec.type : new Planet;//除了地球和土星比较特殊,其他星球都创建为Planet对象,Planet继承自Sim.Object
167
168         planet.init({animateOrbit:true, animateRotation: true, showOrbit:true,
169             distance:spec.distance * SolarSystemApp.EARTH_DISTANCE + Sun.SIZE_IN_EARTHS,
170             size:spec.size * SolarSystemApp.EXAGGERATED_PLANET_SCALE,
171             period : spec.period,
172             revolutionSpeed : 0.002,
173             map : spec.map});
174         this.addObject(planet);
175         this.planets.push(planet);
176
177         var orbit = new Orbit();//行星轨道
178         orbit.init(spec.distance * SolarSystemApp.EARTH_DISTANCE + Sun.SIZE_IN_EARTHS);
179         this.addObject(orbit);
180         this.orbits.push(orbit);
181     }
182 }
183
184 SolarSystemApp.MOUSE_MOVE_TOLERANCE = 4;
185 SolarSystemApp.MAX_ROTATION_X = Math.PI / 2;
186 SolarSystemApp.MAX_CAMERA_Z = Sun.SIZE_IN_EARTHS * 50;
187 SolarSystemApp.MIN_CAMERA_Z = Sun.SIZE_IN_EARTHS * 2;//镜头最小z值
188 SolarSystemApp.EARTH_DISTANCE = 50;
189 SolarSystemApp.PLUTO_DISTANCE_IN_EARTHS = 77.2;
190 SolarSystemApp.EARTH_DISTANCE_SQUARED = 45000;
191 SolarSystemApp.EXAGGERATED_PLANET_SCALE = 5.55;
192 SolarSystemApp.planet_specs = [
193     //大小,距离,周期,纹理图片
194    // Mercury
195    { size : 1 / 2.54, distance : 0.4, period : 0.24, map : "../IMAGE/SOLAR/Mercury.jpg" },
196    // Venus
197    { size : 1 / 1.05, distance : 0.7, period : 0.62, map : "../IMAGE/SOLAR/venus.jpg"  },
198    // Earth
199    { type : Earth, size : 1 , distance : 1, period : 1, map : "../IMAGE/SOLAR/earth_surface_2048.jpg"  },
200    // Mars
201    { size : 1 / 1.88, distance : 1.6, period : 1.88, map : "../IMAGE/SOLAR/MarsV3-Shaded-2k.jpg"  },
202    // Jupiter
203    { size : 11.1, distance : 5.2, period : 11.86, map : "../IMAGE/SOLAR/realj2k.jpg"  },
204    // Saturn
205    { type : Saturn, size : 9.41, distance : 10, period : 29.46, map : "../IMAGE/SOLAR/saturn_bjoernjonsson.jpg"  },
206    // Uranus
207    { size : 4, distance : 19.6, period : 84.01, map : "../IMAGE/SOLAR/uranus.jpg"  },
208    // Neptune
209    { size : 3.88, distance : 38.8, period : 164.8, map : "../IMAGE/SOLAR/neptune.jpg"  },
210    // Pluto - have to exaggerate his size or we'll never see the little guy
211    { size : 10 / 5.55, distance : 77.2, period : 247.7, map : "../IMAGE/SOLAR/pluto.jpg"  },
212                                ];
接下来是Sim.Object的示例代码:
 1 //Sim.Object的使用方式
 2 // Custom Planet class
 3 Planet = function()
 4 {
 5     Sim.Object.call(this);
 6 }
 7
 8 Planet.prototype = new Sim.Object();
 9
10 Planet.prototype.init = function(param)
11 {
12     param = param || {};
13
14     // Create an orbit group to simulate the orbit - this is the top-level Planet group
15     var planetOrbitGroup = new THREE.Object3D();//planetOrbitGroup是一个Three.js中的3D对象,Three.js为它准备了各种相关的方法和属性
16
17     // Tell the framework about our object
18     this.setObject3D(planetOrbitGroup);//将Sim.js定义的Sim.object与Three.js定义的Object3D关联起来
19
20     // Create a group to contain Planet and Clouds meshes
21     var planetGroup = new THREE.Object3D();
22     var distance = param.distance || 0;
23     var distsquared = distance * distance;
24     planetGroup.position.set(Math.sqrt(distsquared/2), 0, -Math.sqrt(distsquared/2));//设置行星位置
25     planetOrbitGroup.add(planetGroup);//planetGroup是planetOrbitGroup在Three.js层面的子物体
26
27     this.planetGroup = planetGroup;
28     var size = param.size || 1;
29     this.planetGroup.scale.set(size, size, size);//设置大小比例
30
31     var map = param.map;//纹理图片
32     this.createGlobe(map);//使用纹理图片建立行星
33
34     this.animateOrbit = param.animateOrbit;//行星是否沿着轨道运动
35     this.period = param.period;//公转周期
36     this.revolutionSpeed = param.revolutionSpeed ? param.revolutionSpeed : Planet.REVOLUTION_Y;//公转速度
37 }
38
39 Planet.prototype.createGlobe = function(map)
40 {
41     // Create our Planet with nice texture
42     var geometry = new THREE.SphereGeometry(1, 32, 32);//建立一个多面体(球)
43     //var texture = THREE.ImageUtils.loadTexture(map);
44     //@@新版加载纹理方法
45     var texture = new THREE.TextureLoader().load(map);
46     //var material = new THREE.MeshPhongMaterial( {map: texture, ambient: 0x333333} );
47     //@@
48     var material = new THREE.MeshPhongMaterial( {map: texture} );
49     var globeMesh = new THREE.Mesh( geometry, material );
50
51     // Add it to our group
52     this.planetGroup.add(globeMesh);//globeMesh是planetGroup的子物体
53
54     // Save it away so we can rotate it
55     this.globeMesh = globeMesh;
56 }
57
58
59 Planet.prototype.update = function() //物体的update
60 {
61     // Simulate the orbit
62     if (this.animateOrbit)
63     {
64         this.object3D.rotation.y += this.revolutionSpeed / this.period;
65     }
66
67     Sim.Object.prototype.update.call(this);
68 }
69
70 Planet.REVOLUTION_Y = 0.003;
最终效果:
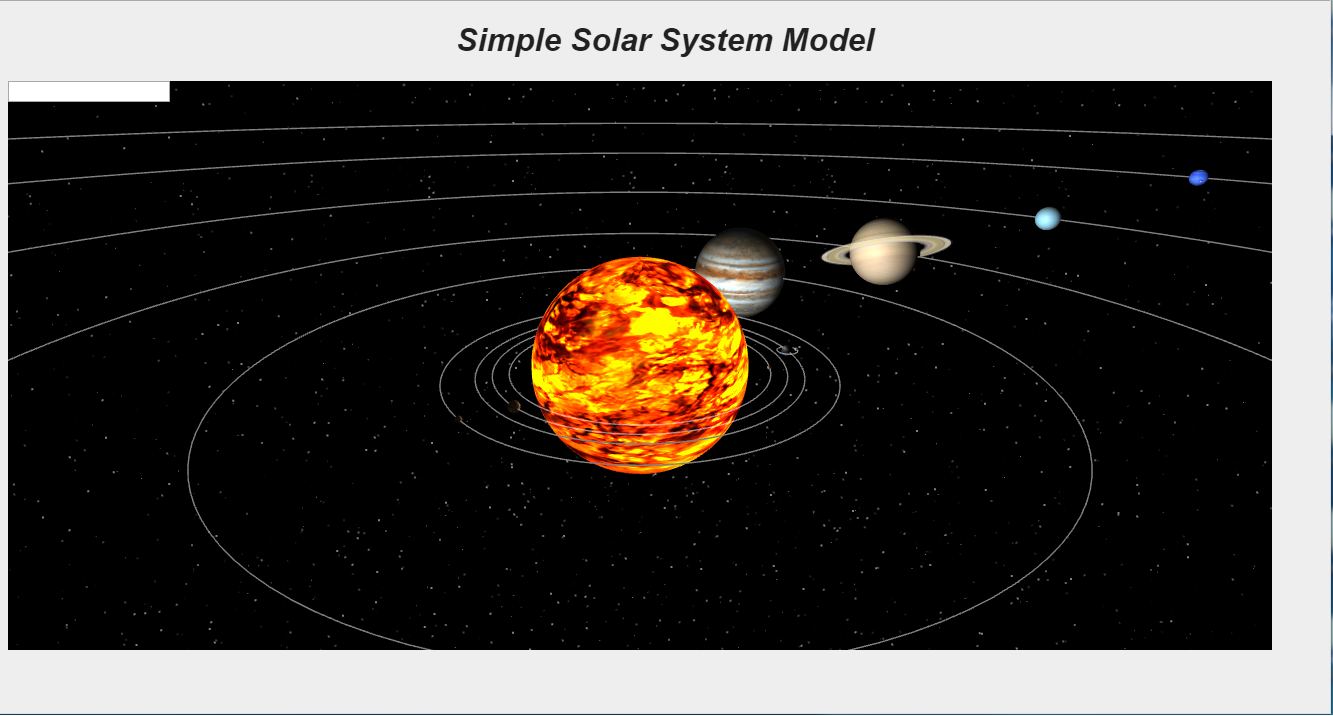
上面的代码简单演示了基于Three.js的面向对象框架使用方法,在使用过程中我们发现Three.js的更倾向于3D场景构建,其本身并不具备作为“游戏引擎”的完整功能,很多功能需要用户自己编写。与其相对babylon.js是一个面向3D游戏应用编写的WebGL封装(http://www.babylonjs.com/),具有碰撞检测、物理模拟等功能,但渲染性能较Three.js略低。
下一步准备编写基于Three.js的3D碰撞检测功能。

 浙公网安备 33010602011771号