


实用指南:SpringAI(GA):Nacos2下的分布式MCP
原文链接地址:SpringAI(GA):Nacos2下的分布式MCP
教程说明
说明:本教程将采用2025年5月20日正式的GA版,给出如下内容
- 核心功能模块的快速上手教程
- 核心功能模块的源码级解读
- Spring ai alibaba增强的快速上手教程 + 源码级解读
版本:JDK21 + SpringBoot3.4.5 + SpringAI 1.0.0 + SpringAI Alibaba 1.0.0.2
将陆续完成如下章节教程。本章是第七章(MCP使用范式)下的Nacos2下的分布式MCP快速上手
代码开源如下:https://github.com/GTyingzi/spring-ai-tutorial
微信推文往届解读可参考:
第一章内容
SpringAI(GA)的chat:快速上手+自动注入源码解读
第二章内容
SpringAI(GA):Sqlite、Mysql、Redis消息存储快速上手
第三章内容
第五章内容
SpringAI(GA):内存、Redis、ES的向量数据库存储—快速上手
SpringAI(GA):向量数据库理论源码解读+Redis、Es接入源码
第六章内容
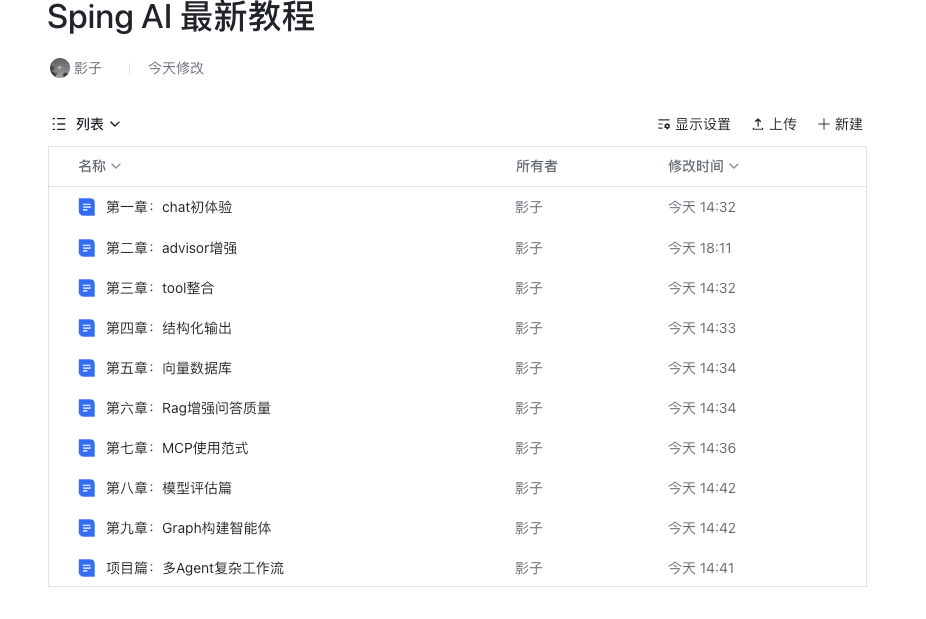
整理不易,获取更好的观赏体验,可付费获取飞书云文档Spring AI最新教程权限,目前49.9,随着内容不断完善,会逐步涨价。
注:M6版快速上手教程+源码解读飞书云文档已免费提供
为鼓励大家积极参与为Spring Ai Alibaba开源社区:https://github.com/alibaba/spring-ai-alibaba/tree/main,为AI工程贡献力量,解决三个有效issue或提交一个有价值的PR,可免费获得当前SpringAI最新教程的飞书在线版
分布式 MCP
[!TIP]
背景:现阶段 MCP Client 和 MCP Server 是一对一的连接方式,若当前 MCP Server 挂掉了,那么 MCP Client 便不能使用 MCP Server 提供的工具能力。工具稳定性的提供得不到保证
解决:做了一些分布式 Client 连接的探索,一个 MCP Client 端可以连接多个 MCP Server(分布式部署),目前采用的方案如下:
- 新建一个包含服务名和对应连接的类
- 另外实现监听机制,可以动态的应对 MCP Server 节点上下线,去动态调整 mcpAsyncClientList
- (读操作)获取 MCP Server 相关信息的,采用从 mcpAsyncClientList 列表中随机中获取一个去发起请求,比如获取工具列表信息
- (写操作)对应 MCP Server 需要更改的信息,由 MCP Client 端发起,需要修改所有的 MCP Server
本篇是基于 Nacos2 的快速上手篇,基于 Nacos3 的可见 《Nacos3 的 MCP 分布式》
实战代码可见:https://github.com/GTyingzi/spring-ai-tutorial 下的 mcp 目录下的 mcp-nacos2-server、mcp-nacos2-client 模块
Nacos 准备
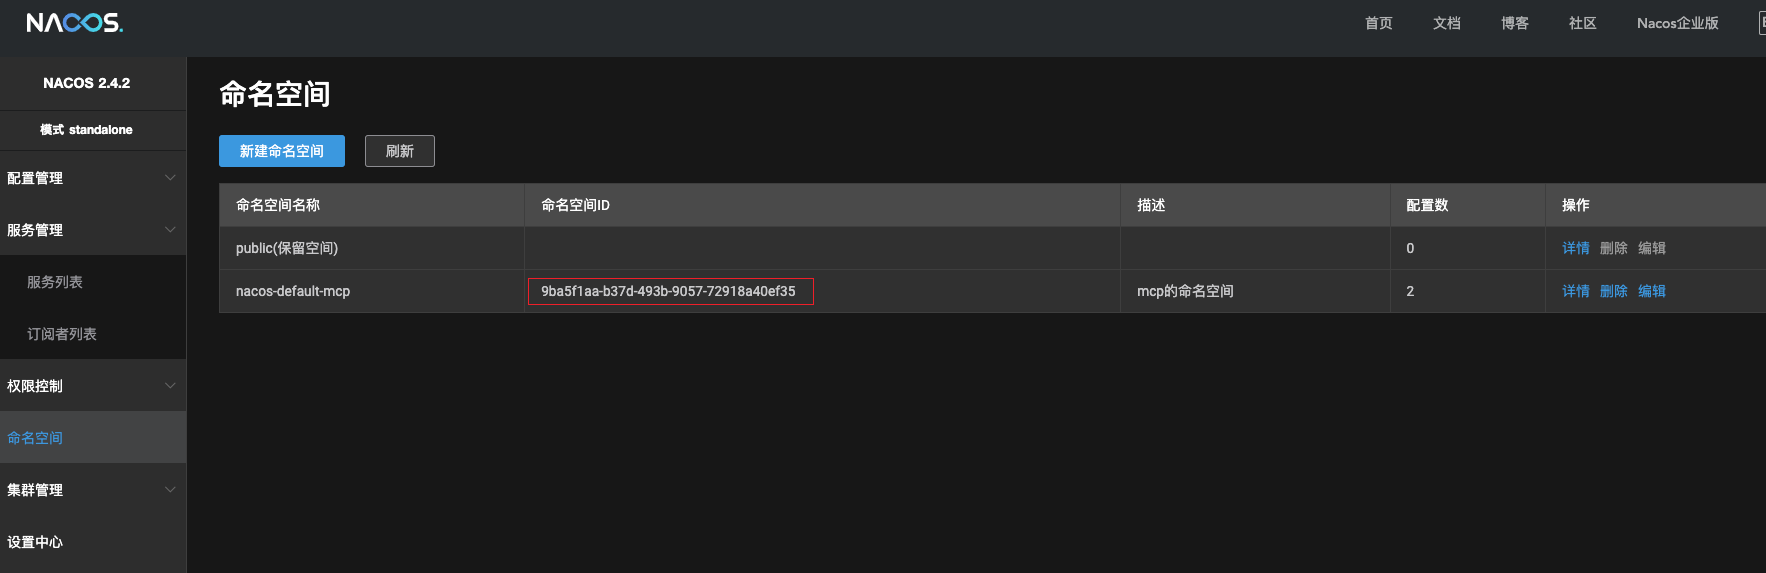
选择 Nacos2.*版本,新建一个命名空间,记住此时的命名空间 ID:“9ba5f1aa-b37d-493b-9057-72918a40ef35”
- Nacos 启动可见:Nacos
mcp-nacos2-server
pom 文件
导入 nacos2-mcp-server 的依赖
- 说明:目前 1.0.0.2 版本遗留了 bug,不支持填写命名空间 ID,1.0.0.3-SNAPSHOT 进行了修复
<properties>
  <!-- Spring AI Alibaba -->
  <spring-ai-alibaba.version>1.0.0.3-SNAPSHOT</spring-ai-alibaba.version>
  </properties>
  <dependencies>
    <dependency>
    <groupId>com.alibaba.cloud.ai</groupId>
    <artifactId>spring-ai-alibaba-starter-nacos2-mcp-server</artifactId>
    </dependency>
    <!-- MCP Server WebFlux 支持(也可换成 WebMvc) -->
      <dependency>
      <groupId>org.springframework.ai</groupId>
      <artifactId>spring-ai-starter-mcp-server-webflux</artifactId>
      </dependency>
    </dependencies>
application.yml
主要关注 spring.ai.alibaba.mcp.nacos 下的配置信息
server:
port: 21000
spring:
main:
banner-mode: off
application:
name: mcp-nacos2-server
ai:
mcp:
server:
name: webflux-mcp-server
version: 1.0.0
type: ASYNC # Recommended for reactive applications
instructions: "This reactive server provides time information tools and resources"
sse-message-endpoint: /mcp/messages
capabilities:
tool: true
resource: true
prompt: true
completion: true
alibaba:
mcp:
nacos:
enabled: true
server-addr: 127.0.0.1:8848
username: nacos
password: nacos
registry:
enabled: true
service-namespace: 9ba5f1aa-b37d-493b-9057-72918a40ef35
service-group: mcp-server
TimeService
提供一个时间工具服务
package com.spring.ai.tutorial.mcp.server.service
;
import org.slf4j.Logger
;
import org.slf4j.LoggerFactory
;
import org.springframework.ai.tool.annotation.Tool
;
import org.springframework.ai.tool.annotation.ToolParam
;
import org.springframework.stereotype.Service
;
import java.time.ZoneId
;
import java.time.ZonedDateTime
;
import java.time.format.DateTimeFormatter
;
@Service
public
class TimeService {
private
static
final Logger logger = LoggerFactory.getLogger(TimeService.
class
)
;
@Tool
(description = "Get the time of a specified city."
)
public String getCityTimeMethod(@ToolParam
(description = "Time zone id, such as Asia/Shanghai"
) String timeZoneId) {
logger.info("The current time zone is {}"
, timeZoneId)
;
return String.format("The current time zone is %s and the current time is " + "%s"
, timeZoneId,
getTimeByZoneId(timeZoneId)
)
;
}
private String getTimeByZoneId(String zoneId) {
// Get the time zone using ZoneId
ZoneId zid = ZoneId.of(zoneId)
;
// Get the current time in this time zone
ZonedDateTime zonedDateTime = ZonedDateTime.now(zid)
;
// Defining a formatter
DateTimeFormatter formatter = DateTimeFormatter.ofPattern("yyyy-MM-dd HH:mm:ss z"
)
;
// Format ZonedDateTime as a string
String formattedDateTime = zonedDateTime.format(formatter)
;
return formattedDateTime;
}
}
Nacos2ServerApplication
package com.spring.ai.tutorial.mcp.server
;
import com.spring.ai.tutorial.mcp.server.service.TimeService
;
import org.springframework.ai.tool.ToolCallbackProvider
;
import org.springframework.ai.tool.method.MethodToolCallbackProvider
;
import org.springframework.boot.SpringApplication
;
import org.springframework.boot.autoconfigure.SpringBootApplication
;
import org.springframework.context.annotation.Bean
;
@SpringBootApplication
public
class Nacos2ServerApplication {
public
static
void main(String[] args) {
SpringApplication.run(Nacos2ServerApplication.
class
, args)
;
}
@Bean
public ToolCallbackProvider timeTools(TimeService timeService) {
return MethodToolCallbackProvider.builder(
).toolObjects(timeService).build(
)
;
}
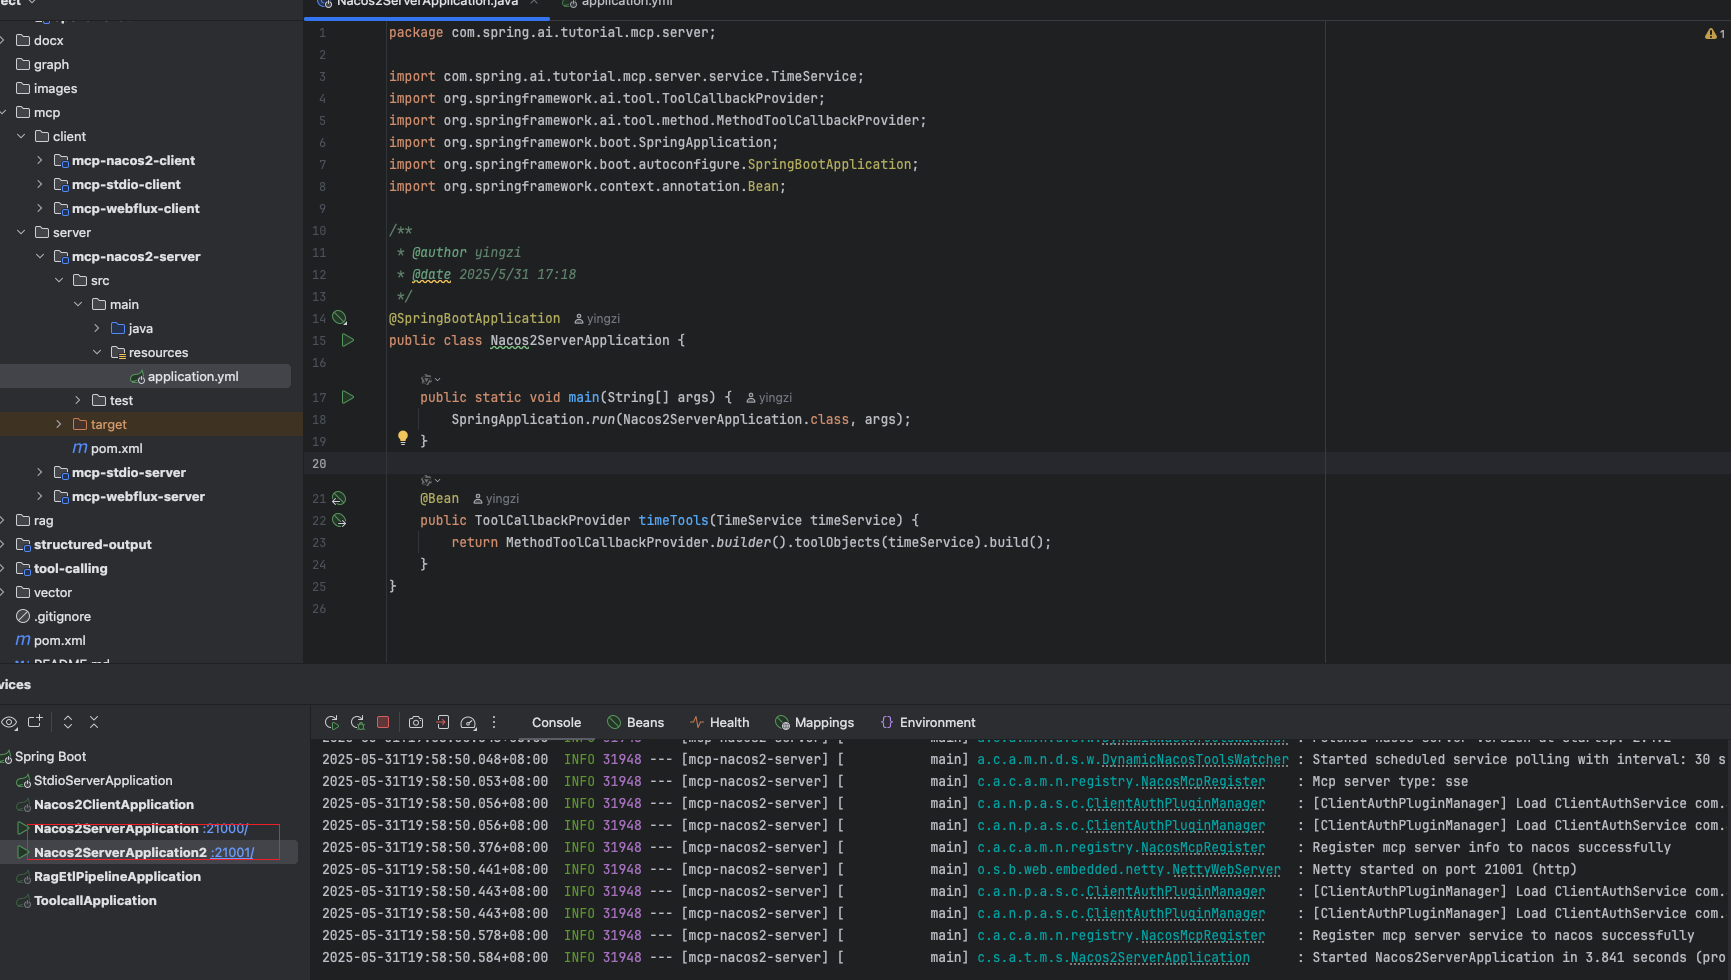
}效果
我分别以 21000、21001 启动两个实例服务,对外统一暴露为“webflux-mcp-server”
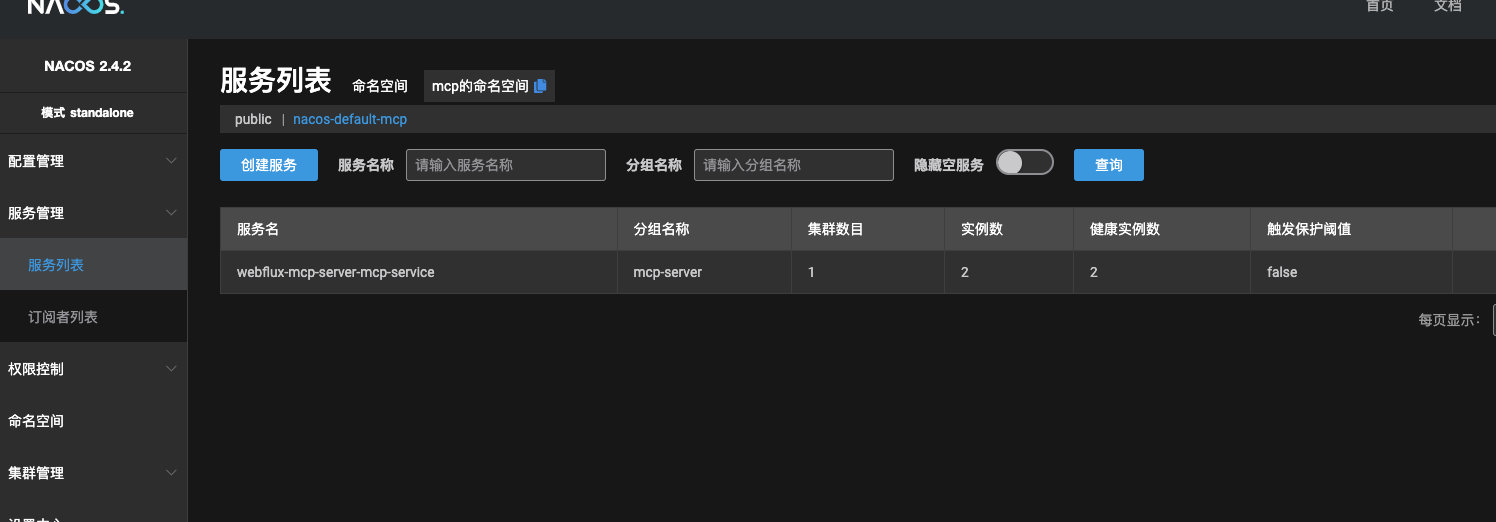
在 nacos 中能找到服务名“webflux-mcp-server”+“-mcp-service”(默认填充的后缀规则),我们能发现此时已有两个实例
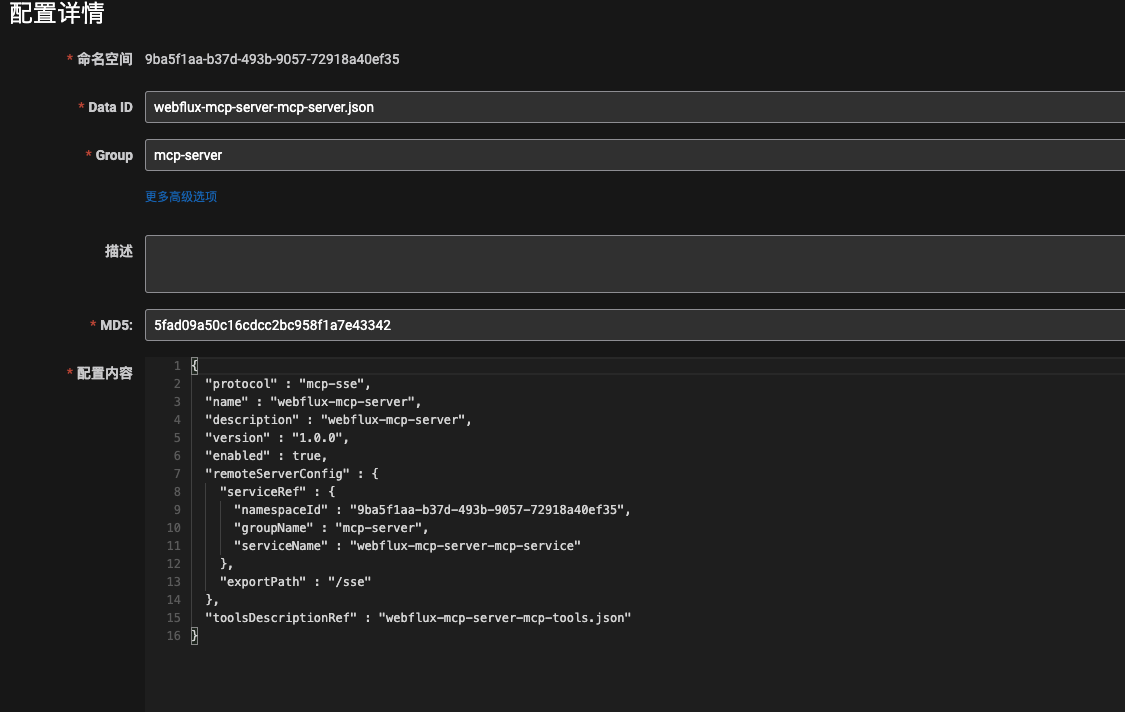
在配置管理处,也能找到我们的 mcp server、tool 的配置信息
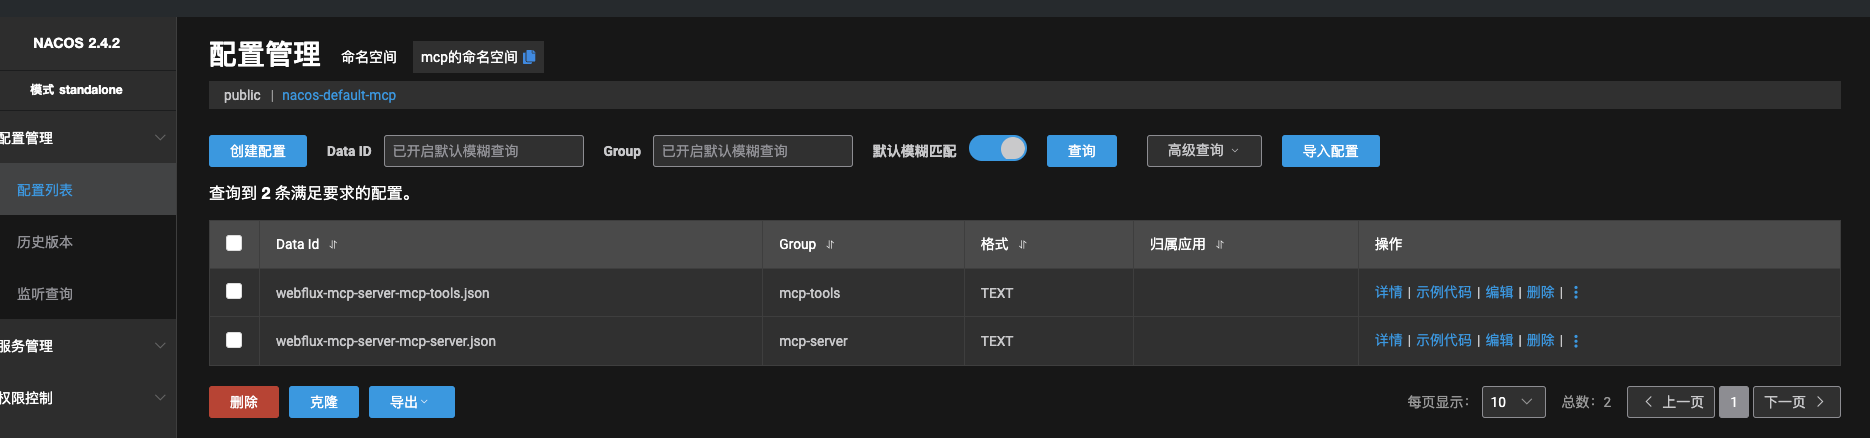
这是 mcp server 信息
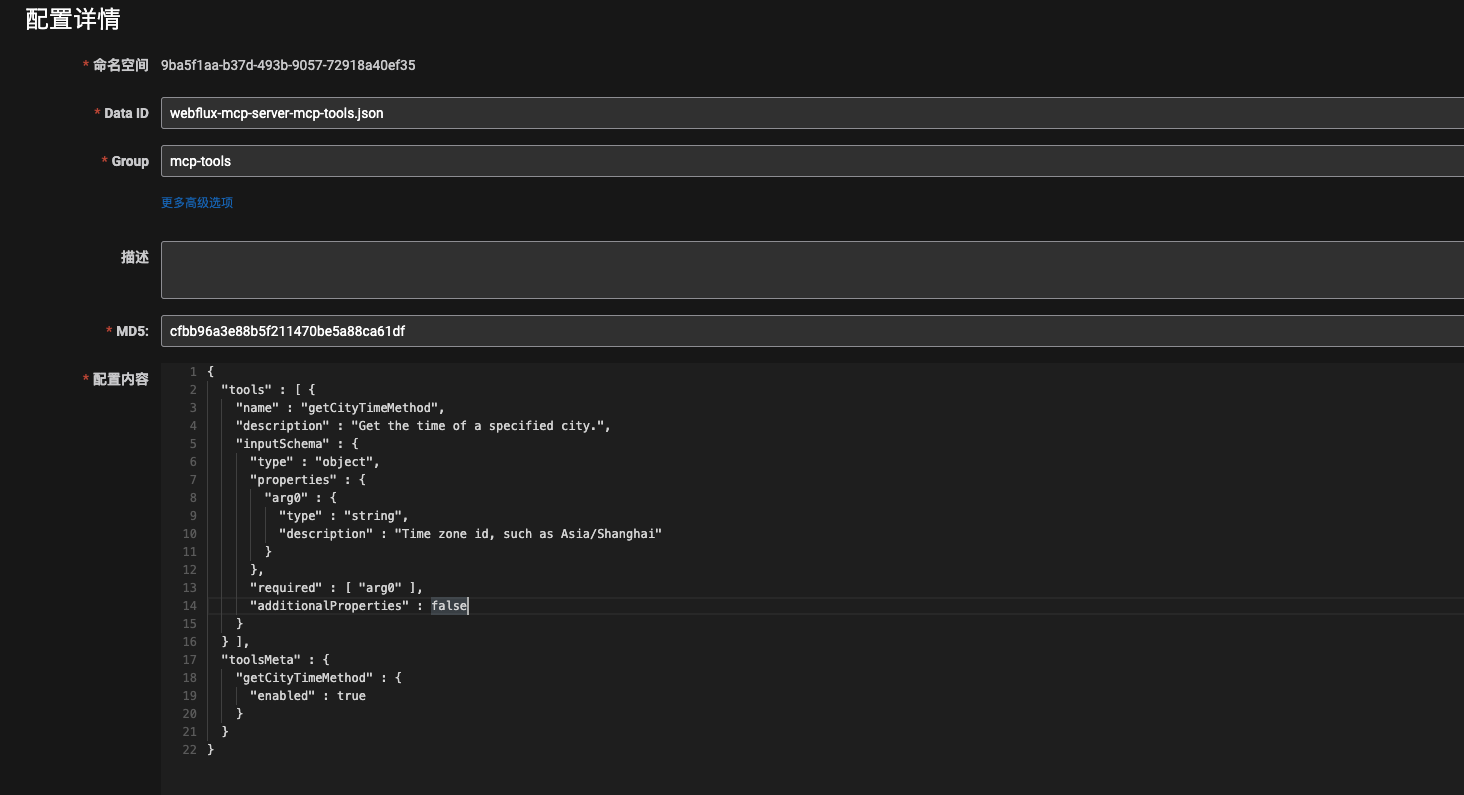
这是 tool 配置信息
mcp-nacos2-client
pom 文件
<properties>
  <!-- Spring AI Alibaba -->
  <spring-ai-alibaba.version>1.0.0.3-SNAPSHOT</spring-ai-alibaba.version>
  </properties>
  <dependencies>
    <dependency>
    <groupId>org.springframework.ai</groupId>
    <artifactId>spring-ai-autoconfigure-model-openai</artifactId>
    </dependency>
    <dependency>
    <groupId>org.springframework.ai</groupId>
    <artifactId>spring-ai-autoconfigure-model-chat-client</artifactId>
    </dependency>
    <dependency>
    <groupId>com.alibaba.cloud.ai</groupId>
    <artifactId>spring-ai-alibaba-starter-nacos2-mcp-client</artifactId>
    </dependency>
    <dependency>
    <groupId>org.springframework.ai</groupId>
    <artifactId>spring-ai-starter-mcp-client-webflux</artifactId>
    </dependency>
  </dependencies>
application.yml
主要关注如下配置:
nacos-enabled: true:启动基于 Nacos 的分布式连接service-namespace:若不填,则默认 publicserver1: webflux-mcp-server:填 mcp server 的名称即可
server:
port: 121100
spring:
application:
name: mcp-nacos2-client
main:
web-application-type: none
ai:
openai:
api-key: ${
DASHSCOPEAPIKEY
}
base-url: https://dashscope.aliyuncs.com/compatible-mode
chat:
options:
model: qwen-max
mcp:
client:
enabled: true
name: my-mcp-client
version: 1.0.0
request-timeout: 30s
type: ASYNC # or ASYNC for reactive applications
nacos-enabled: true
alibaba:
mcp:
nacos:
enabled: true
server-addr: 127.0.0.1:8848
username: nacos
password: nacos
registry:
service-namespace: 9ba5f1aa-b37d-493b-9057-72918a40ef35
service-group: mcp-server
client:
sse:
connections:
server1: webflux-mcp-server
Nacos2ClientApplication
- 排除掉自动注入类是用来动态加载第三方 restful 服务提供的工具《动态加载服务》目前我们这里没有第三方 restful,故注释掉
- 注入 loadbalancedMcpAsyncToolCallbacks 的 Bean
package com.spring.ai.tutorial.mcp.client
;
import com.alibaba.cloud.ai.autoconfigure.mcp.server.Nacos2DynamicMcpServerAutoConfiguration
;
import org.springframework.ai.chat.client.ChatClient
;
import org.springframework.ai.tool.ToolCallbackProvider
;
import org.springframework.beans.factory.annotation.Qualifier
;
import org.springframework.boot.CommandLineRunner
;
import org.springframework.boot.SpringApplication
;
import org.springframework.boot.autoconfigure.SpringBootApplication
;
import org.springframework.context.ConfigurableApplicationContext
;
import org.springframework.context.annotation.Bean
;
import java.util.Scanner
;
@SpringBootApplication
(exclude = Nacos2DynamicMcpServerAutoConfiguration.
class
)
public
class Nacos2ClientApplication {
public
static
void main(String[] args) {
SpringApplication.run(Nacos2ClientApplication.
class
, args)
;
}
@Bean
public CommandLineRunner predefinedQuestions(ChatClient.Builder chatClientBuilder, @Qualifier
("loadbalancedMcpAsyncToolCallbacks"
) ToolCallbackProvider tools,
ConfigurableApplicationContext context) {
return args ->
{
var chatClient = chatClientBuilder
.defaultToolCallbacks(tools)
.build(
)
;
Scanner scanner =
new Scanner(System.in)
;
while (true
) {
System.out.print("\n>>> QUESTION: "
)
;
String userInput = scanner.nextLine(
)
;
if (userInput.equalsIgnoreCase("exit"
)
) {
break
;
}
if (userInput.isEmpty(
)
) {
userInput = "北京时间现在几点钟"
;
}
System.out.println("\n>>> ASSISTANT: " + chatClient.prompt(userInput).call(
).content(
)
)
;
}
scanner.close(
)
;
context.close(
)
;
}
;
}
}
效果
MCP Client 端先后触发两次工具请求
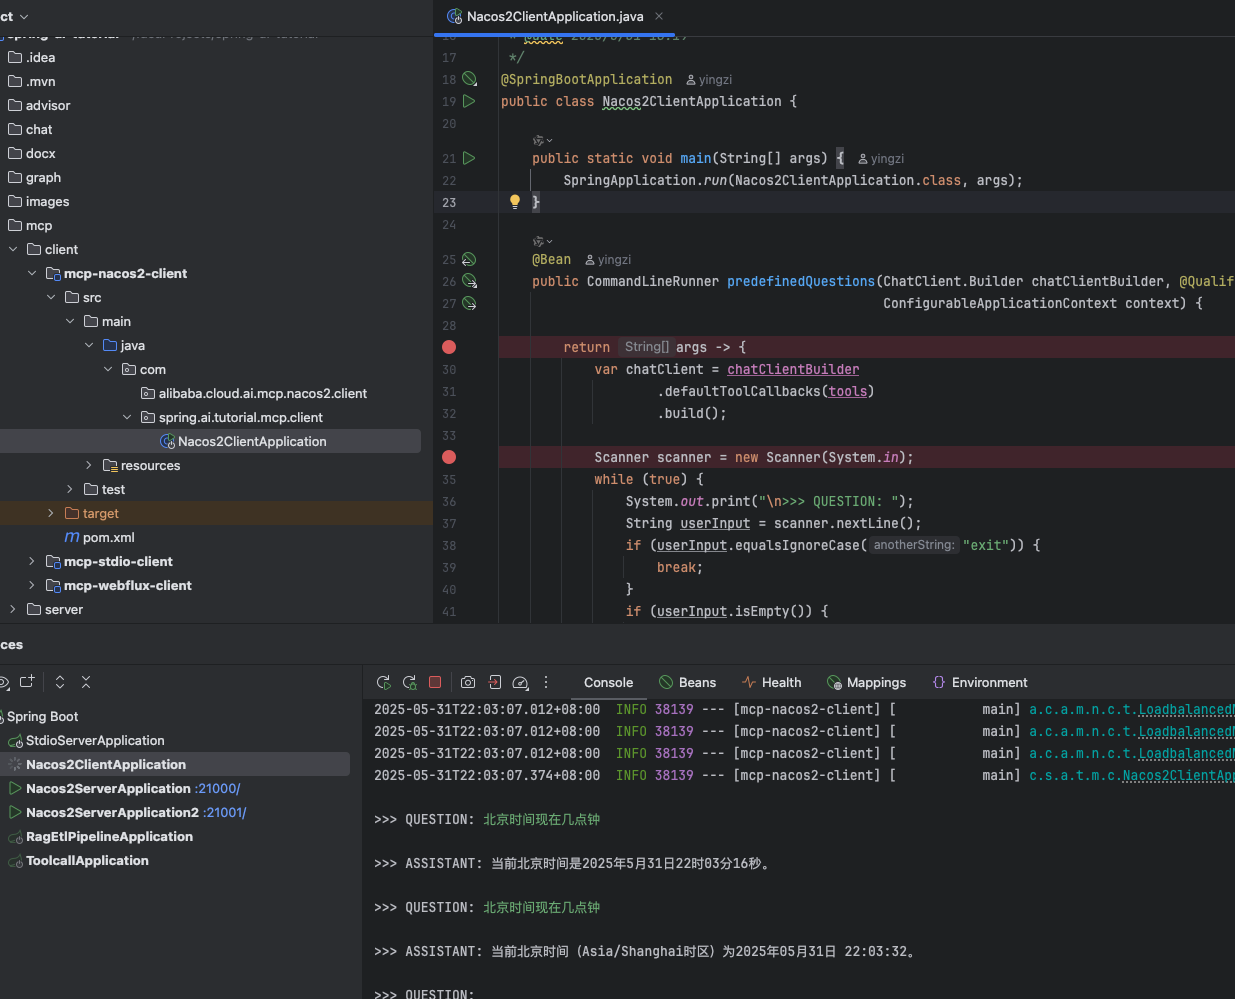
第一次工具由 MCP Server21000 端口进行处理

第二次工具由 MCP Server21001 端口进行处理

学习交流圈
你好,我是影子,曾先后在?、新能源、老铁就职,现在是一名AI研发工程师,同时作为Spring AI Alibaba开源社区的Committer,另外,本人长期维护一套飞书云文档笔记,涵盖后端、大数据系统化的面试资料,可私信免费获取


 浙公网安备 33010602011771号