


篇章六 数据结构——链表(二) - 详解
目录
1. LinkedList的模拟实现
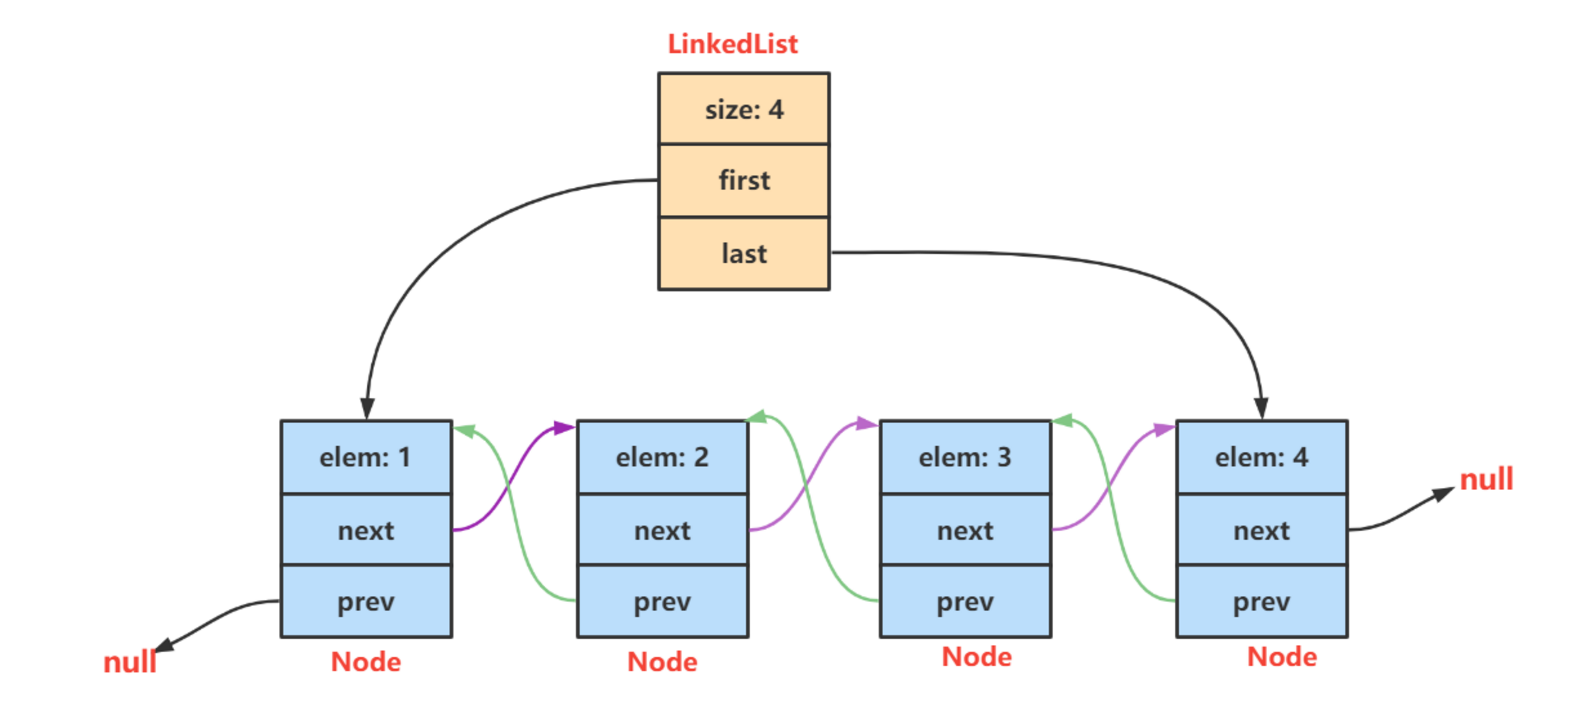
1.1 双向链表结构图
1.2 三个简单方法的实现
@Override public void display() { ListNode cur = head; while (cur != null) { System.out.print(cur.val + " "); cur = cur.next; } System.out.println(); } @Override public int size() { int len = 0; ListNode cur = head; while (cur != null) { len++; cur = cur.next; } return len; } @Override public boolean contains(int key) { ListNode cur = head; while (cur != null) { if (cur.val == key) { return true; } cur = cur.next; } return false; }此处和单链表一样,不在赘述。
1.3 头插法
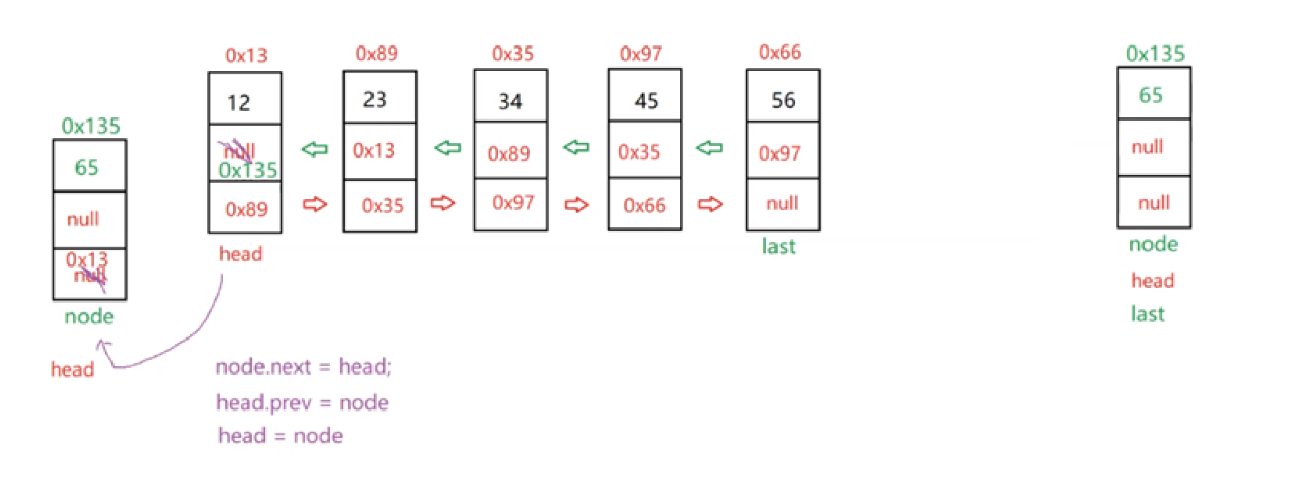
@Override public void addFirst(int data) { ListNode node = new ListNode(data); if (head == null) { head = last = node; }else { node.next = head; head.prev = node; head = node; } }1.4 尾插法
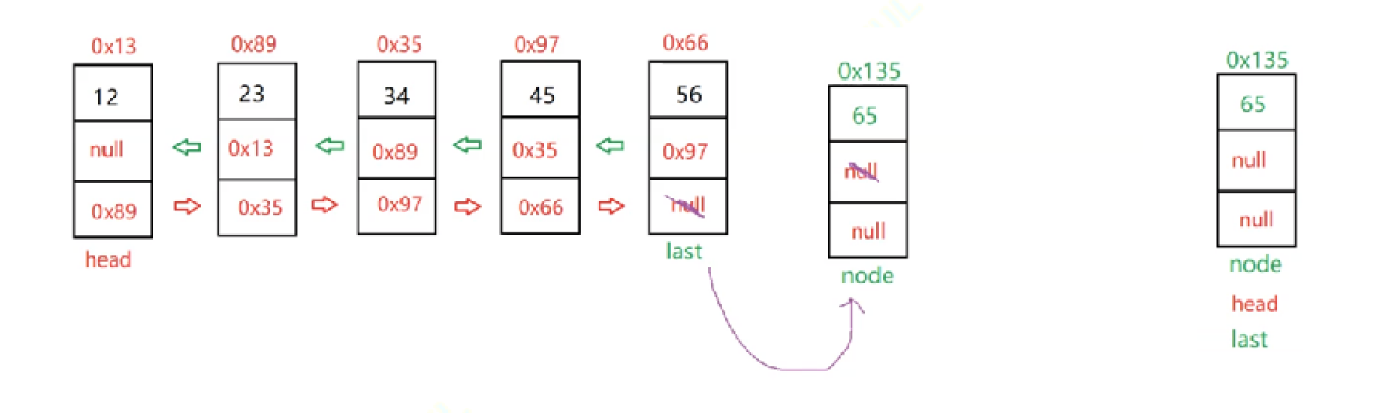
@Override public void addLast(int data) { ListNode node = new ListNode(data); if (head == null) { last = head = node; }else { last.next = node; node.prev = last; last = last.next; } }1.5 中间插入
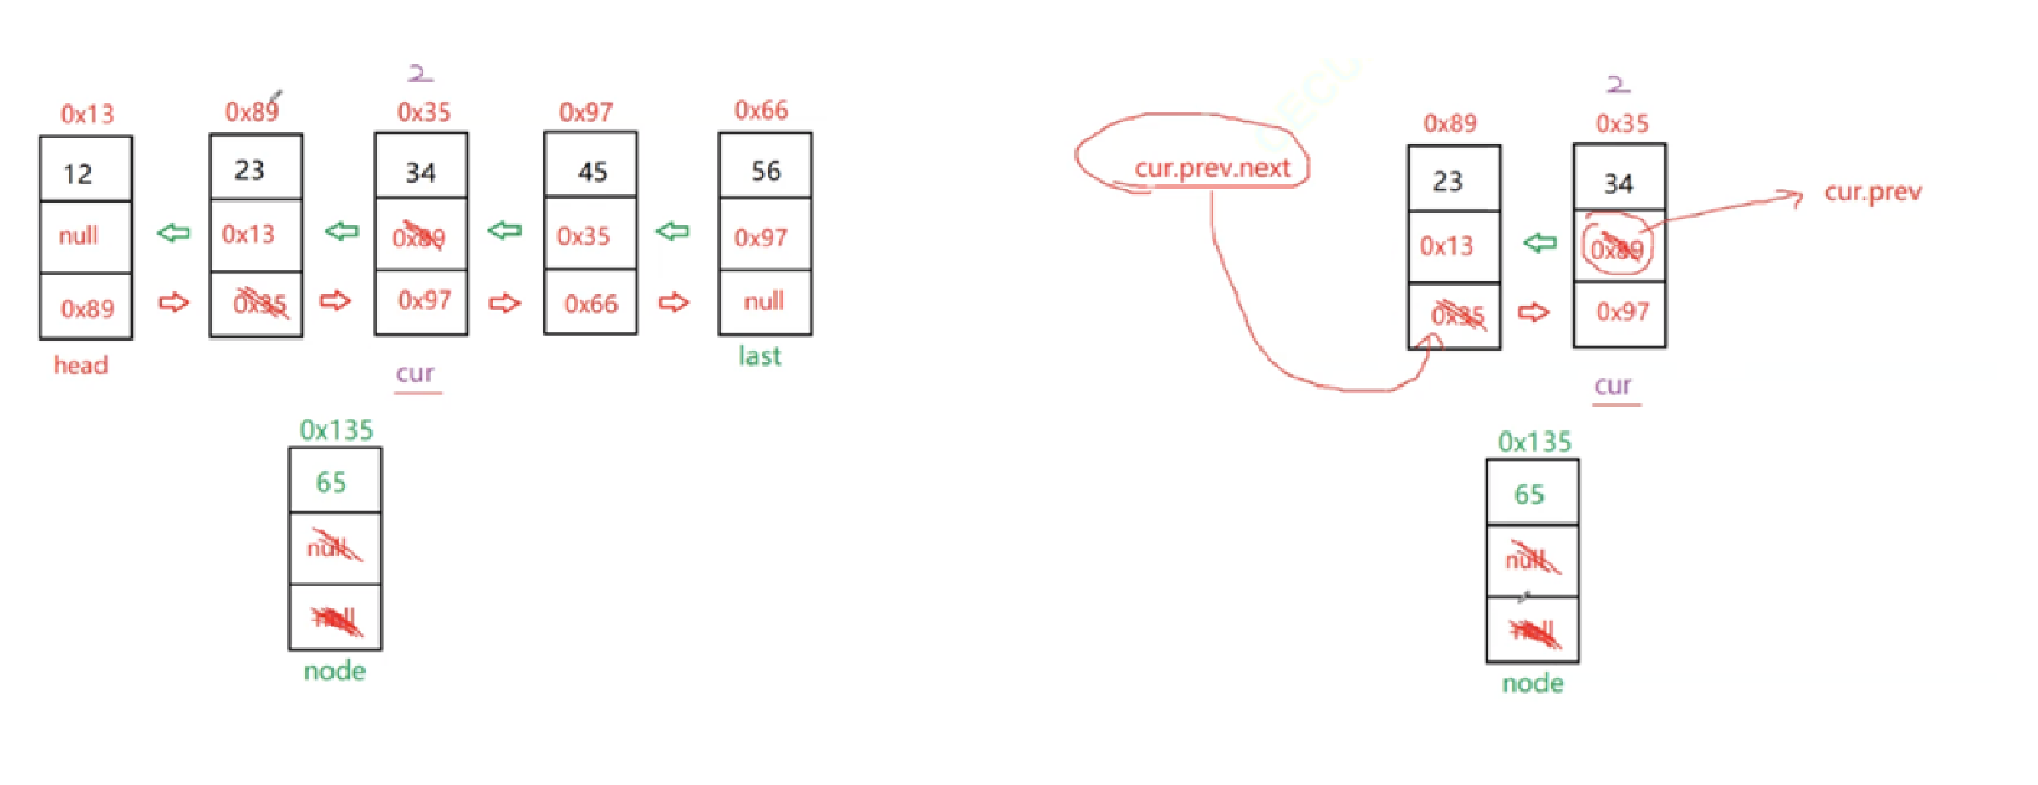
@Overridepublic void addIndex(int index, int data) { int len = size(); if (index len) { return; } if (index == 0) { addFirst(data); return; } if (index == len) { addLast(data); return; } // 中间插入 ListNode node = new ListNode(data); ListNode cur = findIndex(index); node.next = cur; cur.prev.next = node; node.prev = cur.prev; cur.prev = node;}private ListNode findIndex(int index) { ListNode cur = head; while (index != 0) { cur = cur.next; index--; } return cur;}此处直接找到 index 位置即可,不需要找 index - 1,因为有 prev
1.6 删除 key
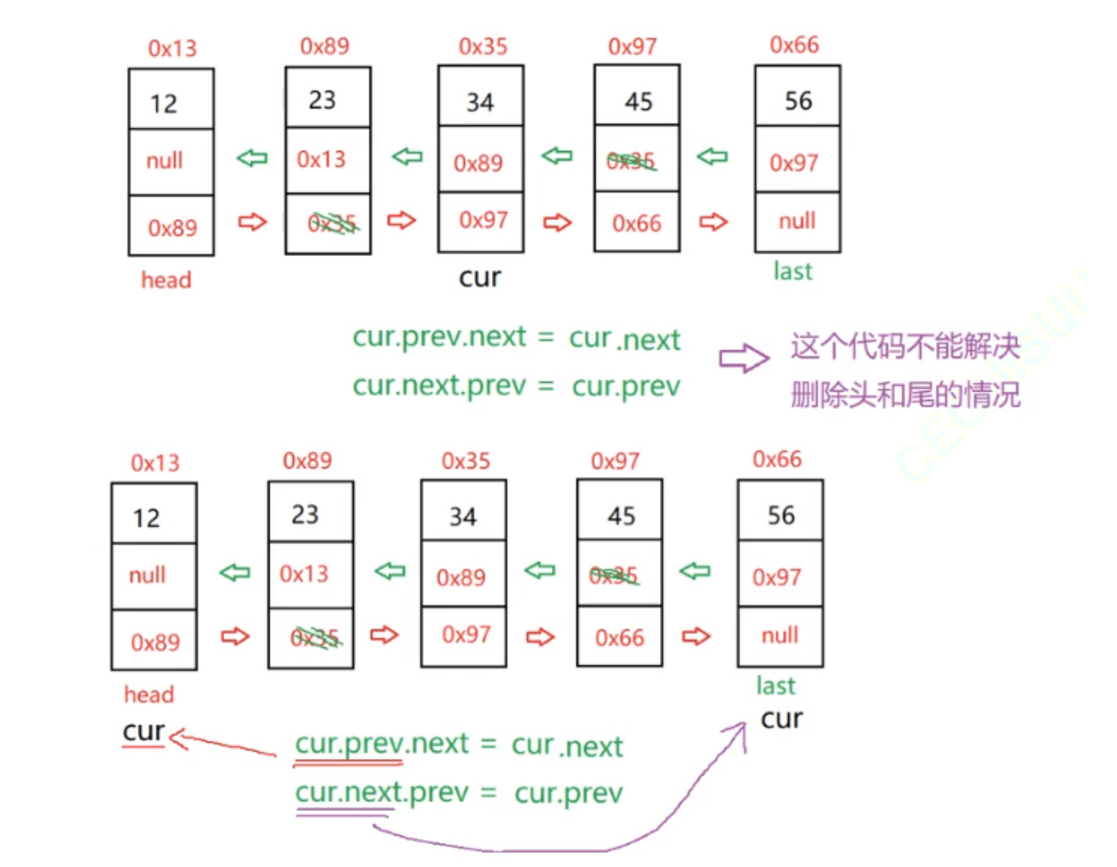
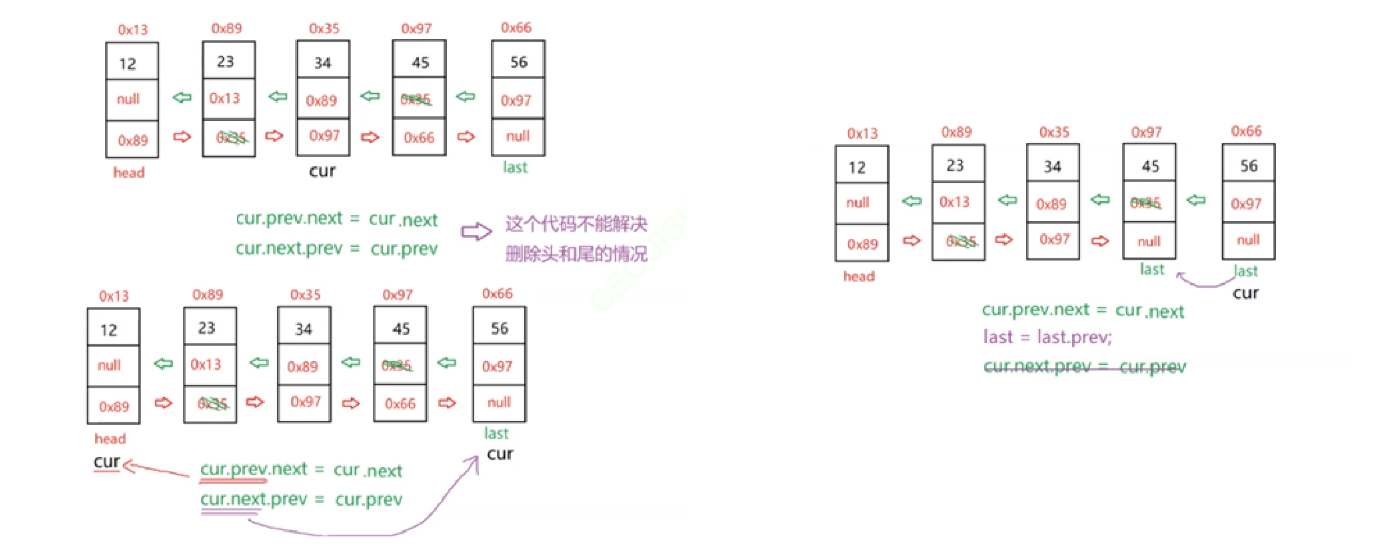
@Override public void remove(int key) { ListNode cur = head; while (cur != null) { if (cur.val == key) { // 开始删除 if (cur == head) { head = head.next; if (head != null) { head.prev = null; } } else { cur.prev.next = cur.next; if (cur.next == null) { last = last.prev; }else { cur.next.prev = cur.prev; } } return; } cur = cur.next; } }注意:
1.此处最关键的代码:
cur.prev.next = cur.next;
cur.next.prev = cur.prev;
2.但是很显然解决不了头节点和尾节点,需要条件语句单独处理
3.特殊情况:
只有一个节点的链表,且为key值
需要加上判断逻辑:
if (head != null) {
head.prev = null;
}
1.7 删除所有key
@Override public void removeAllKey(int key) { ListNode cur = head; while (cur != null) { if (cur.val == key) { // 开始删除 if (cur == head) { head = head.next; if (head != null) { head.prev = null; } } else { cur.prev.next = cur.next; if (cur.next == null) { last = last.prev; }else { cur.next.prev = cur.prev; } } } cur = cur.next; } }注意:
很显然将 删除key代码中的 return;删除即可
1.8 clear
@Override public void clear() { ListNode cur = head; while (cur != null) { ListNode curNext = cur.next; cur.prev = null; cur.next = null; cur = curNext; } head = null; last = null; }2.LinkedList的使用
2.1 什么是LinkedList
LinkedList的底层是双向链表结构,由于链表没有将元素存储在连续的空间中,元素存储在单独的节点中,然后通过引用将节点连接起来了,因此在在任意位置插入或者删除元素时,不需要搬移元素,效率比较高。
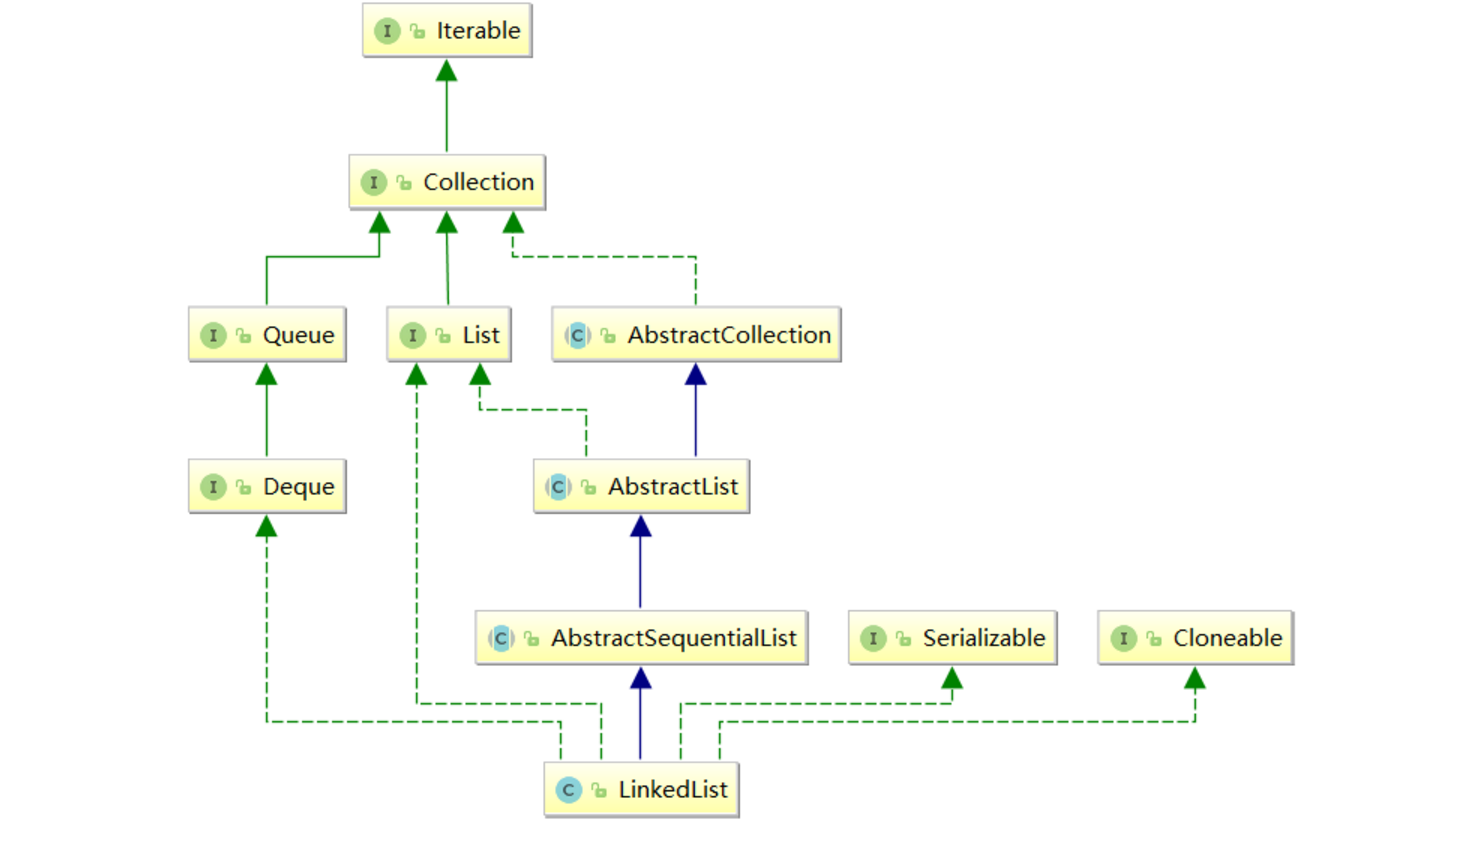
在集合框架中,LinkedList也实现了List接口,具体如下:
【说明】
LinkedList实现了List接口
LinkedList的底层使用了双向链表
LinkedList没有实现RandomAccess接口,因此LinkedList不支持随机访问
LinkedList的任意位置插入和删除元素时效率比较高,时间复杂度为O(1)
LinkedList比较适合任意位置插入的场景
5.2 LinkedList的使用
1.LinkedList的构造

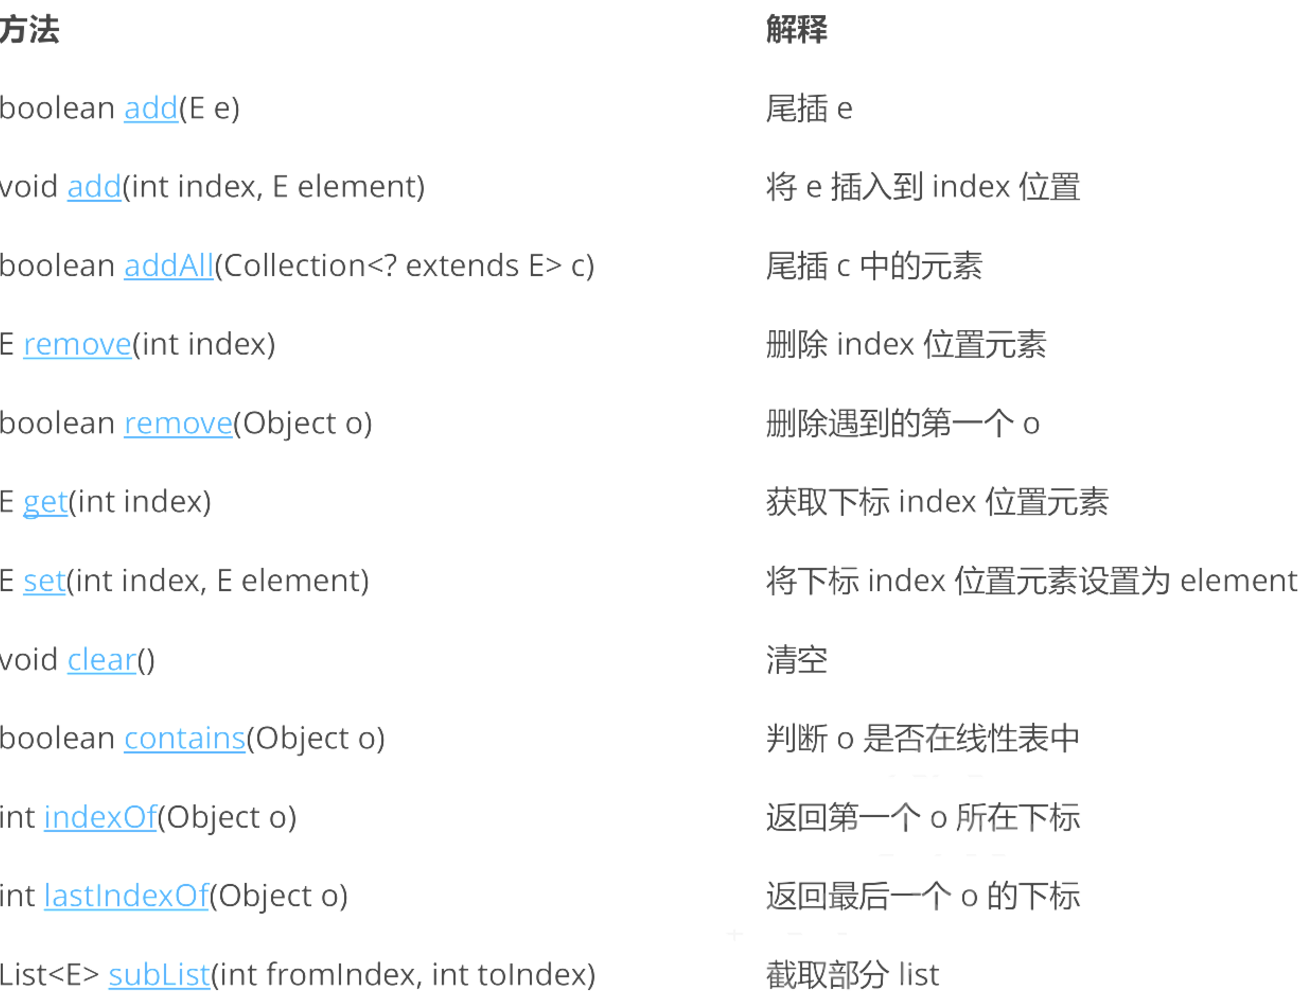
2. LinkedList的其他常用方法介绍
3.LinkedList的遍历33.
public static void main(String[] args) { LinkedList linkedList2 = new LinkedList<>(); linkedList2.add(1); linkedList2.addLast(3); linkedList2.addLast(4); linkedList2.addLast(5); System.out.println(linkedList2); System.out.println("=========ListIterator========="); ListIterator listIterator = linkedList2.listIterator(linkedList2.size()); while (listIterator.hasPrevious()) { System.out.print(listIterator.previous() + " "); } System.out.println(); System.out.println("=========ListIterator========="); ListIterator listIterator1 = linkedList2.listIterator(); while (listIterator1.hasNext()) { System.out.print(listIterator1.next() + " "); } System.out.println(); System.out.println("=========Iterator========="); Iterator iterator = linkedList2.iterator(); while (iterator.hasNext()) { System.out.print(iterator.next() + " "); } System.out.println(); System.out.println("=========for each========="); for (Integer x : linkedList2) { System.out.print(x + " "); } System.out.println(); System.out.println("=========for========="); for (int i = 0; i < linkedList2.size(); i++) { System.out.print(linkedList2.get(i) + " "); } System.out.println(); }5.3 ArrayList 和 LinkedList的区别


 浙公网安备 33010602011771号