springboot整合Mybatis-plus
1.说明
Mybatis-Plus是一个Mybatis框架的增强插件,根据官方描述(https://mybatis.plus/guide/),MP只做增强不做改变,引入它不会对现有工程产生影响,如丝般顺滑。
并且只需简单配置,即可快速进行 CRUD 操作,从而节省大量时间。
代码生成、分页、性能分析等功能一应俱全,最新已经更新到了3.1.1版本了,3.X系列支持lambda语法,让我在写条件构造的时候少了很多的"魔法值",从代码结构上更简洁了。下面开始动手创建自己的项目把!!

2.创建springboot项目
按下图步骤,创建一个springboot项目。我是创建了一个父子工程,创建了普通的maven项目,在项目下创建不同的springboot项目,也可以直接创建spring boot项目。
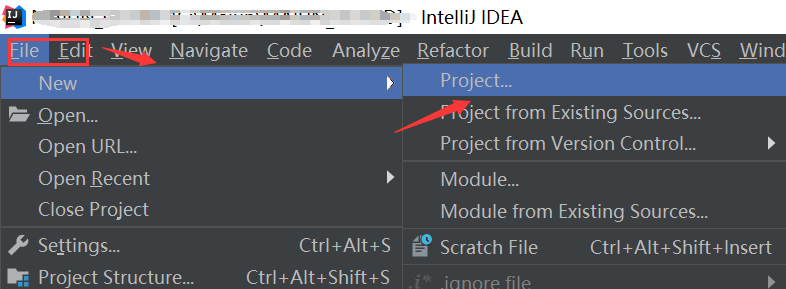
2.1创建项目
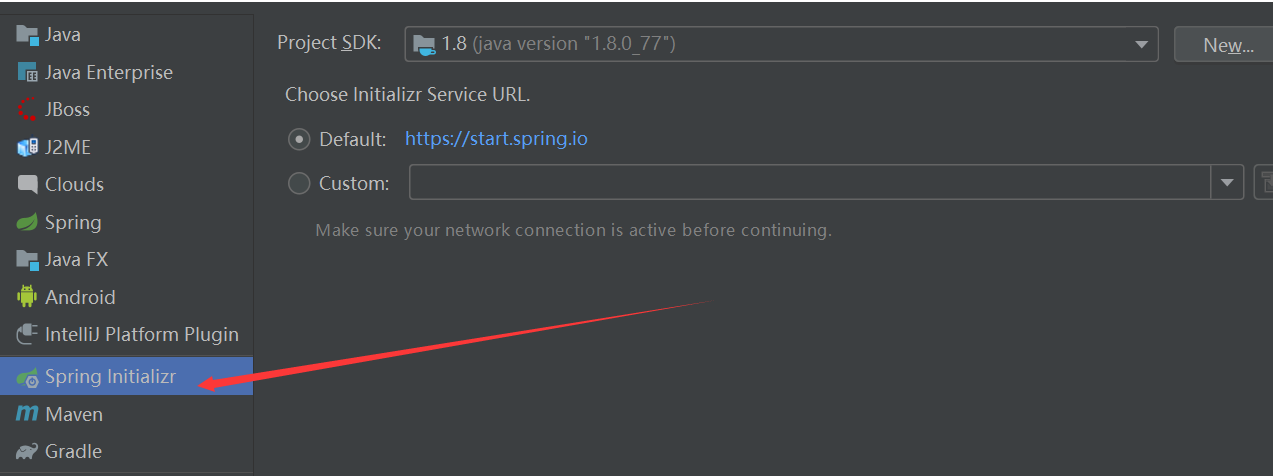
2.2选择Spring Initializr(springboot项目)
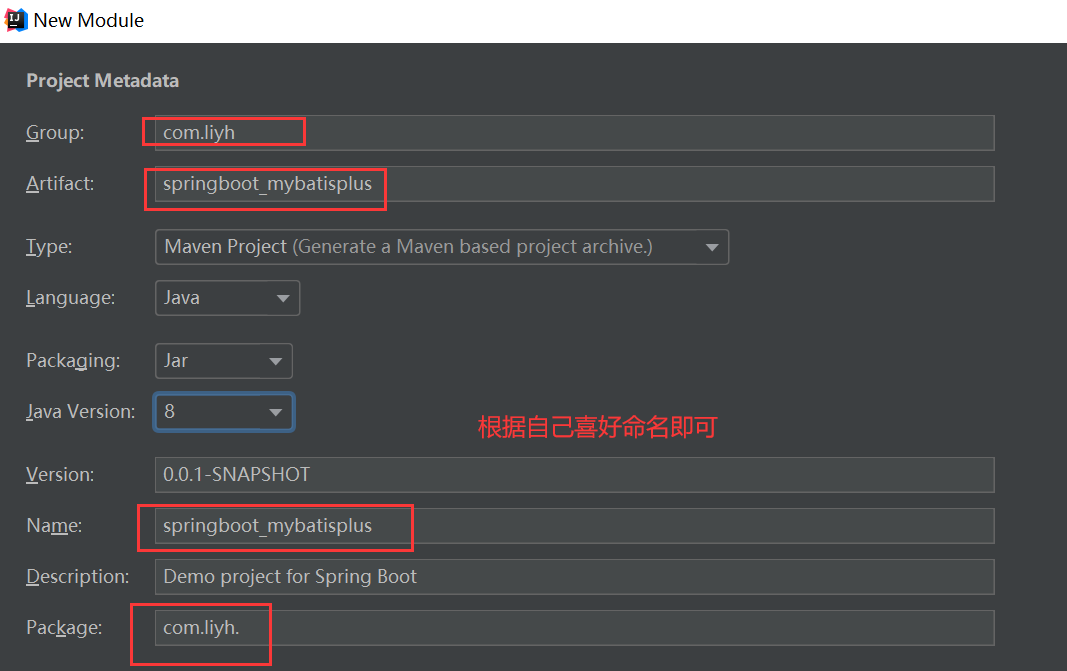
2.3配置属性,完成点击next
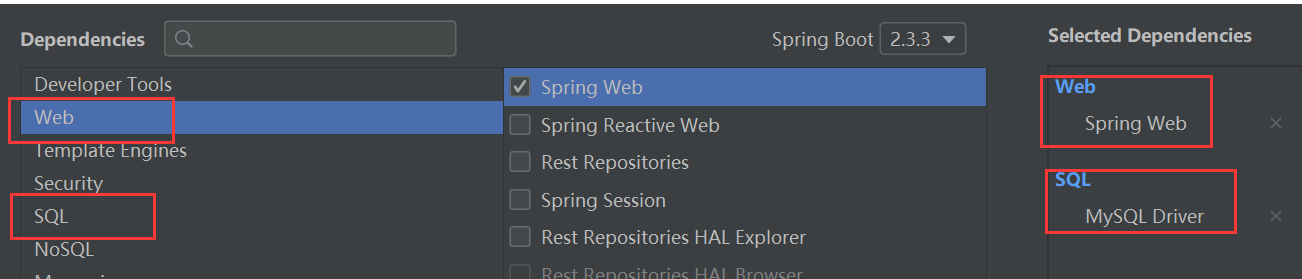
2.4选择依赖,也可以不选择,稍后在pom文件里添加
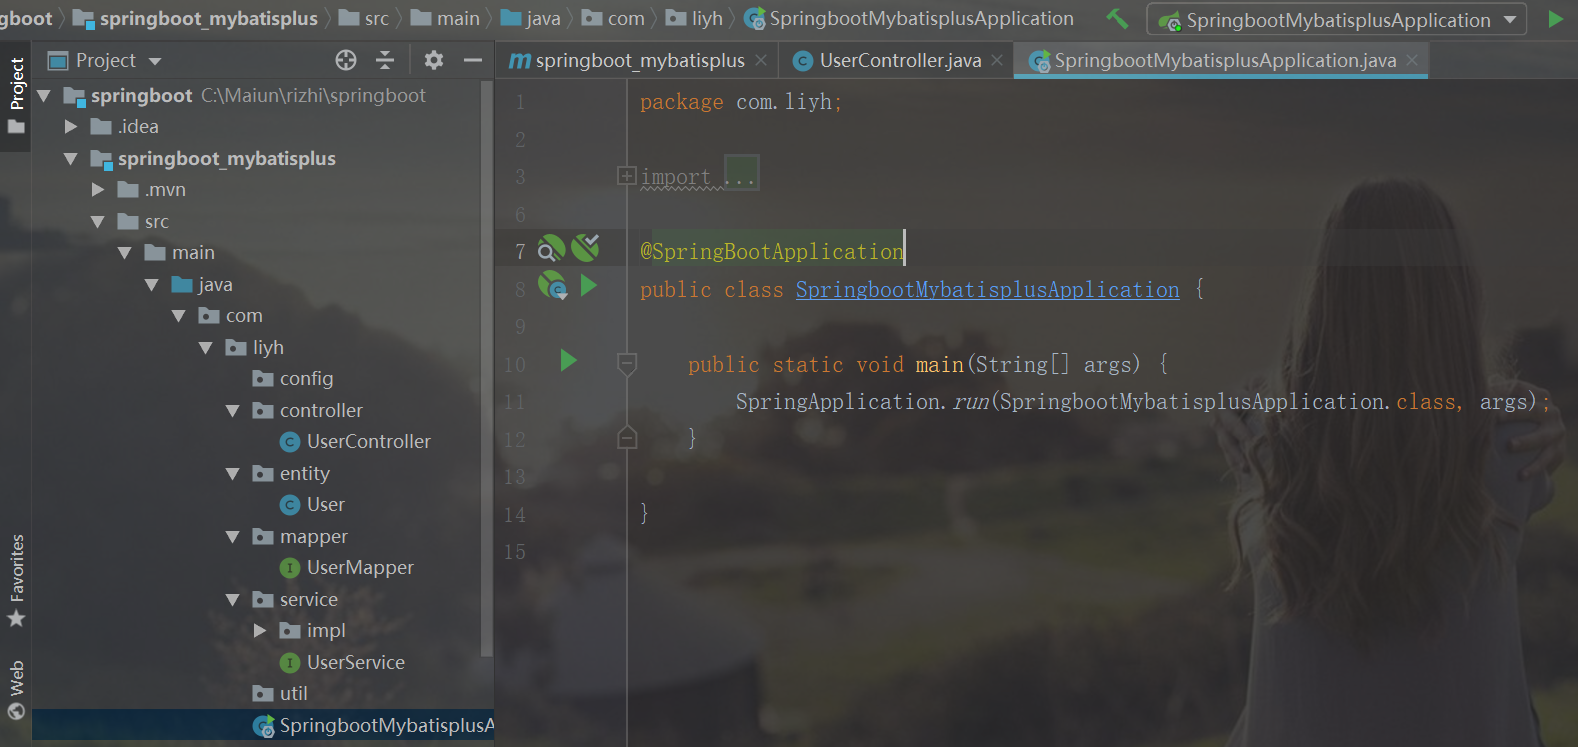
2.5项目启动类
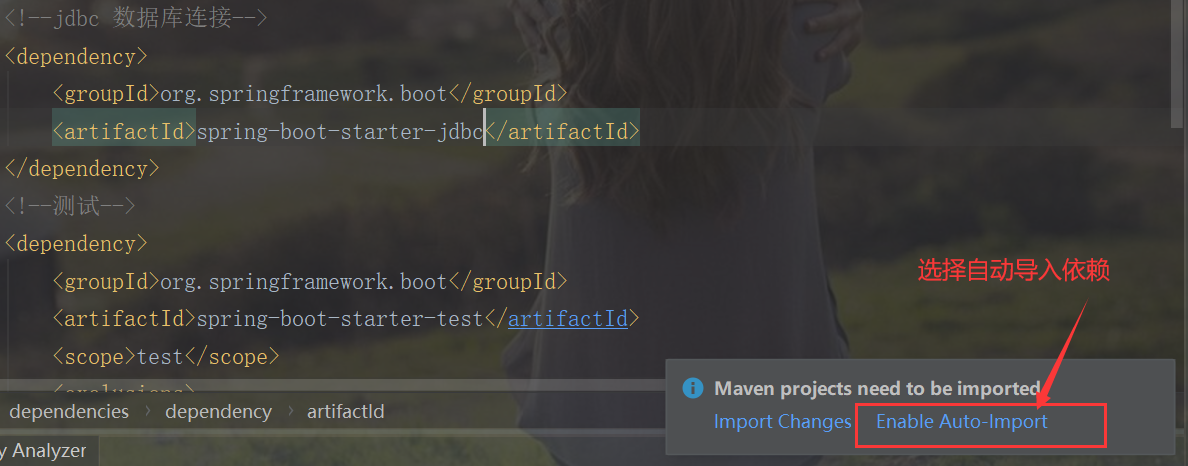
3.Pom文件添加依赖
<dependencies>
    <!--SpringMVC模式的web应用-->
    <dependency>
        <groupId>org.springframework.boot</groupId>
        <artifactId>spring-boot-starter-web</artifactId>
    </dependency>
    <!--mysql驱动-->
    <dependency>
        <groupId>mysql</groupId>
        <artifactId>mysql-connector-java</artifactId>
        <scope>runtime</scope>
    </dependency>
    <!--jdbc 数据库连接-->
    <dependency>
        <groupId>org.springframework.boot</groupId>
        <artifactId>spring-boot-starter-jdbc</artifactId>
    </dependency>
    <!-- 引入阿里数据库连接池 -->
    <dependency>
        <groupId>com.alibaba</groupId>
        <artifactId>druid</artifactId>
        <version>1.1.6</version>
    </dependency>
    <!--lombok-->
    <dependency>
        <groupId>org.projectlombok</groupId>
        <artifactId>lombok</artifactId>
        <optional>true</optional>
    </dependency>
    <!-- mybatisPlus 核心库 -->
    <dependency>
        <groupId>com.baomidou</groupId>
        <artifactId>mybatis-plus-boot-starter</artifactId>
        <version>3.1.0</version>
    </dependency>
    <!--测试-->
    <dependency>
        <groupId>org.springframework.boot</groupId>
        <artifactId>spring-boot-starter-test</artifactId>
        <scope>test</scope>
    </dependency>
</dependencies>
4.配置文件
在resource目录下新建,application.yml文件,配置数据库连接驱动,日志级别。配置如下。
# 配置端口
server:
  port: 8081
spring:
  # 配置数据源
  datasource:
    url: jdbc:mysql://localhost:3306/db1?useUnicode=true&characterEncoding=utf-8
    username: root
    password: root
    driver-class-name: com.mysql.cj.jdbc.Driver
# mybatis-plus相关配置
mybatis-plus:
  # xml扫描,多个目录用逗号或者分号分隔(告诉 Mapper 所对应的 XML 文件位置)
  mapper-locations: classpath:com.liyh.mapper/*.xml
  # 以下配置均有默认值,可以不设置
  global-config:
    db-config:
      #主键类型 AUTO:"数据库ID自增" INPUT:"用户输入ID",ID_WORKER:"全局唯一ID (数字类型唯一ID)", UUID:"全局唯一ID UUID";
      id-type: auto
      #字段策略 IGNORED:"忽略判断"  NOT_NULL:"非 NULL 判断")  NOT_EMPTY:"非空判断"
      field-strategy: NOT_EMPTY
      #数据库类型
      db-type: MYSQL
  configuration:
    # 是否开启自动驼峰命名规则映射:从数据库列名到Java属性驼峰命名的类似映射
    map-underscore-to-camel-case: true
    # 如果查询结果中包含空值的列,则 MyBatis 在映射的时候,不会映射这个字段
    call-setters-on-nulls: true
    # 这个配置会将执行的sql打印出来,在开发或测试的时候可以用
    log-impl: org.apache.ibatis.logging.stdout.StdOutImpl
# 日志级别
logging:
  level:
    root: info
数据库表

/*
 Navicat Premium Data Transfer

 Source Server         : localhost
 Source Server Type    : MySQL
 Source Server Version : 50622
 Source Host           : localhost:3306
 Source Schema         : db1

 Target Server Type    : MySQL
 Target Server Version : 50622
 File Encoding         : 65001

 Date: 28/08/2020 11:32:49
*/

SET NAMES utf8mb4;
SET FOREIGN_KEY_CHECKS = 0;

-- ----------------------------
-- Table structure for t_user
-- ----------------------------
DROP TABLE IF EXISTS `t_user`;
CREATE TABLE `t_user`  (
  `id` int(11) NOT NULL AUTO_INCREMENT,
  `birthday` date NULL DEFAULT NULL,
  `gender` varchar(1) CHARACTER SET utf8 COLLATE utf8_general_ci NULL DEFAULT NULL,
  `username` varchar(32) CHARACTER SET utf8 COLLATE utf8_general_ci NULL DEFAULT NULL,
  `password` varchar(256) CHARACTER SET utf8 COLLATE utf8_general_ci NULL DEFAULT NULL,
  `remark` varchar(32) CHARACTER SET utf8 COLLATE utf8_general_ci NULL DEFAULT NULL,
  `station` varchar(11) CHARACTER SET utf8 COLLATE utf8_general_ci NULL DEFAULT NULL,
  `telephone` varchar(11) CHARACTER SET utf8 COLLATE utf8_general_ci NULL DEFAULT NULL,
  `name` varchar(255) CHARACTER SET utf8 COLLATE utf8_general_ci NULL DEFAULT NULL,
  PRIMARY KEY (`id`) USING BTREE
) ENGINE = InnoDB AUTO_INCREMENT = 3 CHARACTER SET = utf8 COLLATE = utf8_general_ci ROW_FORMAT = Compact;

-- ----------------------------
-- Records of t_user
-- ----------------------------
INSERT INTO `t_user` VALUES (1, '2020-06-04', '1', 'admin', '$2a$10$qnWeSm.dqxgPXTeQlM.rR.CjezneVtUuIYg0TfPHzWQPy2hyc3dJq', '系统管理员', '正常', '888888', '管理员');
INSERT INTO `t_user` VALUES (2, '2020-06-04', '2', 'xiaoming', '$2a$10$qnWeSm.dqxgPXTeQlM.rR.CjezneVtUuIYg0TfPHzWQPy2hyc3dJq', '营养健康师', '正常', '666666', '小明');

SET FOREIGN_KEY_CHECKS = 1;
5.开始编写代码及测试
5.1 创建entity

实体类:
package com.liyh.entity;

import com.baomidou.mybatisplus.annotation.TableName;
import lombok.Data;
import java.io.Serializable;
import java.util.Date;

/**
 * 用户实体类
 * @Author: liyh
 * @Date: 2020/8/28 11:39
 */
@Data
@TableName(value = "t_user")
public class User implements Serializable{
    private Integer id; // 主键
    private Date birthday; // 生日
    private String gender; // 性别
    private String username; // 用户名,唯一
    private String password; // 密码
    private String remark; // 备注
    private String station; // 状态
    private String telephone; // 联系电话
    private String name; // 姓名

    public String getName() {
        return name;
    }

    public void setName(String name) {
        this.name = name;
    }

    public Integer getId() {
        return id;
    }

    public void setId(Integer id) {
        this.id = id;
    }

    public Date getBirthday() {
        return birthday;
    }

    public void setBirthday(Date birthday) {
        this.birthday = birthday;
    }

    public String getGender() {
        return gender;
    }

    public void setGender(String gender) {
        this.gender = gender;
    }

    public String getUsername() {
        return username;
    }

    public void setUsername(String username) {
        this.username = username;
    }

    public String getPassword() {
        return password;
    }

    public void setPassword(String password) {
        this.password = password;
    }

    public String getRemark() {
        return remark;
    }

    public void setRemark(String remark) {
        this.remark = remark;
    }

    public String getStation() {
        return station;
    }

    public void setStation(String station) {
        this.station = station;
    }

    public String getTelephone() {
        return telephone;
    }

    public void setTelephone(String telephone) {
        this.telephone = telephone;
    }

}
5.2 创建mapper
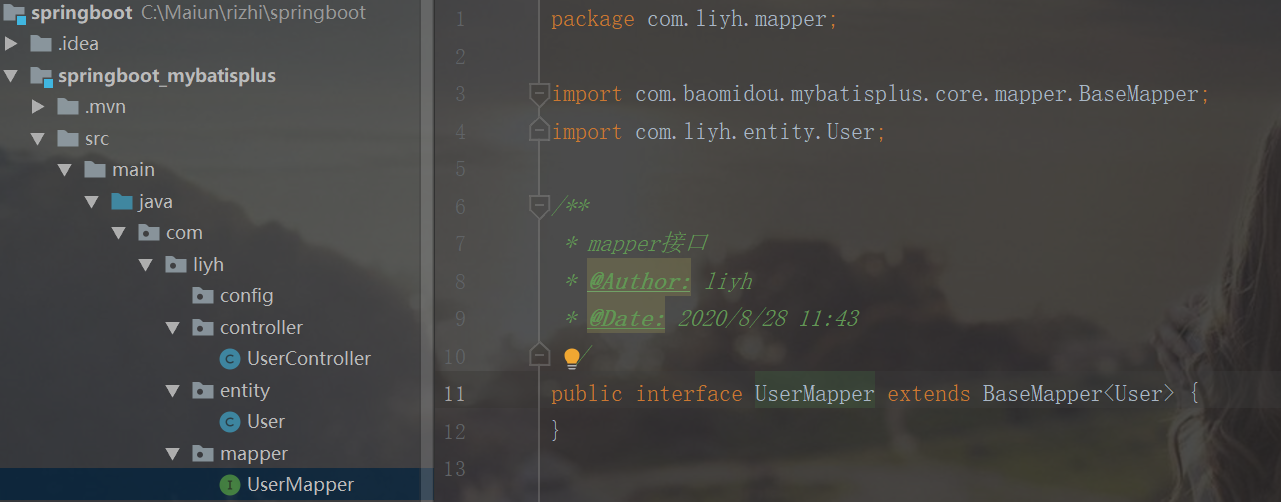
在mapper包中创建UserMapper接口,并继承mybatisPlus的BaseMapper,如下图
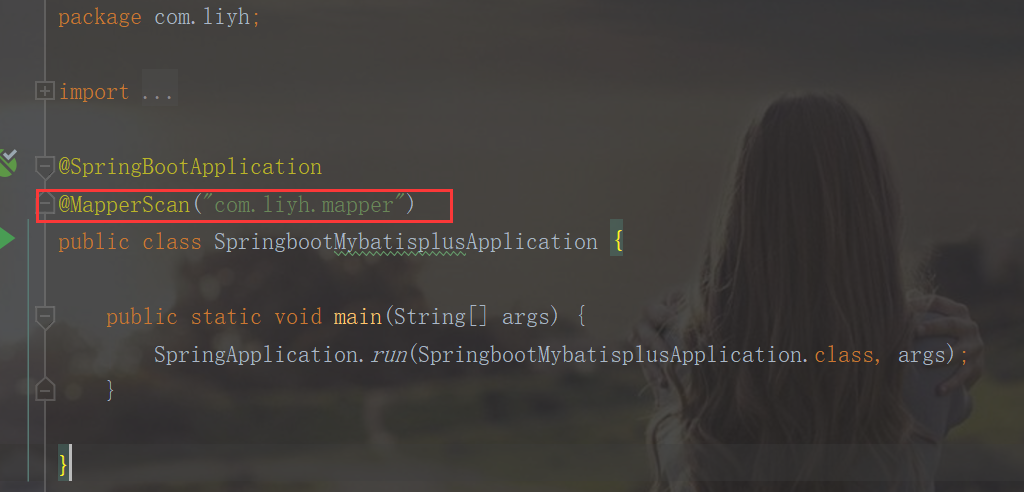
5.3 在启动类添加mapper扫描
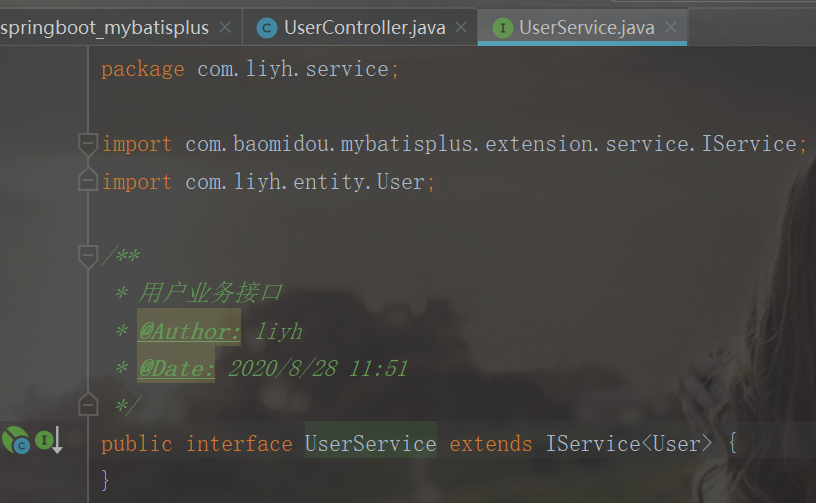
5.4 创建service和impl
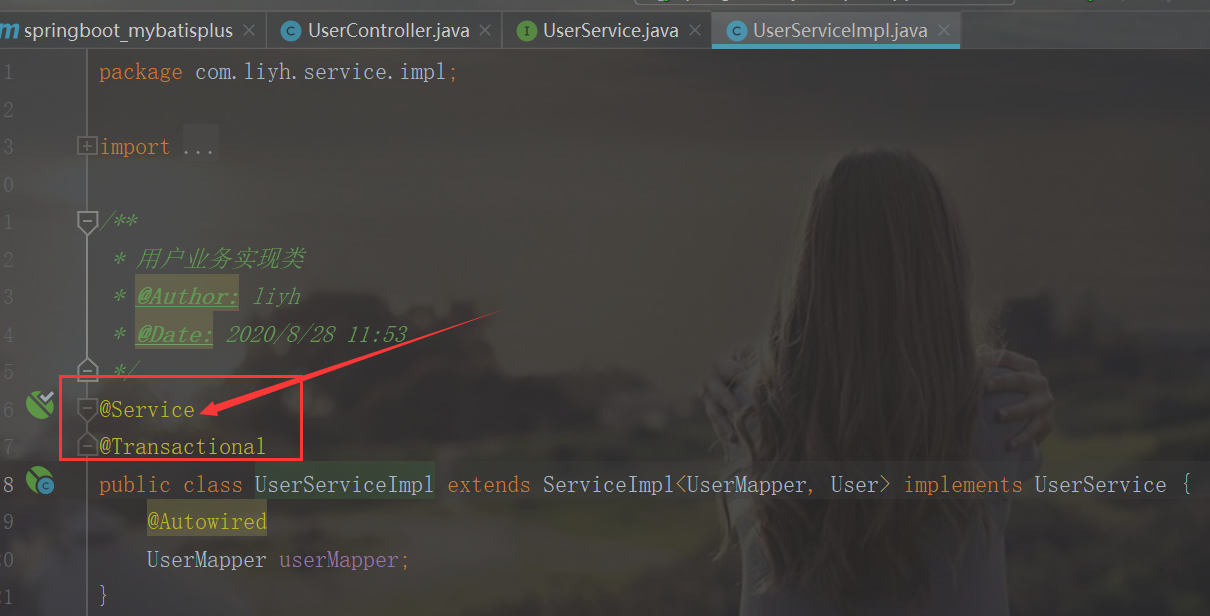
(注意:在UserServiceImpl类,必须加上@Service注解,否则会报错 Field userService in com.liyh.mybatisplus.controller.UserController required)
5.5 创建controller
这里我们看到,service中我们没有写任何方法,MyBatis-Plus官方封装了许多基本CRUD的方法,可以直接使用大量节约时间,MP共通方法详见IService,ServiceImpl,BaseMapper源码,写入操作在ServiceImpl中已有事务绑定,这里我们举一些常用的方法演示。
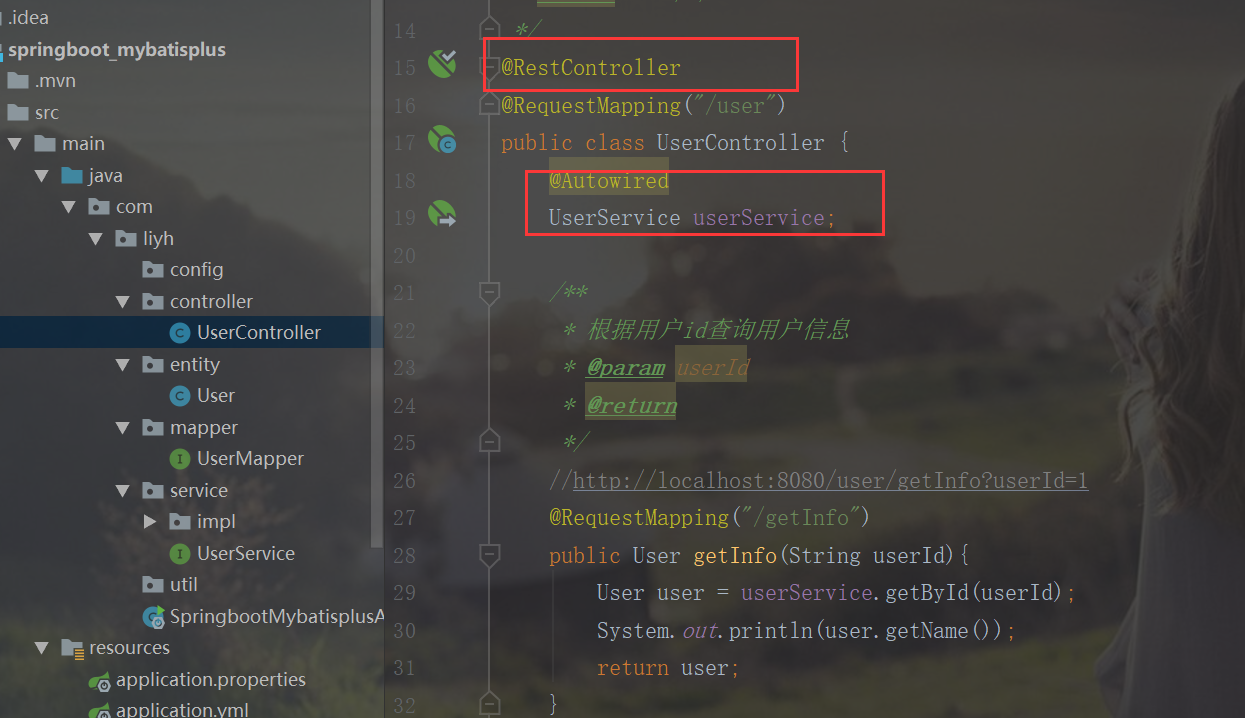
package com.liyh.controller;
import com.liyh.entity.User;
import com.liyh.service.UserService;
import org.springframework.beans.factory.annotation.Autowired;
import org.springframework.web.bind.annotation.RequestMapping;
import org.springframework.web.bind.annotation.RestController;
import java.util.Date;
import java.util.List;
/**
* @Author: liyh
* @Date: 2020/8/28 11:52
*/
@RestController
@RequestMapping("/user")
public class UserController {
@Autowired
UserService userService;
/**
* 根据用户id查询用户信息
* @param userId
* @return
*/
//http://localhost:8080/user/getInfo?userId=1
@RequestMapping("/getInfo")
public User getInfo(String userId){
User user = userService.getById(userId);
System.out.println(user.getName());
return user;
}
/**
* 查询所有信息
* @return
*/
//http://localhost:8080/user/getUserList
@RequestMapping("/getUserList")
public List<User> getUserList(){
return userService.list();
}
/**
* 新增用户信息
*/
//http://localhost:8080/user/saveInfo
@RequestMapping("/saveInfo")
public void saveInfo(){
User user = new User();
user.setBirthday(new Date());
user.setGender("1");
user.setUsername("apple");
user.setPassword("apple");
user.setRemark("消费大师");
user.setStation("冻结");
user.setTelephone("111111");
user.setName("平锅");
userService.save(user);
}
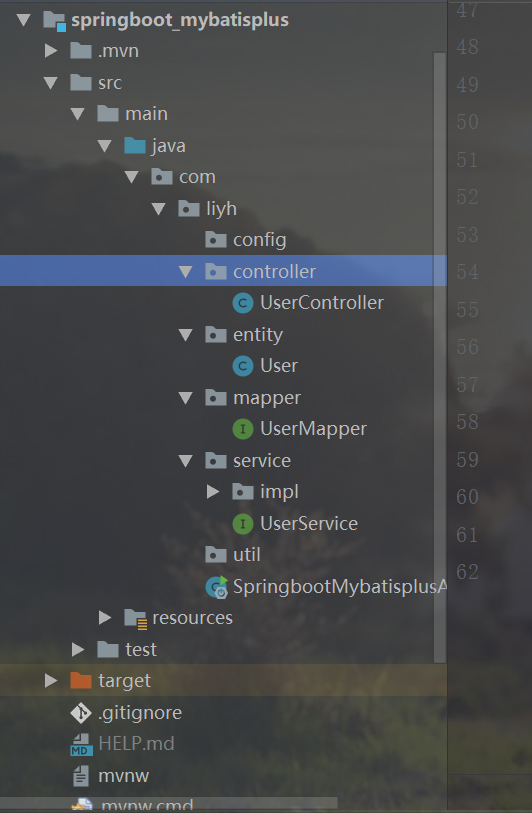
}5.6 项目总体结构
5.7 启动项目进行测试
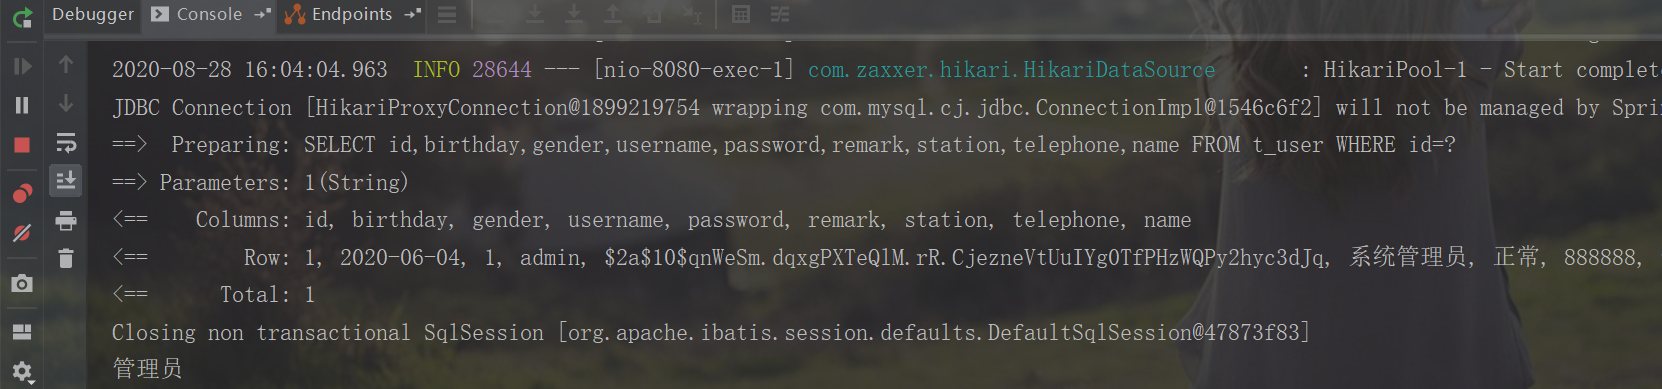
5.7.1 测试getInfo接口

/**
* 根据用户id查询用户信息
* @param userId
* @return
*/
//http://localhost:8080/user/getInfo?userId=1
@RequestMapping("/getInfo")
public User getInfo(String userId){
    User user = userService.getById(userId);
    System.out.println(user.getName());
    return user;
}
5.7.2 测试getUserList接口
/**
* 查询所有信息
* @return
*/
//http://localhost:8080/user/getUserList
@RequestMapping("/getUserList")
public List<User> getUserList(){
    return userService.list();
}
5.7.3 测试save接口

6. 数据库

7. 项目地址:https://gitee.com/liyhGitee/springboot
发布自己的项目到git,浏览:https://www.cnblogs.com/liyhbk/p/13578717.html
8. 结束语
上天的程序员后续分享,关于springboot的更多功能和使用,每一个截图都是实战的结果,谢谢阅读,点波关注哟!!!

 浙公网安备 33010602011771号