linux部署Python UI自动化项目过程
1.安装chrome浏览器
- 下载
访问谷歌中文网站:Google Chrome 网络浏览器。

将页面滑到最下面,点击其他平台,
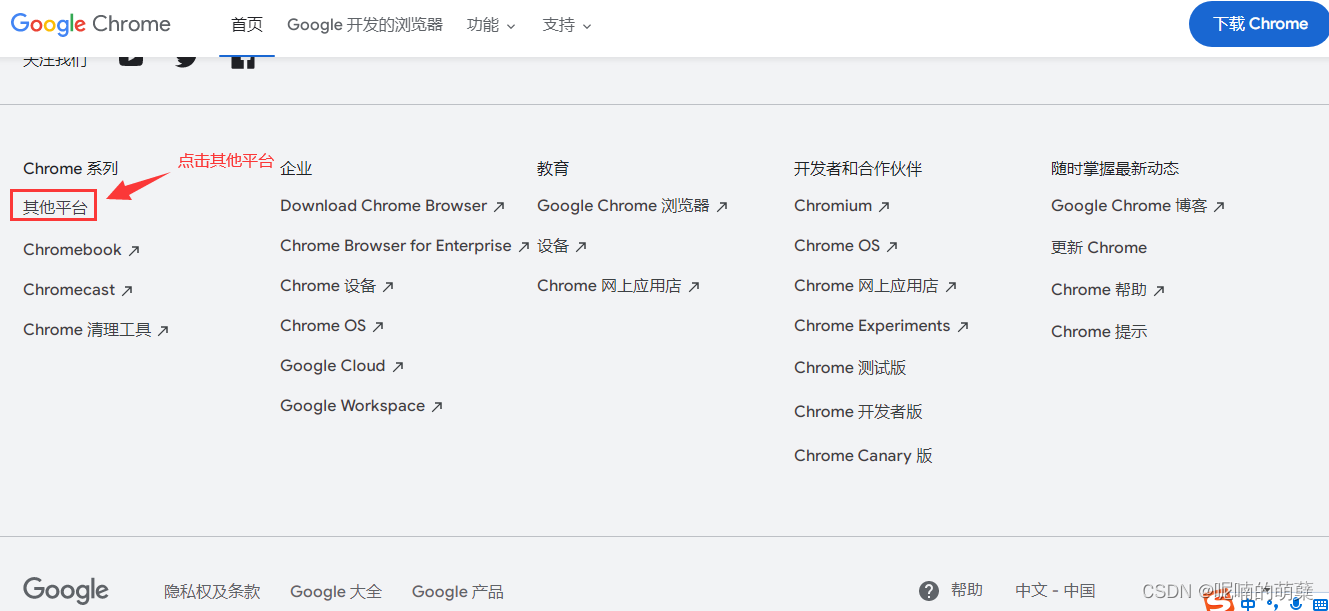
在弹出的页面选择linux
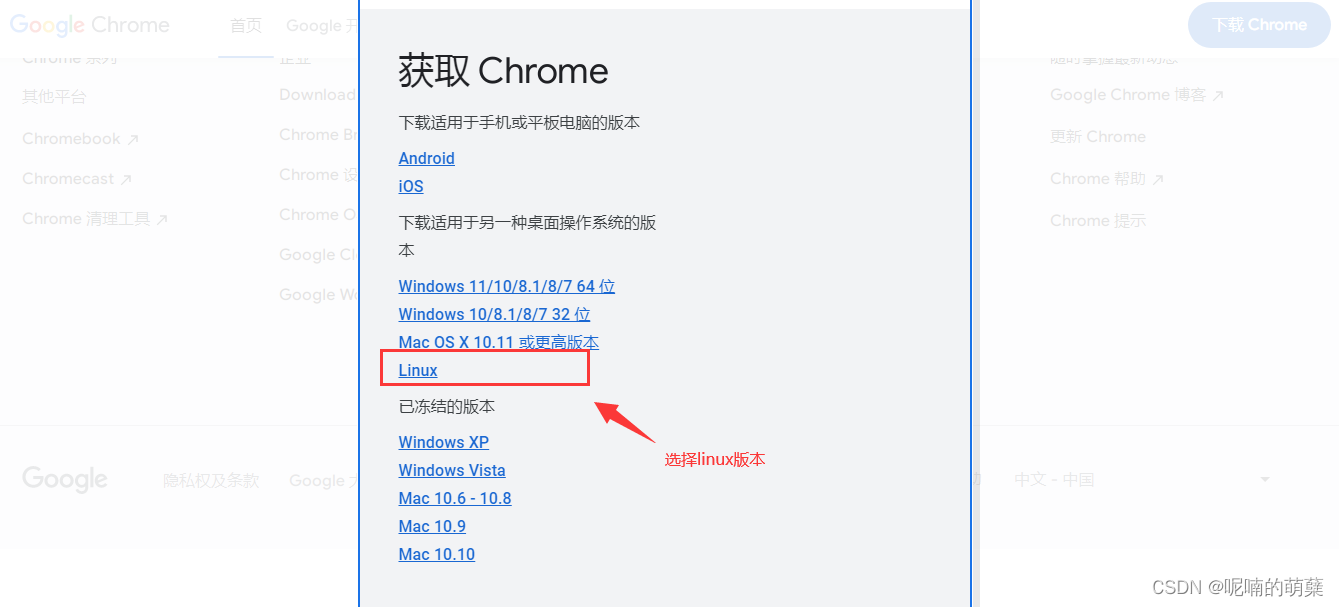
选择对应的系统版本进行下载。
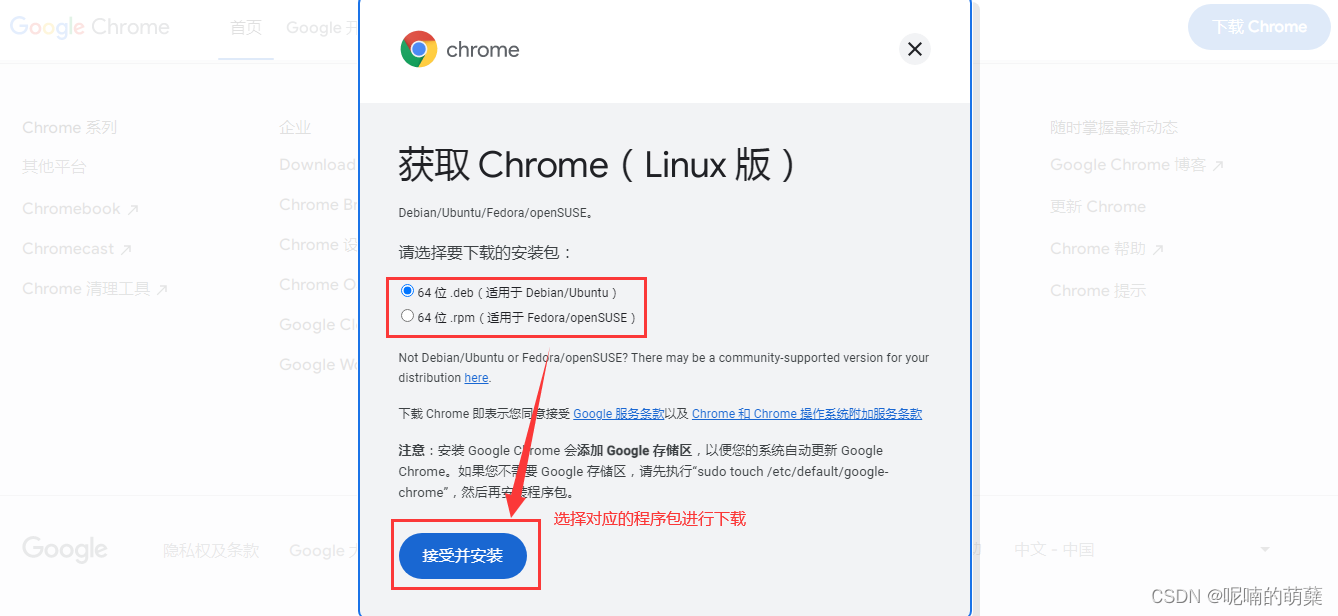
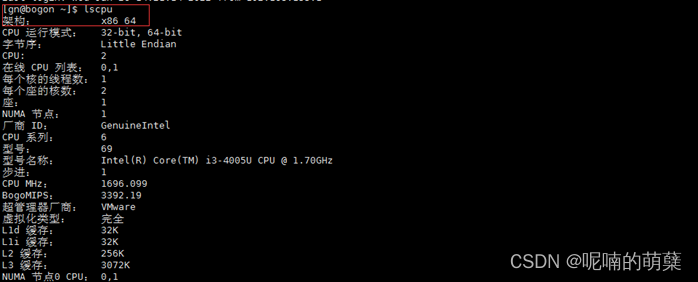
下载后的deb包默认是arm架构,rpm包默认是x86架构的。所以在选择的时候要对应的系统架构选择安装包,可以通过lscpu查看一下自己系统的架构。怎么获取x86架构的deb包和arm架构的rpm包欢迎留言告诉我。

- 安装包上传
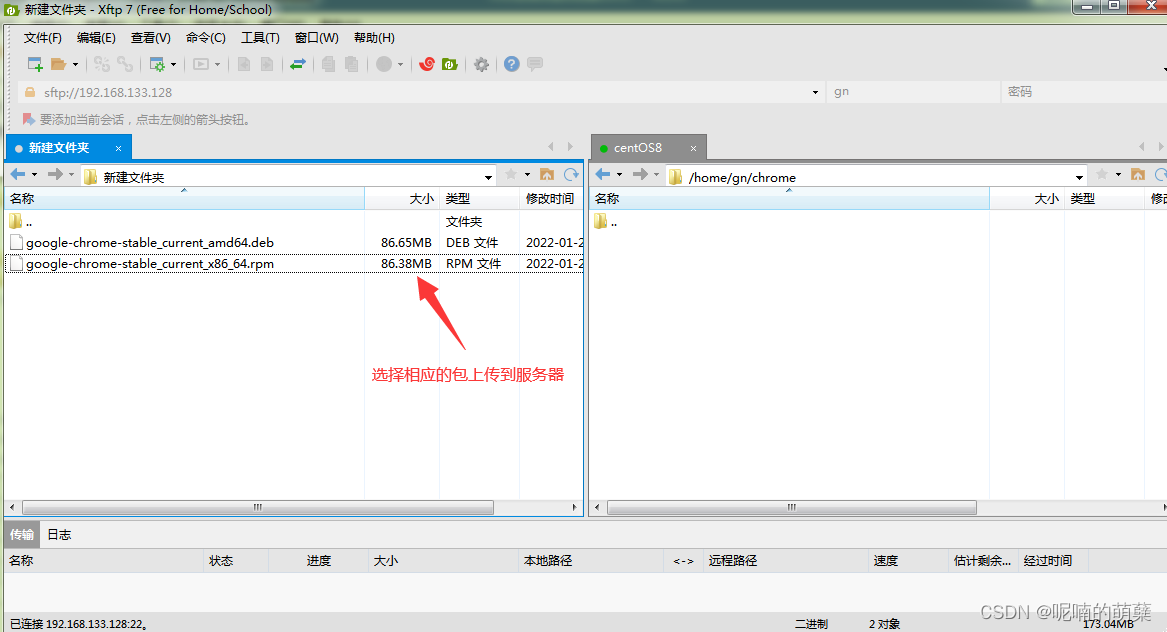
- 安装
使用yum localinstall <包名>进行安装。yun localinstall能够自动解决安装依赖包问题。使用rpm -ivh <包名>可以进行安装,但是不能自动解决依赖包问题,未用rpm -ivh进行安装试验,有兴趣的人可以尝试安装试一下。

- 查看是否安装成功
[root@ccc ~]# google-chrome --version
Google Chrome 92.0.4515.107
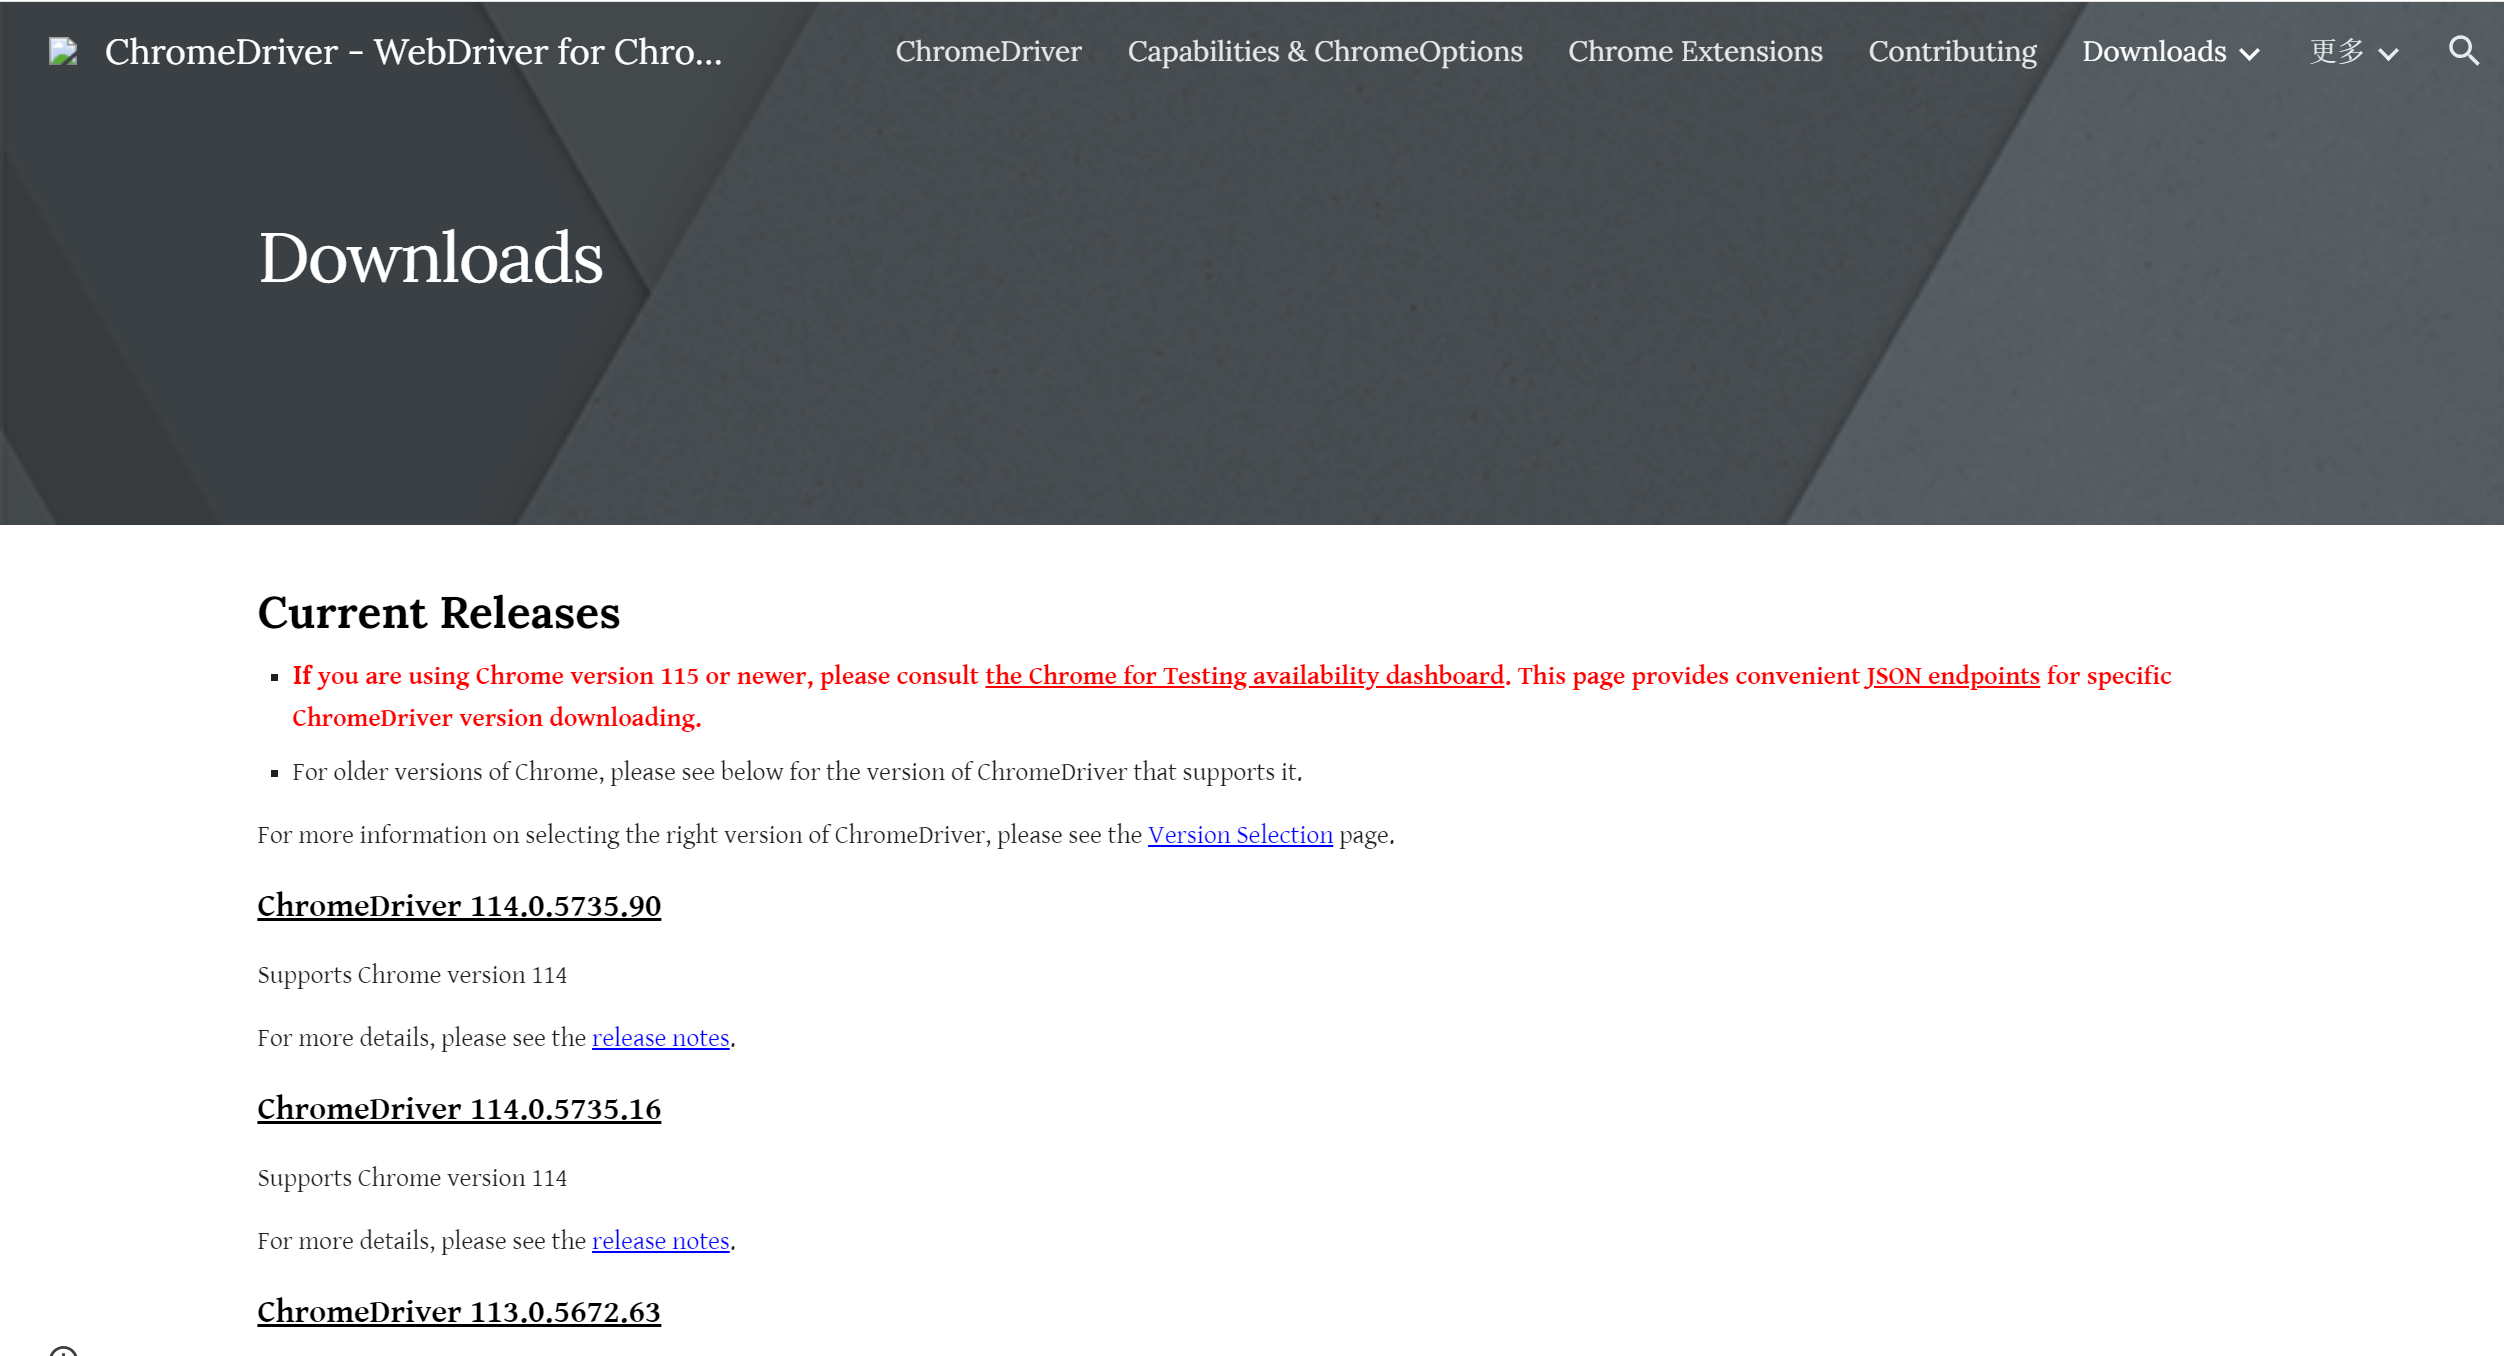
2.上传chrome驱动程序
- 下载
下载地址:https://chromedriver.chromium.org/downloads
根据上传到浏览器的chrome版本下载对应的chrome驱动
- 解压chrome驱动
unzip chromedriver_linux64.zip
- 1 给chrome驱动权限,并检查chrome驱动版本
#给与执行权限
chmod +x /usr/bin/chromedriver
#检查chromedriver版本:
chromedriver -version
- 2 不给chrome驱动权限,直接在程序中引用解压后的chrome驱动(我采用的方式)
将解压后的chrome驱动放在项目根目录上
from selenium import webdriver
from selenium.webdriver import Remote
from selenium.webdriver.chrome.service import Service as ChromeService

        chrome_options = webdriver.ChromeOptions()

        # -----如果linux系统没有安装桌面,下面两句一定要有哦,必须开启无界面浏览器-------
        chrome_options.add_argument("--headless")
        chrome_options.add_argument("--disable-gpu")

        # 关闭浏览器被操作提示
        chrome_options.add_experimental_option("excludeSwitches", ['enable-automation'])


        # driver = webdriver.Chrome(service=ChromeService(ChromeDriverManager().install()), options=chrome_options)  # 启动浏览器
        driver = webdriver.Chrome(service=ChromeService(executable_path="./chromedriver"),
                                  options=chrome_options)
        driver.set_window_size(1680, 1050)
3.安装allure
1上传allure-commandline-2.13.1.zip上传到服务器的/opt目录下

2解压
unzip allure-commandline-2.13.1.zip
3配置环境变量
将解压后allure下bin目录的路径/opt/ allure-commandline-2.13.1/bin配置进环境变量
vi /etc/profile
在PATH后追加以下内容,保存
:$PATH:/opt/allure-commandline-2.13.1/bin
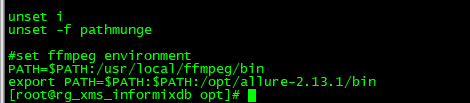
使环境变量生效
source /etc/profile
4验证
在命令行输入allure --version,能出现版本说明allure命令行已经安装成功了

参考链接:
https://blog.csdn.net/weixin_45777235/article/details/122711735
https://blog.csdn.net/bang152101/article/details/108874136

 浙公网安备 33010602011771号