Spring框架总结(六)
注解
注解方式可以简化spring的IOC容器的配置!
使用注解步骤:
1)先引入context名称空间
xmlns:context="http://www.springframework.org/schema/context"
2)开启注解扫描
<context:component-scan base-package="cn.itcast.e_anno2"></context:component-scan>
3)使用注解
通过注解的方式,把对象加入ioc容器。
创建对象以及处理对象依赖关系,相关的注解:
@Component 指定把一个对象加入IOC容器
@Repository 作用同@Component; 在持久层使用
@Service 作用同@Component; 在业务逻辑层使用
@Controller 作用同@Component; 在控制层使用
@Resource 属性注入
总结:
1) 使用注解,可以简化配置,且可以把对象加入IOC容器,及处理依赖关系(DI)
2) 注解可以和XML配置一起使用。
事例
(1)开启注解
 1 <?xml version="1.0" encoding="UTF-8"?>
 2 <beans xmlns="http://www.springframework.org/schema/beans"
 3     xmlns:xsi="http://www.w3.org/2001/XMLSchema-instance" xmlns:p="http://www.springframework.org/schema/p"
 4     xmlns:context="http://www.springframework.org/schema/context"
 5     xsi:schemaLocation="
 6         http://www.springframework.org/schema/beans
 7         http://www.springframework.org/schema/beans/spring-beans.xsd
 8         http://www.springframework.org/schema/context
 9         http://www.springframework.org/schema/context/spring-context.xsd">
10
11     <!-- 开启注解 需要引入xmlns:context="http://www.springframework.org/schema/context"-->
12     <context:component-scan base-package="com.liuyang.annocation"></context:component-scan>
13
14 </beans>
(2)然后再类中加入如下
@Component("userAction")
public class UserAction {

    @Resource(name="us")
    private UserService us;

    public String execute() {
        us.save();
        return null;
    }

}
component是全局类型设置,然后给类加个名字,@Component("userAction")userAction加入ioc容器,相当于之前的bean中写的<bean id=userAction class=".." />
Resource属性设置,属性注入到容器中,@Resource(name="us"),相当于
<bean id="" class="">
<property name="us" ref="us" /> @Resource相当于这里的配置
</bean>
(3)@Component和@Resource可以直接写,不加()的内容,但是类的命名要合法
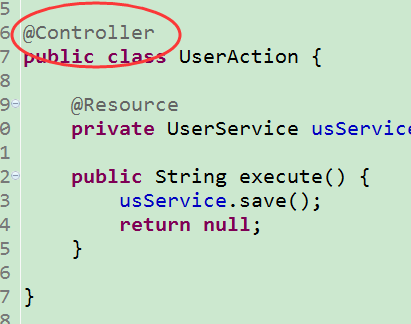
 1 @Component
 2 public class UserAction {
 3
 4     @Resource
 5     private UserService usService;
 6
 7     public String execute() {
 8         usService.save();
 9         return null;
10     }
11
12 }
如图位置必须如此命名才能识别

(4)实际项目中会更严格的标注,标注注解是做什么的


(5)混合使用注释和XML配置
 1 <?xml version="1.0" encoding="UTF-8"?>
 2 <beans xmlns="http://www.springframework.org/schema/beans"
 3     xmlns:xsi="http://www.w3.org/2001/XMLSchema-instance" xmlns:p="http://www.springframework.org/schema/p"
 4     xmlns:context="http://www.springframework.org/schema/context"
 5     xsi:schemaLocation="
 6         http://www.springframework.org/schema/beans
 7         http://www.springframework.org/schema/beans/spring-beans.xsd
 8         http://www.springframework.org/schema/context
 9         http://www.springframework.org/schema/context/spring-context.xsd">
10
11     <!-- 开启注解 需要引入xmlns:context="http://www.springframework.org/schema/context"-->
12     <context:component-scan base-package="com.liuyang.annocation4.mix"></context:component-scan>
13
14     <bean id="userDAO" class="com.liuyang.annocation4.mix.UserDAO"></bean>
15 </beans>

 浙公网安备 33010602011771号