
MemCached缓存技术(四)操作MemCached(1)Telnet方式(命令行方式)
Posted on 2020-08-25 10:00 MissRong 阅读(127) 评论(0) 收藏 举报MemCached缓存技术(四)操作MemCached
Telnet方式(命令行方式)
统计信息的命令:
stats
stats items
stats slabs
****自己操作****
命令行
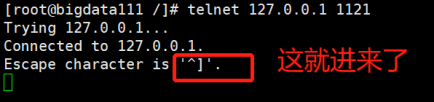
telnet 127.0.0.1 1121
(注:退出用quit)
----------------------------------------------------------
可能出现的问题:
[root@bigdata111 bin]# telnet 127.0.0.1 1121
Trying 127.0.0.1...
telnet: connect to address 127.0.0.1: Connection refused
解决办法:
(1)先检查telnet是否已经安装:
[root@bigdata111 bin]# rpm -qa telnet
telnet-0.17-64.el7.x86_64
(2)再检查telnet-server是否已经安装:
[root@bigdata111 bin]# rpm -qa telnet-server
如果没有安装就进行安装:
[root@bigdata111 bin]# yum install telnet-server
如果进行了telnet-server安装操作,且已成功安装,则由于telnet服务是由xinetd守护的,所以我们需要重新启动xinetd
[root@bigdata111 bin]# service xinetd restart
----------------------------------------------------------------------------
这里可能出现报错:
Redirecting to /bin/systemctl restart xinetd.service
Failed to restart xinetd.service: Unit xinetd.service failed to load: No such file or directory.
第一个问题解决办法是:将启动命令换为:/bin/systemctl restart xinetd.service
对于第二个问题的解决办法:
(1)首先,检查服务器已安装的tftp-server
使用命令:rpm -qa | grep tftp-server
如果存在已安装的tftp这里会列出来,否则就需要安装
(2)安装tftp-server 和 xinetd
使用如下的命令,进行相应服务的安装:
[root@bigdata111 xinetd.d]# yum -y install tftp-server
[root@bigdata111 bin]# yum -y install xinetd
(3)修改tftp配置文件
[root@bigdata111 bin]# vi /etc/xinetd.d/tftp
service tftp
{
socket_type = dgram
protocol = udp
wait = yes
user = root
server = /usr/sbin/in.tftpd
server_args = -s /var/lib/tftpboot
disable = no //需要修改的地方,初始时刻为yes
per_source = 11
cps = 100 2
flags = IPv4
}
(4)重起服务
使用如下命令进行服务的重新启动
/bin/systemctl restart xinetd.service
查看服务启动状况
ps aux | grep xinetd 或者 ps -ef|grep xinetd 或者 ps -a | grep tftp
如果没有效果,使用如下命令
/bin/systemctl enable xinetd.service //开启服务
/bin/systemctl start xinetd.service //启动服务

如果xinetd启动成功,可以查看xinetd的运行情况
netstat -tnlp
如果不识别netstat命令,就下载:
[root@bigdata111 /]# yum install net-tools.x86_64

现在再执行命令行:
telnet 127.0.0.1 1121
--------------------------------------------------------------------------------------------------------
输入命令行:
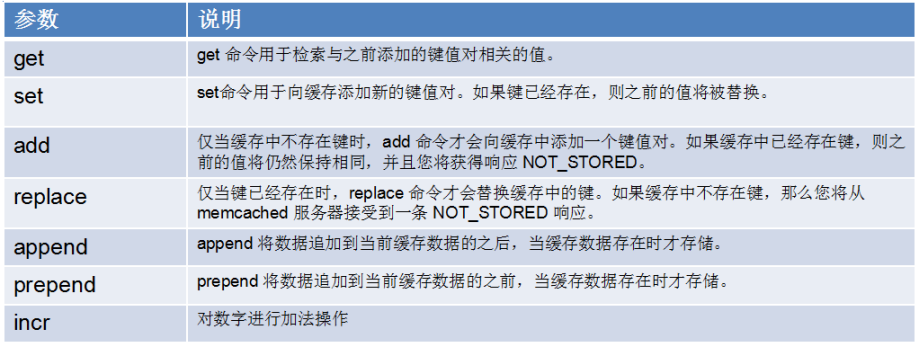
1)添加数据
add key1 0 0 4
解释:
第一个0 代表标志位,不用关心
第二个0 代表过期时间,0代表不过期(如果大于0,就代表过期时间)
4 表示数据长度
接着输入数据:abcd
会返回:
STORED
2)取数据
get key1
会返回:
VALUE key1 0 4
abcd
END
3)返回状态
stats
会返回:
STAT pid 2492 解释:该memcached实例的进程号
STAT uptime 5111
STAT time 1598069798
STAT version 1.4.25
STAT libevent 2.0.21-stable
STAT pointer_size 64
STAT rusage_user 0.045217
STAT rusage_system 0.090434
STAT curr_connections 10
STAT total_connections 11
STAT connection_structures 11
STAT reserved_fds 20
STAT cmd_get 1
STAT cmd_set 1
STAT cmd_flush 0
STAT cmd_touch 0
STAT get_hits 1
STAT get_misses 0
STAT delete_misses 0
STAT delete_hits 0
STAT incr_misses 0
STAT incr_hits 0
STAT decr_misses 0
STAT decr_hits 0
STAT cas_misses 0
STAT cas_hits 0
STAT cas_badval 0
STAT touch_hits 0
STAT touch_misses 0
STAT auth_cmds 0
STAT auth_errors 0
STAT bytes_read 61
STAT bytes_written 49
STAT limit_maxbytes 134217728
STAT accepting_conns 1
STAT listen_disabled_num 0
STAT time_in_listen_disabled_us 0
STAT threads 4
STAT conn_yields 0
STAT hash_power_level 16
STAT hash_bytes 524288
STAT hash_is_expanding 0
STAT malloc_fails 0
STAT bytes 73
STAT curr_items 1
STAT total_items 1
STAT expired_unfetched 0
STAT evicted_unfetched 0
STAT evictions 0
STAT reclaimed 0
STAT crawler_reclaimed 0
STAT crawler_items_checked 0
STAT lrutail_reflocked 0
END

 浙公网安备 33010602011771号