
大数据技术之Elasticsearch-安装ES(二)安装Elasticsearch
我安装的是单节点的
1)解压elasticsearch-6.1.1.tar.gz到/usr/local目录下
[root@bigdata111 local]# tar -zxvf elasticsearch-6.1.1.tar.gz -C /usr/local/
2)在/usr/local/elasticsearch-6.1.1路径下创建data和logs文件夹
[root@bigdata111 elasticsearch-6.1.1]# mkdir data
[root@bigdata111 elasticsearch-6.1.1]# mkdir logs
3)修改配置文件/usr/local/elasticsearch-6.1.1/config/elasticsearch.yml
[root@bigdata111 config]# pwd
/usr/local/elasticsearch-6.1.1/config
[root@bigdata111 config]# vi elasticsearch.yml
|
# ---------------------------------- Cluster ------------------------------------- cluster.name: my-application # ------------------------------------ Node -------------------------------------- node.name: bigdata111 # ----------------------------------- Paths --------------------------------------- path.data: /usr/local/elasticsearch-6.1.1/data path.logs: /usr/local/elasticsearch-6.1.1/logs # ----------------------------------- Memory ----------------------------------- bootstrap.memory_lock: false bootstrap.system_call_filter: false # ---------------------------------- Network ------------------------------------ network.host: 192.168.212.111 # --------------------------------- Discovery ------------------------------------ discovery.zen.ping.unicast.hosts: ["bigdata111"] # ---------------------------------- Various ----------------------------------- # # Require explicit names when deleting indices: # #action.destructive_requires_name: true http.cors.enabled: true http.cors.allow-origin: "*" node.master: true node.data: true |
(1)cluster.name
如果要配置集群需要两个节点上的elasticsearch配置的cluster.name相同,都启动可以自动组成集群,这里如果不改cluster.name则默认是cluster.name=my-application,
(2)nodename随意取但是集群内的各节点不能相同
(3)修改后的每行前面不能有空格,修改后的“:”后面必须有一个空格
# The default list of hosts is ["127.0.0.1", "[::1]"]
(4)如果搭建集群,discovery.zen.ping.unicast.hosts: ["主节点名"]不用动
(5)如果搭建集群,从节点的node.master: true要改成false
4)配置linux系统环境(参考:http://blog.csdn.net/satiling/article/details/59697916)
都以root用户进行-sudo
(1)编辑limits.conf 添加类似如下内容
[root@bigdata111 elasticsearch-6.1.1]$ sudo vi /etc/security/limits.conf
添加如下内容:
* soft nofile 65536
* hard nofile 131072
* soft nproc 4096
* hard nproc 4096
(2)进入limits.d目录下修改配置文件。
[root@bigdata111 config]# cd /etc/security/limits.d/
[root@bigdata111 limits.d]# ll
total 4
-rw-r--r--. 1 root root 191 Aug 18 2015 20-nproc.conf
[root@bigdata111 limits.d]# vi 20-nproc.conf
修改如下内容:
* soft nproc 1024
#修改为
* soft nproc 4096
(3)修改配置sysctl.conf
[root@bigdata111 elasticsearch-6.1.1]$ sudo vi /etc/sysctl.conf
添加下面配置:
vm.max_map_count=655360
并执行命令:
[root@bigdata111 elasticsearch-6.1.1]$ sudo sysctl -p
然后,重新启动elasticsearch,即可启动成功。
5)启动elasticsearch
注意:一定不能在root用户下启动ES!会报错的
新建用户参考:https://www.cnblogs.com/liuxinrong/articles/13550320.html
[root@bigdata111 elasticsearch-6.1.1]# su demouser
[demouser@bigdata111 elasticsearch-6.1.1]$ bin/elasticsearch
注:如果后面再加上-d就是后台启动

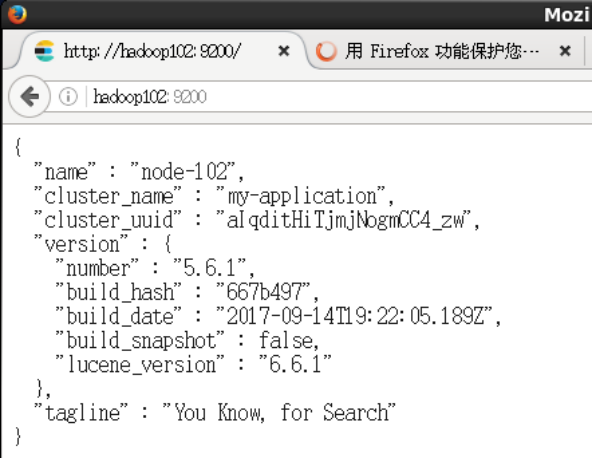
6)测试elasticsearch
|
[itstar@hadoop102 elasticsearch-6.1.1]$ curl http://hadoop102:9200 curl -XGET 'localhost:9200/_cat/health?v&pretty'
{ "name" : "node-102", "cluster_name" : "my-application", "cluster_uuid" : "znZfW5tGQou9rKzb6pG6vA", "version" : { "number" : "5.6.1", "build_hash" : "667b497", "build_date" : "2017-09-14T19:22:05.189Z", "build_snapshot" : false, "lucene_version" : "6.6.1" }, "tagline" : "You Know, for Search" } |
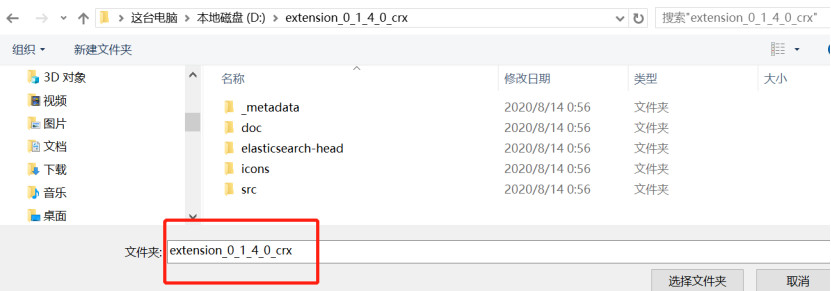
7)安装elasticsearch-head.crx插件
第一种安装方法(推荐):
(1)Google浏览器:打开浏览器,进入“更多工具”——>“扩展程序”,将插件拖入即可完成安装
如果遇到问题:

解决办法:
将.crx文件拓展名后再加上.zip后缀

然后解压到当前文件夹

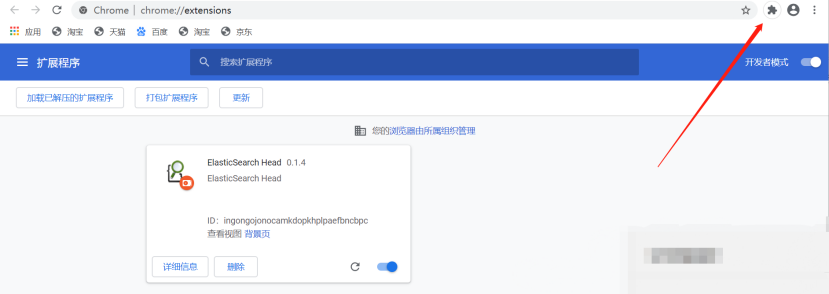


(2)360浏览器:打开浏览器,双击elasticsearch-head.crx插件即可完成安装
(3)使用插件查看节点状态
|
第二种安装方法: 下载插件:https://github.com/mobz/elasticsearch-head nodejs官网下载安装包:https://nodejs.org/dist/ node-v6.9.2-linux-x64.tar.xz 拷贝 安装nodejs: 解压 配置环境变量: export NODE_HOME=/usr/local/node-v6.9.2-linux-x64 export PATH=$PATH:$NODE_HOME/bin 查看node和npm版本: node -v npm -v 解压head插件到/opt/module目录下: unzip elasticsearch-head-master.zip 查看当前head插件目录下有无node_modules/grunt目录: 没有:执行命令创建:npm install grunt --save --registry=https://registry.npm.taobao.org 安装head插件: npm install -g cnpm --registry=https://registry.npm.taobao.org 安装grunt: npm install -g grunt-cli --registry=https://registry.npm.taobao.org 编辑Gruntfile.js vim Gruntfile.js 文件93行添加 hostname:'0.0.0.0' 检查head根目录下是否存在base文件夹 没有:将 _site下的base文件夹及其内容复制到head根目录下 mkdir base cp base/* ../base/ 启动grunt server: grunt server -d 如果提示grunt的模块没有安装: Local Npm module “grunt-contrib-clean” not found. Is it installed? Local Npm module “grunt-contrib-concat” not found. Is it installed? Local Npm module “grunt-contrib-watch” not found. Is it installed? Local Npm module “grunt-contrib-connect” not found. Is it installed? Local Npm module “grunt-contrib-copy” not found. Is it installed? Local Npm module “grunt-contrib-jasmine” not found. Is it installed? 执行以下命令: npm install grunt-contrib-clean -registry=https://registry.npm.taobao.org npm install grunt-contrib-concat -registry=https://registry.npm.taobao.org npm install grunt-contrib-watch -registry=https://registry.npm.taobao.org npm install grunt-contrib-connect -registry=https://registry.npm.taobao.org npm install grunt-contrib-copy -registry=https://registry.npm.taobao.org npm install grunt-contrib-jasmine -registry=https://registry.npm.taobao.org 最后一个模块可能安装不成功,但是不影响使用。 浏览器访问head插件: |

 浙公网安备 33010602011771号