使用PowerShell自动编译部署前端
前言
最近在开发一套管理系统,做了前后端分离。
后台使用的是Asp.Net Core 3.1
前端使用的是Vue+Ant Design
自己搞了一台云服务器,打算把系统部署到云服务器上。以供外网访问。
服务器OS是WinServer2016
所以打算通过IIS平台来发部与部署系统。
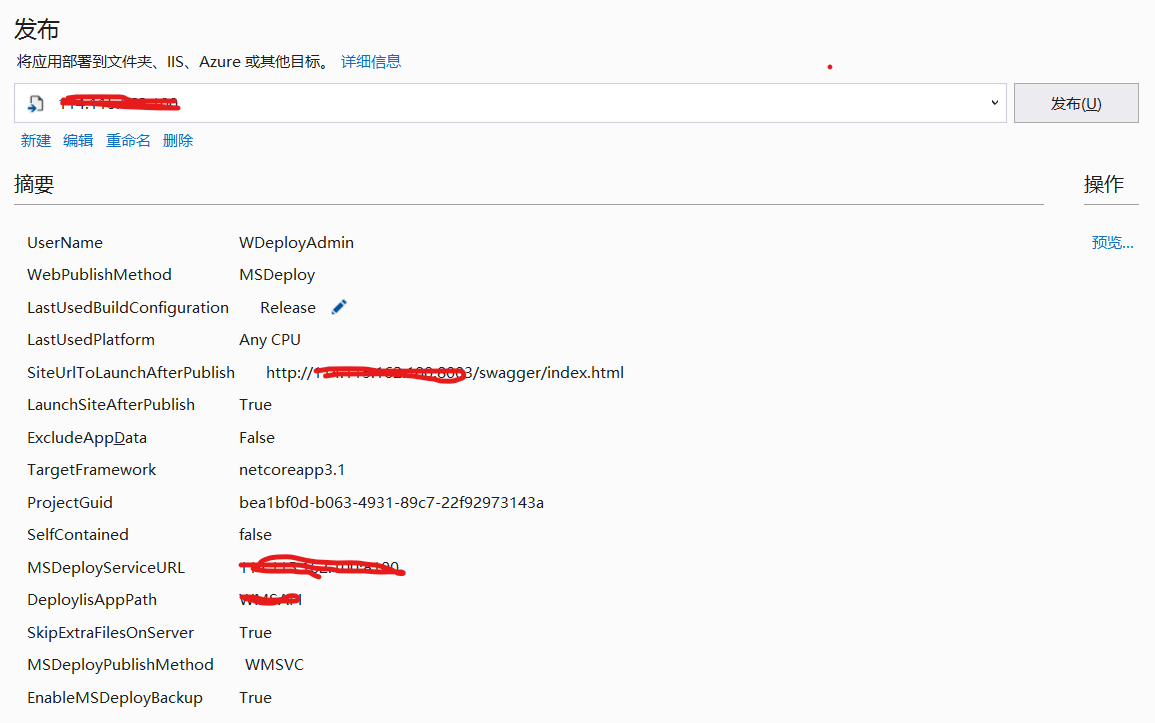
后台部署
后台部署很好办。因为可以通过Visual Studio,使用IIS的Web Deploy组件一健发布到服务器

前端部署-手动
因为项目还小。要部署的也就一个前端,一个后端。也没有什么分布式部署。
显然现还用不到到通过工具自动从GIT拿代码,然后通过流水线自动构建这种大炮。
在没有使用PowerShell自己部署前,前端部署流程是:
1。通过npm run build:live编译,然后会把编译好的文件生成在dist目录
2。通过Windows远程桌面,连接到远程服务器。然后Ctrl+C,Ctrl+V把文件复制到服务器指定目录
因为dist目录文件数量太多,但是大小都比较小,直接复制可能比较慢。
把dist目录压缩一下。然后手动复制到服务器,然后解压到服务器目录。
这样速度上来说比直接复制快一点。
但是一想到后端可以通过VS一键发布到服务器,而前端就要通过手动的方式复制到服务器
这样的差距有点大。所以自己想通过写一些脚本达到自动部署的目的。
自动部署方案
虽然说要设计一个自动部署方案,还不如说是通过机器模拟手工部署的流程。
达到把手工的工作机器自动完成。从而解放双手。
那么流程其实还是和手工差不多。
1。编译前端代码
2。把编译后dist目录压缩成一个ZIP文件
3。远程连接到服务器
4。把压缩文件传输到服务器
5。把压缩文件解压到指定目录(先把原目录所有文件删除,再把压缩文件解压)
6。断开远程服务器连接,删除本地压缩文件
自动部署PowerShell脚本
基本上把上面的6个动作都用脚本实现,基本上就实现了自动部署的流程。
接下来就是一步步的实现过程
1。编译前端代码
这个很好办。基本就是执行一下npm run build:live脚本
Write-Host 'Build Starting' -ForegroundColor Yellow
$BuildScript={npm run build:live}
Invoke-Command -ScriptBlock $BuildScript
Write-Host 'Build Completed' -ForegroundColor Green
Write-Host就是在控制台输出信息,-ForegroundColor就是指定以什么颜色输出
Invoke-Command就是执行一段脚本 -ScriptBlock就是脚本内容,这里我们定义了npm run build:live
2。把编译后dist目录压缩成一个ZIP文件
Write-Host 'Compress Starting' -ForegroundColor Yellow
$CurDateString=Get-Date -Format "yyyyMMddHHmmss"
$ZIPFileName="Deploy"+$CurDateString+".zip"
$CurPath=(Resolve-Path .).Path
$ZIPFilePath=$CurPath+"\"+$ZIPFileName
Compress-Archive -Path ".\dist\*" -DestinationPath $ZIPFilePath
Write-Host 'Compress Completed' -ForegroundColor Green
通过Compress-Archive命令,我们可以把目录压缩成ZIP文件
-Path 压缩的路径
-DestinationPath 生成ZIP文件的路径
然后压缩文件名是通过字符串+日期的格式来生成文件,这样也就知道我们部署文件的时间了。
通过Start-Process的PowerShell来执行一个压缩命令
完成以上命令,那么就会在前端代码根目录生成一个对应的压缩文件了
3。远程连接到服务器
通过PowerShell远程连接到服务器这一步是比较难的。
因为他要在服务器和本机做一定的配置才可以实现
首先在服务器里面
通过PowerShell运行Enable-PSRemoting
来开启可以使用PowerShell远程连接
然后打开PowerShell远程连接对应的防火墙端口
开启防火墙"Windows 远程管理“项,端口:5985
然后在服务器和本机都执行:winrm quickconfig
来快速配置WinRM
然后在本机通过PowerShell执行
Set-Item wsman:localhost\Client\TrustedHosts -value 服务器IP
来允许本机可以远程连接到服务器
至此。环境配置方面就都已经完成。可以通过PowerShell来连接到服务器了
然后我们通过写PowerShell脚本,来实现远程连接到服务器
Write-Host 'Deploy Starting' -ForegroundColor Yellow
$User = "登录帐号"
$Password = Read-Host -Prompt "Please enter the server password" -AsSecureString
Write-Host 'Start connecting to the server' -ForegroundColor Yellow
$Credential = New-Object -TypeName System.Management.Automation.PSCredential -ArgumentList $User, $Password
$Session = New-PSSession -ComputerName 服务器IP -Credential $Credential
Write-Host 'Successfully connected to the server' -ForegroundColor Green
我这里把登录服务器帐号写死了。但是密码要在每次执行的时候输入。以达到保密的目的。
因为我们这个脚本是要上传到Git的。要是被人看到了还是不好,所以密码就没有写死在这里了。要每次输入
Read-Host -AsSecureString就是指要在控制台输入一串密码。密码是以*显示出来。
New-PSSession就是打开一个远程的会话 -Credential是以指定凭据的方式打开远程会话
到这里没有报错的话。基本上就表示连接到服务器了
4。把压缩文件复制到服务器
这个步骤还是比较简单。基本上就一个命令
Copy-Item $ZIPFilePath -Destination $RemotePath -ToSession $Session
Copy-Item 复制一个对像 -Destination 复制的目标地址(服务器目录) -ToSession 哪个远程会话连接
基本上这样一个命令就可以把本地的一个文件复制到远程服务器目录了
5。把压缩文件解压
这个步骤基本上和压缩是一样的。也是调用Expand-Archive来执行解压。
有区别的是压缩是在本机执行。解压是在远程会话执行
Invoke-Command -Session $Session -ScriptBlock {param($p) Remove-Item -Path $p -Recurse -Force} -ArgumentList $RemoteDestinationPath
Invoke-Command -Session $Session -ScriptBlock {param($p,$dp) Expand-Archive -Path $p -DestinationPath $dp} -ArgumentList $RemoteZipPath,$RemoteDestinationPath
Invoke-Command -Session就是在指定远程会话里执行一个命令
第一个脚本是先把服务器上的目标目录文件清除,所以Invoke-Command -ScriptBlock是调用远程的Remove-Item
第二个脚本是在远程会话解压ZIP文件 -Path是压缩文件路径,-DestinationPath是解压到目标地址路径
6。断开远程连接,删除本的压缩文件
这个步就比较简单了,基本上就调用两个命令就OK
Disconnect-PSSession -Session $Session
Remove-Item -Path $ZIPFilePath
Disconnect-PSSession 断开一个远程会话
Remove-Item移除一个文件
到此,一个自动部署的脚本就完成了。把脚本保存在一个文件里。
要部署的时候。直接在VSCode的终端里运行这个PowerShell脚本文件。
就可以自动把编译好的前端部署到服务器了
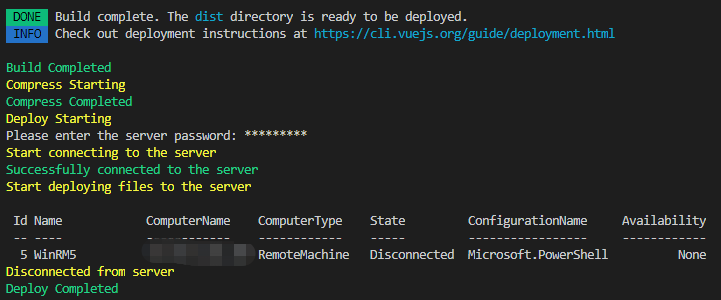
下图为运行结果
本PowerShell完整的脚本


 1 Write-Host 'Build Starting' -ForegroundColor Yellow
 2 $BuildScript={npm run build:live}
 3 Invoke-Command -ScriptBlock $BuildScript
 4 Write-Host 'Build Completed' -ForegroundColor Green
 5 Write-Host 'Compress Starting' -ForegroundColor Yellow
 6 $CurDateString=Get-Date -Format "yyyyMMddHHmmss"
 7 $ZIPFileName="Deploy"+$CurDateString+".zip"
 8 $CurPath=(Resolve-Path .).Path
 9 $ZIPFilePath=$CurPath+"\"+$ZIPFileName
10 Compress-Archive -Path ".\dist\*" -DestinationPath $ZIPFilePath
11 Write-Host 'Compress Completed' -ForegroundColor Green
12 Write-Host 'Deploy Starting' -ForegroundColor Yellow
13 $User = "登录帐号"
14 $Password = Read-Host -Prompt "Please enter the server password" -AsSecureString
15 Write-Host 'Start connecting to the server' -ForegroundColor Yellow
16 $Credential = New-Object -TypeName System.Management.Automation.PSCredential -ArgumentList $User, $Password
17 $Session = New-PSSession -ComputerName 服务器IP -Credential $Credential
18 Write-Host 'Successfully connected to the server' -ForegroundColor Green
19 Write-Host 'Start deploying files to the server' -ForegroundColor Yellow
20 $RemotePath="D:\Deploy\"
21 Copy-Item $ZIPFilePath -Destination $RemotePath -ToSession $Session
22 $RemoteDestinationPath=$RemotePath+"Web\"
23 $RemoteZipPath=$RemotePath+$ZIPFileName
24 Invoke-Command -Session $Session -ScriptBlock {param($p) Remove-Item -Path $p -Recurse -Force} -ArgumentList $RemoteDestinationPath
25 Invoke-Command -Session $Session -ScriptBlock {param($p,$dp) Expand-Archive -Path $p -DestinationPath $dp} -ArgumentList $RemoteZipPath,$RemoteDestinationPath
26 Disconnect-PSSession -Session $Session
27 Remove-Item -Path $ZIPFilePath
28 Write-Host 'Disconnected from server' -ForegroundColor Yellow
29 Write-Host 'Deploy Completed' -ForegroundColor Green
特别感谢:清平乐(Tutuu) 在PowerShell对于压缩与解压的帮助。

 浙公网安备 33010602011771号