
Springboot入门程序
一,需要工具
Idea和jdk1.8版本以上
二、新建一个新的工程
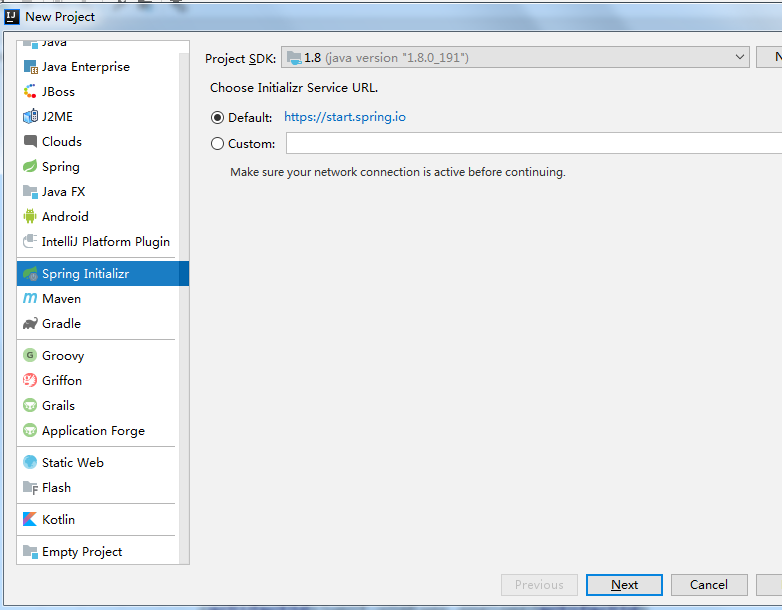
点击next,需要等一会,因为需要联网加载,第一次不成功,可以点击Previous然后再次点击next,多试几次就成功了
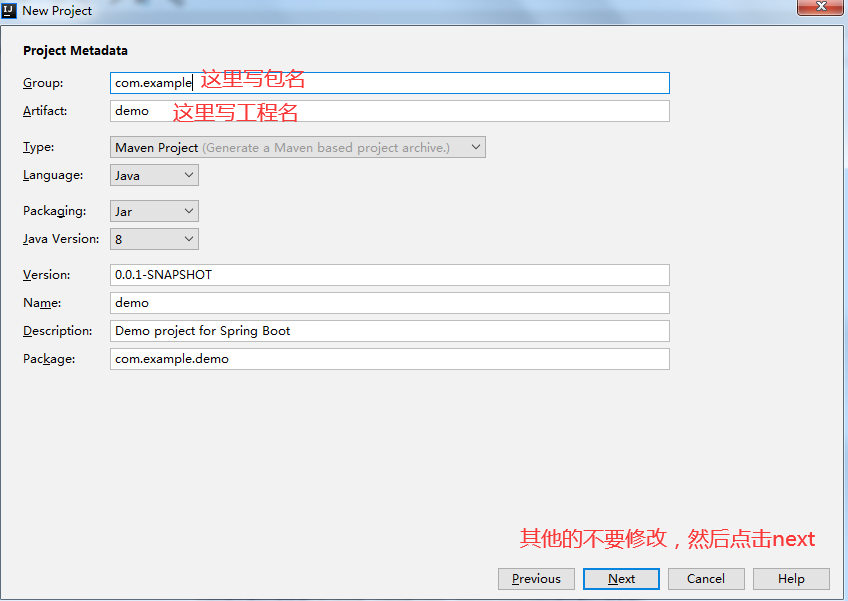
这里选择Web,然后再选择右边的web或者如下图的提示,然后点击next

然后点击,next,Finnish就完成了进入如下页面
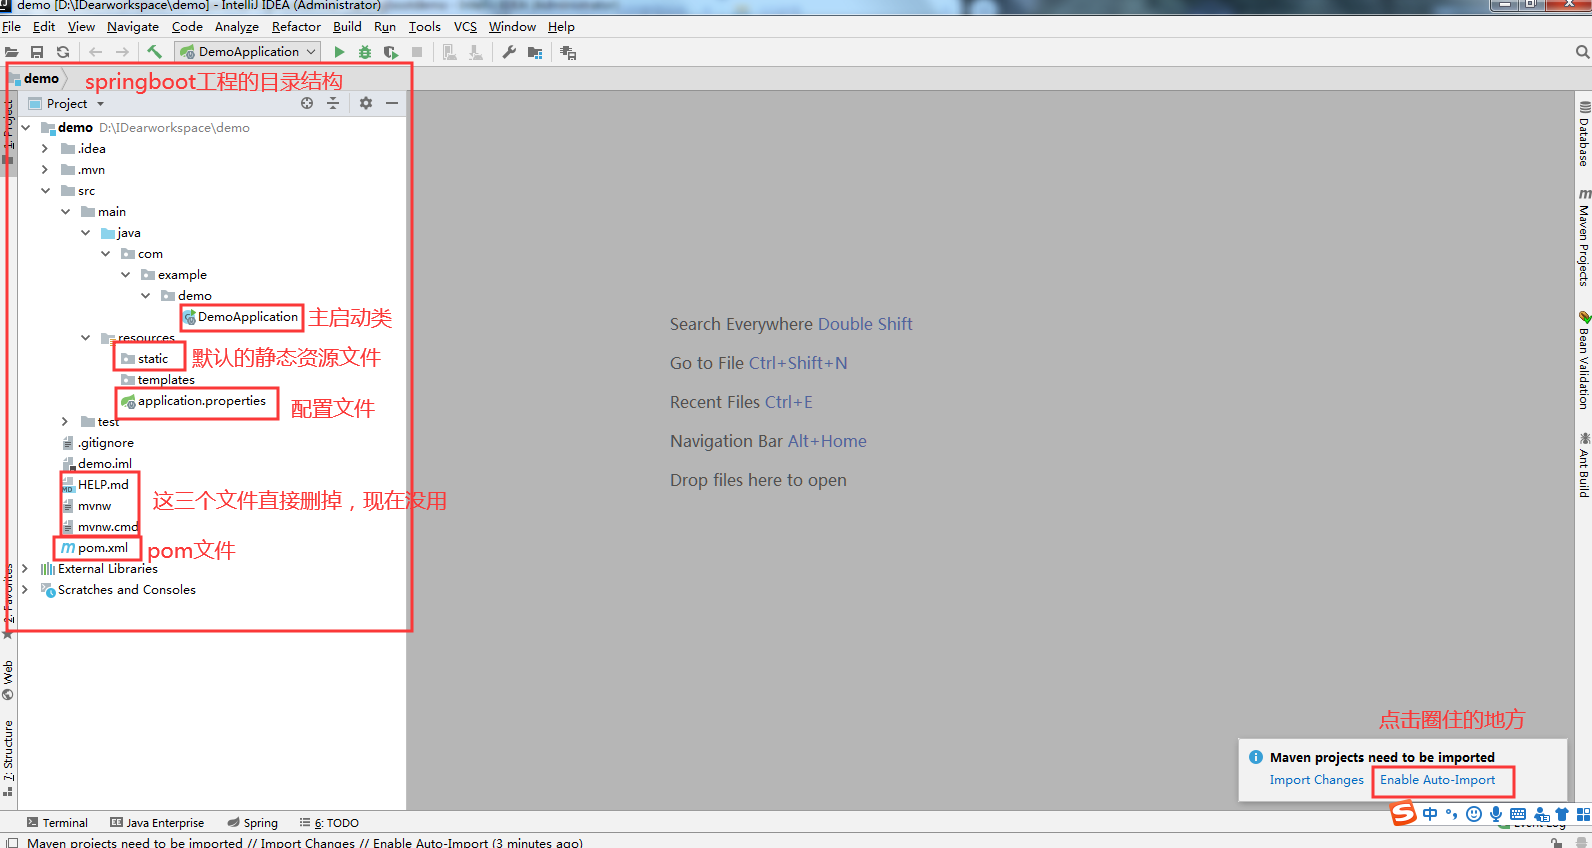
现在我们的工程就建立完了,
剩下的就可以写Controller层,实体类,配置可以参考这个springboot基本配置
bean实体类
import lombok.AllArgsConstructor;
import lombok.Data;
import lombok.NoArgsConstructor;
import org.springframework.boot.context.properties.ConfigurationProperties;

@Data
@ConfigurationProperties(prefix = "userbody")
@AllArgsConstructor
@NoArgsConstructor
public class User {
    private String uid;
    private String uname;
    private String pwd;
    private String hobby;
}
Controller类
import com.offcn.springbootdemo.bean.User;
import org.springframework.beans.factory.annotation.Autowired;
import org.springframework.beans.factory.annotation.Value;
import org.springframework.boot.context.properties.EnableConfigurationProperties;
import org.springframework.web.bind.annotation.GetMapping;
import org.springframework.web.bind.annotation.RestController;

import javax.annotation.Resource;

@RestController //这个注解相当于ResponseBody和Controller两个注解public class HelloConfigController {
    @Resource
    User user;

    @GetMapping("/get")
    public String getIpAndHost(){
        return "host_ip: " + host_ip + "<br/> host_port: " + host_port;
    }

    @GetMapping(value = "/getUser")
    public String getUSer(){
        return user.toString();
    }
}
接下来启动主启动类就可以了
可以参考这个妹子写的

 浙公网安备 33010602011771号