

git使用小记
git输错账号密码的处理方式:
1.打开控制面板(快捷打开win+R,输入control);
2.点击打开用户账户;
3.点击打开凭证管理(windows凭证管理栏);
4.普通凭证下拉打开有你已存在的git账号密码,删除即可。
git基本操作
1、初始化操作
2、创建新版本库
3、修改和提交
4、撤消操作
5、查看提交历史
6、分支与标签
7、合并与衍合
8、远程操作
1、初始化操作
$ git config -global user.name <name> #设置提交者名字
$ git config -global user.email <email> #设置提交者邮箱
$ git config -global core.editor <editor> #设置默认文本编辑器
$ git config -global merge.tool <tool> #设置解决合并冲突时差异分析工具
$ git config -list #检查已有的配置信息
2、创建新版本库
$ git clone <url> #克隆远程版本库
    // 如 git clone git@192.168.9.19:myproject.git
    //   git clone http://username:password@这里是ip:xx.git

$ git init #初始化本地版本库
    //初始完之后需要clone 远程版本库下载新的数据
3、修改和提交
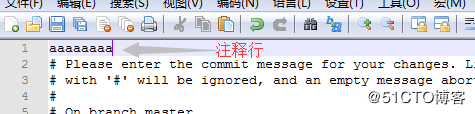
$ git add . #添加所有改动过的文件
    // 如果想忽略某个文件,需要新建一个.gitignore文件,写入想忽略的文件名称

$ git add <file> #添加指定的文件
$ git mv <old> <new> #文件重命名
$ git rm <file> #删除文件
$ git rm -cached <file> #停止跟踪文件但不删除
$ git commit -m <file> # 提交指定文件
$ git commit -m “commit message” #提交所有更新过的文件
$ git commit -amend # 修改最后一次提交
$ git commit -C HEAD -a -amend #增补提交(不会产生新的提交历史纪录)

// 一次完整的操作 例   1、git add filename
              2、git commit -m filename

删除例   1、$ vim abc.txt    //先创建一个文件  //创建完之后如果不提交,git rm filename是无法操作的
      2、$ git add abc.txt //提交
      3、$ git commit abc.txt  //上传
          hint: Waiting for your editor to close the file...  会打开一个文件,图2.3
      4、$ git rm abc.txt -f   //强制删除

4、撤消操作
$ git reset -hard HEAD #撤消工作目录中所有未提交文件的修改内容  比如删除也可以撤销
$ git checkout HEAD <file1> <file2> #撤消指定的未提交文件的修改内容
$ git checkout HEAD. #撤消所有文件
$ git revert <commit> #撤消指定的提交

// 删除恢复例:
4.1、$ git rm eee
     rm 'eee'

4.2.1、$ git reset --hard    //也可以加上 HEAD 恢复所有删除的文件
      HEAD is now at 9d1df48 aaaaaaaa

4.2.2、$ git checkout HEAD eee  //这样直接恢复单个文件,reset会将所有删除的文件都恢复

4.2.3、$ git checkout HEAD .      //这样是恢复所有文件

4.2.4、$ git revert    //这个不知道昨用
5、查看提交历史
$ git log #查看提交历史                            // 这里查看的是所有文件的日志
$ git log -p <file> #查看指定文件的提交历史        // 如git log -e filename
$ git blame <file> #以列表方式查看指定文件的提交历史
$ gitk #查看当前分支历史纪录
$ gitk <branch> #查看某分支历史纪录
$ gitk --all #查看所有分支历史纪录
$ git branch -v #每个分支最后的提交
$ git status #查看当前状态
$ git diff #查看变更内容
gitk 查看分支历史

// git branch -v #每个分支最后的提交

// git status # 查看当前的状态

// git diff filename

6、分支与标签
$ git branch #显示所有本地分支
$ git checkout <branch/tagname> #切换到指定分支或标签
$ git branch <new-branch> #创建新分支
$ git branch -d <branch> #删除本地分支
$ git tag #列出所有本地标签
$ git tag <tagname> #基于最新提交创建标签
$ git tag -d <tagname> #删除标签
-
6.1、创建及查看
-


-
6.2、删除
-


-
6.3、tag
-


-
6.4、分支操作
-


7、合并与衍合
$ git merge <branch> #合并指定分支到当前分支
$ git rebase <branch> #衍合指定分支到当前分支
merge 例:
$ git branch test-branch //创建分支

$ git checkout two    // 切换分支
$ touch 分支two测试  // 分支创建一个文件

$ git checkout test-branch
$ git merge two         //最后ls查看就能看到two创建的文件了
8、远程操作
$ git remote -v #查看远程版本库信息
$ git remote show <remote> #查看指定远程版本库信息
$ git remote add <remote> <url> #添加远程版本库
$ git fetch <remote> #从远程库获取代码
$ git pull <remote> <branch> #下载代码及快速合并
$ git push <remote> <branch> #上传代码及快速合并
$ git push <remote> : <branch>/<tagname> #删除远程分支或标签
$ git push -tags #上传所有标签
-
// 查看远指定远程版本库信息

-
// 新加一个版本库,(可以指定某些文件上到在这个库,但这个库好像不能单独下载pull)

-
// 上传分支
-


-
// 只下载某个分支
-
参考文档: https://www.cnblogs.com/nylcy/p/6569284.html
-
$ git clone -b test-branch git@192.168.9.19:myproject.git // 一定加上-b参数
-


注:转载http://blog.51cto.com/xiong51/2089848的内容,只是记录,若有侵权,请联系删除
如有侵权,请联系

 浙公网安备 33010602011771号