SpringBoot从小白到精通(九)使用@Async实现异步执行任务
一、开启异步调用方法
在application启动类中,加上@EnableAsync注解,Spring Boot 会自动扫描异步任务。
package com.example.demo;

import org.springframework.boot.SpringApplication;
import org.springframework.boot.autoconfigure.SpringBootApplication;
import org.springframework.scheduling.annotation.EnableAsync;

@SpringBootApplication
//开启异步调用方法
@EnableAsync
public class Demo1Application {

    public static void main(String[] args) {
        SpringApplication.run(Demo1Application.class, args);
    }

}
二、创建异步执行类
创建com.weiz.tasks包,在tasks包里增加AsyncTask 异步任务类,加上@Component 注解,然后在需要异步执行的方法前面加上@Async注解,这样Spring Boot容器扫描到相关异步方法之后,调用时就会将这些方法异步执行。
package com.example.demo.tasks;
import java.util.concurrent.Future;
import org.springframework.scheduling.annotation.Async;
import org.springframework.scheduling.annotation.AsyncResult;
import org.springframework.stereotype.Component;

/**
 * @ClassName AsyncTask
 * @Description 异步执行
 * @Author Lishipu
 * @Date 2025-01-06 15:38
 * Version 1.0
 **/
@Component
public class AsyncTask {
    @Async
    public Future<Boolean> doTask11() throws Exception {
        long start = System.currentTimeMillis();
        Thread.sleep(1000);
        long end = System.currentTimeMillis();
        System.out.println("任务1耗时:" + (end - start) + "毫秒");
        return new AsyncResult<>(true);
    }

    @Async
    public Future<Boolean> doTask22() throws Exception {
        long start = System.currentTimeMillis();
        Thread.sleep(700);
        long end = System.currentTimeMillis();
        System.out.println("任务2耗时:" + (end - start) + "毫秒");
        return new AsyncResult<>(true);
    }

    @Async
    public Future<Boolean> doTask33() throws Exception {
        long start = System.currentTimeMillis();
        Thread.sleep(600);
        long end = System.currentTimeMillis();
        System.out.println("任务3耗时:" + (end - start) + "毫秒");
        return new AsyncResult<>(true);
    }
}
说明:@Async 加上这个注解,就表示该方法是异步执行方法。
三、调用异步方法
创建一个DoTask调用类,我们看看这几个方法,是怎么执行的:
package com.example.demo.tasks;

/**
 * @ClassName DoTask
 * @Description
 * @Author Lishipu
 * @Date 2025-01-06 15:39
 * Version 1.0
 **/
import java.util.concurrent.Future;
import org.springframework.beans.factory.annotation.Autowired;
import org.springframework.web.bind.annotation.GetMapping;
import org.springframework.web.bind.annotation.RequestMapping;
import org.springframework.web.bind.annotation.RestController;
@RestController
@RequestMapping("/tasks")
public class DoTask {
    @Autowired
    private AsyncTask asyncTask;

    @GetMapping("/test1")
    public String test1() throws Exception {
        long start = System.currentTimeMillis();
        Future<Boolean> a = asyncTask.doTask11();
        Future<Boolean> b = asyncTask.doTask22();
        Future<Boolean> c = asyncTask.doTask33();
        while (!a.isDone() || !b.isDone() || !c.isDone()) {
            if (a.isDone() && b.isDone() && c.isDone()) {
                break;
            }
        }
        long end = System.currentTimeMillis();
        String times = "任务全部完成,总耗时:" + (end - start) + "毫秒";
        System.out.println(times);
        return times;
    }
}
四、验证测试
启动程序之后,在浏览器输入:http://localhost:8080/tasks/test1 。
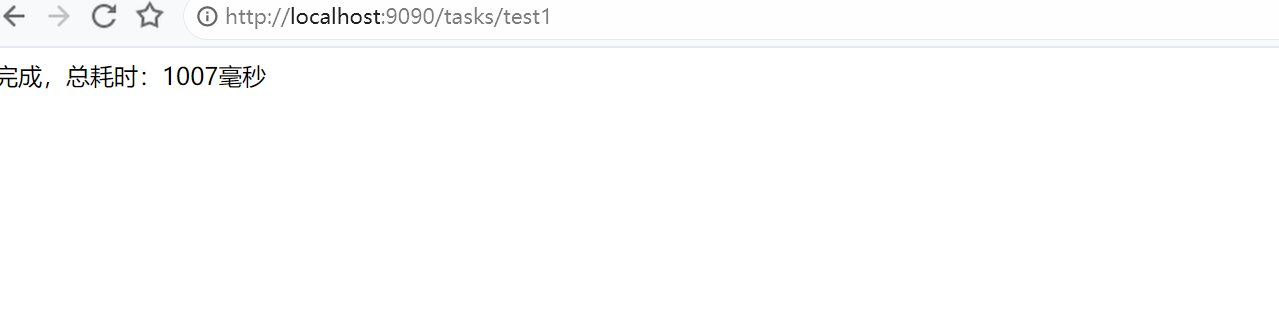

从这个总耗时可以看出,三个方法确实是异步执行的。耗时接近时间最长的doTask11方法。
总的项目文件


 浙公网安备 33010602011771号