vue-manage-system 后台管理系统开发总结
前言
vue-manage-system,一个基于 Vue.js 和 element-ui 的后台管理系统模板,从2016年年底第一个commit,到现在差不多两年了,GitHub上也有了 5k star,也是这些让我有了持续更新的动力,其中也踩了很多坑,在这总结一下。
github地址:vue-manage-system
线上地址:lin-xin.gitee.io/example/work/


自定义图标
element-ui 自带的字体图标比较少,而且许多比较常见的都没有,因此需要自己引入自己想要的字体图标。最受欢迎的图标库 Font Awesome,足足有 675 个图标,但也因此导致字体文件比较大,而项目中又不需要用到这么多图标。那么这时候,阿里图标库就是一个非常不错的选择。
首先在阿里图标上创建一个项目,设置图标前缀,比如 el-icon-lx,设置Font Family,比如 lx-iconfont,添加需要用到的图标到项目中,我这边选择 Font class 生成在线链接,因为所有页面都需要用到图标,就直接在 index.html 中引入该css链接就行了
<!DOCTYPE html>
<html>
<head>
    <meta charset="utf-8">
    <title>vue-manage-system</title>
    <!-- 这里引入阿里图标样式 -->
    <link rel="stylesheet" href="//at.alicdn.com/t/font_830376_qzecyukz0s.css">
</head>
<body>
<div id="app"></div>
</body>
</html>
然后需要设置前缀为 el-icon-lx 的图标类名使用 lx-iconfont 字体。
[class*="el-icon-lx"], [class^=el-icon-lx] {
    font-family: lx-iconfont!important;
}
但是这个样式要放在哪里才可以呢?这可不是随便放就行的。在 main.js 中,引入了 element-ui 的样式,而样式中有这样的一段css:
[class*=" el-icon-"], [class^=el-icon-]{
    font-family: element-icons!important;
    speak: none;
    font-style: normal;
    font-weight: 400;
    font-variant: normal;
    text-transform: none;
    line-height: 1;
    vertical-align: baseline;
    display: inline-block;
    -webkit-font-smoothing: antialiased;
    -moz-osx-font-smoothing: grayscale;
}
很明显,如果这段 css 在我们自定义样式后面才执行,就会覆盖了我们的样式,那自定义的图标就显示不了。而在 build 项目的时候,会把 APP.vue 中的的样式打包进 app.css 中,然后再把 main.js 中引用到的样式追加到后面。那么我们可以把自定义样式放到一个css文件中,然后在 main.js 引入 element-ui css 的后面引入,那就可以覆盖掉默认字体了,然后便可以在项目中通过 <i class="el-icon-lx-people"></i> 使用图标了。
那机智的人就发现了,我自定义图标的前缀不要含 el-icon- 就不会有这样的问题了。是的,那么为了和原有字体保持一样的样式,需要复制它的整段css
/* 假设前缀为 el-lx */
[class*="el-lx-"], [class^=el-lx-]{
    font-family: lx-iconfont!important;
    speak: none;
    font-style: normal;
    font-weight: 400;
    font-variant: normal;
    text-transform: none;
    line-height: 1;
    vertical-align: baseline;
    display: inline-block;
    -webkit-font-smoothing: antialiased;
    -moz-osx-font-smoothing: grayscale;
}
导航菜单
element-ui 关于导航菜单的文档也是非常详细了,但是还是有人提 issue 或者加 QQ 问我:三级菜单怎么弄等等。而且具体的菜单项可能是服务器端根据权限而返回特定的数据项,因此不能写死在模板中。
首先定好菜单数据的格式如下,即使服务器端返回的格式不是这样,也需要前端处理成下面的格式:
export default {
    data() {
        return {
            items: [{
                icon: 'el-icon-lx-home',
                index: 'dashboard',
                title: '系统首页'
            },{
                icon: 'el-icon-lx-calendar',
                index: '1',
                title: '表单相关',
                subs: [{
                    index: '1-1',
                    title: '三级菜单',
                    subs: [{
                        index: 'editor',
                        title: '富文本编辑器'
                    }]
                }]
            },{
                icon: 'el-icon-lx-warn',
                index: '2',
                title: '错误处理',
                subs: [{
                    index: '404',
                    title: '404页面'
                }]
            }]
        }
    }
}
icon 就是菜单图标,就可以用到我们上面自定义的图标了;index 就是路由地址;title 就是菜单名称;subs 就是子菜单了。而模板则通过判断菜单中是否包含 subs 从而显示二级菜单和三级菜单。
<el-menu :default-active="onRoutes" :collapse="collapse" router>
    <template v-for="item in items">
        <template v-if="item.subs">
            <el-submenu :index="item.index" :key="item.index">
                <template slot="title">
                    <i :class="item.icon"></i><span slot="title">{{ item.title }}</span>
                </template>
                <template v-for="subItem in item.subs">
                    <el-submenu v-if="subItem.subs" :index="subItem.index" :key="subItem.index">
                        <template slot="title">{{ subItem.title }}</template>
                        <!-- 三级菜单 -->
                        <el-menu-item v-for="(threeItem,i) in subItem.subs" :key="i" :index="threeItem.index">
                            {{ threeItem.title }}
                        </el-menu-item>
                    </el-submenu>
                    <el-menu-item v-else :index="subItem.index" :key="subItem.index">
                        {{ subItem.title }}
                    </el-menu-item>
                </template>
            </el-submenu>
        </template>
        <!-- 没有二级菜单 -->
        <template v-else>
            <el-menu-item :index="item.index" :key="item.index">
                <i :class="item.icon"></i><span slot="title">{{ item.title }}</span>
            </el-menu-item>
        </template>
    </template>
</el-menu>
这样就完成了一个动态的导航菜单。
通过 Header 组件中的一个按钮来触发 Sidebar 组件展开或收起,涉及到了组件之间传递数据,这里通过 Vue.js 单独的事件中心(Event Bus)管理组件间的通信。
const bus = new Vue();
在 Header 组件中点击按钮时触发 collapse 事件:
bus.$emit('collapse', true);
在 Sidebar 组件中监听 collapse 事件:
bus.$on('collapse', msg => {
    this.collapse = msg;
})
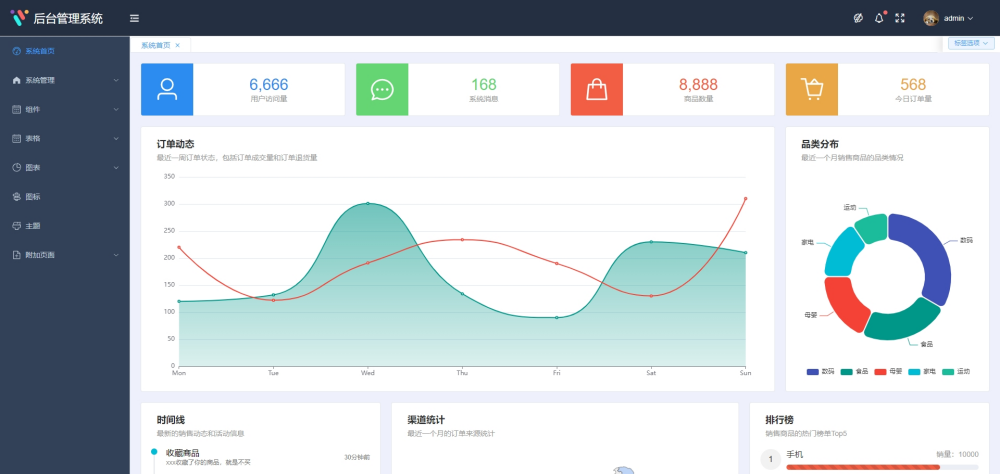
图表自适应
vue-manage-system 中用到的图表插件是 vue-schart,是把一个基于 canvas 的图表插件 schart.js 进行了封装。要做到图表能够自适应宽度,随着 window 或者父元素的大小改变而重新渲染,如果图表插件里没实现该功能,就需要自己手动实现。
vue-schart 中提供了 renderChart() 的方法可以重新渲染图表,Vue.js 中父组件调用子组件的方法,可以通过 $refs 进行调用。
<schart ref="bar" canvasId="bar" :data="data" type="bar" :options="options"></schart>
然后监听 window 的 resize 事件,调用 renderChart() 方法重新渲染图表。
import Schart from 'vue-schart';
export default {
    components: {
        Schart
    },
    mounted(){
        window.addEventListener('resize', ()=>{
            this.$refs.bar.renderChart();
        })
    }
}
不过也要记得组件销毁时移除监听哦!监听窗口大小改变完成了,那父元素大小改变呢?因为父元素宽度设为百分比,当侧边栏折叠的时候,父元素的宽度发生了变化。但是 div 并没有 resize 事件,无法监听到它的宽度改变,但是触发折叠的时候,我们是知道的。那么是否可以通过监听到折叠变化的时候,再调用渲染函数重新渲染图表呢?那么还是通过 Event Bus 监听侧边栏的改变,并在 300ms 后重新渲染,因为折叠时候有 300ms 的动画过程
bus.$on('collapse', msg => {
    setTimeout(() => {
        this.$refs.bar.renderChart();
    }, 300);
});
多标签页
多标签页,也是提 issue 最多的一个功能。
当在 A 标签页输入一些内容之后,打开 B 标签再返回到 A,要保留离开前的状态,因此需要使用 keep-alive 进行缓存,而且关闭之后的标签页就不再缓存,避免关闭后再打开还是之前的状态。keep-alive 的属性 include 的作用就是只有匹配的组件会被缓存。include 匹配的不是路由名,而是组件名,那么每个组件都需要添加 name 属性。
在 Tags 组件中,监听路由变化,将打开的路由添加到标签页中:
export default {
    data() {
        return {
            tagsList: []
        }
    },
    methods: {
        setTags(route){
            const isExist = this.tagsList.some(item => {
                return item.path === route.fullPath;
            })
            if(!isExist){
                this.tagsList.push({
                    title: route.meta.title,
                    path: route.fullPath,
                    name: route.matched[1].components.default.name
                })
            }
        }
    },
    watch:{
        $route(newValue, oldValue){
            this.setTags(newValue);
        }
    }
}
在 setTags 方法中,将一个标签对象存到标签数组中,包括title(标签显示的title),path(标签的路由地址),name(组件名,用于include匹配的)。路由地址需要用 fullPath 字段,如果使用 path 字段,那如果地址后面带有参数,就都没保存起来了。
在 Home 组件中,监听到标签的变化,缓存需要的组件。
<keep-alive :include="tagsList">
    <router-view></router-view>
</keep-alive>
export default {
    data(){
        return {
            tagsList: []
        }
    },
    created(){
        // 只有在标签页列表里的页面才使用keep-alive,即关闭标签之后就不保存到内存中了。
        bus.$on('tags', msg => {
            let arr = [];
            for(let i = 0, len = msg.length; i < len; i ++){
                // 提取组件名存到tagsList中,通过include匹配
                msg[i].name && arr.push(msg[i].name);
            }
            this.tagsList = arr;
        })
    }
}
总结
由于该项目中不包含任何业务代码,所以还是相对比较简单的,不过从开发中还是积累了一些经验,在其它项目中可以更加熟练地开发。功能虽然不算多,但是也勉强够用,如果有什么好的建议,可以开 issue 一起讨论。
更多文章:lin-xin/blog
微信赞赏


 浙公网安备 33010602011771号