

OpenCV入门(11):基本操作之几何变换
在图像处理中,几何变换是改变图像形状、位置和大小的重要操作,它不改变图像的像素值,而是通过对像素坐标的重新映射实现图像的重新布局。常见的几何变换包括平移、旋转、仿射变换、缩放和翻转,这些操作在图像配准、目标检测、图像矫正等领域有着广泛应用。
一、图像平移(Translation)
1.1 原理
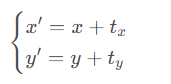
平移是将图像中每个像素在 x 轴和 y 轴方向上移动固定的距离。设原始图像中像素点坐标为 (x,y),在 x 轴方向平移 t,在 y 轴方向平移 t,则平移后的坐标 (x′,y′) 可通过以下公式计算:
为了统一矩阵运算形式,引入齐次坐标表示,将二维坐标 (x,y) 扩展为三维坐标 (x,y,1),此时平移变换可以用矩阵乘法表示:
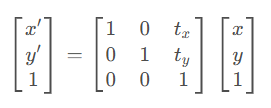
其中,左侧矩阵称为平移矩阵 T,通过该矩阵与原始坐标向量相乘,即可得到平移后的坐标。
1.2 API
warpAffine 函数用于对图像进行仿射变换:
void warpAffine(InputArray src, OutputArray dst, InputArray M, Size dsize,
                int flags=INTER_LINEAR, int borderMode=BORDER_CONSTANT,
                const Scalar& borderValue=Scalar());
src,dst:分别为输入图像和输出图像M:仿射矩阵,后面会给出计算方法dst_sz:输出图像的大小flags:变换后的要用到的插值方式
1.3 示例代码
#include <opencv2/opencv.hpp>
#include <iostream>

using namespace cv;
using namespace std;

int main() {
    // 读取图像
    Mat image = imread("test.jpg");
    if (image.empty()) {
        cout << "Could not open or find the image" << endl;
        return -1;
    }

    // 定义平移矩阵
    int xOffset = 200;
    int yOffset = 200;
    Mat tranMat = Mat::zeros(2, 3, CV_32FC1);
    tranMat.at<float>(0, 0) = 1;
    tranMat.at<float>(0, 2) = xOffset; // 水平平移量
    tranMat.at<float>(1, 1) = 1;
    tranMat.at<float>(1, 2) = yOffset; // 垂直平移量

    // 根据平移矩阵进行仿射变换
    Mat rotatedImage;
    Size dstSize = image.size(); // 输出图像的大小
    warpAffine(image, rotatedImage, tranMat, dstSize, INTER_LINEAR, BORDER_CONSTANT, Scalar(255, 255, 255));

    // 显示图像
    imshow("Original Image", image);
    imshow("Rotated Image", rotatedImage);

    waitKey(0);
    return 0;
}
原图和平移后的图像如下所示:

二、图像旋转(Rotation)
2.1 原理
旋转是将图像围绕一个指定点(通常是图像中心)旋转一定角度。设原始像素点坐标为 (x,y),绕原点旋转 θ 角度后得到新坐标 (x′,y′)。
2.2 API
图像旋转可以通过 cv::getRotationMatrix2D() 和 cv::warpAffine() 函数实现。需要指定旋转中心和旋转角度。
Mat getRotationMatrix2D(Point2f center, double angle, double scale);
void warpAffine(InputArray src, OutputArray dst, InputArray M, Size dsize,
                int flags=INTER_LINEAR, int borderMode=BORDER_CONSTANT,
                const Scalar& borderValue=Scalar());
getRotationMatrix2D 函数用于生成旋转矩阵:
center:旋转中心angle:旋转弧度,注意要将角度转换成弧度scale:缩放比例
warpAffine 函数还是对图像进行仿射变换。
2.3 示例代码
#include <opencv2/opencv.hpp>
#include <iostream>

using namespace cv;
using namespace std;

int main() {
    // 读取图像
    Mat image = imread("test.jpg");
    if (image.empty()) {
        cout << "Could not open or find the image" << endl;
        return -1;
    }

    // 旋转参数
    Point2f center(image.cols / 2, image.rows / 2); // 旋转中心点,这里是图像中心
    double angle = 45;  // 旋转45度
    double scale = 1.0; // 缩放因子,这里是1.0(不缩放)

    // 生成旋转矩阵
    Mat R = getRotationMatrix2D(center, angle, scale);
    Mat rotatedImage;

    // 应用旋转变换
    warpAffine(image, rotatedImage, R, image.size());

    // 显示图像
    imshow("Original Image", image);
    imshow("Rotated Image", rotatedImage);

    waitKey(0);
    return 0;
}
原图和旋转后的图像如下所示:

三、仿射变换(Affine Transformation)
3.1 原理
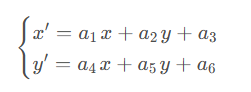
仿射变换是一种线性变换,它保持了图像中的 “直线性” 和 “平行性”,可以实现平移、旋转、缩放、错切等多种变换的组合。仿射变换的一般公式为:
用齐次坐标和矩阵乘法表示为:
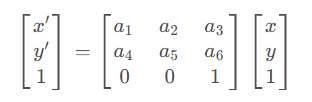
要确定仿射变换矩阵,需要已知原始图像中三个不共线的点及其在变换后图像中的对应点,通过解线性方程组即可得到矩阵中的六个参数。
3.2 API
Mat getAffineTransform(const Point2f src[], const Point2f dst[]);
void warpAffine(InputArray src, OutputArray dst, InputArray M, Size dsize,
                int flags=INTER_LINEAR, int borderMode=BORDER_CONSTANT,
                const Scalar& borderValue=Scalar());
getAffineTransform 函数根据原始图像和目标图像中三个对应点对,计算仿射变换矩阵;warpAffine 函数用于仿射变换。
3.3 示例代码
#include <opencv2/opencv.hpp>
#include <iostream>

using namespace cv;
using namespace std;

int main() {
    // 读取图像
    Mat image = imread("test.jpg");
    if (image.empty()) {
        cout << "Could not open or find the image" << endl;
        return -1;
    }

    Point2f srcPoints[] = { Point2f(0, 0), Point2f(image.cols - 1, 0), Point2f(0, image.rows - 1) };
    Point2f dstPoints[] = { Point2f(50, 50), Point2f(image.cols - 50, 30), Point2f(20, image.rows - 80) };

    // 计算仿射变换矩阵
    Mat M = getAffineTransform(srcPoints, dstPoints);
    Mat affineImage;
    // 应用仿射变换
    warpAffine(image, affineImage, M, image.size());

    // 显示图像
    imshow("Original Image", image);
    imshow("Affine Transformed Image", affineImage);

    waitKey(0);
    return 0;
}
效果图如下所示:

四、图像缩放
4.1 原理
缩放是改变图像大小的操作,分为放大和缩小。
4.2 API
图像缩放可以通过 cv::resize() 函数实现。可以指定缩放后的图像尺寸或缩放比例。
void resize(InputArray src, OutputArray dst, Size dsize, double fx=0, double fy=0, int interpolation=INTER_LINEAR)
src,dst:分别为原图像和扩展缩放后的图像。dsize:为缩放后图像的大小fx,fy:分别为X和Y方向的缩放因子,dszie和fx,fy不能同时为 0interpolation:插值方法,有以下几种:INTER_NEAREST- 最近邻插值INTER_LINEAR- 线性插值(默认)INTER_AREA- 区域插值INTER_CUBIC- 三次样条插值INTER_LANCZOS4-Lanczos插值
4.3 示例代码
#include <opencv2/opencv.hpp>
#include <iostream>

using namespace cv;
using namespace std;

int main() {
    // 读取图像
    Mat image = imread("test.jpg");
    if (image.empty()) {
        cout << "Could not open or find the image" << endl;
        return -1;
    }

    // 设置目标图像的尺寸
    Mat rotatedImage;
    Size newSize(800, 600); // 新的宽度和高度
    resize(image, rotatedImage, newSize);

    // 显示图像
    imshow("Original Image", image);
    imshow("Rotated Image", rotatedImage);

    waitKey(0);
    return 0;
}
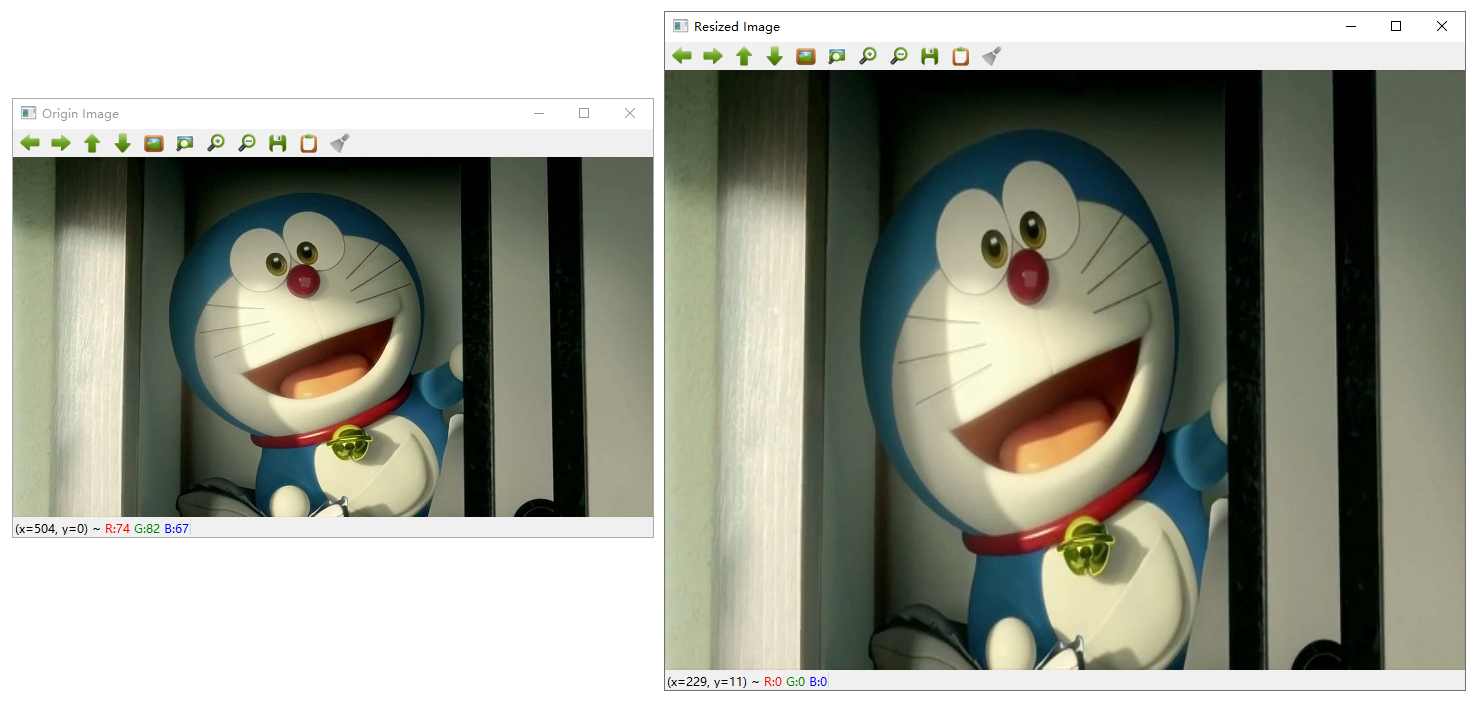
原图和缩放后的图像如下所示:
五、图像翻转
5.1 原理
图像翻转可以通过 cv::flip() 函数实现。可以指定翻转方向(水平、垂直或两者)。
5.2 API
void flip(
    InputArray src,
    OutputArray dst,
    int flipCode
);
参数说明
src:输入图像,可以是任意类型的单通道或多通道图像。dst:翻转后的输出图像,将与输入图像具有相同的类型和大小。flipCode:指定翻转的方式:flipCode > 0:沿y轴翻转(水平翻转)。flipCode == 0:沿x轴翻转(垂直翻转)。flipCode < 0:沿中心翻转(同时沿 x 轴和 y 轴翻转)。
5.3 示例代码
#include <opencv2/opencv.hpp>
#include <iostream>

using namespace cv;
using namespace std;

int main() {
    // 读取图像
    Mat image = imread("test.jpg");
    if (image.empty()) {
        cout << "Could not open or find the image" << endl;
        return -1;
    }

    // 初始化输出矩阵
    Mat flipped_horizontal, flipped_vertical, flipped_center;

    // 水平翻转
    flip(image, flipped_horizontal, 1);

    // 垂直翻转
    flip(image, flipped_vertical, 0);

    // 中心翻转
    flip(image, flipped_center, -1);

    // 显示结果
    imshow("Original Image", image);
    imshow("Flipped Horizontally", flipped_horizontal);
    imshow("Flipped Vertically", flipped_vertical);
    imshow("Flipped Center", flipped_center);

    waitKey(0);
    return 0;
}
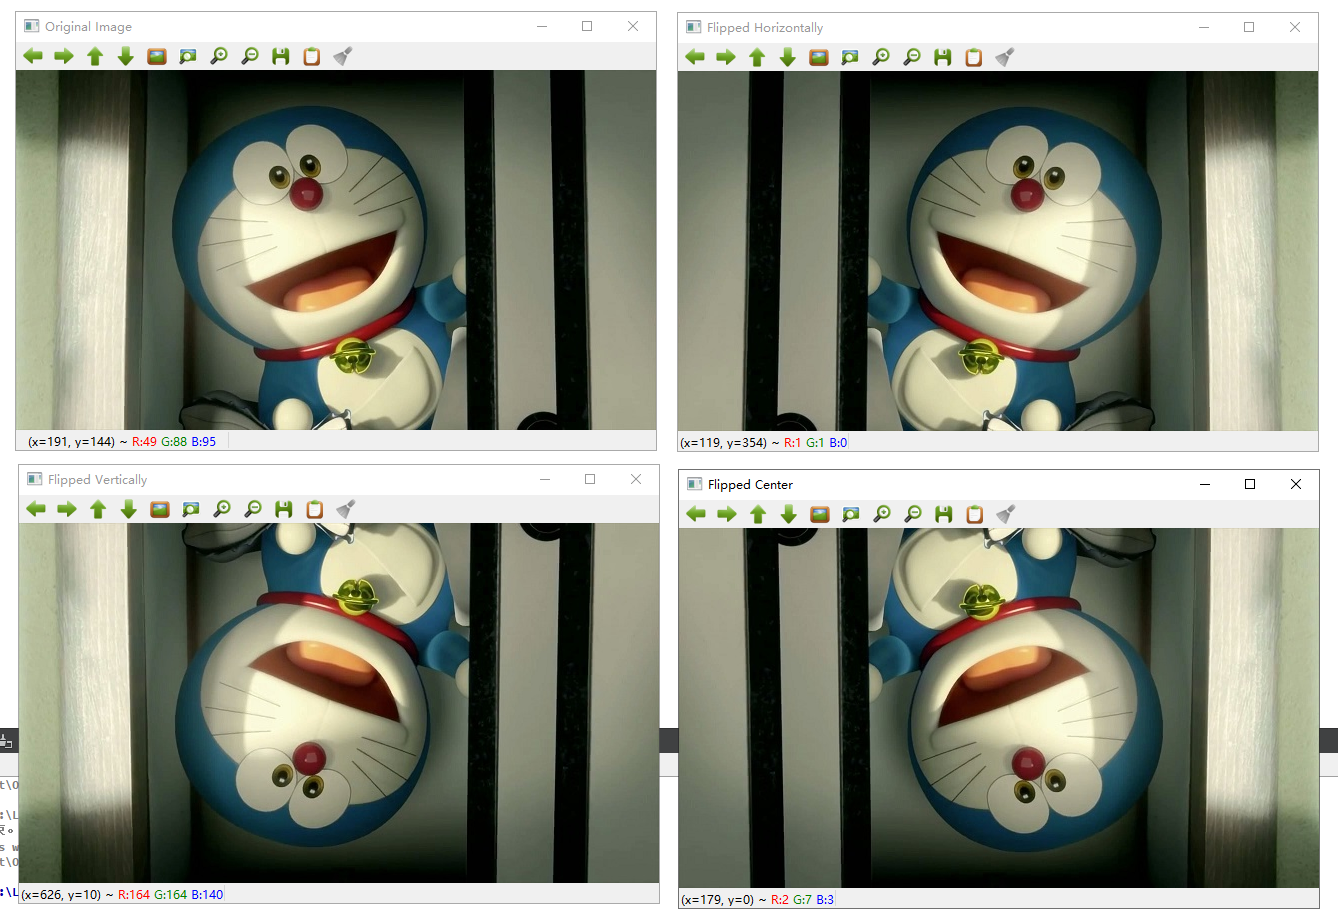
原图和翻转后的图像如下所示:

 浙公网安备 33010602011771号