CentOS 8.2使用pgAdmin安装PostgreSQL 13.1
PostgreSQL是最高级的RDBMS,而pgAdmin是Postgres的Web UI。在这里,您将看到如何在CentOS 8上使用pgAdmin安装PostgreSQL。
什么是PostgreSQL?
PostgreSQL(也称为Postgres)是一个免费的开源关系数据库管理系统(RDBMS),强调可扩展性和SQL遵从性。PostgreSQL最初被命名为POSTGRES,指的是Ingres数据库的后继者。在1996年,该项目被更名为PostgreSQL,以反映其对SQL的支持。
PostgreSQL的事务具有原子性,一致性,隔离性,耐久性(ACID)属性,自动可更新视图,实例化视图,触发器,外键和存储过程。它旨在处理各种工作负载,从单台机器到具有多个并发用户的数据仓库或Web服务。它是macOS Server的默认数据库,也可用于Linux,FreeBSD,OpenBSD和Windows。(来源:维基百科)
PostgreSQL是一个免费软件,并根据PostgreSQL许可证发行(免费和开放源代码,允许)。
什么是pgAdmin?
pgAdmin是用于Postgres数据库服务器的免费开放源代码图形用户界面(GUI)管理工具。
pgAdmin在桌面和Web界面中可用。pgAdmin是PostgreSQL的其他管理工具中功能丰富且最受欢迎的功能。
就像PostgreSQL一样,pgAdmin也是一个免费软件。它也根据PostgreSQL许可证分发。
环境规格:
- CPU :3.4 GHz(2核)
- 内存:2 GB
- 储存空间:20 GB
- 作业系统:CentOS 8.2
- 主机名:postgres.lianglab.cn
- IP地址:192.168.6.160/24
第一步:更新Linux服务器软件包
使用SSH客户端并登录到postgres.lianglab.cn作为根用户。
使用dnf命令更新Linux服务器软件包。
[root@postgres ~]# hostnamectl set-hostname postgres.lianglab.cn
[root@postgres ~]#dnf update -y
Dependencies resolved.
Nothing to do.
Complete!
我们的Linux操作系统已经是最新的。
检查Linux操作系统和内核版本。
[root@postgres ~]# uname -r
4.18.0-193.28.1.el8_2.x86_64
[root@postgres ~]# cat /etc/redhat-release
CentOS Linux release 8.2.2004 (Core)
第二步:安装Postgres官方Yum存储库
尽管Linux yum存储库中提供了Postgres数据库服务器,但是要安装最新版本,我们必须在Linux服务器中添加PostgreSQL官方yum存储库。
[root@postgres ~]# dnf install -y https://download.postgresql.org/pub/repos/yum/reporpms/EL-8-x86_64/pgdg-redhat-repo-latest.noarch.rpm
Last metadata expiration check: 1:47:55 ago on Sat 19 Dec 2020 07:50:22 PM CST.
pgdg-redhat-repo-latest.noarch.rpm                           15 kB/s |  11 kB     00:00
Dependencies resolved.
============================================================================================
 Package                    Architecture     Version           Repository              Size
============================================================================================
Installing:
 pgdg-redhat-repo           noarch           42.0-14           @commandline            11 k

Transaction Summary
============================================================================================
Install  1 Package

Total size: 11 k
Installed size: 11 k
Downloading Packages:
Running transaction check
Transaction check succeeded.
Running transaction test
Transaction test succeeded.
Running transaction
  Preparing        :                                                                    1/1
  Installing       : pgdg-redhat-repo-42.0-14.noarch                                    1/1
  Verifying        : pgdg-redhat-repo-42.0-14.noarch                                    1/1
Installed products updated.

Installed:
  pgdg-redhat-repo-42.0-14.noarch

Complete!
通过执行以下命令,在标准yum存储库中禁用PostgreSQL模块。
[root@postgres ~]# dnf list postgresql
PostgreSQL common RPMs for RHEL/CentOS 8 - x86_64           191 kB/s | 511 kB     00:02
PostgreSQL 13 for RHEL/CentOS 8 - x86_64                    9.2 kB/s | 196 kB     00:21
PostgreSQL 12 for RHEL/CentOS 8 - x86_64                    8.0 kB/s | 418 kB     00:52
PostgreSQL 11 for RHEL/CentOS 8 - x86_64                     18 kB/s | 608 kB     00:34
PostgreSQL 10 for RHEL/CentOS 8 - x86_64                    135 kB/s | 411 kB     00:03
PostgreSQL 9.6 for RHEL/CentOS 8 - x86_64                   3.1 kB/s | 400 kB     02:09
PostgreSQL 9.5 for RHEL/CentOS 8 - x86_64                   4.4 kB/s | 356 kB     01:20
Available Packages
postgresql.x86_64               10.14-1.module_el8.2.0+487+53cc39ce                AppStream
[root@postgres ~]#
[root@postgres ~]# dnf -qy module disable postgresql
[root@postgres ~]# dnf list postgresql
Last metadata expiration check: 0:10:17 ago on Sat 19 Dec 2020 09:45:13 PM CST.
Error: No matching Packages to list
第三步:CentOS 8上安装Postgres数据库服务器
【1】使用dnf命令在Linux服务器上安装Postgres数据库服务器13(在撰写本文时为最新)。
[root@postgres ~]# dnf install -y postgresql13-server
Last metadata expiration check: 0:11:15 ago on Sat 19 Dec 2020 09:45:13 PM CST.
Dependencies resolved.
============================================================================================
 Package                     Architecture   Version                    Repository      Size
============================================================================================
Installing:
 postgresql13-server         x86_64         13.1-1PGDG.rhel8           pgdg13         5.6 M
Installing dependencies:
 postgresql13                x86_64         13.1-1PGDG.rhel8           pgdg13         1.4 M
 postgresql13-libs           x86_64         13.1-1PGDG.rhel8           pgdg13         410 k

Transaction Summary
============================================================================================
Install  3 Packages

Total download size: 7.4 M
Installed size: 31 M
Downloading Packages:
(1/3): postgresql13-libs-13.1-1PGDG.rhel8.x86_64.rpm        9.1 kB/s | 410 kB     00:45
(2/3): postgresql13-13.1-1PGDG.rhel8.x86_64.rpm             9.6 kB/s | 1.4 MB     02:27
(3/3): postgresql13-server-13.1-1PGDG.rhel8.x86_64.rpm      5.3 kB/s | 5.6 MB     17:46
--------------------------------------------------------------------------------------------
Total                                                       7.1 kB/s | 7.4 MB     17:46
warning: /var/cache/dnf/pgdg13-e81daebfc8b779ec/packages/postgresql13-13.1-1PGDG.rhel8.x86_64.rpm: Header V4 DSA/SHA1 Signature, key ID 442df0f8: NOKEY
PostgreSQL 13 for RHEL/CentOS 8 - x86_64                    1.6 MB/s | 1.7 kB     00:00
Importing GPG key 0x442DF0F8:
 Userid     : "PostgreSQL RPM Building Project <pgsqlrpms-hackers@pgfoundry.org>"
 Fingerprint: 68C9 E2B9 1A37 D136 FE74 D176 1F16 D2E1 442D F0F8
 From       : /etc/pki/rpm-gpg/RPM-GPG-KEY-PGDG
Key imported successfully
Running transaction check
Transaction check succeeded.
Running transaction test
Transaction test succeeded.
Running transaction
  Preparing        :                                                                    1/1
  Installing       : postgresql13-libs-13.1-1PGDG.rhel8.x86_64                          1/3
  Running scriptlet: postgresql13-libs-13.1-1PGDG.rhel8.x86_64                          1/3
  Installing       : postgresql13-13.1-1PGDG.rhel8.x86_64                               2/3
  Running scriptlet: postgresql13-13.1-1PGDG.rhel8.x86_64                               2/3
  Running scriptlet: postgresql13-server-13.1-1PGDG.rhel8.x86_64                        3/3
  Installing       : postgresql13-server-13.1-1PGDG.rhel8.x86_64                        3/3
  Running scriptlet: postgresql13-server-13.1-1PGDG.rhel8.x86_64                        3/3
  Verifying        : postgresql13-13.1-1PGDG.rhel8.x86_64                               1/3
  Verifying        : postgresql13-libs-13.1-1PGDG.rhel8.x86_64                          2/3
  Verifying        : postgresql13-server-13.1-1PGDG.rhel8.x86_64                        3/3
Installed products updated.

Installed:
  postgresql13-13.1-1PGDG.rhel8.x86_64          postgresql13-libs-13.1-1PGDG.rhel8.x86_64
  postgresql13-server-13.1-1PGDG.rhel8.x86_64

Complete!
【2】执行一次以下命令来初始化Postgres数据库。
[root@postgres ~]# /usr/pgsql-13/bin/postgresql-13-setup initdb
Initializing database ... OK
【3】启用并启动Postgres数据库服务。
[root@postgres ~]# systemctl enable --now postgresql-13
Created symlink /etc/systemd/system/multi-user.target.wants/postgresql-13.service → /usr/lib/systemd/system/postgresql-13.service.
【4】检查Postgres数据库服务的状态
[root@postgres ~]# systemctl status postgresql-13.service
● postgresql-13.service - PostgreSQL 13 database server
   Loaded: loaded (/usr/lib/systemd/system/postgresql-13.service; enabled; vendor preset: d>
   Active: active (running) since Sat 2020-12-19 22:18:10 CST; 3min 55s ago
     Docs: https://www.postgresql.org/docs/13/static/
  Process: 945378 ExecStartPre=/usr/pgsql-13/bin/postgresql-13-check-db-dir ${PGDATA} (code>
 Main PID: 945384 (postmaster)
    Tasks: 8 (limit: 23840)
   Memory: 17.4M
   CGroup: /system.slice/postgresql-13.service
           ├─945384 /usr/pgsql-13/bin/postmaster -D /var/lib/pgsql/13/data/
           ├─945385 postgres: logger
           ├─945387 postgres: checkpointer
           ├─945388 postgres: background writer
           ├─945389 postgres: walwriter
           ├─945390 postgres: autovacuum launcher
           ├─945391 postgres: stats collector
           └─945392 postgres: logical replication launcher

Dec 19 22:18:10 postgres.lianglab.cn systemd[1]: Starting PostgreSQL 13 database server...
Dec 19 22:18:10 postgres.lianglab.cn postmaster[945384]: 2020-12-19 22:18:10.802 CST [94538>
Dec 19 22:18:10 postgres.lianglab.cn postmaster[945384]: 2020-12-19 22:18:10.802 CST [94538>
Dec 19 22:18:10 postgres.lianglab.cn systemd[1]: Started PostgreSQL 13 database server.
【5】检查Postgres数据库服务端口监听信息
[root@postgres ~]# netstat -anptl| grep postmaster
tcp        0      0 127.0.0.1:5432          0.0.0.0:*               LISTEN      945384/postmaster
[root@postgres ~]# ss -anptl| grep postmaster
LISTEN    0         244              127.0.0.1:5432             0.0.0.0:*        users:(("postmaster",pid=945384,fd=6))
【6】检查已安装的PostgreSQL服务器的版本。
[root@postgres ~]# psql -V
psql (PostgreSQL) 13.1
【7】切换到postgres用户并连接到psql shell来设置管理员用户密码。
[root@postgres ~]# su - postgres
[postgres@postgres ~]$ psql
psql (13.1)
Type "help" for help.

postgres=# ALTER USER postgres WITH PASSWORD 'liang123';
ALTER ROLE
postgres=# \q
[postgres@postgres ~]$ exit
logout
第四步:配置Postgres数据库服务以进行网络访问
PostgreSQL的默认服务端口是5432/tcp。执行以下命令以验证PostgreSQL服务正在侦听此端口。
[root@postgres ~]# ss -tulpn | grep 5432
tcp     LISTEN   0        244            127.0.0.1:5432           0.0.0.0:*      users:(("postmaster",pid=945384,fd=6))
您可能会注意到PostgreSQL服务最初仅在localhost接口上运行。但是,要使我们的Postgres数据库可用于网络客户端,必须将PostgreSQL配置为在所有(或某些特定)接口上运行。
在vi文本编辑器中编辑PostgreSQL配置文件。
[root@postgres ~]# vi /var/lib/pgsql/13/data/postgresql.conf
在其中搜索以下指令。
# listen_addresses = 'localhost'
并用以下指令替换它。
listen_addresses = '*'
[root@postgres ~]# cat /var/lib/pgsql/13/data/postgresql.conf| grep listen_addresses
#listen_addresses = 'localhost'		# what IP address(es) to listen on;
[root@postgres ~]# vi /var/lib/pgsql/13/data/postgresql.conf
[root@postgres ~]# cat /var/lib/pgsql/13/data/postgresql.conf| grep listen_addresses
#listen_addresses = 'localhost'		# what IP address(es) to listen on;
listen_addresses = '*'
[root@postgres ~]#

现在,您的Postgres数据库服务已配置为在所有网络接口上进行侦听。
允许192.168.6.0/24网络客户端访问pg_hba.conf文件中的PostgreSQL服务。
[root@postgres ~]# echo "host all all 192.168.6.0/24 md5" >> /var/lib/pgsql/13/data/pg_hba.conf
重新启动Postgres数据库服务以应用更改。
[root@postgres ~]# systemctl restart postgresql-13.service
再次使用ss命令检查网络服务。
[root@postgres ~]# ss -tulpn | grep 5432
tcp     LISTEN   0        244              0.0.0.0:5432           0.0.0.0:*      users:(("postmaster",pid=946059,fd=6))
tcp     LISTEN   0        244                 [::]:5432              [::]:*      users:(("postmaster",pid=946059,fd=7))
Postgres Service现在在所有网络接口上运行。
第五步:Postgres数据库服务配置Linux防火墙
在CentOS 8中,我们已经为PostgreSQL提供了防火墙服务,因此我们可以通过使用firewall-cmd命令来允许它
[root@postgres ~]# firewall-cmd --permanent --add-service=postgresql
success
[root@postgres ~]# firewall-cmd --reload
success
Postgres数据库服务器已安装在Linux服务器上。
第六步:CentOS 8上安装pgAdmin Yum存储库
pgAdmin是一个流行的Web界面,用于PostgreSQL数据库的数据库管理。
在PostgreSQL官方yum存储库中也提供了pgAdmin。但这在我们的CentOS 8服务器没有作用的
因此,我们正在从pgAdmin官方yum存储库中安装pgAdmin的最新稳定版本。
首先需要从Linux服务器上删除PostgreSQL yum存储库。
[root@postgres ~]# cat /etc/yum.repos.d/pgdg-redhat-all.repo | grep pgdg| wc -l
33
[root@postgres ~]# dnf remove -y pgdg-redhat-repo
Dependencies resolved.
========================================================================================================================================================================
 Package                                      Architecture                       Version                                Repository                                 Size
========================================================================================================================================================================
Removing:
 pgdg-redhat-repo                             noarch                             42.0-14                                @@commandline                              11 k

Transaction Summary
========================================================================================================================================================================
Remove  1 Package

Freed space: 11 k
Running transaction check
Transaction check succeeded.
Running transaction test
Transaction test succeeded.
Running transaction
  Preparing        :                                                                                                                                                1/1
  Erasing          : pgdg-redhat-repo-42.0-14.noarch                                                                                                                1/1
  Verifying        : pgdg-redhat-repo-42.0-14.noarch                                                                                                                1/1
Installed products updated.

Removed:
  pgdg-redhat-repo-42.0-14.noarch

Complete!
[root@postgres ~]# cat /etc/yum.repos.d/pgdg-redhat-all.repo | grep pgdg| wc -l
cat: /etc/yum.repos.d/pgdg-redhat-all.repo: No such file or directory    #####pgdg-redhat-all.repo文件已经被删除掉。
0
[root@postgres ~]# ll /etc/yum.repos.d/
total 12
-rw-r--r--. 1 root root 1752 Sep 28 10:01 CentOS-Base.repo
-rw-r--r--. 1 root root 1220 Sep 28 10:01 epel.repo
-rw-r--r--. 1 root root  200 Dec 18 23:12 mongodb-org-4.4.repo
[root@postgres ~]#
在您的Linux操作系统中添加pgAdmin官方yum存储库。
[root@postgres ~]# dnf install -y https://ftp.postgresql.org/pub/pgadmin/pgadmin4/yum/pgadmin4-redhat-repo-1-1.noarch.rpm
Last metadata expiration check: 2:56:09 ago on Sat 19 Dec 2020 07:50:22 PM CST.
pgadmin4-redhat-repo-1-1.noarch.rpm                                                                                                     3.0 kB/s | 6.6 kB     00:02
Dependencies resolved.
========================================================================================================================================================================
 Package                                           Architecture                        Version                          Repository                                 Size
========================================================================================================================================================================
Installing:
 pgadmin4-redhat-repo                              noarch                              1-1                              @commandline                              6.6 k

Transaction Summary
========================================================================================================================================================================
Install  1 Package

Total size: 6.6 k
Installed size: 4.0 k
Downloading Packages:
Running transaction check
Transaction check succeeded.
Running transaction test
Transaction test succeeded.
Running transaction
  Preparing        :                                                                                                                                                1/1
  Installing       : pgadmin4-redhat-repo-1-1.noarch                                                                                                                1/1
  Verifying        : pgadmin4-redhat-repo-1-1.noarch                                                                                                                1/1
Installed products updated.

Installed:
  pgadmin4-redhat-repo-1-1.noarch

Complete!
现在需要安装阿里云EPEL(Enterprise Linux的额外软件包) yum存储库,因为pgAdmin需要一些标准yum存储库中不可用的软件包。
使用dnf命令并安装EPEL yum存储库。
[root@postgres yum.repos.d]# yum install -y https://mirrors.aliyun.com/epel/epel-release-latest-8.noarch.rpm

[root@postgres yum.repos.d]# sed -i 's|^#baseurl=https://download.fedoraproject.org/pub|baseurl=https://mirrors.aliyun.com|' /etc/yum.repos.d/epel*
[root@postgres yum.repos.d]# sed -i 's|^metalink|#metalink|' /etc/yum.repos.d/epel*
为新安装的yum存储库构建缓存。
[root@postgres yum.repos.d]#  dnf makecache
CentOS-8 - Base - mirrors.tongdun.cn                        1.8 MB/s | 3.9 kB     00:00
CentOS-8 - Extras - mirrors.tongdun.cn                      811 kB/s | 1.5 kB     00:00
CentOS-8 - AppStream - mirrors.tongdun.cn                   2.7 MB/s | 4.3 kB     00:00
Extra Packages for Enterprise Linux Modular 8 - x86_64       17 kB/s | 3.0 kB     00:00
Extra Packages for Enterprise Linux 8 - x86_64               37 kB/s | 4.7 kB     00:00
MongoDB Repository                                          1.6 kB/s | 2.5 kB     00:01
pgadmin4                                                    2.3 kB/s | 2.9 kB     00:01
Metadata cache created.
第七步:CentOS 8上安装pgAdmin Web UI
已添加所有存储库。现在,您可以使用dnf命令安装pgAdmin 。
[root@postgres tdops]# dnf install -y pgadmin4
...
Installed:
  apr-1.6.3-9.el8.x86_64
  apr-util-1.6.1-6.el8.x86_64
  apr-util-bdb-1.6.1-6.el8.x86_64
  apr-util-openssl-1.6.1-6.el8.x86_64
  avahi-libs-0.7-19.el8.x86_64
  centos-logos-httpd-80.5-2.el8.noarch
  cups-libs-1:2.2.6-33.el8.x86_64
  dejavu-fonts-common-2.35-6.el8.noarch
  dejavu-sans-fonts-2.35-6.el8.noarch
  fontconfig-2.13.1-3.el8.x86_64
  fontpackages-filesystem-1.44-22.el8.noarch
  glx-utils-8.4.0-4.20181118git1830dcb.el8.x86_64
  graphite2-1.3.10-10.el8.x86_64
  harfbuzz-1.7.5-3.el8.x86_64
  httpd-2.4.37-21.module_el8.2.0+494+1df74eae.x86_64
  httpd-filesystem-2.4.37-21.module_el8.2.0+494+1df74eae.noarch
  httpd-tools-2.4.37-21.module_el8.2.0+494+1df74eae.x86_64
  libICE-1.0.9-15.el8.x86_64
  libSM-1.2.3-1.el8.x86_64
  libX11-1.6.8-3.el8.x86_64
  libX11-common-1.6.8-3.el8.noarch
  libX11-xcb-1.6.8-3.el8.x86_64
  libXau-1.0.8-13.el8.x86_64
  libXdamage-1.1.4-14.el8.x86_64
  libXext-1.3.3-9.el8.x86_64
  libXfixes-5.0.3-7.el8.x86_64
  libXrender-0.9.10-7.el8.x86_64
  libXxf86vm-1.1.4-9.el8.x86_64
  libglvnd-1:1.2.0-6.el8.x86_64
  libglvnd-egl-1:1.2.0-6.el8.x86_64
  libglvnd-glx-1:1.2.0-6.el8.x86_64
  libjpeg-turbo-1.5.3-10.el8.x86_64
  libwayland-client-1.17.0-1.el8.x86_64
  libwayland-server-1.17.0-1.el8.x86_64
  libxcb-1.13.1-1.el8.x86_64
  libxshmfence-1.3-2.el8.x86_64
  mailcap-2.1.48-3.el8.noarch
  mesa-libEGL-19.3.4-2.el8.x86_64
  mesa-libGL-19.3.4-2.el8.x86_64
  mesa-libgbm-19.3.4-2.el8.x86_64
  mesa-libglapi-19.3.4-2.el8.x86_64
  mod_http2-1.11.3-3.module_el8.2.0+486+c01050f0.1.x86_64
  pcre2-utf16-10.32-1.el8.x86_64
  pgadmin4-4.28-1.el8.noarch
  pgadmin4-desktop-4.28-1.el8.x86_64
  pgadmin4-server-4.28-1.el8.x86_64
  pgadmin4-web-4.28-1.el8.noarch
  python3-mod_wsgi-4.6.4-4.el8.x86_64
  python3-pip-9.0.3-16.el8.noarch
  python3-setuptools-39.2.0-5.el8.noarch
  python36-3.6.8-2.module_el8.1.0+245+c39af44f.x86_64
  qt5-qtbase-5.12.5-4.el8.x86_64
  qt5-qtbase-common-5.12.5-4.el8.noarch
  qt5-qtbase-gui-5.12.5-4.el8.x86_64
  xcb-util-0.4.0-10.el8.x86_64
  xcb-util-image-0.4.0-9.el8.x86_64
  xcb-util-keysyms-0.4.0-7.el8.x86_64
  xcb-util-renderutil-0.3.9-10.el8.x86_64
  xcb-util-wm-0.4.1-12.el8.x86_64

Complete!
要配置SELinux策略,pgAdmin设置脚本需要semanage命令,该命令在policycoreutils-python-utils软件包中提供。
因此,您应该在执行pgAdmin安装脚本之前安装它。
[root@postgres tdops]# dnf install -y policycoreutils-python-utils
Dependencies resolved.
================================================================================
 Package                    Arch   Version                         Repo    Size
================================================================================
Installing:
 policycoreutils-python-utils
                            noarch 2.9-9.el8                       BaseOS 251 k
Installing dependencies:
 checkpolicy                x86_64 2.9-1.el8                       BaseOS 348 k
 python3-audit              x86_64 3.0-0.17.20191104git1c2f876.el8 BaseOS  86 k
 python3-libsemanage        x86_64 2.9-2.el8                       BaseOS 127 k
 python3-policycoreutils    noarch 2.9-9.el8                       BaseOS 2.2 M
 python3-setools            x86_64 4.2.2-2.el8                     BaseOS 601 k

Transaction Summary
================================================================================
Install  6 Packages

Total download size: 3.6 M
Installed size: 11 M
Downloading Packages:
(1/6): python3-audit-3.0-0.17.20191104git1c2f87  27 kB/s |  86 kB     00:03
(2/6): policycoreutils-python-utils-2.9-9.el8.n  44 kB/s | 251 kB     00:05
(3/6): python3-libsemanage-2.9-2.el8.x86_64.rpm  46 kB/s | 127 kB     00:02
(4/6): checkpolicy-2.9-1.el8.x86_64.rpm          40 kB/s | 348 kB     00:08
(5/6): python3-setools-4.2.2-2.el8.x86_64.rpm    85 kB/s | 601 kB     00:07
(6/6): python3-policycoreutils-2.9-9.el8.noarch 125 kB/s | 2.2 MB     00:18
--------------------------------------------------------------------------------
Total                                           147 kB/s | 3.6 MB     00:25
Running transaction check
Transaction check succeeded.
Running transaction test
Transaction test succeeded.
Running transaction
  Preparing        :                                                        1/1
  Installing       : python3-setools-4.2.2-2.el8.x86_64                     1/6
  Installing       : python3-libsemanage-2.9-2.el8.x86_64                   2/6
  Installing       : python3-audit-3.0-0.17.20191104git1c2f876.el8.x86_64   3/6
  Installing       : checkpolicy-2.9-1.el8.x86_64                           4/6
  Installing       : python3-policycoreutils-2.9-9.el8.noarch               5/6
  Installing       : policycoreutils-python-utils-2.9-9.el8.noarch          6/6
  Running scriptlet: policycoreutils-python-utils-2.9-9.el8.noarch          6/6
  Verifying        : checkpolicy-2.9-1.el8.x86_64                           1/6
  Verifying        : policycoreutils-python-utils-2.9-9.el8.noarch          2/6
  Verifying        : python3-audit-3.0-0.17.20191104git1c2f876.el8.x86_64   3/6
  Verifying        : python3-libsemanage-2.9-2.el8.x86_64                   4/6
  Verifying        : python3-policycoreutils-2.9-9.el8.noarch               5/6
  Verifying        : python3-setools-4.2.2-2.el8.x86_64                     6/6

Installed:
  checkpolicy-2.9-1.el8.x86_64
  policycoreutils-python-utils-2.9-9.el8.noarch
  python3-audit-3.0-0.17.20191104git1c2f876.el8.x86_64
  python3-libsemanage-2.9-2.el8.x86_64
  python3-policycoreutils-2.9-9.el8.noarch
  python3-setools-4.2.2-2.el8.x86_64

Complete!
pgAdmin软件带有编写良好的配置脚本,用于配置pgAdmin Web服务。
执行它以创建管理员用户,配置SELinux策略和Apache Web服务器以部署pgAdmin Web服务。
[root@postgres tdops]# /usr/pgadmin4/bin/setup-web.sh
Setting up pgAdmin 4 in web mode on a Redhat platform...
Creating configuration database...
NOTE: Configuring authentication for SERVER mode.

Enter the email address and password to use for the initial pgAdmin user account:

Email address: lianglab@126.com
Password:
Retype password:
pgAdmin 4 - Application Initialisation
======================================

Creating storage and log directories...
Configuring SELinux...
The Apache web server is not running. We can enable and start the web server for you to finish pgAdmin 4 installation. Continue (y/n)? y
Created symlink /etc/systemd/system/multi-user.target.wants/httpd.service → /usr/lib/systemd/system/httpd.service.
Apache successfully enabled.
Apache successfully started.
You can now start using pgAdmin 4 in web mode at http://127.0.0.1/pgadmin4
上面的脚本安装了一个配置文件(/etc/httpd/conf.d/pgadmin4.conf),以将pgAdmin部署在Apache Web服务器上。
此文件中不需要自定义。您仅需要启用和启动httpd服务。
[root@postgres tdops]# cat /etc/httpd/conf.d/pgadmin4.conf
LoadModule wsgi_module modules/mod_wsgi.so
WSGIDaemonProcess pgadmin processes=1 threads=25 python-home=/usr/pgadmin4/venv
WSGIScriptAlias /pgadmin4 /usr/pgadmin4/web/pgAdmin4.wsgi

<Directory /usr/pgadmin4/web/>
	WSGIProcessGroup pgadmin
	WSGIApplicationGroup %{GLOBAL}
	<IfModule mod_authz_core.c>
		# Apache 2.4
		Require all granted
	</IfModule>
	<IfModule !mod_authz_core.c>
		# Apache 2.2
		Order Deny,Allow
		Deny from All
		Allow from 127.0.0.1
		Allow from ::1
	</IfModule>
</Directory>
[root@postgres tdops]# systemctl enable --now httpd.service
[root@postgres tdops]# systemctl status  httpd.service
● httpd.service - The Apache HTTP Server
   Loaded: loaded (/usr/lib/systemd/system/httpd.service; enabled; vendor preset: disabled)
   Active: active (running) since Sat 2020-12-19 23:22:01 CST; 1min 57s ago
     Docs: man:httpd.service(8)
 Main PID: 948184 (httpd)
   Status: "Running, listening on: port 80"
    Tasks: 241 (limit: 23840)
   Memory: 34.6M
   CGroup: /system.slice/httpd.service
           ├─948184 /usr/sbin/httpd -DFOREGROUND
           ├─948198 /usr/sbin/httpd -DFOREGROUND
           ├─948199 /usr/sbin/httpd -DFOREGROUND
           ├─948200 /usr/sbin/httpd -DFOREGROUND
           ├─948201 /usr/sbin/httpd -DFOREGROUND
           └─948202 /usr/sbin/httpd -DFOREGROUND

Dec 19 23:22:01 postgres.lianglab.cn systemd[1]: Starting The Apache HTTP Server...
配置Linux防火墙,以允许传入流量到Apache Web服务器。
[root@postgres tdops]# firewall-cmd --permanent --add-service=http
success
[root@postgres tdops]# firewall-cmd --reload
success
在网络浏览器中打开URL http://192.168.6.160/pgadmin4
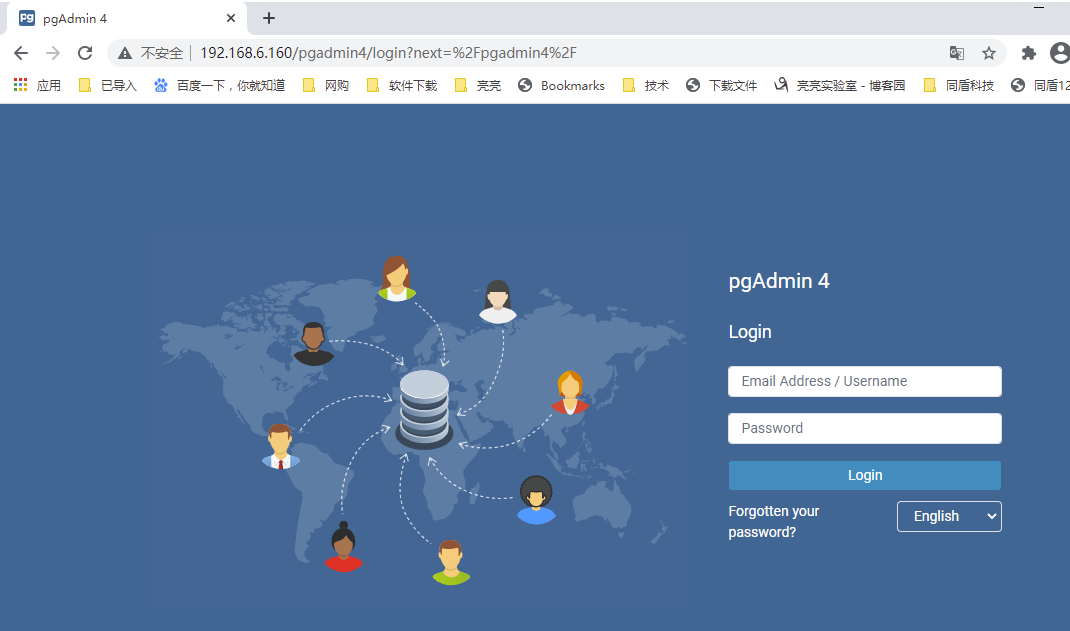
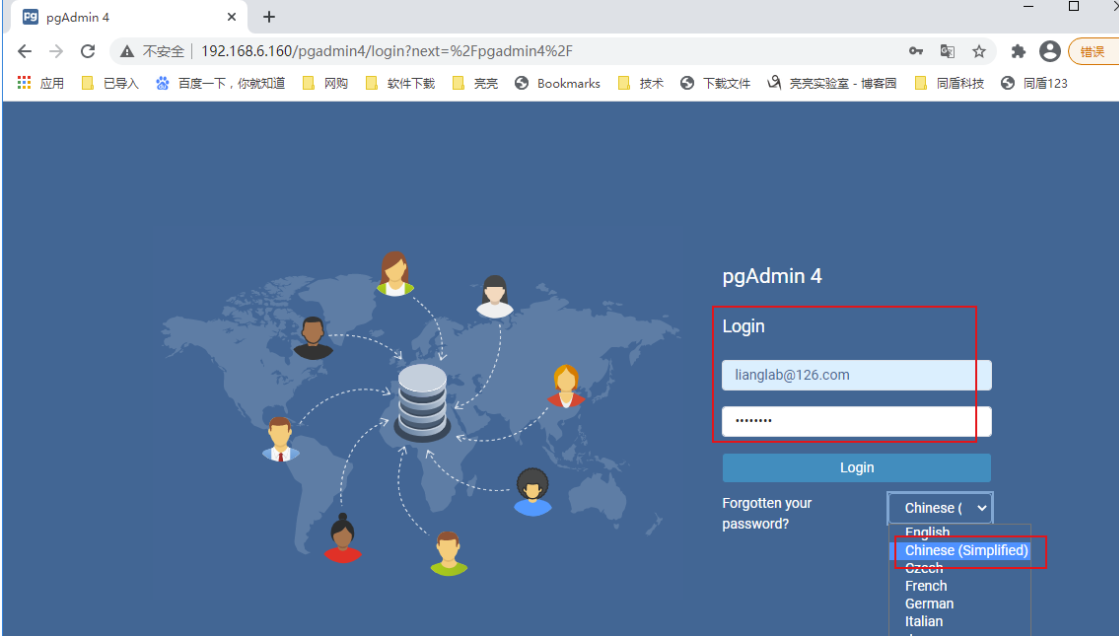
以setup-web.sh脚本创建的管理员用户身份登录pgAdmin 。
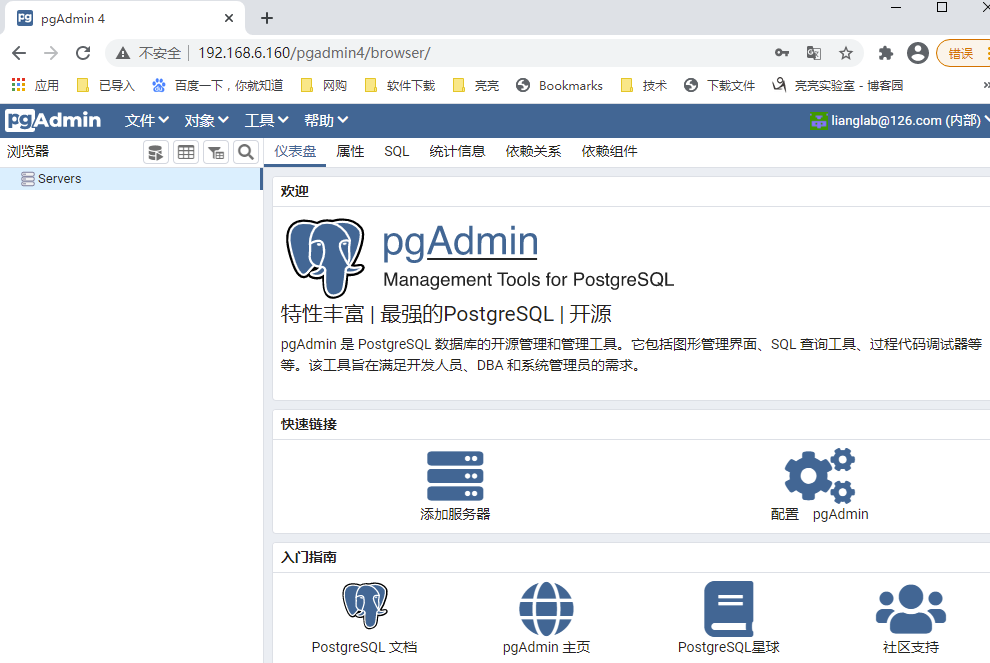
成功登录后,您可以访问pgAdmin仪表板。
要将您的PostgreSQL数据库服务器添加到pgAdmin清单中,请单击“添加新服务器”。
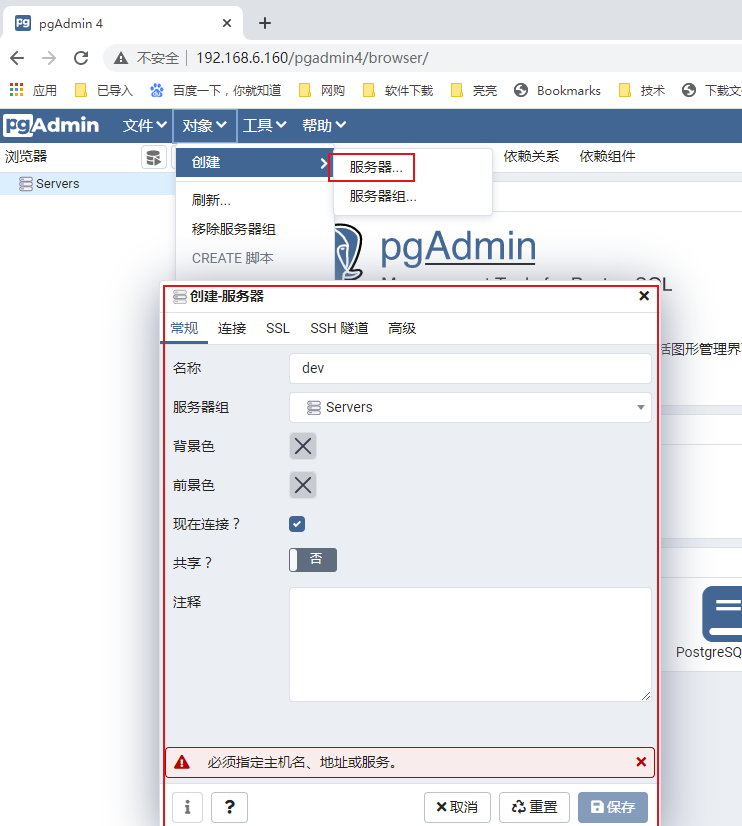
提供服务器名称,然后单击“连接”选项卡。
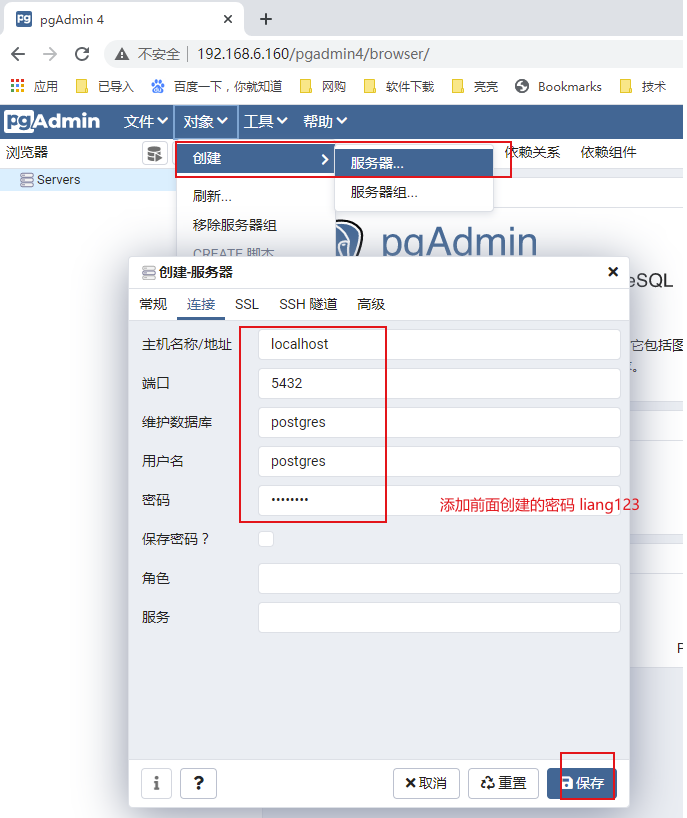

我们的Postgres数据库服务器已添加到pgAdmin中。您可以在左侧面板中看到数据库服务器的树。
广告时间:
- 关于我 :全国7*24高效代维服务
- 微信:lianglab
- QQ:867266199
- 淘宝店:全国7*24高效代维服务
- 全国高效代维:为中小型企业,提供云计算咨询代维、架构设计、降低成本。
结论
在此安装指南中,您学习了如何在CentOS 8服务器上使用pgAdmin安装PostgreSQL。为了学习更多关于Postgres的数据库。

 浙公网安备 33010602011771号