

Vue3实现6位验证码输入框,用户可以连续输入和删除
完整版本
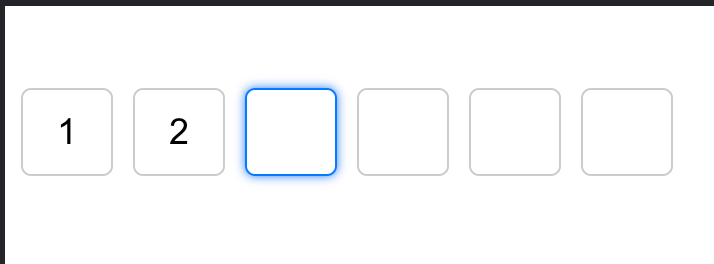
<!--
 * @Author: Jackie
 * @Date: 2023-08-24 14:18:05
 * @LastEditTime: 2023-09-11 14:58:21
 * @LastEditors: Jackie
 * @Description: code输入框-over
 * @FilePath: /web/src/views/Register/components/CodeInput.vue
 * @version:
-->
<template>
  <div class="verification-container">
    <input
      v-for="(code, index) in verificationCodes"
      :key="index"
      v-model="verificationCodes[index]"
      @input="handleInput(index, $event)"
      @keydown="handleKeyDown(index, $event)"
      maxlength="1"
      class="verification-input"
    />
  </div>
</template>
<script setup>
import { ref, defineProps, defineEmits, nextTick } from 'vue';
const emits = defineEmits(['emailCode']);
const verificationCodes = ref(['', '', '', '', '', '']);

const handleInput = (index, event) => {
  const value = event.target.value;
  verificationCodes.value[index] = value;

  // 判断是否输入完成
  if (verificationCodes.value.join('').length === 6) {
    emits('emailCode', verificationCodes.value.join(''));
  }

  // 自动跳到下一个输入框
  if (value && index < verificationCodes.value.length - 1) {
    const nextInput = event.target.nextElementSibling;
    if (nextInput) {
      nextTick(() => {
        nextInput.focus();
      });
    }
  }
};
const handleKeyDown = (index, event) => {
  // 处理删除操作
  if (event.key === 'Backspace' && !event.target.value && index > 0) {
    const prevInput = event.target.previousElementSibling;
    if (prevInput) {
      nextTick(() => {
        prevInput.focus();
      });
    }
  }
};
</script>
<style lang="less" scoped>
.verification-container {
  display: flex;
}

.verification-input {
  width: 54px;
  height: 54px;
  margin-right: 30px;
  text-align: center;
  font-size: 20px;
  border: 1px solid #ebebeb;
  border-radius: 5px;
  &:last-child {
    margin-right: 0;
  }
}

.verification-input:focus {
  outline: none;
  // border-color: #007bff;
  // box-shadow: 0 0 5px #007bff;
}
</style>
剪贴板直接填充版
<!--
 * @Author: Jackie
 * @Date: 2023-08-24 14:18:05
 * @LastEditTime: 2023-09-12 11:03:37
 * @LastEditors: Jackie
 * @Description: code输入框 - 可以使用 - 黏贴版 直接填充
 * @FilePath: /vue3-demo/src/components/code/CodeInput5.vue
 * @version:
-->
<template>
  <div class="verification-container">
    <input
      v-for="(code, index) in verificationCodes"
      :key="index"
      v-model="verificationCodes[index]"
      @input="handleInput(index, $event)"
      @keydown="handleKeyDown(index, $event)"
      @paste="handlePaste"
      ref="inputFieldRef"
      maxlength="1"
      class="verification-input"
    />
  </div>
</template>

<script setup>
import {
  ref,
  defineProps,
  defineEmits,
  nextTick,
  getCurrentInstance
} from 'vue';
const emits = defineEmits(['emailCode']);
const { proxy } = getCurrentInstance();
// proxy.$refs[`input${index - 1}`]
const verificationCodes = ref(['', '', '', '', '', '']);

const handleInput = (index, event) => {
  const value = event.target.value;
  verificationCodes.value[index] = value;

  // 判断是否输入完成
  if (verificationCodes.value.join('').length === 6) {
    emits('emailCode', verificationCodes.value.join(''));
  }

  // 自动跳到下一个输入框
  if (value && index < verificationCodes.value.length - 1) {
    const nextInput = event.target.nextElementSibling;
    if (nextInput) {
      nextTick(() => {
        nextInput.focus();
      });
    }
  }
};

const handleKeyDown = (index, event) => {
  // 处理删除操作
  if (event.key === 'Backspace' && !event.target.value && index > 0) {
    const prevInput = event.target.previousElementSibling;
    if (prevInput) {
      nextTick(() => {
        prevInput.focus();
      });
    }
  }
};
const inputFieldRef = ref(null);
const handlePaste = (event) => {
  const clipboardData = event.clipboardData || window.clipboardData;
  const pastedText = clipboardData.getData('text');
  const codes = pastedText.trim().substring(0, 6).split('');
  verificationCodes.value = codes.concat(Array(6 - codes.length).fill(''));

  // nextTick 方法来确保在更新 DOM 之后设置焦点。我们通过 $refs.inputField 引用最后一个输入框,并使用 focus 方法将焦点设置在最后一个输入框中
  nextTick(() => {
    console.log(inputFieldRef.value, proxy.$refs['inputFieldRef']);
    const lastInput = inputFieldRef.value[verificationCodes.value.length - 1];
    if (lastInput) {
      lastInput.focus();
    }
  });
};
</script>
<style lang="scss" scoped>
.verification-container {
  display: flex;
}

.verification-input {
  width: 54px;
  height: 54px;
  margin-right: 30px;
  text-align: center;
  font-size: 20px;
  border: 1px solid #ebebeb;
  border-radius: 5px;
  &:last-child {
    margin-right: 0;
  }
}

.verification-input:focus {
  outline: none;
  // border-color: #007bff;
  // box-shadow: 0 0 5px #007bff;
}
</style>

<!-- 使用
  添加了一个 @paste 事件监听器,用于监听粘贴事件。当用户在输入框中按下快捷键粘贴时,将调用 handlePaste 方法。在该方法中,我们使用 event.clipboardData 或 window.clipboardData 获取剪贴板数据,并提取前 6 个字符作为验证码。然后,将这些验证码填充到 verificationCodes 数组中
<CodeInput @emailCode="emailCodeFun" />

const emailCodeFun = (val) => {
  console.log(val);
  emailCode.value = val;
};
-->
可以随意填写删除
<template>
  <div class="verification-container">
    <input
      v-for="(code, index) in verificationCodes"
      :key="index"
      v-model="verificationCodes[index]"
      @input="handleInput(index, $event)"
      @keydown="handleKeyDown(index, $event)"
      maxlength="1"
      class="verification-input"
    />
  </div>
</template>

<script>
import { ref, nextTick } from 'vue';

export default {
  setup() {
    const verificationCodes = ref(['', '', '', '', '', '']);

    const handleInput = (index, event) => {
      const value = event.target.value;
      verificationCodes.value[index] = value;

      // 自动跳到下一个输入框
      if (value && index < verificationCodes.value.length - 1) {
        const nextInput = event.target.nextElementSibling;
        if (nextInput) {
          nextTick(() => {
            nextInput.focus();
          });
        }
      }
    };

    const handleKeyDown = (index, event) => {
      // 处理删除操作
      if (event.key === 'Backspace' && !event.target.value && index > 0) {
        const prevInput = event.target.previousElementSibling;
        if (prevInput) {
          nextTick(() => {
            prevInput.focus();
          });
        }
      }
    };

    return {
      verificationCodes,
      handleInput,
      handleKeyDown
    };
  }
};
</script>

<style lang="scss" scoped>
.verification-container {
  display: flex;
}

.verification-input {
  width: 40px;
  height: 40px;
  margin-right: 10px;
  text-align: center;
  font-size: 18px;
  border: 1px solid #ccc;
  border-radius: 5px;
}

.verification-input:focus {
  outline: none;
  border-color: #007bff;
  box-shadow: 0 0 5px #007bff;
}
</style>
在更新后的代码中,我们添加了一个新的handleKeyDown方法来处理键盘按键事件。如果用户按下了 "Backspace" 键并且当前输入框为空,则将焦点设置到前一个输入框。
通过这个更改,当用户输入一半时,按下 "Backspace" 键会自动删除前一个输入框中的内容,并将焦点移动到前一个输入框,以允许用户重新输入。
请注意,我们使用了nextTick函数来确保在下一个DOM更新周期后设置焦点,以避免与Vue的响应式更新冲突。
希望这个更新后的代码能够解决问题,并允许用户在输入一半时删除前面的内容。
必须输入完整才能删除内容
<template>
  <div class="verification-container">
    <input
      v-for="(code, index) in verificationCodes"
      :key="index"
      v-model="verificationCodes[index]"
      @input="handleInput(index, $event)"
      maxlength="1"
      class="verification-input"
    />
  </div>
</template>
<script>
import { ref } from 'vue';

export default {
  setup() {
    const verificationCodes = ref(['', '', '', '', '', '']);

    const handleInput = (index, event) => {
      const value = event.target.value;
      verificationCodes.value[index] = value;

      // 自动跳到下一个输入框
      if (value && index < verificationCodes.value.length - 1) {
        const nextInput = event.target.nextElementSibling;
        if (nextInput) {
          nextInput.focus();
        }
      }

      // 自动删除前面的内容
      if (!value && index > 0) {
        const prevInput = event.target.previousElementSibling;
        if (prevInput) {
          prevInput.focus();
        }
      }
    };

    return {
      verificationCodes,
      handleInput
    };
  }
};
</script>
<style lang="scss" scoped>
.verification-container {
  display: flex;
}

.verification-input {
  width: 40px;
  height: 40px;
  margin-right: 10px;
  text-align: center;
  font-size: 18px;
  border: 1px solid #ccc;
  border-radius: 5px;
}

.verification-input:focus {
  outline: none;
  border-color: #007bff;
  box-shadow: 0 0 5px #007bff;
}
</style>
使用v-for指令生成6个输入框,并将每个输入框的值绑定到verificationCodes数组中的对应索引位置。我们还使用@input事件监听输入框的输入,并调用handleInput方法处理输入事件。
在组件的逻辑部分,定义verificationCodes数组,并实现handleInput方法。
代码中,我们使用ref创建了一个名为verificationCodes的响应式数组,用于保存每个输入框的值。在handleInput方法中,我们更新对应索引位置的值,并根据输入的情况自动跳到下一个输入框或删除前面的内容。我们使用focus()方法将焦点设置到下一个或前一个输入框
文档来源于https://blog.csdn.net/JackieDYH/article/details/131326786

 浙公网安备 33010602011771号