spring cloud(二)简单快速的实现负载均衡的功能
上篇参考:Spring Cloud快速使用教程(一)
在快速搭建Spring Cloud我们如果要简单快速的使用负载均衡可以如下实现
以下是实现示例:
使用Spring Cloud快速使用教程(一)创建seaver-a模块的方法创建server-a01
在创建好的模块创建控制器:

IndexA:
package com.example.servicea01.controller;

import org.springframework.cloud.netflix.eureka.EnableEurekaClient;
import org.springframework.cloud.openfeign.EnableFeignClients;
import org.springframework.web.bind.annotation.*;

@RestController
// 添加注解声明是注册中心客户端
@EnableEurekaClient
// 实现不同子服务调用
@EnableFeignClients
public class IndexA {
    @RequestMapping("testA")
    public String test(){
        return "Hello 8086";  //这里用来输出区分
    }
}
添加配置文件application.yml:
server:
  # 服务端口号
  port: 8086
spring:
  application:
    # 服务名称 - 服务之间使用名称进行通讯,注意这里的服务名称要和需要负载的模块服务名一致
    name: service-objcat-a
eureka:
  client:
    service-url:
      # 填写注册中心服务器地址
      defaultZone: http://localhost:8081/eureka
    # 是否需要将自己注册到注册中心
    register-with-eureka: true
    # 是否需要搜索服务信息
    fetch-registry: true
  instance:
    # 使用ip地址注册到注册中心
    prefer-ip-address: true
    # 注册中心列表中显示的状态参数
    instance-id: ${spring.cloud.client.ip-address}:${server.port}
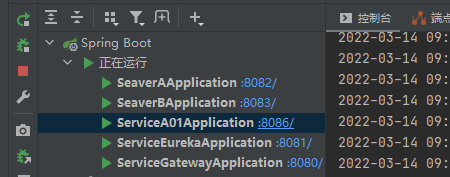
保存运行项目:
我们现在反复访问seaver-b的地址:http://localhost:8083/call
可以看到显示内容在seaver-a和seaver-a01切换
b to a 访问结果 ---Hello A
b to a 访问结果 ---Hello 8086
到此简单的负载实现了

 浙公网安备 33010602011771号