在CNN中使用Tensorflow进行数据增强
开始之前,需要思考一些基本问题
1、为什么需要大量数据
当您训练机器学习模型时,您真正在做的是调整其参数,以便它可以将特定输入(例如,图像)映射到某个输出(标签)。我们的优化目标是追逐我们模型损失较低的最佳位置,这种情况发生在您的参数以正确的方式调整时。
现在的神经网络通常具有数百万的参数,因此,你需要向您的机器学习模型喂入一定比例的示例,以获得良好的性能。此外,您需要的参数数量与模型送执行的任务的复杂程度成正比。
2、如果我没有“更多数据”,如何获得更多数据?
3、即使有我有大量的数据,扩充也可以提供帮助吗
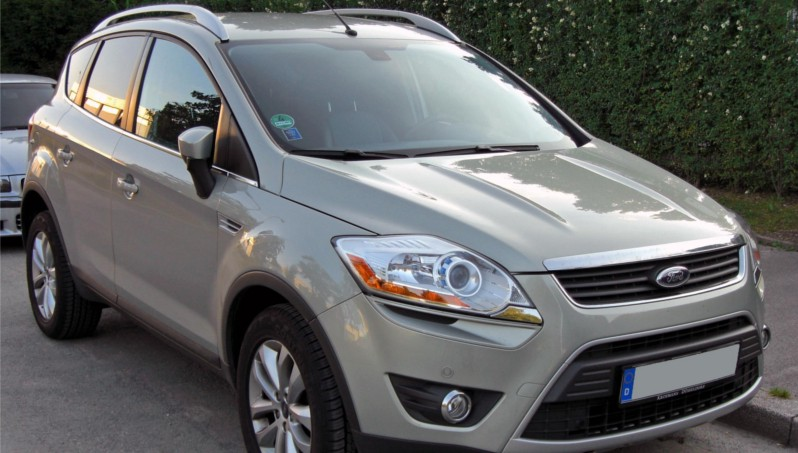
,右边的代表品牌B(雪佛兰)。")
流行的增强技术
让我们探讨几种最常用的图像增强技术,包括代码示例和增强后的图像可视化。从这里开始,数据将被称为图像。我们将在所有示例中使用用Python编写的Tensorflow或OpenCV。以下是我们将在文章中使用的技术索引:
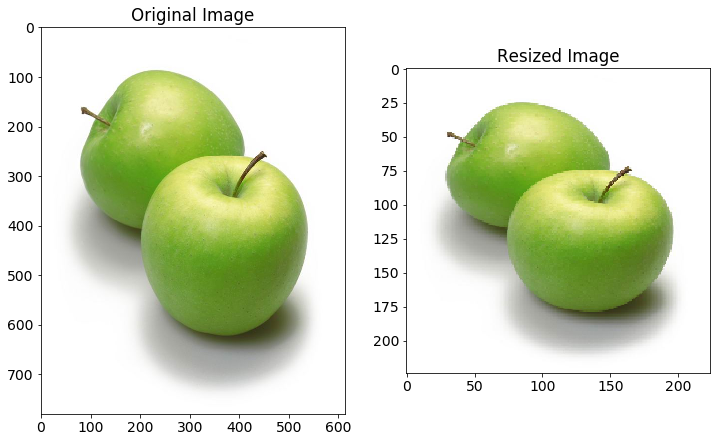
在任何技术之前:图像大小调整
从互联网收集的图像将具有不同的大小。由于在大多数神经网络中存在完全连接的层,所以馈送到网络的图像将需要固定大小(除非您在传递到密集层之前使用空间金字塔池)。因此,在图像增强发生之前,让我们将图像预处理到我们网络所需的大小。使用固定大小的图像,我们可以获得批量处理它们的好处。


 1 import tensorflow as tf
 2 import matplotlib.image as mpimg
 3 import numpy as np
 4
 5 IMAGE_SIZE = 224
 6
 7 def tf_resize_images(X_img_file_paths):
 8     X_data = []
 9     tf.reset_default_graph()
10     X = tf.placeholder(tf.float32, (None, None, 3))
11     tf_img = tf.image.resize_images(X, (IMAGE_SIZE, IMAGE_SIZE),
12                                     tf.image.ResizeMethod.NEAREST_NEIGHBOR)
13     with tf.Session() as sess:
14         sess.run(tf.global_variables_initializer())
15
16         # Each image is resized individually as different image may be of different size.
17         for index, file_path in enumerate(X_img_file_paths):
18             img = mpimg.imread(file_path)[:, :, :3] # Do not read alpha channel.
19             resized_img = sess.run(tf_img, feed_dict = {X: img})
20             X_data.append(resized_img)
21
22     X_data = np.array(X_data, dtype = np.float32) # Convert to numpy
23     return X_data
缩放
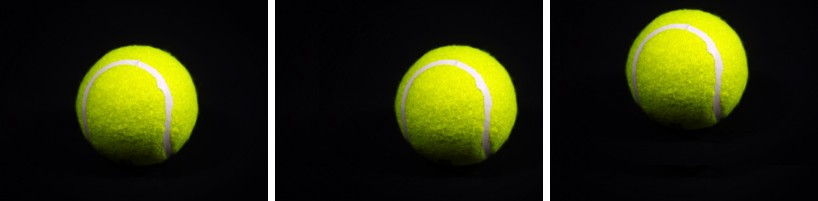
在图像中具有不同缩放的感兴趣对象是图像多样性的最重要方面。当您的网络掌握在真实用户手中时,图像中的对象可能很小或很大。此外,有时,物体可以覆盖整个图像,但不会完全存在于图像中(即在物体的边缘处被裁剪)。
def central_scale_images(X_imgs, scales):
    # Various settings needed for Tensorflow operation
    boxes = np.zeros((len(scales), 4), dtype = np.float32)
    for index, scale in enumerate(scales):
        x1 = y1 = 0.5 - 0.5 * scale # To scale centrally
        x2 = y2 = 0.5 + 0.5 * scale
        boxes[index] = np.array([y1, x1, y2, x2], dtype = np.float32)
    box_ind = np.zeros((len(scales)), dtype = np.int32)
    crop_size = np.array([IMAGE_SIZE, IMAGE_SIZE], dtype = np.int32)

    X_scale_data = []
    tf.reset_default_graph()
    X = tf.placeholder(tf.float32, shape = (1, IMAGE_SIZE, IMAGE_SIZE, 3))
    # Define Tensorflow operation for all scales but only one base image at a time
    tf_img = tf.image.crop_and_resize(X, boxes, box_ind, crop_size)
    with tf.Session() as sess:
        sess.run(tf.global_variables_initializer())

        for img_data in X_imgs:
            batch_img = np.expand_dims(img_data, axis = 0)
            scaled_imgs = sess.run(tf_img, feed_dict = {X: batch_img})
            X_scale_data.extend(scaled_imgs)

    X_scale_data = np.array(X_scale_data, dtype = np.float32)
    return X_scale_data

# Produce each image at scaling of 90%, 75% and 60% of original image.
scaled_imgs = central_scale_images(X_imgs, [0.90, 0.75, 0.60])

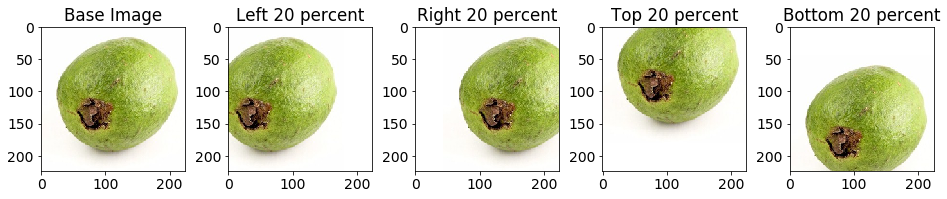
翻译
from math import ceil, floor

def get_translate_parameters(index):
    if index == 0: # Translate left 20 percent
        offset = np.array([0.0, 0.2], dtype = np.float32)
        size = np.array([IMAGE_SIZE, ceil(0.8 * IMAGE_SIZE)], dtype = np.int32)
        w_start = 0
        w_end = int(ceil(0.8 * IMAGE_SIZE))
        h_start = 0
        h_end = IMAGE_SIZE
    elif index == 1: # Translate right 20 percent
        offset = np.array([0.0, -0.2], dtype = np.float32)
        size = np.array([IMAGE_SIZE, ceil(0.8 * IMAGE_SIZE)], dtype = np.int32)
        w_start = int(floor((1 - 0.8) * IMAGE_SIZE))
        w_end = IMAGE_SIZE
        h_start = 0
        h_end = IMAGE_SIZE
    elif index == 2: # Translate top 20 percent
        offset = np.array([0.2, 0.0], dtype = np.float32)
        size = np.array([ceil(0.8 * IMAGE_SIZE), IMAGE_SIZE], dtype = np.int32)
        w_start = 0
        w_end = IMAGE_SIZE
        h_start = 0
        h_end = int(ceil(0.8 * IMAGE_SIZE))
    else: # Translate bottom 20 percent
        offset = np.array([-0.2, 0.0], dtype = np.float32)
        size = np.array([ceil(0.8 * IMAGE_SIZE), IMAGE_SIZE], dtype = np.int32)
        w_start = 0
        w_end = IMAGE_SIZE
        h_start = int(floor((1 - 0.8) * IMAGE_SIZE))
        h_end = IMAGE_SIZE

    return offset, size, w_start, w_end, h_start, h_end

def translate_images(X_imgs):
    offsets = np.zeros((len(X_imgs), 2), dtype = np.float32)
    n_translations = 4
    X_translated_arr = []

    tf.reset_default_graph()
    with tf.Session() as sess:
        sess.run(tf.global_variables_initializer())
        for i in range(n_translations):
            X_translated = np.zeros((len(X_imgs), IMAGE_SIZE, IMAGE_SIZE, 3),
                    dtype = np.float32)
            X_translated.fill(1.0) # Filling background color
            base_offset, size, w_start, w_end, h_start, h_end = get_translate_parameters(i)
            offsets[:, :] = base_offset
            glimpses = tf.image.extract_glimpse(X_imgs, size, offsets)

            glimpses = sess.run(glimpses)
            X_translated[:, h_start: h_start + size[0], \
             w_start: w_start + size[1], :] = glimpses
            X_translated_arr.extend(X_translated)
    X_translated_arr = np.array(X_translated_arr, dtype = np.float32)
    return X_translated_arr

translated_imgs = translate_images(X_imgs)
旋转(90度)
def rotate_images(X_imgs):
    X_rotate = []
    tf.reset_default_graph()
    X = tf.placeholder(tf.float32, shape = (IMAGE_SIZE, IMAGE_SIZE, 3))
    k = tf.placeholder(tf.int32)
    tf_img = tf.image.rot90(X, k = k)
    with tf.Session() as sess:
        sess.run(tf.global_variables_initializer())
        for img in X_imgs:
            for i in range(3):  # Rotation at 90, 180 and 270 degrees
                rotated_img = sess.run(tf_img, feed_dict = {X: img, k: i + 1})
                X_rotate.append(rotated_img)

    X_rotate = np.array(X_rotate, dtype = np.float32)
    return X_rotate

rotated_imgs = rotate_images(X_imgs)

旋转(更精细的角度)
根据上面的需求,它可能是必要的对于各种角度。如果这图片的背景是一种固定的颜色,新加的颜色需要与背景融合,否则,神经网络不会将它作为一种特征来学习,而这种特征是不必要的。
from math import pi

def rotate_images(X_imgs, start_angle, end_angle, n_images):
    X_rotate = []
    iterate_at = (end_angle - start_angle) / (n_images - 1)

    tf.reset_default_graph()
    X = tf.placeholder(tf.float32, shape = (None, IMAGE_SIZE, IMAGE_SIZE, 3))
    radian = tf.placeholder(tf.float32, shape = (len(X_imgs)))
    tf_img = tf.contrib.image.rotate(X, radian)
    with tf.Session() as sess:
        sess.run(tf.global_variables_initializer())

        for index in range(n_images):
            degrees_angle = start_angle + index * iterate_at
            radian_value = degrees_angle * pi / 180  # Convert to radian
            radian_arr = [radian_value] * len(X_imgs)
            rotated_imgs = sess.run(tf_img, feed_dict = {X: X_imgs, radian: radian_arr})
            X_rotate.extend(rotated_imgs)

    X_rotate = np.array(X_rotate, dtype = np.float32)
    return X_rotate

# Start rotation at -90 degrees, end at 90 degrees and produce totally 14 images
rotated_imgs = rotate_images(X_imgs, -90, 90, 14)

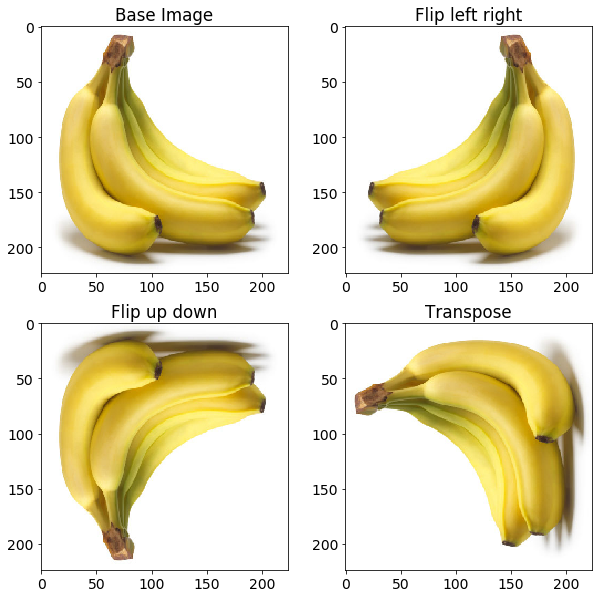
翻转
这种情况对于网络来说更重要的是消除假设对象的某些特征仅在特定方面可用的偏差。考虑图像示例中显示的情况。您不希望网络知道香蕉的倾斜仅发生在基本图像中观察到的右侧。
def flip_images(X_imgs):
    X_flip = []
    tf.reset_default_graph()
    X = tf.placeholder(tf.float32, shape = (IMAGE_SIZE, IMAGE_SIZE, 3))
    tf_img1 = tf.image.flip_left_right(X)
    tf_img2 = tf.image.flip_up_down(X)
    tf_img3 = tf.image.transpose_image(X)
    with tf.Session() as sess:
        sess.run(tf.global_variables_initializer())
        for img in X_imgs:
            flipped_imgs = sess.run([tf_img1, tf_img2, tf_img3], feed_dict = {X: img})
            X_flip.extend(flipped_imgs)
    X_flip = np.array(X_flip, dtype = np.float32)
    return X_flip

flipped_images = flip_images(X_imgs)
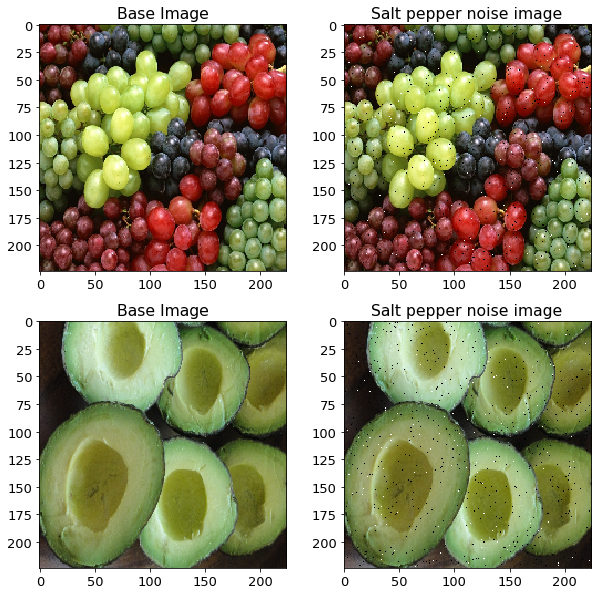
添加椒盐噪声
def add_salt_pepper_noise(X_imgs):
    # Need to produce a copy as to not modify the original image
    X_imgs_copy = X_imgs.copy()
    row, col, _ = X_imgs_copy[0].shape
    salt_vs_pepper = 0.2
    amount = 0.004
    num_salt = np.ceil(amount * X_imgs_copy[0].size * salt_vs_pepper)
    num_pepper = np.ceil(amount * X_imgs_copy[0].size * (1.0 - salt_vs_pepper))

    for X_img in X_imgs_copy:
        # Add Salt noise
        coords = [np.random.randint(0, i - 1, int(num_salt)) for i in X_img.shape]
        X_img[coords[0], coords[1], :] = 1

        # Add Pepper noise
        coords = [np.random.randint(0, i - 1, int(num_pepper)) for i in X_img.shape]
        X_img[coords[0], coords[1], :] = 0
    return X_imgs_copy

salt_pepper_noise_imgs = add_salt_pepper_noise(X_imgs)
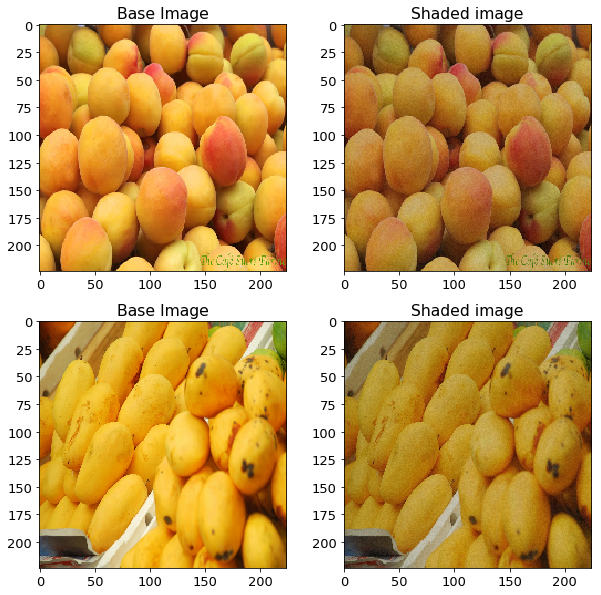
光照条件
import cv2

def add_gaussian_noise(X_imgs):
    gaussian_noise_imgs = []
    row, col, _ = X_imgs[0].shape
    # Gaussian distribution parameters
    mean = 0
    var = 0.1
    sigma = var ** 0.5

    for X_img in X_imgs:
        gaussian = np.random.random((row, col, 1)).astype(np.float32)
        gaussian = np.concatenate((gaussian, gaussian, gaussian), axis = 2)
        gaussian_img = cv2.addWeighted(X_img, 0.75, 0.25 * gaussian, 0.25, 0)
        gaussian_noise_imgs.append(gaussian_img)
    gaussian_noise_imgs = np.array(gaussian_noise_imgs, dtype = np.float32)
    return gaussian_noise_imgs

gaussian_noise_imgs = add_gaussian_noise(X_imgs)
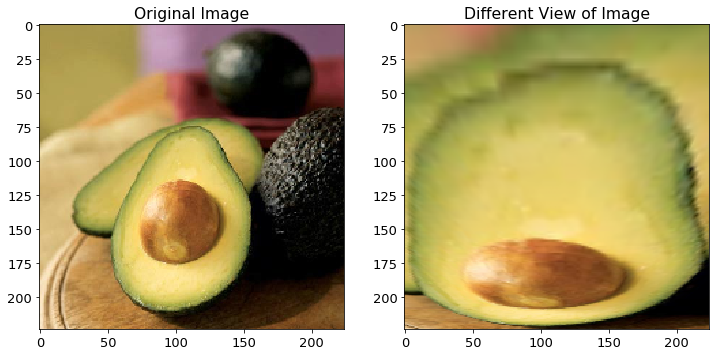
 透视变换
透视变换
def get_mask_coord(imshape):
    vertices = np.array([[(0.09 * imshape[1], 0.99 * imshape[0]),
                          (0.43 * imshape[1], 0.32 * imshape[0]),
                          (0.56 * imshape[1], 0.32 * imshape[0]),
                          (0.85 * imshape[1], 0.99 * imshape[0])]], dtype = np.int32)
    return vertices

def get_perspective_matrices(X_img):
    offset = 15
    img_size = (X_img.shape[1], X_img.shape[0])

    # Estimate the coordinates of object of interest inside the image.
    src = np.float32(get_mask_coord(X_img.shape))
    dst = np.float32([[offset, img_size[1]], [offset, 0], [img_size[0] - offset, 0],
                      [img_size[0] - offset, img_size[1]]])

    perspective_matrix = cv2.getPerspectiveTransform(src, dst)
    return perspective_matrix

def perspective_transform(X_img):
    # Doing only for one type of example
    perspective_matrix = get_perspective_matrices(X_img)
    warped_img = cv2.warpPerspective(X_img, perspective_matrix,
                                     (X_img.shape[1], X_img.shape[0]),
                                     flags = cv2.INTER_LINEAR)
    return warped_img

perspective_img = perspective_transform(X_img)
总结
尽管上面的图像增强方法列表并非详尽无遗,但是包含了许多广泛使用的方法,您可以组合的使用这些扩充来生成更多的图像。您可以在Github中查看本文使用的代码。

 浙公网安备 33010602011771号