Kubernetes 1.15部署日记-使用kubeadm--<1-2-3-4>
2019年9月17日
由于此次日记篇幅较长blog限制直接使用word发布所以分成几篇来发。
1.环境准备
|
10.110.149.172|192.168.111.51 |
K8s-1 |
Centos7.5 |
|
10.110.149.173|192.168.111.5 |
K8s-2 |
Centos7.5 |
1.1添加记录到hosts文件
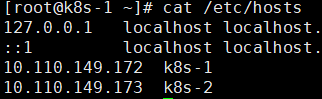
[root@k8s-1 ~]# cat /etc/hosts

10.110.149.172 k8s-1

10.110.149.173 k8s-2
两台都添加。
1.2关闭防火墙,不关闭则需要添加k8s以及docker相关通信端口

systemctl stop firewalld

systemctl disable firewalld
1.3禁用selinux
setenforce 0

vi /etc/selinux/config

SELINUX=disabled
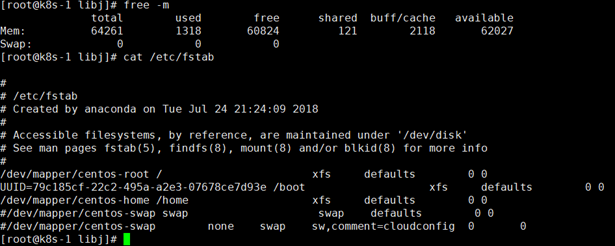
1.4关闭swap
swapoff -a
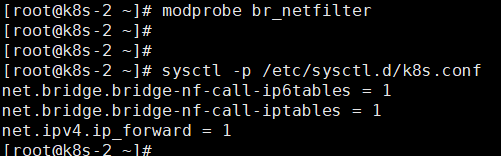
1.5创建/etc/sysctl.d/k8s.conf文件,添加如下内容:
net.bridge.bridge-nf-call-ip6tables = 1

net.bridge.bridge-nf-call-iptables = 1

net.ipv4.ip_forward = 1

执行命令使其生效

[root@k8s-2 ~]# modprobe br_netfilter

[root@k8s-2 ~]# sysctl -p /etc/sysctl.d/k8s.conf
1.6为kube-proxy开启ipvs 需要加载以下模块
ip_vs

ip_vs_rr

ip_vs_wrr

ip_vs_sh

nf_conntrack_ipv4
[root@k8s-1 ~]# cat > /etc/sysconfig/modules/ipvs.modules <<EOF

> #!/bin/bash

> modprobe -- ip_vs

> modprobe -- ip_vs_rr

> modprobe -- ip_vs_wrr

> modprobe -- ip_vs_sh

> modprobe -- nf_conntrack_ipv4

> EOF

[root@k8s-1 ~]#

[root@k8s-1 ~]#

[root@k8s-1 ~]# chmod 755 /etc/sysconfig/modules/ipvs.modules

[root@k8s-1 ~]#

[root@k8s-1 ~]#

[root@k8s-1 ~]# bash /etc/sysconfig/modules/ipvs.modules

[root@k8s-1 ~]#

[root@k8s-1 ~]#

[root@k8s-1 ~]# lsmod | grep -e ip_vs -e nf_conntrack_ipv4

nf_conntrack_ipv4 15053 0

nf_defrag_ipv4 12729 1 nf_conntrack_ipv4

ip_vs_sh 12688 0

ip_vs_wrr 12697 0

ip_vs_rr 12600 0

ip_vs 141432 6 ip_vs_rr,ip_vs_sh,ip_vs_wrr

nf_conntrack 133053 2 ip_vs,nf_conntrack_ipv4

libcrc32c 12644 3 xfs,ip_vs,nf_conntrack

[root@k8s-1 ~]#
上面执行的脚本以及相关命令是为了保证节点重启后ipvs的功能能正常加载。查看ipvs的相关代理规则推荐安装ipvsadm管理工具。直接yum install ipvsadm 即可。
2.安装docker
2.1配置docker yum源
yum install -y yum-utils device-mapper-persistent-data lvm2 ipvsadm

yum-config-manager \

--add-repo \

https://download.docker.com/linux/centos/docker-ce.repo
查看docker版本 yum安装docker

yum list docker-ce.x86_64 --showduplicates |sort -r

本地缓存

yum makecache fast

yum install -y --setopt=obsoletes=0 \

docker-ce-18.09.7-3.el7
启动服务
systemctl start docker
systemctl enable docker
2.2修改docker的cgroup driver 为systemd
[root@k8s-2 ~]# systemctl restart docker

[root@k8s-2 ~]#

[root@k8s-2 ~]#

[root@k8s-2 ~]# docker info | grep Cgroup

Cgroup Driver: systemd

[root@k8s-2 ~]# cat /etc/docker/daemon.json

{

"exec-opts": ["native.cgroupdriver=systemd"]

}

[root@k8s-2 ~]#
3.使用kubeadm 部署kubernetes
3.1配置安装kubeadm kubelet kubectl
配置yum 源 国外的的kubernetes 源无法使用 ,这里使用阿里云的kubernetes yum源。

cat <<EOF > /etc/yum.repos.d/kubernetes.repo

[kubernetes]

name=Kubernetes

baseurl=https://mirrors.aliyun.com/kubernetes/yum/repos/kubernetes-el7-x86_64/

enabled=1

gpgcheck=1

repo_gpgcheck=1

gpgkey=https://mirrors.aliyun.com/kubernetes/yum/doc/yum-key.gpg https://mirrors.aliyun.com/kubernetes/yum/doc/rpm-package-key.gpg

EOF

yum makecache fast

yum install kubeadm kubelet kubectl
4.使用kubeadm初始化集群
4.1配置kubeadm.yaml
[root@k8s-1 libj]# cat kubeadm.yaml

apiVersion: kubeadm.k8s.io/v1beta2

kind: InitConfiguration

localAPIEndpoint:

advertiseAddress: 192.168.111.51

bindPort: 6443

---

apiVersion: kubeadm.k8s.io/v1beta2

kind: ClusterConfiguration

kubernetesVersion: v1.15.0

networking:

serviceSubnet: 10.1.0.0/16

podSubnet: 10.2.0.0/16

imageRepository: "registry.aliyuncs.com/google_containers"
4.2执行初始化
[root@k8s-1 libj]# kubeadm init --config kubeadm.yaml

[init] Using Kubernetes version: v1.15.0

[preflight] Running pre-flight checks

[WARNING IsDockerSystemdCheck]: detected "cgroupfs" as the Docker cgroup driver. The recommended driver is "systemd". Please follow the guide at https://kubernetes.io/docs/setup/cri/

[preflight] Pulling images required for setting up a Kubernetes cluster

[preflight] This might take a minute or two, depending on the speed of your internet connection

[preflight] You can also perform this action in beforehand using 'kubeadm config images pull'

[kubelet-start] Writing kubelet environment file with flags to file "/var/lib/kubelet/kubeadm-flags.env"

[kubelet-start] Writing kubelet configuration to file "/var/lib/kubelet/config.yaml"

[kubelet-start] Activating the kubelet service

[certs] Using certificateDir folder "/etc/kubernetes/pki"

[certs] Generating "ca" certificate and key

[certs] Generating "apiserver-kubelet-client" certificate and key

[certs] Generating "apiserver" certificate and key

[certs] apiserver serving cert is signed for DNS names [k8s-1 kubernetes kubernetes.default kubernetes.default.svc kubernetes.default.svc.cluster.local] and IPs [10.1.0.1 192.168.111.51]

[certs] Generating "front-proxy-ca" certificate and key

[certs] Generating "front-proxy-client" certificate and key

[certs] Generating "etcd/ca" certificate and key

[certs] Generating "apiserver-etcd-client" certificate and key

[certs] Generating "etcd/server" certificate and key

[certs] etcd/server serving cert is signed for DNS names [k8s-1 localhost] and IPs [192.168.111.51 127.0.0.1 ::1]

[certs] Generating "etcd/healthcheck-client" certificate and key

[certs] Generating "etcd/peer" certificate and key

[certs] etcd/peer serving cert is signed for DNS names [k8s-1 localhost] and IPs [192.168.111.51 127.0.0.1 ::1]

[certs] Generating "sa" key and public key

[kubeconfig] Using kubeconfig folder "/etc/kubernetes"

[kubeconfig] Writing "admin.conf" kubeconfig file

[kubeconfig] Writing "kubelet.conf" kubeconfig file

[kubeconfig] Writing "controller-manager.conf" kubeconfig file

[kubeconfig] Writing "scheduler.conf" kubeconfig file

[control-plane] Using manifest folder "/etc/kubernetes/manifests"

[control-plane] Creating static Pod manifest for "kube-apiserver"

[control-plane] Creating static Pod manifest for "kube-controller-manager"

[control-plane] Creating static Pod manifest for "kube-scheduler"

[etcd] Creating static Pod manifest for local etcd in "/etc/kubernetes/manifests"

[wait-control-plane] Waiting for the kubelet to boot up the control plane as static Pods from directory "/etc/kubernetes/manifests". This can take up to 4m0s

[apiclient] All control plane components are healthy after 17.503969 seconds

[upload-config] Storing the configuration used in ConfigMap "kubeadm-config" in the "kube-system" Namespace

[kubelet] Creating a ConfigMap "kubelet-config-1.15" in namespace kube-system with the configuration for the kubelets in the cluster

[upload-certs] Skipping phase. Please see --upload-certs

[mark-control-plane] Marking the node k8s-1 as control-plane by adding the label "node-role.kubernetes.io/master=''"

[mark-control-plane] Marking the node k8s-1 as control-plane by adding the taints [node-role.kubernetes.io/master:NoSchedule]

[bootstrap-token] Using token: u5455t.tnp9bx2lkm0wgzhl

[bootstrap-token] Configuring bootstrap tokens, cluster-info ConfigMap, RBAC Roles

[bootstrap-token] configured RBAC rules to allow Node Bootstrap tokens to post CSRs in order for nodes to get long term certificate credentials

[bootstrap-token] configured RBAC rules to allow the csrapprover controller automatically approve CSRs from a Node Bootstrap Token

[bootstrap-token] configured RBAC rules to allow certificate rotation for all node client certificates in the cluster

[bootstrap-token] Creating the "cluster-info" ConfigMap in the "kube-public" namespace

[addons] Applied essential addon: CoreDNS

[addons] Applied essential addon: kube-proxy


Your Kubernetes control-plane has initialized successfully!


To start using your cluster, you need to run the following as a regular user:


mkdir -p $HOME/.kube

sudo cp -i /etc/kubernetes/admin.conf $HOME/.kube/config

sudo chown $(id -u):$(id -g) $HOME/.kube/config


You should now deploy a pod network to the cluster.

Run "kubectl apply -f [podnetwork].yaml" with one of the options listed at:

https://kubernetes.io/docs/concepts/cluster-administration/addons/


Then you can join any number of worker nodes by running the following on each as root:


kubeadm join 192.168.111.51:6443 --token u5455t.tnp9bx2lkm0wgzhl \

--discovery-token-ca-cert-hash sha256:7811481be449b5464c80532986be38a670553ce3de102ef375b7cc1fceabcac9

执行初始化完成。
4.3配置kubectl 命令
mkdir -p $HOME/.kube

sudo cp -i /etc/kubernetes/admin.conf $HOME/.kube/config

sudo chown $(id -u):$(id -g) $HOME/.kube/config
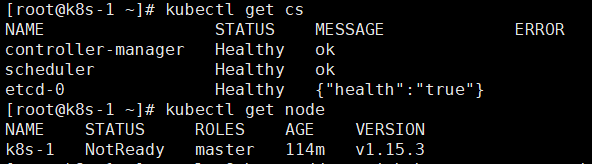
使用kubectl 检查k8s集群
4.4配置kubectl自动补全
yum install -y bash-completion

[root@k8s-1 ~]# source /usr/share/bash-completion/bash_completion

[root@k8s-1 ~]# source <(kubectl completion bash)

[root@k8s-1 ~]#

[root@k8s-1 ~]# echo "source <(kubectl completion bash)" >> ~/.bashrc

[root@k8s-1 ~]#

[root@k8s-1 ~]#
1-2-3-4前期准备、安装docker、安装kubectl kubelet kubeadm 、部署集群配置kubectl命令已完成。
吐槽下 不知都是那里出了问题word无法直接发布博客了 发布上来格式还大篇幅的错误格式费解。。。之前还好好的。一定是那里出了问题。
友情推荐:一键安装Kubernetes HA。

 浙公网安备 33010602011771号