

在图像中绘制基本形状和文字
注:原创不易,转载请务必注明原作者和出处,感谢支持!
一 基本形状的绘制
本文的内容和数字图像处理的关系不大,主要是关于OpenCV提供的在图像中绘制基本形状和文字的相关API。
OpenCV中的两种基本数据结构Point和Scalar
Point数据结构表示了由图像坐标\(x\)和\(y\)所指定的2D点。注意,图像坐标原点在左上角,向右为\(x\)轴(列)正向,向下为\(y\)轴(行)正向。比如图像第10行第8列可以用下列的代码来表示其位置。
Point pt;
pt.y = 10;
pt.x = 8;
Point其实是由模板Point_经过typedef而来。OpenCV提供了很多由模板Point_typedef而来的类型。比如下面所示的例子所示。几乎常用的基本的数据类型(int, float, double),都有对应的Point数据类型。在使用Point时请选择相应的类型即可。
typedef Point_<int> cv::Point2i;
typedef Point2i cv::Point;
typedef Point_<double> cv::Point2d;
typedef Point_<float> cv::Point2f;
typedef Point_<int64> cv::Point2l;
OpenCV中同样提供了3D点的Point类型,它的数据成员则为x, y和z。它的模板类为Point3_,同样,OpenCV也为常用的基本数据类型提供了对应的Point类型如下所示。
typedef Point3_<int> cv::Point3i;
typedef Point3_<float> cv::Point3f;
typedef Point3_<double> cv::Point3d;
Scalar表示的是有4个元素的数组,该类型在OpenCV中常常用于传递像素值(比如RGB三通道的像素)。该类型实际上是从cv::Vec<_Tp, 4>继承而来的。从Scalar的构造函数可以看出,Scalar的第三个和第四个值具有默认值0。所以,当你使用三个值(比如RGB三个值)来初始化一个Scalar对象时,第4个值则默认为0。
Scalar_(_Tp v0, _Tp v1, _Tp v2 = 0, _Tp v3 = 0);
OpenCV中的Scalar类型是由Scalar_<double>typedef而来的,如下面的代码所示。所以,Scalar中的元素是double类型的。这一点需要注意一下。
typedef Scalar_<double> cv::Scalar
线的绘制(line)
OpenCV中提供了APIline()来进行直线的绘制。API的详细信息如下所示。
void cv::line (
	InputOutputArray img,	// 要被绘制直线的图像
    Point pt1,				// 线段端点1
    Point pt2,				// 线段端点2
    const Scalar &color,	// 线段颜色
    int thickness = 1,		// 线段粗细
    int lineType = LINE_8,	// 线的类型
    int shift = 0
);
比如,要在图像上绘制一条从左上角到右下角的一条粗度为3,类型为LINE_AA(反锯齿)的蓝线,则可以使用以下的代码。
// draw a line
Point pt1(0, 0);						// top left point
Point pt2(src.cols, src.rows);			// bottom right point
Scalar color = Scalar(255, 0, 0);		// blue color
line(src, pt1, pt2, color, 3, LINE_AA);	// thickness = 3, lineType = LINE_AA
imshow("line", src);

椭圆的绘制(ellipse)
OpenCV中提供了APIellipse()来绘制椭圆,该API的详细参数如下。
void cv::ellipse(
	InputOutputArray img,	// 要被绘制椭圆的图片
    Point center,			// 椭圆中心位置
    Size axes,				// 椭圆的长半轴和短半轴的长度
    double angle,			// 旋转角度
    double startAngle,		// 椭圆弧起始角度
    double endAngle,		// 椭圆弧终止角度
    const Scalar &color,	// 椭圆的颜色
    int thickness = 1,		// 线的粗细,为负则表示填充该椭圆
    int lineType = LINE_8,	// 线类型
    int shift = 0
);
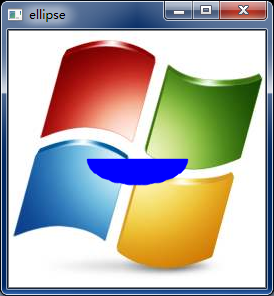
比如,要在图像中心绘制一个旋转了45度的,长半轴和短半轴分别为50像素和25像素的蓝色椭圆可以使用如下的代码。
// draw a ellipse
Point center(src.cols / 2, src.rows / 2);
Size axes(50, 25);
Scalar color(255, 0, 0);
ellipse(src, center, axes, 45, 0, 360, color, -1, LINE_AA);
// ellipse(src, center, axes, 0, 0, 180, color, -1, LINE_AA);
imshow("ellipse", src);

矩形的绘制(rectangle)
OpenCV中提供的矩形绘制APIrectangle()与上面的line()的参数情况非常类似。需要注意的是pt1和pt2是矩形中位于斜对角线上的两个点(比如左上角点和右下角点),thickness如果为负数,则表示使用颜色color对该矩形进行填充。
void cv::rectangle(
	InputOutputArray img,	// 要被绘制矩形的图像
    Point pt1,				// 端点1
    Point pt2,				// 端点2
    const Scalar &color,	// 颜色
    int thickness = 1,		// 线的粗细,为负数则表示使用color对矩形进行填充
    int lineType = LINE_8,	// 矩形边线的类型
    int shift = 0
);
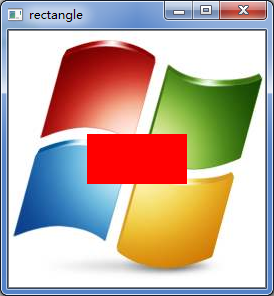
比如要在图像中心绘一个宽为100像素,高为50个像素的红色矩形可以使用如下的代码。
// draw a rectangle
Point center(src.cols / 2, src.rows / 2);
Point pt1(center.x - 50, center.y - 25);
Point pt2(center.x + 50, center.y + 25);
Rect r = Rect(pt1, pt2);
Scalar color = Scalar(0, 0, 255);
// override method of rectangle()
// rectangle(src, r, color, -1, LINE_8);
rectangle(src, pt1, pt2, color, 2, LINE_8);
imshow("rectangle", src);

圆的绘制(circle)
OpenCV中画圆的API为circle(),具体参数如下所示。
void cv::circle(
	InputOutputArray img,
    Point center,
    int radius,				// 圆的半径
    const Scalar &color,
    int thickness = 1,		// 线的粗细,为负则表示填充圆形
    int lineType = LINE_8,
    int shift = 0
);
比如要在图像中心位置绘制一个半径为60个像素的红色的圆可以使用如下代码。
// draw a circle
Point center(src.cols / 2, src.rows / 2);
int radius = 60;
Scalar color(0, 0, 255);
circle(src, center, radius, color, -1, LINE_AA);
imshow("circle", src);

使用fillPoly()绘制填充的多边形
OpenCV中提供了APIfillPoly()用于填充多边形。其详细情况如下。
void cv::fillPoly(
	Mat &img,
    const Point **pts,		// 多边形顶点集
    const int *npts,		// 多边形顶点数目
    int ncountours,			// 多边形数量
    const Scalar &color,
    int lineType = LINE_8,
    int shift = 0,
    Point offset = Point()
);
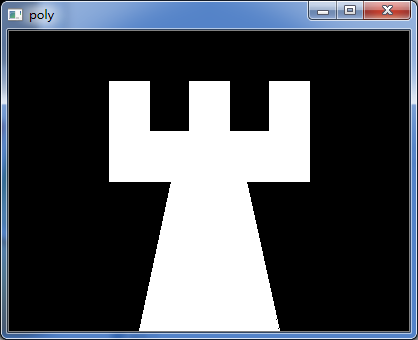
下面是一个填充多边形的一个例子。
// draw a poly
Mat dst(Size(400, 300), src.type(), Scalar(0, 0, 0));
int w = 400;
Point rook_points[1][20];
rook_points[0][0] = Point(w / 4.0, 7 * w / 8.0);
rook_points[0][1] = Point(3 * w / 4.0, 7 * w / 8.0);
rook_points[0][2] = Point(3 * w / 4.0, 13 * w / 16.0);
rook_points[0][3] = Point(11 * w / 16.0, 13 * w / 16.0);
rook_points[0][4] = Point(19 * w / 32.0, 3 * w / 8.0);
rook_points[0][5] = Point(3 * w / 4.0, 3 * w / 8.0);
rook_points[0][6] = Point(3 * w / 4.0, w / 8.0);
rook_points[0][7] = Point(26 * w / 40.0, w / 8.0);
rook_points[0][8] = Point(26 * w / 40.0, w / 4.0);
rook_points[0][9] = Point(22 * w / 40.0, w / 4.0);
rook_points[0][10] = Point(22 * w / 40.0, w / 8.0);
rook_points[0][11] = Point(18 * w / 40.0, w / 8.0);
rook_points[0][12] = Point(18 * w / 40.0, w / 4.0);
rook_points[0][13] = Point(14 * w / 40.0, w / 4.0);
rook_points[0][14] = Point(14 * w / 40.0, w / 8.0);
rook_points[0][15] = Point(w / 4.0, w / 8.0);
rook_points[0][16] = Point(w / 4.0, 3 * w / 8.0);
rook_points[0][17] = Point(13 * w / 32.0, 3 * w / 8.0);
rook_points[0][18] = Point(5 * w / 16.0, 13 * w / 16.0);
rook_points[0][19] = Point(w / 4.0, 13 * w / 16.0);
const Point *ppt[1] = { rook_points[0] };
int npt[] = { 20 };
Scalar color(255, 255, 255);
fillPoly(dst, ppt, npt, 1, color, LINE_8);
imshow("poly", dst);
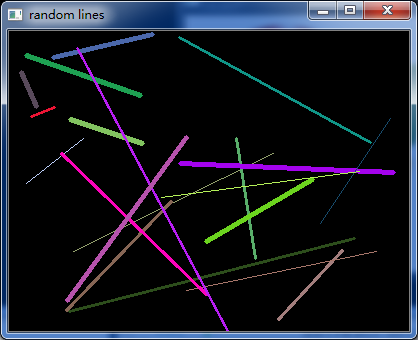
二 随机数
OpenCV提供了RNG类用于产生随机数。其最常用的两个方法是产生高斯分布的gaussian()和均匀分布的uniform()。下面的代码可以生成20条线,每条线的位置、颜色和粗细都是随机的。
RNG rng(time(NULL));
Point p1, p2;
Mat bg = Mat::zeros(Size(400, 300), CV_8UC3);
namedWindow("random lines", WINDOW_AUTOSIZE);

for (int i = 0; i < 20; ++i)
{
    p1.x = rng.uniform(0, bg.cols);
    p2.x = rng.uniform(0, bg.cols);
    p1.y = rng.uniform(0, bg.rows);
    p2.y = rng.uniform(0, bg.rows);
    Scalar color(rng.uniform(0, 256), rng.uniform(0, 256), rng.uniform(0, 256));
    int thickness = rng.uniform(1, 4);

    waitKey(50);
    line(bg, p1, p2, color, thickness, LINE_8);
    imshow("random lines", bg);
}

三 绘制文字
OpenCV提供了APIputText()来向图片中绘制文字。该API的详细信息如下。
void cv::putText(
	InputOutputArray img,			// 要被绘制文字的图像
    const String &text,				// 待绘制文字
    Point org,						// 包含文字方框的左下角位置
    int fontFace,					// 字体
    double fontScale,				// 字体缩放系数
    Scalar color,					// 文字颜色
    int thickness = 1,				// 文字粗细
    int lineType = LINE_8,			// 线类型
    bool bottomLeftOrigin = false
);
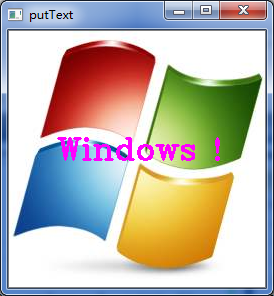
下面的代码可以在图像中绘制“windows !”。
// draw text "Windows !"
char text[] = "Windows !";
Point pos(src.cols / 2 - 80, src.rows / 2);
Scalar color(255, 0, 255);
putText(src, text, pos, CV_FONT_HERSHEY_COMPLEX, 1.0, color, 2, LINE_8);
imshow("putText", src);

 浙公网安备 33010602011771号