Nginx 安装详细(一)
1. 老规矩,来点开场白:Nginx简单介绍
Nginx是一款自由的、开源的、高性能的HTTP服务器和反向代理服务器;同时也是一个IMAP、POP3、SMTP代理服务器;Nginx可以作为一个HTTP服务器进行网站的发布处理,另外Nginx可以作为反向代理进行负载均衡的实现。
更多关于Nginx介绍以及作用请自行百度
2. 安装Nginx基础依赖包
[root@nginx ~]# yum install gcc gcc-c++ pcre-devel zlib-devel openssl-devel -y
3. 下载相关的软件包
3.1 下载nginx稳定版
注:进入Nginx安装包下载地址复制您想要的版本链接,我这里以Nginx-1.14.0为例。
[root@nginx~]# cd /usr/local/src/
[root@ nginx src]# wget http://nginx.org/download/nginx-1.14.0.tar.gz
3.2 下载nginx-sticky模块(可选安装,应用于集群)
作用:后端做负载均衡解决session sticky问题。
[root@nginx src]# wget https://bitbucket.org/nginx-goodies/nginx-sticky-module-ng/get/master.tar.gz
3.3 下载ngx_cache_purge模块(可选安装)
作用:将ngx_cache_purge编译到到Nginx中,用来清除指定URL的缓存。
(官网地址:http://labs.frickle.com/nginx_ngx_cache_purge/)
[root@nginx src]# wget http://labs.frickle.com/files/ngx_cache_purge-2.3.tar.gz

4. 添加Nginx用户和组
[root@nginx ~]# groupadd www
[root@nginx ~]# useradd -g www www -s /sbin/nologin
注:创建nginx运行用户www并加入到www组,不允许www用户直接登录系统。
5. 解压Nginx源码包并进入解压目录,进行编译安装
[root@nginx src]# tar zxf nginx-1.14.0.tar.gz
# 注意3.2的可选项
[root@nginx src]# tar zxf ngx_cache_purge-2.3.tar.gz
# 注意3.3的可选项
[root@nginx src]# tar zxf nginx-goodies-nginx-sticky-module-ng-08a395c66e42.tar.gz
[root@nginx src]# cd nginx-1.14.0/
注:‘=’号后面是自己安装包的绝对路径,和配置文件路径。
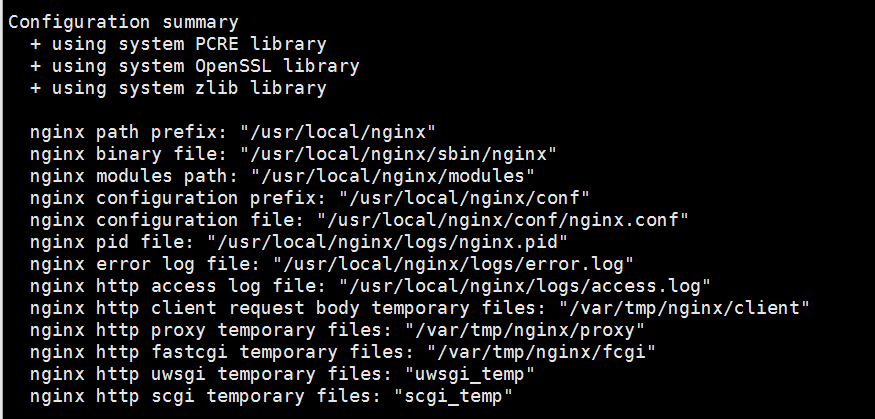
[root@nginx-master nginx-1.14.0]# ./configure --prefix=/usr/local/nginx
> --user=www --group=www
> --with-http_stub_status_module
> --with-http_realip_module --with-http_ssl_module
> --with-http_gzip_static_module
> --http-client-body-temp-path=/var/tmp/nginx/client
> --http-proxy-temp-path=/var/tmp/nginx/proxy
> --http-fastcgi-temp-path=/var/tmp/nginx/fcgi
# 注意3.2的可选项
> --with-pcre --add-module=/usr/local/src/ngx_cache_purge-2.3
# 注意3.3的可选项
> --add-module=/usr/local/src/nginx-goodies-nginx-sticky-module-ng-08a395c66e42

执行完编译后:
[root@nginx nginx-1.14.0]# make && make install
注:Nginx的所有模块必须在编译的时候添加,不能再运行的时候动态加载。
6. 优化Nginx程序的执行路径
[root@nginx nginx-1.14.0]# ln -s /usr/local/nginx/sbin/nginx /usr/local/sbin/
[root@nginx nginx-1.14.0]# nginx -t
如果出现以下问题:

需要创建此目录:
[root@nginx nginx-1.14.0]# mkdir -p /var/tmp/nginx/client

7. 配置Nginx开机自启动等命令,方便我们管理Nginx
原始管理nginx的命令,不是很方便!
[root@nginx-master ~]# nginx              启动nginx
[root@nginx-master ~]# nginx -s reload    重启nginx
[root@nginx-master ~]# nginx -s stop      停止nginx
接下来设置常用的管理命令:
1) 创建开机启动命令脚本文件:
[root@nginx ~]# vim /etc/init.d/nginx
2) 在这个Nginx文件中插入一下启动脚本代码:
-----------------------------------脚本如下 -----------------------------------
#! /bin/bash
# chkconfig: - 85 15
PATH=/usr/local/nginx
DESC="nginx daemon"
NAME=nginx
DAEMON=$PATH/sbin/$NAME
CONFIGFILE=$PATH/conf/$NAME.conf
PIDFILE=$PATH/logs/$NAME.pid
scriptNAME=/etc/init.d/$NAME
set -e
[ -x "$DAEMON" ] || exit 0
do_start() {
$DAEMON -c $CONFIGFILE || echo -n "nginx already running"
}
do_stop() {
$DAEMON -s stop || echo -n "nginx not running"
}
do_reload() {
$DAEMON -s reload || echo -n "nginx can't reload"
}
case "$1" in
start)
echo -n "Starting $DESC: $NAME"
do_start
echo "."
;;
stop)
echo -n "Stopping $DESC: $NAME"
do_stop
echo "."
;;
reload|graceful)
echo -n "Reloading $DESC configuration..."
do_reload
echo "."
;;
restart)
echo -n "Restarting $DESC: $NAME"
do_stop
do_start
echo "."
;;
*)
echo "Usage: $scriptNAME {start|stop|reload|restart}" >&2
exit 3
;;
esac
exit 0
[root@nginx ~]# cd /etc/init.d/
3) 设置所有人都有对这个启动脚本nginx文件的执行权限:
[root@nginx init.d]# chmod a+x nginx
4) 把nginx加入系统服务中:
[root@nginx init.d]# chkconfig --add nginx
5) 把服务设置为开机启动:
[root@nginx init.d]# chkconfig nginx on
注:reboot重启系统生效!
6) 重启后,就可以执行如下命令进行管理了
systemctl start   nginx.service         # 启动nginx
systemctl stop    nginx.service         # 结束nginx
systemctl restart nginx.service         # 重启nginx
systemctl enable  nginx.service         # 开机启动
8. 如果出现 Nginx 启动不了,请尝试以下方法
1) 如果之前安装过httpd,侧需要先卸载httpd,否则启动失败,除非修改Nginx启动端口。
[root@nginx ~]# yum remove httpd -y
2) 如果还是启动不来,再试试这个方法:杀死Nginx相关的进程之后,启动Nginx
[root@nginx ~]#ps -A | grep nginx
[root@nginx ~]#kill -9 pid1
[root@nginx ~]#kill -9 pid2
3) 如果还是不行,查看日志信息解决。
9. 启动Nginx并访问测试
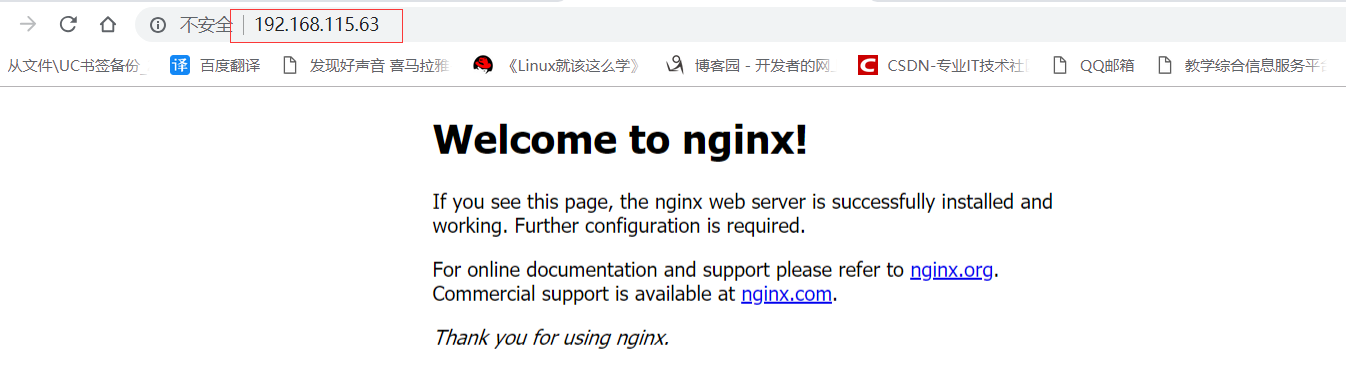
后续继续更新Nginx优化及反向代理功能相关内容!
作者:神奇二进制
文章出处:https://www.cnblogs.com/l-hh/
本文版权归作者和博客园共有,欢迎转载,但未经作者同意必须保留此段声明,且在文章页面明显位置给出原文链接,否则保留追究法律责任的权利。
文章如有叙述不当的地方,欢迎指正。如果觉得文章对你有帮助,可以精神上的支持 [推荐] 或者 [关注我] ,一起交流,共同进步!

 浙公网安备 33010602011771号