
VirtualBox下CentOS7中Asp.Net Core的环境搭建:七.安装Nginx
安装Nginx
1.1 安装依赖项
yum -y install wget

yum -y install gcc gcc-c++ pcre pcre-devel openssl openssl-devel zlib zlib-devel
下载Nginx包,并安装
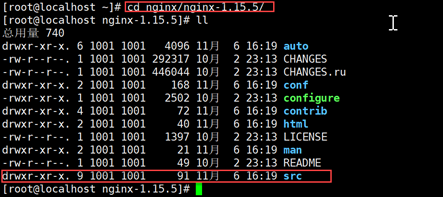
wget http://nginx.org/download/nginx-1.15.5.tar.gz

mkdir nginx

tar -zxvf nginx-1.15.5.tar.gz -C nginx

cd nginx/nginx-1.15.5/
1.2 编译安装
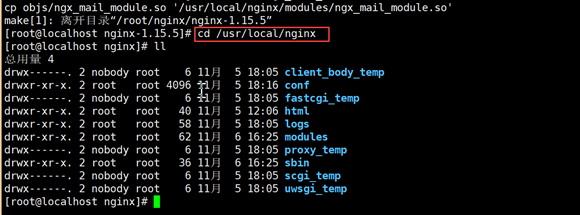
# 配置:这里需要安装额外的模块

./configure --prefix=/usr/local/nginx --with-http_ssl_module --with-stream --with-mail=dynamic

# 编译
make

# 安装
make install
以下是安装的结果
1.3 创建软链接
ln -s /usr/local/nginx/sbin/nginx /usr/local/bin
如上所述,这样可以不用再设置环境变量
1.4 证书相关
为了增强项目的安全性,有时需要将http访问转为https访问。通过对nginx中ssl模块进行设置,可以实现这一点。通常,这需要向CA申请安全证书(常用免费证书:https://letsencrypt.org/
1.4.1 证书的生成
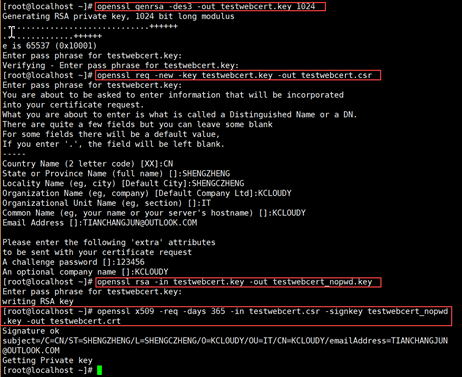
在root目录下建立certs文件夹,切换到该文件夹,依次运行以下命令:
# 建立服务器私钥(过程需要输入密码,请记住这个密码)生成RSA密钥

openssl genrsa -des3 -out testwebcert.key 1024

# 生成一个证书请求  需要依次输入国家,地区,组织,email,common name等,common name可以写你的名字或者域名。如果为了https申请,必须和域名吻合,否则会引发浏览器警报。

openssl req -new -key testwebcert.key -out testwebcert.csr

# 生成不需要密码的key

openssl rsa -in testwebcert.key -out testwebcert_nopwd.key

# 生成crt文件

openssl x509 -req -days 365 -in testwebcert.csr -signkey testwebcert_nopwd.key -out testwebcert.crt
1.4.2 证书的位置
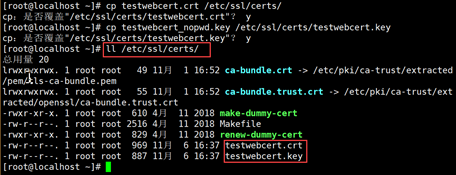
将证书复制到 /etc/ssl/certs/ 目录
cp testwebcert.crt /etc/ssl/certs/

cp testwebcert_nopwd.key /etc/ssl/certs/testwebcert.key
1.4.3 迪菲-赫尔曼密钥交换
一般来说,之后修改nginx.conf配置文件就可以了。为了进一步增强安全性,可以进行迪菲-赫尔曼密钥交换,在 /etc/ssl/certs/ 目录中
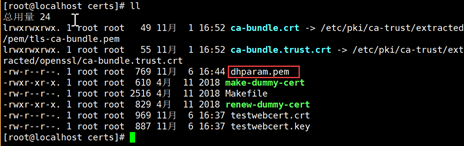
openssl dhparam -out dhparam.pem 4096
以下是生成的文件
1.5 nginx配置文件相关
1.5.1 自定义 proxy.conf 文件
vi /usr/local/nginx/conf/proxy.conf
在 /usr/local/nginx/conf/ 目录下新建 proxy.conf 文件,后面会在nginx.conf中引用此文件。
proxy_redirect            off;

proxy_set_header          Host                  $host;

proxy_set_header          X-Real-IP             $remote_addr;

proxy_set_header          X-Forwarded-For    $proxy_add_x_forwarded_for;

proxy_set_header          X-Forwarded-Proto      $scheme;

client_max_body_size      10m;

client_body_buffer_size   128k;

proxy_connect_timeout     90;

proxy_send_timeout        90;

proxy_read_timeout        90;

proxy_buffers             32                    4k;
1.5.2 创建存放应用配置目录:/usr/local/nginx/conf/conf.d
mkdir /usr/local/nginx/conf/conf.d/
1.5.3 修改 nginx.conf 文件
vi /usr/local/nginx/conf/nginx.conf
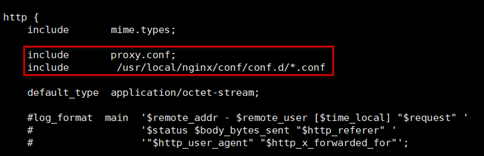
修改 /usr/local/nginx/conf/ 目录下的nginx.conf文件,着重点已经使用了不同的颜色进行标注
worker_processes  1;


events {

    worker_connections  1024;

}


http {

    include       proxy.conf;

    include       /usr/local/nginx/conf/conf.d/*.conf;

    include       mime.types;

    default_type  application/octet-stream;


    limit_req_zone $binary_remote_addr zone=one:10m rate=5r/s;

    server_tokens off;


    sendfile        on;

    #tcp_nopush     on;


    keepalive_timeout  29;

    client_body_timeout 10;

    client_header_timeout 10;

    send_timeout 10;


  #如果为应用单独配置conf的话,得注释掉
    upstream testweb{

        server localhost:5000;

  }


    server {

        listen       80;

        add_header Strict-Transport-Security max-age=15768000;

        return 301 https://$host$request_uri;

    }


    # HTTPS server

    #

    server {

        listen *:443    ssl;

        server_name     localhost;

        ssl_certificate /etc/ssl/certs/testwebcert.crt;

        ssl_certificate_key /etc/ssl/certs/testwebcert.key;

        ssl_protocols TLSv1.1 TLSv1.2;

        ssl_prefer_server_ciphers on;

        ssl_dhparam /etc/ssl/certs/dhparam.pem;

        ssl_ciphers "EECDH+AESGCM:EDH+AESGCM:AES256+EECDH:AES256+EDH";

        ssl_ecdh_curve secp384r1;

        ssl_session_cache shared:SSL:10m;

        ssl_session_tickets off;

        ssl_stapling on; #ensure your cert is capable

        ssl_stapling_verify on; #ensure your cert is capable


        add_header Strict-Transport-Security "max-age=63072000; includeSubdomains; preload";

        add_header X-Frame-Options SAMEORIGIN;

        add_header X-Content-Type-Options nosniff;


     #如果单独为应用配置Conf的话,得注释掉
        #Redirects all traffic

        location / {

            proxy_pass  http://testweb;

            limit_req   zone=one burst=10 nodelay;

            limit_req_status 503;

        }

    }

}
1.5.4 多应用配置
1.5.4.1 为每个站点创建独立的配置文件
vi /usr/local/nginx/conf/conf.d/testweb.conf
配置文件下载地址(包括:主配置文件-nginx.conf、反向代理-proxweb.conf、常用站点配置-normalweb.conf、https站点配置-sslweb.conf、静态文件配置-imageweb.conf)
配置文件格式如下:
server {

  #注意这里,要把默认的那个default_server去掉,因为我们在下面要单独配置域名访问,所以这里不要留default_server,不然会报错。

  listen    80;

  #这里写你想设置的域名,可以写多个,与名之间用空格隔开

  server_name testweb.com;


  # Load configuration files for the default server block.

  location / {

       proxy_store off;

       proxy_redirect off;

        proxy_pass http://localhost:5000;

        proxy_http_version 1.1;

        proxy_set_header Upgrade $http_upgrade;

        proxy_set_header Connection keep-alive;

        proxy_set_header Host $http_host;

       proxy_set_header X-Forwarded-For $proxy_add_x_forwarded_for;

       proxy_set_header X-Real-IP $remote_addr;

        proxy_cache_bypass $http_upgrade;

    }


    access_log  /var/log/testweb_access.log  main;


    error_page  404              /404.html;

    location = /404.html {

        root   /usr/local/nginx/html;

    }


    # redirect server error pages to the static page /50x.html

    error_page   500 502 503 504  /50x.html;

    location = /50x.html {

        root   /usr/local/nginx/html;

    }

}
1.5.4.2 验证及重启Nginx
nginx –t

nginx –s reload
1.5.4.3 配置文件配置好了之后,还需要在linux下面的hosts文件下面加上以上域名
vi /etc/hosts

127.0.0.1 testweb.com
1.5.4.4 如果我们是要在windows下面访问虚拟机里面的linux下面的网站,那么还要在windows下面配置hosts文件,所有的域名都指向linux服务器,例如:
192.168.59.99 testweb.com
1.5.4.5 相关Error
nginx: [emerg] a duplicate default server for 0.0.0.0:80 in /usr/local/nginx/conf/conf.d/
配置文件testweb.conf中listen 80 后面有空字符,删除即可。
1.6 nginx 开机自动启动
1.6.1 设置nginx自启动,在/lib/systemd/system/ 目录下创建一个服务文件
vi /lib/systemd/system/nginx.service
注意,这里的路径是 /lib/systemd/system/ ,而非上面testweb项目自启动服务文件所在的 /etc/systemd/system/ 这一点值得注意。
[Unit]

Description=nginx - high performance web server

After=network.target remote-fs.target nss-lookup.target


[Service]

Type=forking

ExecStart=/usr/local/nginx/sbin/nginx -c /usr/local/nginx/conf/nginx.conf

ExecReload=/usr/local/nginx/sbin/nginx -s reload

ExecStop=/usr/local/nginx/sbin/nginx -s stop


[Install]

WantedBy=multi-user.target

1.6.2 文件编辑完成之后,运行以下命令启动服务:
systemctl enable nginx.service

# 启动nginx服务

systemctl start nginx.service

# 查看状态

systemctl status nginx.service
结果如下:
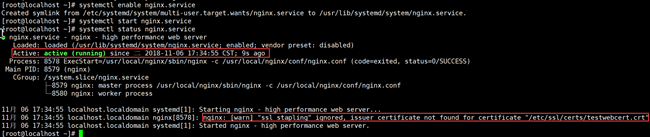
这里之所以有一个警告,是因为我们使用的证书是自己生成的,而不是正式的证书。
1.6.3 对配置文件修改后需要重启服务,执行以下命令:
# 如果修改了文件,这个是必须的

systemctl daemon-reload
# 重新启动服务

systemctl restart nginx.service
1.7 访问相关
由于在nginx.conf中配置了 add_header Strict-Transport-Security max-age=15768000; 即只能允许https访问, 因此输入http://192.168.56.99会提示错误。
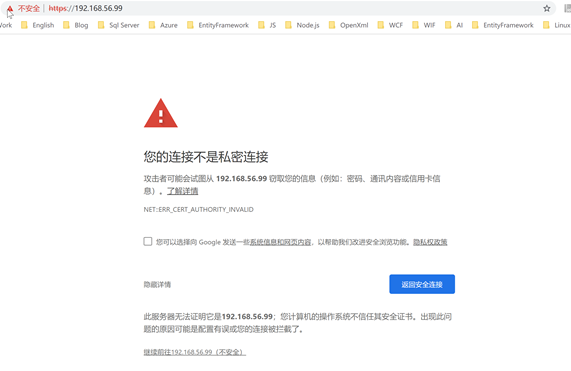
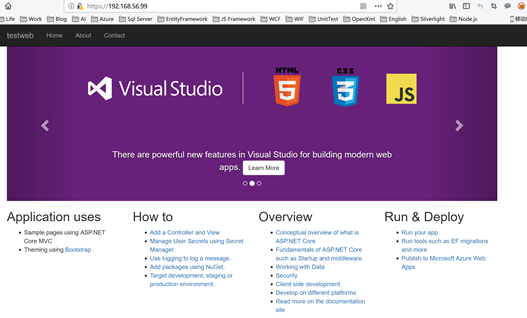
继续前往(Chrome)/添加例外(Firefox)后,正常的访问结果如下图所示,之所以会出现这样的提示,是因为所用的证书是自己生成的。
1.8 相关问题
l 杀死nginx进程
解决方案:查询nginx主进程号:ps -ef | grep nginx ;杀死进程:kill -QUIT 主进程号

l 服务器重启之后,执行 nginx -t 是没问题的,然而在执行 nginx -s reload 的时候报错:nginx: [error] invalid PID number "" in "/usr/local/nginx/logs/nginx.pid"

解决方案
nginx -c /usr/local/nginx/conf/nginx.conf

nginx -s reload

 浙公网安备 33010602011771号