
k8s v1.24.1 配置 cephfs
本地环境情况
| 角色 | IP | 版本 |
|---|---|---|
| k8s-master-1 | 172.16.16.108 | K8S v1.24.1, containerd://1.6.8 |
| k8s-node-1 | 172.16.16.109 | K8S v1.24.1, containerd://1.6.8 |
| k8s-node-2 | 172.16.16.110 | K8S v1.24.1, containerd://1.6.8 |
| ceph1 | 172.16.16.190 | ceph version 14.2.22 |
| ceph2 | 172.16.16.191 | ceph version 14.2.22 |
| ceph3 | 172.16.16.192 | ceph version 14.2.22 |
Ceph-CSI版本: v3.7.2
官方文档:https://github.com/ceph/ceph-csi/blob/devel/docs/deploy-cephfs.md
部署 ceph-csi
在 k8s-master-1 上进行操作
mkdir -p /data/yaml/default/cephfs-csi && cd /data/yaml/default/cephfs-csi
# github 上的资源可能会拉取失败
wget https://github.com/ceph/ceph-csi/archive/refs/tags/v3.7.2.zip
unzip ceph-csi-3.7.2.zip
cd ceph-csi-3.7.2/deploy/cephfs/kubernetes
# 创建 CSIDriver 对象:
kubectl create -f csidriver.yaml
# 为sidecar容器和节点插件部署RBAC:
kubectl create -f csi-provisioner-rbac.yaml
kubectl create -f csi-nodeplugin-rbac.yaml
# 为 CSI 插件配置 ConfigMap
# 通过在 ceph1 上执行 ceph -s|grep id: 获取ceph 集群id :eda101d5-385e-4160-bac6-fa3aaffc73d8
cat > csi-config-map.yaml << EOF
---
apiVersion: v1
kind: ConfigMap
data:
config.json: |-
[
{
"clusterID": "eda101d5-385e-4160-bac6-fa3aaffc73d8", # 替换自己的集群ID
"monitors": [
"172.16.16.190:6789", # 替换成对应的 ceph 集群的IP
"172.16.16.191:6789", # 替换成对应的 ceph 集群的IP
"172.16.16.192:6789" # 替换成对应的 ceph 集群的IP
]
}
]
metadata:
name: ceph-csi-config
EOF
kubectl create -f csi-config-map.yaml
# 为 CSI pods 部署 Ceph 所需的 ConfigMap
kubectl create -f ../../../examples/ceph-conf.yaml
# cephfs 使用到的下面这5个镜像需要自己处理,国内可能无法进行拉取
registry.k8s.io/sig-storage/csi-provisioner:v3.2.1
registry.k8s.io/sig-storage/csi-resizer:v1.5.0
registry.k8s.io/sig-storage/csi-snapshotter:v6.0.1
registry.k8s.io/sig-storage/csi-node-driver-registrar:v2.5.1
quay.io/cephcsi/cephcsi:v3.7.2
# 部署 CSI Sidecar 容器:
kubectl create -f csi-cephfsplugin-provisioner.yaml
# 部署 CSI CephFS 驱动程序:
kubectl create -f csi-cephfsplugin.yaml
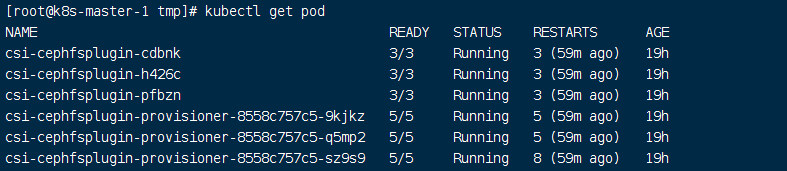
# 验证是否部署成功
kubectl get pod
Ceph 创建 cephfs
在管理节点上(ceph1)执行
# 因为 Ceph文件系统需要启动 ceph-mds,ceph-mds 用来管理文件系统的元数据,只有文件系统才需要,对象储存和块储存都不需要。
cd /data/ceph-deploy/
ceph-deploy mds create ceph1

# CephFS 需要两个Pools, data 和 metadata, 分别存储文件数据和文件元数据
ceph osd pool create cephfs_data 16 16
ceph osd pool create cephfs_metadata 16 16
ceph fs new cephfs cephfs_metadata cephfs_data

# 获取 ceph admin key 后面创建 k8s Storageclass 资源时有用
ceph auth get-key client.admin
AQD/9Fljn5t/AhAA/8WoMpdDKoqM1WVbJ3KEXA==
创建Storageclass
在 k8s-master-1 上进行操作
# 需要创建一个secret,csi会通过pod访问ceph集群,密码使用上面 ceph admin 的密码
cd /data/yaml/default/cephfs-csi

cat >> secret.yaml << EOF
apiVersion: v1
kind: Secret
metadata:
  name: csi-cephfs-secret
stringData:
  userID: admin
  userKey: AQD/9Fljn5t/AhAA/8WoMpdDKoqM1WVbJ3KEXA==
  adminID: admin
  adminKey: AQD/9Fljn5t/AhAA/8WoMpdDKoqM1WVbJ3KEXA==
EOF

kubectl apply -f secret.yaml

# 创建 storageclass
cat >> storageclass.yaml << EOF
apiVersion: storage.k8s.io/v1
kind: StorageClass
metadata:
  name: csi-cephfs-sc
provisioner: cephfs.csi.ceph.com
parameters:
  clusterID: eda101d5-385e-4160-bac6-fa3aaffc73d8 # ceph cluster ID
  fsName: cephfs          # cephfs 名称,上面创建
  pool: cephfs_data           # cephfs pool 名称
  csi.storage.k8s.io/provisioner-secret-name: csi-cephfs-secret
  csi.storage.k8s.io/provisioner-secret-namespace: default
  csi.storage.k8s.io/controller-expand-secret-name: csi-cephfs-secret
  csi.storage.k8s.io/controller-expand-secret-namespace: default
  csi.storage.k8s.io/node-stage-secret-name: csi-cephfs-secret
  csi.storage.k8s.io/node-stage-secret-namespace: default
reclaimPolicy: Delete
allowVolumeExpansion: true
mountOptions:
  - discard
EOF

kubectl apply -f storageclass.yaml

# 检查
kubectl get sc

测试
# 创建 pvc
mkdir -p /data/yaml/default/nginx && cd /data/yaml/default/nginx

cat >> pvc.yaml << EOF
apiVersion: v1
kind: PersistentVolumeClaim
metadata:
  name: nginx-data
spec:
  accessModes:
    - ReadWriteMany
  resources:
    requests:
      storage: 1Gi
  storageClassName: csi-cephfs-sc
EOF

kubectl apply -f pvc.yaml

# 创建好pvc后会自动将我们pvc绑定到pv节点上
[root@k8s-master-1 nginx]# kubectl get pvc
NAME         STATUS   VOLUME                                     CAPACITY   ACCESS MODES   STORAGECLASS    AGE
nginx-data   Bound    pvc-4a0b02da-a8d2-425d-99d0-4571c54ebbdc   1Gi        RWX            csi-cephfs-sc   20h

# 挂载Pod测试
cat >> deployment.yaml << EOF
apiVersion: apps/v1
kind: Deployment
metadata:
  name: nginx
  namespace: default
  labels:
    app: nginx
spec:
  replicas: 2
  selector:
    matchLabels:
      app: nginx
  template:
    metadata:
      labels:
        app: nginx
    spec:
      containers:
      - name: nginx
        image: nginx:1.22.1-alpine
        imagePullPolicy: IfNotPresent
        volumeMounts:
        - name: time-data
          mountPath: /etc/localtime
          readOnly: false
        - name: www
          mountPath: /usr/share/nginx/html
          subPath: html
      volumes:
      - name: time-data
        hostPath:
          path: /usr/share/zoneinfo/Asia/Shanghai
      - name: www
        persistentVolumeClaim:
          claimName: nginx-data
EOF

kubectl apply -f deployment.yaml

测试在 pod 中添加数据检查另外一个 pod 是否可以看到


遇到的问题一
# 创建cephfs的时候出现 storageclass 创建 pvc pending 的状态。并且错误日志会提示 persistentvolume-controller waiting for a volume to be created, either by external provisioner “cephfs.csi.ceph.com” or manually created by system administrator。

# 解决办法:
# 进去 csi-cephfsplugin 容器内执行 ceph status 命令具体分析
kubectl exec -it csi-cephfsplugin-provisioner-8558c757c5-9kjkz -c csi-cephfsplugin -- bash
ceph status
unable to get monitor info from DNS SRV with service name: ceph-mon
[errno 2] RADOS object not found (error connecting to the cluster)
# 是因为 ceph 集群没有启用 ceph-mds 导致,执行 ceph-deploy mds create ceph1 后正常
列出一下网上 cephfs 和 ceph RBD 的对比情况
cephfs:
优点:
1.读取延迟低,I/O带宽表现良好,尤其是block size较大一些的文件
2.灵活度高,支持k8s的所有接入模式
缺点:
1.写入延迟相对较高且延迟时间不稳定
适用场景:
适用于要求灵活度高(支持k8s多节点挂载特性),对I/O延迟不甚敏感的文件读写操作,以及非海量的小文件存储支持。例如作为常用的应用/中间件挂载存储后端。
Ceph RBD:
优点:
1.I/O带宽表现良好
2.读写延迟都很低
3.支持镜像快照,镜像转储
缺点:
1.不支持多节点挂载
适用场景:
对I/O带宽和延迟要求都较高,且无多个节点同时读写数据需求的应用,例如数据库。

 浙公网安备 33010602011771号