
Hugging face 跑通大模型全流程 (并拿出隐藏层的矩阵向量)
运行模型
参考官方教程就好了
好文推荐:【大模型】基于Hugging Face调用大模型基础流程
安装包
pip install transformers
然后参考官方教程就好了。
导入包和模型
建立一个notebok文件
import torch
from transformers import AutoTokenizer, AutoModelForCausalLM

checkpoint = "NousResearch/Hermes-2-Pro-Llama-3-8B"
tokenizer = AutoTokenizer.from_pretrained(checkpoint)
model = AutoModelForCausalLM.from_pretrained(checkpoint, torch_dtype=torch.bfloat16, device_map="auto")
如果报错
OSError: We couldn't connect to 'https://huggingface.co' to load this file, couldn't find it in the cached files and it looks like NousResearch/Hermes-2-Pro-Llama-3-8B is not the path to a directory containing a file named config.json.
Checkout your internet connection or see how to run the library in offline mode at 'https://huggingface.co/docs/transformers/installation#offline-mode'.
就需要手动下载模型,参考第二章,然后将模型放在./model/Hermes-2-Pro-Llama-3-8B,将代码改为
import torch
from transformers import AutoTokenizer, AutoModelForCausalLM
import os
print("当前工作目录:", os.getcwd()) # 打印当前工作目录
checkpoint = "main_LLM/model/Hermes-2-Pro-Llama-3-8B"

tokenizer = AutoTokenizer.from_pretrained(checkpoint)
model = AutoModelForCausalLM.from_pretrained(checkpoint, torch_dtype=torch.bfloat16, device_map="auto")
模型问答及隐藏层获取
chat = [
    {"role": "user", "content": "Hey"} # 修改prompt
]

tool_prompt = tokenizer.apply_chat_template(
    chat,
    return_tensors="pt",
    return_dict=True,
    add_generation_prompt=True,
)
tool_prompt = tool_prompt.to(model.device)

# 关键:使用 model(**tool_prompt, output_hidden_states=True) 获取输出,并设置 output_hidden_states=True
outputs = model(**tool_prompt, output_hidden_states=True)

# outputs 将会是一个 ModelOutput 或 BaseModelOutputWithPastAndCrossAttentions 类型的对象
# 隐藏状态通常存储在 outputs.hidden_states 属性中,它是一个元组 (tuple)
hidden_states = outputs.hidden_states

print(f"模型输出类型: {type(outputs)}") # 打印输出类型
print(f"隐藏状态类型: {type(hidden_states)}") # 打印 hidden_states 类型
print(f"隐藏状态层数: {len(hidden_states)}") # 打印隐藏状态的层数 (Transformer layers + embedding layer)

# 打印最后一层隐藏状态的形状 (batch_size, sequence_length, hidden_size)
last_layer_hidden_state = hidden_states[-1] #  获取最后一层的隐藏状态
print(f"最后一层隐藏状态的形状: {last_layer_hidden_state.shape}")

# 可以进一步访问和分析其他层的隐藏状态
# 例如,打印第一层隐藏状态的形状
first_layer_hidden_state = hidden_states[0]
print(f"第一层隐藏状态的形状: {first_layer_hidden_state.shape}")
下载模型
如果不正确联网,是访问不到Hugging face的,这时候就需要本地加载大模型。有两种方法:
- 需要自己手动下载大模型到本机,然后上传到服务器。(需要本机正确联网,服务器无所谓)
- 镜像网站下载。(建议)
下载方式多种多样,下面逐一介绍。
使用huggingface-cli(建议)
huggingface-cli 是 Hugging Face 官方提供的命令行工具,自带完善的下载功能。
1. 安装依赖
pip install -U huggingface_hub
2. 设置环境变量(如果使用官方网站下载,则跳过即可)
Linux
export HF_ENDPOINT=https://hf-mirror.com
Windows Powershell
$env:HF_ENDPOINT = "https://hf-mirror.com"
建议将上面这一行写入 ~/.bashrc。
3.1 下载模型
huggingface-cli download --resume-download gpt2 --local-dir gpt2
3.2 下载数据集
huggingface-cli download --repo-type dataset --resume-download wikitext --local-dir wikitext
可以添加 --local-dir-use-symlinks False 参数禁用文件软链接,这样下载路径下所见即所得
使用git(稍建议)
需要自己手动下载大模型到本机,然后上传到服务器。(需要本机正确联网,服务器无所谓)
也可以使用 镜像网站下载。(建议)
1. 安装git-lfs
yum install git-lfs
# Make sure you have git-lfs installed (https://git-lfs.github.com/)
git lfs install
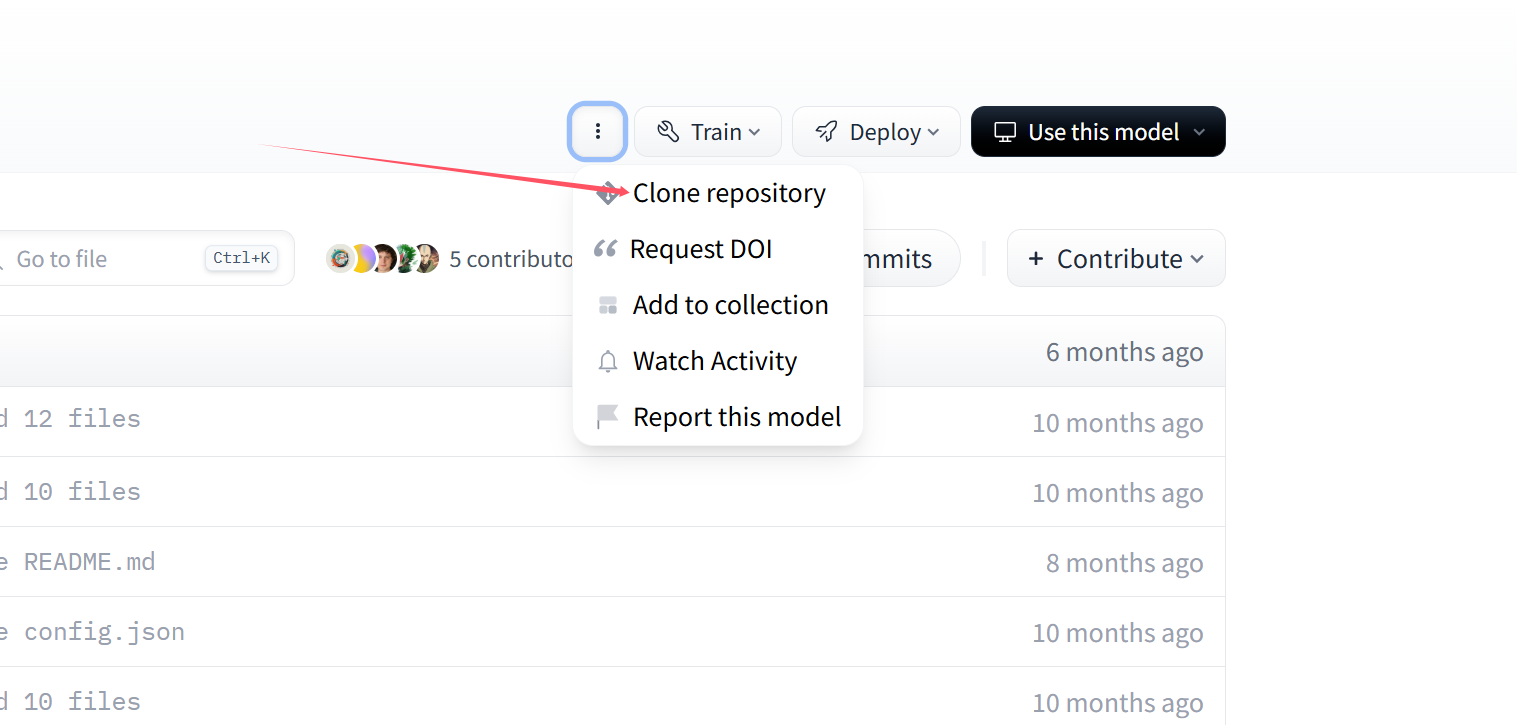
在下面图片的位置,点击Clone repository,就可以看到链接,将gitxxxx链接复制
例如
2.1 官方下载
使用官方 ,下载NousResearch/Hermes-2-Pro-Llama-3-8B。
# 首先尝试
git lfs clone https://huggingface.co/NousResearch/Hermes-2-Pro-Llama-3-8B
# 如果不行再尝试
git clone https://huggingface.co/NousResearch/Hermes-2-Pro-Llama-3-8B
2.2 镜像网站下载
方法类似例如使用https://hf-mirror.com ,下载CohereForAI/aya-vision-8b。
# 首先尝试
git lfs clone https://hf-mirror.com/CohereForAI/aya-vision-8b
# 如果不行再尝试
git clone https://hf-mirror.com/CohereForAI/aya-vision-8b
直接下载(不建议)
需要自己手动下载大模型到本机,然后上传到服务器。(需要本机正确联网,服务器无所谓)
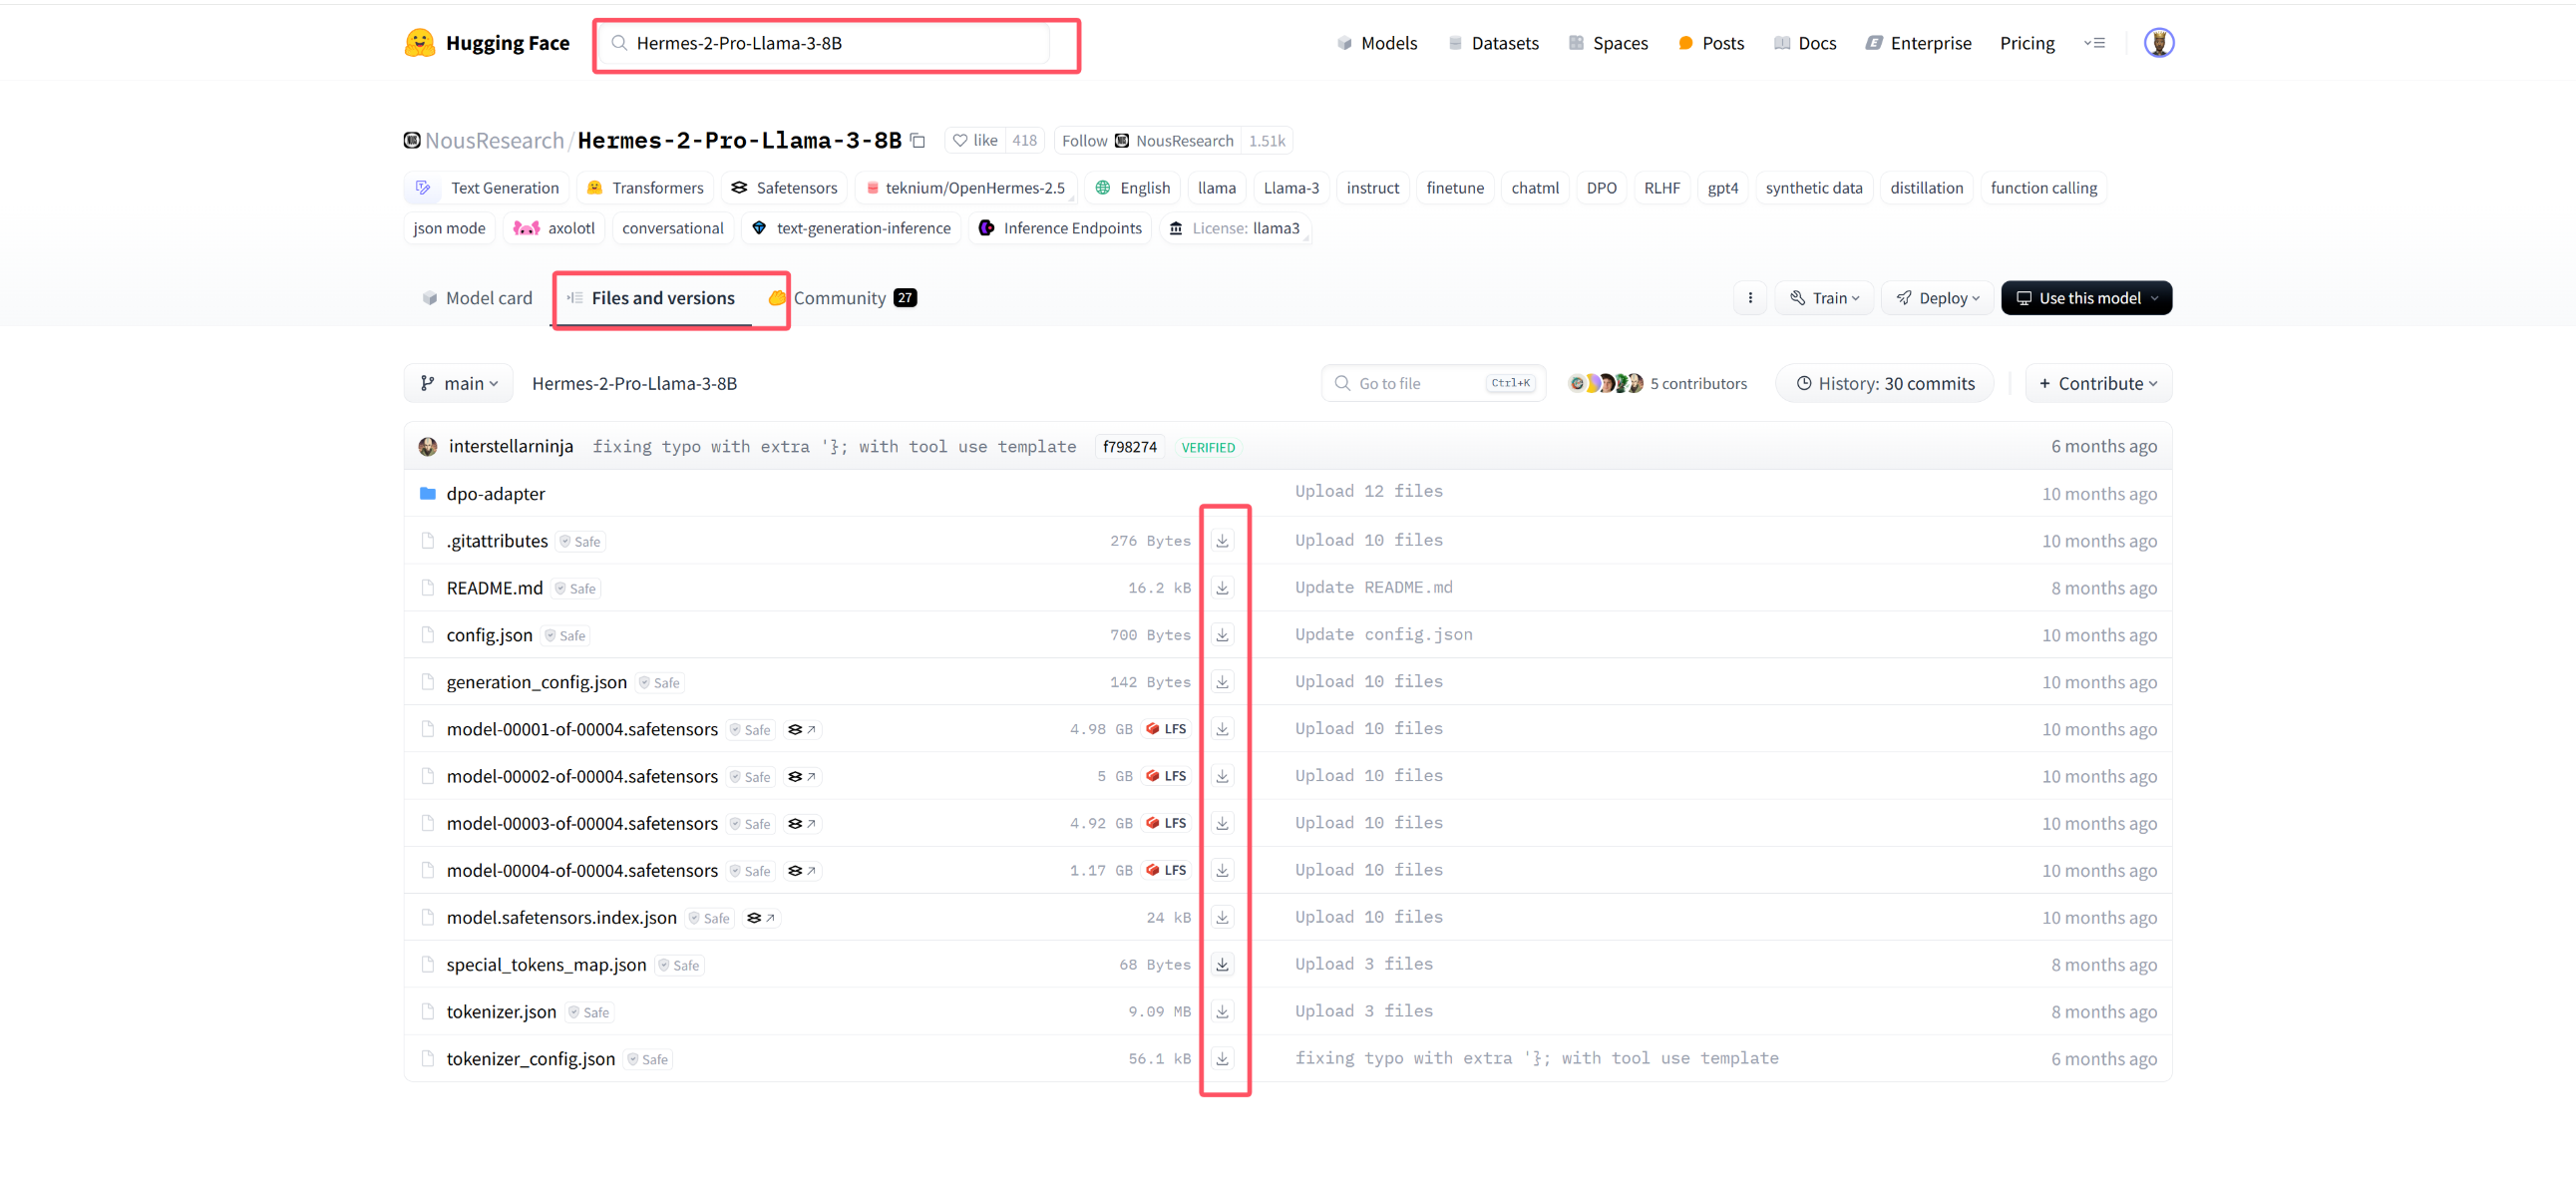
比如说Hermes-2-Pro-Llama-3-8B模型,搜索后,点击Files and versions,然后逐个下载,如下图:

 浙公网安备 33010602011771号