

Quartz.Net 3.x使用 代码调用好使 配置的不好使【转载再修改】
Quartz.Net简介
Quartz.NET是一个用C#编写的业调度框架
创建步骤:
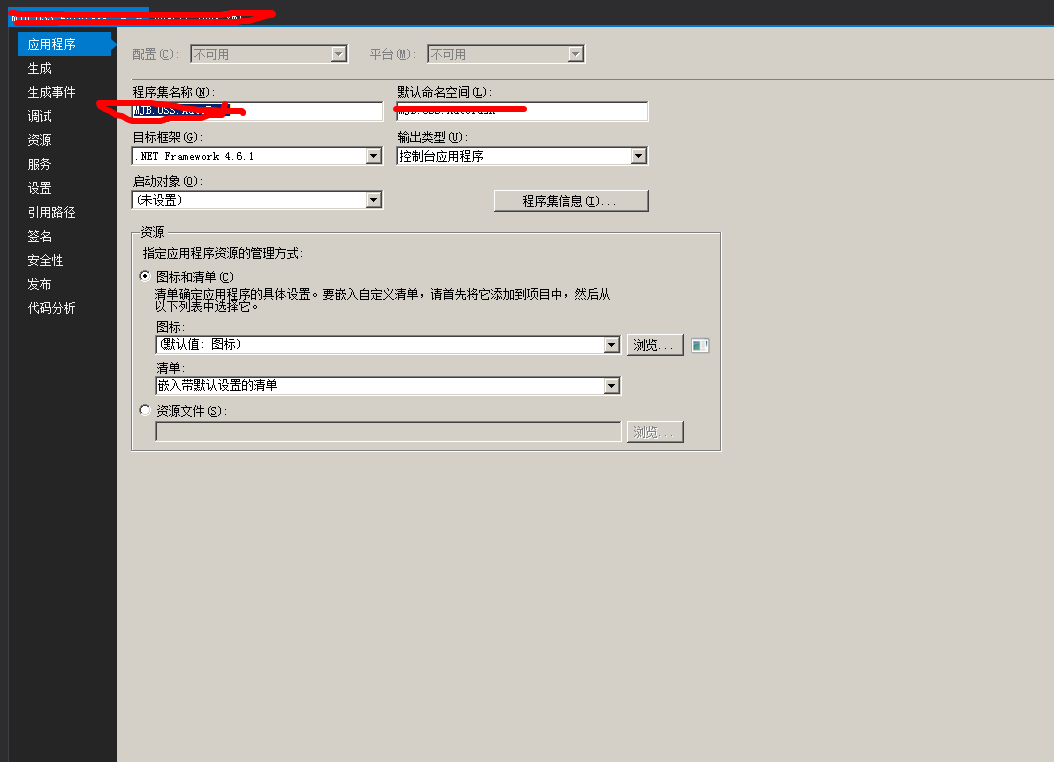
1.创建一个控制台程序
.Net框架使用4.6.1
2.使用Nugget添加Quartz,Quartz.Plugins[2.x版本不需要]
3.创建Job

 public class HelloJob : IJob
    {
        private static int ii = 0;
        public string Name { private get; set; }//使用依赖JobFactory将数据映射值“注入”到类中;如IJobDetail与ITrigger都设置了Name,则ITrigger会覆盖IJobDetail的值
        public async Task Execute(IJobExecutionContext context)
        {
            ii++;
            await System.Console.Out.WriteLineAsync(string.Format("Key:{0}", context.JobDetail.Key));
        }
    }
|
1
2
3
4
5
6
7
8
9
10
11
|
public class HelloWord : IJob { public async Task Execute(IJobExecutionContext context) { //string name = context.JobDetail.JobDataMap.GetString("name"); //await Console.Out.WriteLineAsync(string.Format("Key:{0}", context.JobDetail.Key)); await Console.Out.WriteLineAsync(string.Format("Execute DateTime:{0}", DateTime.Now.ToString("yyyy-MM-dd HH:mm:ss"))); } } |
4.在代码里面配置触发器
|
1
2
3
4
5
6
7
8
9
10
11
12
13
14
15
16
17
18
19
20
21
22
23
24
25
26
27
28
29
30
31
32
33
34
35
36
37
38
39
40
41
42
43
44
45
46
47
48
49
50
51
52
53
54
55
56
57
58
59
60
61
62
63
64
65
66
67
68
69
70
71
72
73
74
75
76
77
78
79
80
81
82
83
84
85
86
87
88
89
90
91
92
93
94
95
96
97
98
99
100
101
|
private static async Task RunProgramRunExample() { try { // Grab the Scheduler instance from the Factory NameValueCollection props = new NameValueCollection { { "quartz.serializer.type", "binary" } }; StdSchedulerFactory factory = new StdSchedulerFactory(); IScheduler scheduler = await factory.GetScheduler(); // and start it off await scheduler.Start(); DateTimeOffset dateTimeOffset = DateTimeOffset.Now.AddSeconds(5); // define the job and tie it to our HelloJob class IJobDetail job0 = JobBuilder.Create<HelloJob>() .WithIdentity("job11", "group0") .UsingJobData("Name", "IJobDetail") .Build(); // Trigger the job to run now, and then repeat every 10 seconds ITrigger trigger0 = TriggerBuilder.Create() .WithIdentity("trigger1", "group0") .StartAt(dateTimeOffset) //.StartNow()//设置马上启动触发器 //.StartAt(DateTimeOffset.Now.AddDays(1))//设置一天后执行,如设置的时间小于当前时间则立即执行 .WithSimpleSchedule(x => x//设置执行计划 .WithIntervalInSeconds(1)//间隔1s执行 .RepeatForever()//永远执行下去 //.WithRepeatCount(10)//执行10就不再执行,测试其实会执行11次 ) //.EndAt(new DateTimeOffset(DateTime.Now.AddSeconds(5)))//当前时间+5s后结束执行 .UsingJobData("Name", "ITrigger") .WithPriority(11)//设置触发器优先级,当有多个触发器在相同时间出发时,优先级最高[数字最大]的优先 .Build(); var job1 = JobBuilder.Create<HelloWord>() .WithIdentity("job100", "group1") .UsingJobData("name", "Quartz.Net")//设置在Job所需要的参数,通过context.JobDetail.JobDataMap.GetString("name")获取 .Build(); var trigger1 = TriggerBuilder.Create() .WithIdentity("trigger1", "group1") .StartAt(dateTimeOffset) //.StartNow() .WithSimpleSchedule(x => x.WithIntervalInSeconds(1).RepeatForever()) .UsingJobData("name", "QuartZ...")//设置在Job所需要的参数,通过context.Trigger.JobDataMap.GetString("name")获取 .WithPriority(100) .Build(); // Tell quartz to schedule the job using our trigger //await scheduler.ScheduleJob(job0, trigger0); #region 日历 //创建所有的假期;如只添加两天,则只有这两天是假期 var cal = new HolidayCalendar(); cal.AddExcludedDate(DateTime.Now); cal.AddExcludedDate(DateTime.Now.AddDays(2)); var aa = cal.ExcludedDates;//只返回日期部分 await scheduler.AddCalendar("myHolidays", cal, true, true); #endregion var dic = new Dictionary<IJobDetail, IReadOnlyCollection<ITrigger>>(); dic.Add(job0, new HashSet<ITrigger>() { trigger0 }); dic.Add(job1, new HashSet<ITrigger>() { trigger1 }); await scheduler.ScheduleJobs(dic, true); //while (true) //{ // // some sleep to show what's happening // await Task.Delay(TimeSpan.FromSeconds(6)); //} //// and last shut down the scheduler when you are ready to close your program //await scheduler.Shutdown(); #region CronTriggers //每天上午8点到17点之间每隔一分钟触发一次 var t = TriggerBuilder.Create() .WithIdentity("trigger1", "group1") .WithCronSchedule("0 0/1 8-17 * * ?") .ForJob(job1) .Build(); //每天上午10: 42开火 var t1 = TriggerBuilder.Create() .WithIdentity("trigger1", "group1") .WithCronSchedule("0 42 10 * * ?") .ForJob(job1) .Build(); t1 = TriggerBuilder.Create() .WithIdentity("trigger1", "group1") .WithSchedule(CronScheduleBuilder.DailyAtHourAndMinute(10, 42)) .Build(); #endregion } catch (SchedulerException se) { System.Console.WriteLine(se); } } |
在main里面调用RunProgramRunExample即可;
5.使用配置文件配置触发器
1.添加quartz.config[需要与app.config在同级不然找不到]
# You can configure your scheduler in either <quartz> configuration section
# or in quartz properties file
# Configuration section has precedence

quartz.scheduler.instanceName = QuartzTest

# configure thread pool info
quartz.threadPool.type = Quartz.Simpl.SimpleThreadPool, Quartz
quartz.threadPool.threadCount = 10
quartz.threadPool.threadPriority = Normal

# job initialization plugin handles our xml reading, without it defaults are used
quartz.plugin.xml.type = Quartz.Plugin.Xml.XMLSchedulingDataProcessorPlugin, Quartz.Plugins
#指定quartz_jobs.xml路径
quartz.plugin.xml.fileNames = ~/quartz_jobs.xml

# export this server to remoting context 使用CrystalQuartz 放开如下注释
#quartz.scheduler.exporter.type = Quartz.Simpl.RemotingSchedulerExporter, Quartz
#quartz.scheduler.exporter.port = 555
#quartz.scheduler.exporter.bindName = QuartzScheduler
#quartz.scheduler.exporter.channelType = tcp
#quartz.scheduler.exporter.channelName = httpQuartz
2.添加quartz_jobs.xml配置文件[可以放到任意目录,因为在quartz.config指定路径]
core配置规则见:https://www.quartz-scheduler.net/documentation/quartz-3.x/tutorial/crontrigger.html
<?xml version="1.0" encoding="UTF-8"?>

<!-- This file contains job definitions in schema version 2.0 format -->

<job-scheduling-data xmlns="http://quartznet.sourceforge.net/JobSchedulingData" xmlns:xsi="http://www.w3.org/2001/XMLSchema-instance" version="2.0">

  <processing-directives>
    <overwrite-existing-data>true</overwrite-existing-data>
  </processing-directives>

  <schedule>

    <!--TestJob测试 任务配置-->
    <job>
      <name>TestJob</name>
      <group>Test</group>
      <description>TestJob测试</description>
      <job-type>QuartzNet.HelloWord,QuartzNet</job-type>
      <durable>true</durable>
      <recover>false</recover>
    </job>
    <trigger>
      <cron>
        <name>TestJobTrigger</name>
        <group>Test</group>
        <job-name>TestJob</job-name>
        <job-group>Test</job-group>
        <start-time>2015-01-22T00:00:00+08:00</start-time>
        <cron-expression>0/3 * * * * ?</cron-expression>
      </cron>
    </trigger>
  </schedule>
</job-scheduling-data>
3.将以上配置文件的'复制到输出目录'修改为'始终复制'
5.如需要将控制台程序做Windows服务,则如Nugget中添加Topshelf,Topshelf.Log4Net;然后创建
  public class ServiceRunner : ServiceControl, ServiceSuspend
    {
        private readonly IScheduler scheduler;
        public ServiceRunner()
        {
            StdSchedulerFactory factory = new StdSchedulerFactory();
            scheduler = factory.GetScheduler().Result;
        }

        public bool Start(HostControl hostControl)
        {
            scheduler.Start();
            return true;
        }

        public bool Stop(HostControl hostControl)
        {
            scheduler.Shutdown(true);
            return true;
        }

        public bool Continue(HostControl hostControl)
        {
            scheduler.ResumeAll();
            return true;
        }

        public bool Pause(HostControl hostControl)
        {
            scheduler.PauseAll();
            return true;
        }
    }
main代码:
|
1
2
3
4
5
6
7
8
9
10
11
12
|
static void Main(string[] args) { HostFactory.Run(x => { x.UseLog4Net(); x.Service<ServiceRunner>(); x.SetDescription("调度服务"); x.SetDisplayName("AutoTask"); x.SetServiceName("AutoTask"); x.EnablePauseAndContinue(); }); } |
编译程序,在cmd[需使用管理员权限运行]执行 install即可

启动服务即可;
6.使用CrystalQuartz管理Quartz.Net
1.创建一个空的Asp.Net项目;
2.用Nuget添加CrystalQuartz.Remote;
3引用Quartz.Plugins.
4.在web.config的configuration/crystalQuartz/provider节点下添加需管理的Quartz.Net的的路径;配置文件如下:
 View Code
5.在quartz.config中配置
# export this server to remoting context 使用CrystalQuartz 放开如下注释
quartz.scheduler.exporter.type = Quartz.Simpl.RemotingSchedulerExporter, Quartz
#指定端口号,即CrystalQuartz需要监视的端口号
quartz.scheduler.exporter.port = 555
quartz.scheduler.exporter.bindName = QuartzScheduler
quartz.scheduler.exporter.channelType = tcp
quartz.scheduler.exporter.channelName = httpQuartz
6.在IIS添加CrystalQuartz所属ASP.NET的站点;然后在站点后加上/CrystalQuartzPanel.axd即可;

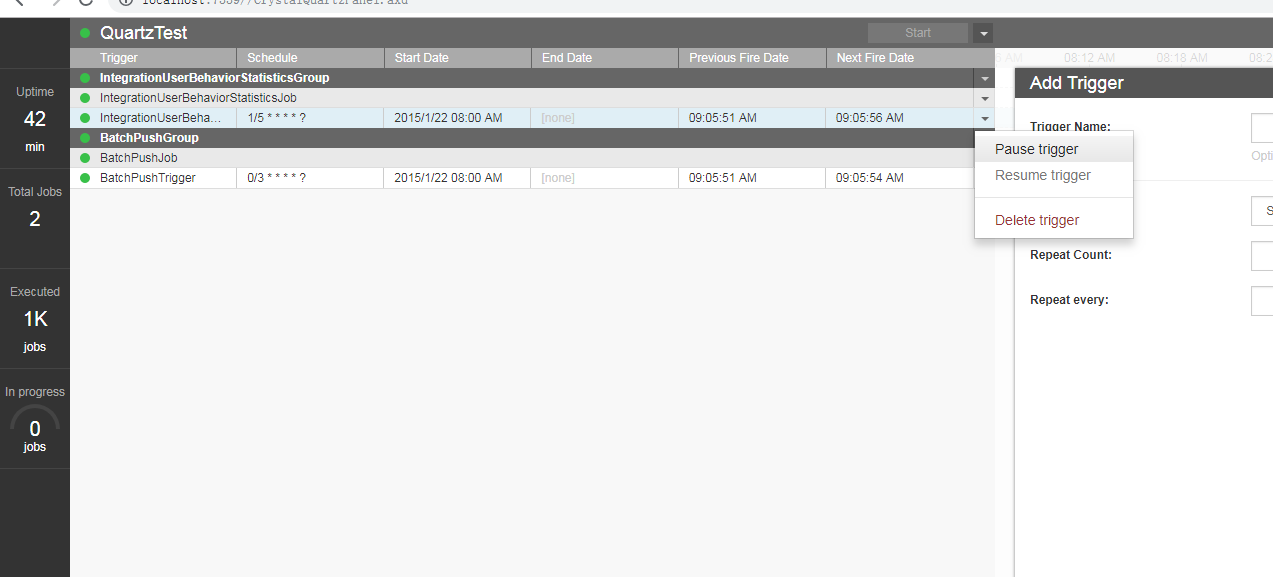
我偷个懒,没有部署站点,直接在VS中运行;上图可以看过我们在Quartz.NET中配置的Job和其所属的触发器;
触发器也可以在管理里面中添加如下图:

也可以删除或立即启动相应的触发器

 浙公网安备 33010602011771号