
Linux系统下本地yum镜像源环境部署-完整记录
之前介绍了Linux环境下本地yum源配置方法,不过这个是最简单最基础的配置,在yum安装的时候可能有些软件包不够齐全,下面说下完整yun镜像源系统环境部署记录(yum源更新脚本下载地址:https://pan.baidu.com/s/1miMNPgc 提取密码:x49g):
1)安装nginx,用于yum镜像源访问配置
[root@yum ~]# yum -y install gcc pcre-devel zlib-devel openssl-devel
[root@yum ~]# cd /data/software
[root@yum software]# wget http://nginx.org/download/nginx-1.12.0.tar.gz
[root@yum software]# tar -zvxf nginx-1.12.0.tar.gz
[root@yum software]# cd nginx-1.12.0
添加www用户,其中-M参数表示不添加用户家目录,-s参数表示指定shell类型
[root@yum nginx-1.12.0]# useradd www -M -s /sbin/nologin
[root@yum nginx-1.12.0]# ./configure --prefix=/data/nginx --user=www --group=www --with-http_ssl_module --with-http_flv_module --with-http_stub_status_module --with-http_gzip_static_module --with-pcre
[root@yum nginx-1.12.0]# make && make install
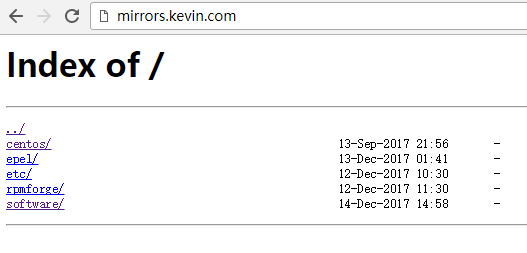
2)配置nginx
[root@yum ~]# cat /data/nginx/conf/vhosts/mirrors.conf
server {
listen 80;
server_name yum.kevin.cn mirrors.kevin.cn localhost;
index index.html index.php index.htm;
access_log /data/nginx/logs/access.log main;
error_log /data/nginx/logs/error.log;
location / {
root /data/mirrors;
autoindex on;
autoindex_exact_size off;
autoindex_localtime on;
}
}
[root@yum ~]# /data/nginx/sbin/nginx -t
nginx: the configuration file /data/nginx/conf/nginx.conf syntax is ok
nginx: configuration file /data/nginx/conf/nginx.conf test is successful
[root@yum ~]# /data/nginx/sbin/nginx
[root@yum ~]# lsof -i:80
COMMAND PID USER FD TYPE DEVICE SIZE/OFF NODE NAME
nginx 7741 root 6u IPv4 28311 0t0 TCP *:http (LISTEN)
nginx 7769 www 6u IPv4 28311 0t0 TCP *:http (LISTEN)
nginx 7770 www 6u IPv4 28311 0t0 TCP *:http (LISTEN)
nginx 7771 www 6u IPv4 28311 0t0 TCP *:http (LISTEN)
nginx 7772 www 6u IPv4 28311 0t0 TCP *:http (LISTEN)
nginx 7773 www 6u IPv4 28311 0t0 TCP *:http (LISTEN)
nginx 7774 www 6u IPv4 28311 0t0 TCP *:http (LISTEN)
nginx 7775 www 6u IPv4 28311 0t0 TCP *:http (LISTEN)
nginx 7776 www 6u IPv4 28311 0t0 TCP *:http (LISTEN)
3)创建yum源数据目录
[root@yum ~]# mkdir -p /data/mirrors
[root@yum ~]# cd /data/mirrors/
[root@yum mirrors]# mkdir centos epel etc rpmforge
[root@yum mirrors]# ls
centos epel etc rpmforge
4)编写yum源下载更新脚本(从mirrors.ustc.edu.cn镜像网站下载和更新)
[root@yum ~]# cat /data/script/mirrors.sh
#!/bin/bash
#==========================================
# Program : /bin/update_yum_source.sh
# Info : 定期同步官方 yum 源到本地
# Version : 2017.12.10 v1.0
# author :kevin
# Usage : 3 3 * * * /bin/bash /data/script/mirrors.sh
#==========================================
Date=`date +%Y%m%d`
LogFile="/data/logs/$Date.log"
ReceiveMail="wangshibo@kevin.com"
RsyncBin="/usr/bin/rsync"
RsyncPerm="-avrt --delete --exclude=debug/ --exclude=isos/ --exclude=SRPMS/ --exclude=ppc/ --delete-excluded"
#============ centos ==============
CentOS_Path="/data/mirrors/centos"
YumSiteList="rsync://mirrors.ustc.edu.cn/centos/"
centosparm="--exclude=2*/ --exclude=3*/ --exclude=4*/ --exclude=5*/"
#============ epel ==============
epelSite="rsync://mirrors.ustc.edu.cn/fedora-epel"
epelLocalPath="/data/mirrors/epel"
epelparm="--include=7/x86_64 --include=7Server/x86_64 --include=6/x86_64 --include=6Server/x86_64"
#============ rpmforge ==============
rpmforgeSite="rsync://apt.sw.be/pub/freshrpms/pub/dag/redhat/"
#rpmforgeSite="rsync://apt.sw.be/redhat/"
rpmforgeLocalPath="/data/mirrors/rpmforge/"
rpmforgeparm="--exclude=ppc/ --exclude=el2.1/ --exclude=el3/ --exclude=el4/ --exclude=el5/"
echo "---- $Date `date +%T` Begin ----" >>$LogFile
# centos
$RsyncBin $RsyncPerm $centosparm $YumSiteList $CentOS_Path >> $LogFile
# epel
$RsyncBin $RsyncPerm $epelparm $epelSite $epelLocalPath >> $LogFile
# rpmforge
$RsyncBin $RsyncPerm $rpmforgeparm $rpmforgeSite $rpmforgeLocalPath >> $LogFile
echo "---- $Date `date +%T` End ----" >> $LogFile
#/bin/mail -s "opt001 - update yum source - $Date" $ReceiveMail<$LogFile
以上脚本中需要注意的几点:
--exclude 表示rsync同步的时候,需要排除的目录(具体表现:同步下来的目录里面为空,大小为0)
--include 表示rsync同步的时候,只想同步的目录
由于本案例是部署yum源,用于linux服务器上本地yum方案安装,不需要同步isos镜像(同时也可以节省机器空间资源),所以在同步的时候将isos镜像目录屏蔽
执行同步脚本。这个过程比较长,大概要下载将近180G的内容。需要耐心等待~~
[root@yum ~]# sh -x /data/script/mirrors.sh
[root@yum ~]# du -sh /data/mirrors/*
93G /data/mirrors/centos
80G /data/mirrors/epel
4.0K /data/mirrors/etc
4.0K /data/mirrors/rpmforge
410M /data/mirrors/software
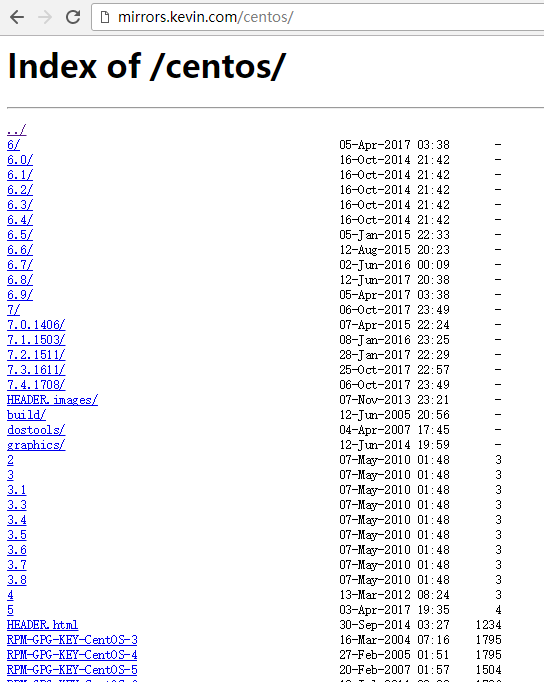
[root@yum ~]# ls /data/mirrors/centos/
2 3.6 6.0 6.6 7.1.1503 dostools RPM-GPG-KEY-CentOS-3 RPM-GPG-KEY-CentOS-Debug-6 timestamp.txt
3 3.7 6.1 6.7 7.2.1511 filelist.gz RPM-GPG-KEY-centos4 RPM-GPG-KEY-CentOS-Debug-7
3.1 3.8 6.2 6.8 7.3.1611 graphics RPM-GPG-KEY-CentOS-4 RPM-GPG-KEY-CentOS-Security-6
3.3 4 6.3 6.9 7.4.1708 HEADER.html RPM-GPG-KEY-CentOS-5 RPM-GPG-KEY-CentOS-Testing-6
3.4 5 6.4 7 build HEADER.images RPM-GPG-KEY-CentOS-6 RPM-GPG-KEY-CentOS-Testing-7
3.5 6 6.5 7.0.1406 dir_sizes RPM-GPG-KEY-beta RPM-GPG-KEY-CentOS-7 TIME
[root@yum ~]# ls /data/mirrors/epel/
4 5Client 7Server fullfilelist.KDUVzc9WPK RPM-GPG-KEY-EPEL-4 RPM-GPG-KEY-EPEL-7Server
4AS 5Server epel-release-latest-6.noarch.rpm fullfiletimelist-epel RPM-GPG-KEY-EPEL-5 testing
4ES 6 epel-release-latest-7.noarch.rpm fullfiletimelist-epel.WaO7KUHvYz RPM-GPG-KEY-EPEL-6
4WS 6Server fullfilelist imagelist-epel RPM-GPG-KEY-EPEL-6Server
5 7 fullfilelist.AwiES3LjSB RPM-GPG-KEY-EPEL RPM-GPG-KEY-EPEL-7
5)替换linux本机的yum源地址
[root@yum ~]# cd /etc/yum.repos.d/
[root@yum yum.repos.d]# ls
CentOS-Base.repo CentOS-Debuginfo.repo CentOS-fasttrack.repo CentOS-Media.repo CentOS-Vault.repo
[root@yum yum.repos.d]# mkdir bak
[root@yum yum.repos.d]# mv *.repo bak/
[root@yum yum.repos.d]# ls
bak
编写yum源文件
[root@yum yum.repos.d]# cat CentOS-Base.repo
# CentOS-Base.repo
#
# The mirrors system uses the connecting IP address of the client and the
# update status of each mirrors to pick mirrors that are updated to and
# geographically close to the client. You should use this for CentOS updates
# unless you are manually picking other mirrorss.
#
# If the mirrorslist= does not work for you, as a fall back you can try the
# remarked out baseurl= line instead.
#
#
[base]
name=CentOS-CentOS-$releasever - Base
#mirrorslist=http://mirrorlist.centos.org/?release=CentOS-$releasever&arch=$basearch&repo=os&infra=$infra
baseurl=http://mirrors.kevin.cn/centos/$releasever/os/$basearch/
gpgcheck=1
gpgkey=http://mirrors.kevin.cn/centos/RPM-GPG-KEY-CentOS-$releasever
#released updates
[updates]
name=CentOS-CentOS-$releasever - Updates
#mirrorslist=http://mirrorlist.centos.org/?release=CentOS-$releasever&arch=$basearch&repo=updates&infra=$infra
baseurl=http://mirrors.kevin.cn/centos/$releasever/updates/$basearch/
gpgcheck=1
gpgkey=http://mirrors.kevin.cn/centos/RPM-GPG-KEY-CentOS-$releasever
#additional packages that may be useful
[extras]
name=CentOS-CentOS-$releasever - Extras
#mirrorslist=http://mirrorlist.centos.org/?release=CentOS-$releasever&arch=$basearch&repo=extras&infra=$infra
baseurl=http://mirrors.kevin.cn/centos/$releasever/extras/$basearch/
gpgcheck=1
gpgkey=http://mirrors.kevin.cn/centos/RPM-GPG-KEY-CentOS-$releasever
#additional packages that extend functionality of existing packages
[centosplus]
name=CentOS-CentOS-$releasever - Plus
#mirrorslist=http://mirrorlist.centos.org/?release=CentOS-$releasever&arch=$basearch&repo=centosplus&infra=$infra
baseurl=http://mirrors.kevin.cn/centos/$releasever/centosplus/$basearch/
gpgcheck=1
enabled=0
gpgkey=http://mirrors.kevin.cn/centos/RPM-GPG-KEY-CentOS-$releasever
#contrib - packages by Centos Users
[contrib]
name=CentOS-CentOS-$releasever - Contrib
#mirrorslist=http://mirrorlist.centos.org/?release=CentOS-$releasever&arch=$basearch&repo=contrib&infra=$infra
baseurl=http://mirrors.kevin.cn/centos/$releasever/contrib/$basearch/
gpgcheck=1
enabled=0
gpgkey=http://mirrors.kevin.cn/centos/RPM-GPG-KEY-CentOS-$releasever
[root@yum yum.repos.d]# cat epel.repo
[epel]
name=Extra Packages for Enterprise Linux $releasever - $basearch
baseurl=http://mirrors.kevin.cn/epel/$releasever/$basearch
#mirrorlist=https://mirrors.fedoraproject.org/metalink?repo=epel-6&arch=$basearch
failovermethod=priority
enabled=1
gpgcheck=1
gpgkey=http://mirrors.kevin.cn/epel/RPM-GPG-KEY-EPEL-$releasever
[epel-debuginfo]
name=Extra Packages for Enterprise Linux 6 - $basearch - Debug
baseurl=http://mirrors.kevin.cn/epel/$releasever/$basearch/debug
#mirrorlist=https://mirrors.fedoraproject.org/metalink?repo=epel-debug-6&arch=$basearch
failovermethod=priority
enabled=0
gpgkey=http://mirrors.kevin.cn/epel/RPM-GPG-KEY-EPEL-$releasever
gpgcheck=1
[epel-source]
name=Extra Packages for Enterprise Linux 6 - $basearch - Source
baseurl=http://mirrors.kevin.cn/epel/$releasever/SRPMS
#mirrorlist=https://mirrors.fedoraproject.org/metalink?repo=epel-source-6&arch=$basearch
failovermethod=priority
enabled=0
gpgkey=http://mirrors.kevin.cn/epel/RPM-GPG-KEY-EPEL-$releasever
gpgcheck=1
[root@yum yum.repos.d]# yum clean all
[root@yum yum.repos.d]# yum makecache
其他服务器要是想用本yum源,就按照上面操作,将/etc/yum.repos.d目录下的repo文件都移除,然后将上面编写的两个文件放进去,执行yum clean all和yum makecache即可!
============================================================================
温馨提示:以上的yum源配置及两个yum文件在centos6和centos7系统下都适用!已经验证!!
============================================================================
更新以上yum源的脚本:
可以将上面两个文件放到http://mirrors.kevin.com/software里面,用于脚本中下载
[root@yum ~]# cd /data/mirrors/software/
[root@yum software]# ls
yum_reset.sh CentOS-Base.repo epel.repo
[root@yum software]# cat yum_reset.sh
#!/bin/bash
cd /etc/yum.repos.d/
/bin/mkdir /etc/yum.repos.d/bak
mv /etc/yum.repos.d/*.repo /etc/yum.repos.d/bak
wget http://mirrors.kevin.com/software/CentOS-Base.repo
wget http://mirrors.kevin.com/software/epel.repo
/usr/bin/yum clean all
/usr/bin/yum makecache
只需要将上面的yum_reset.sh脚本下载到目标服务器上,然后执行,就可以将目标服务器的yum源更新了。
# wget http://mirrors.kevin.com/software/yum_reset.sh
# sh -x yum_reset.sh
可以定期更新以上的yum源同步脚本(mirros.sh),比如每月更新一次
[root@yum ~]# crontab -e
#每个月1号的23:00点同步一次yum源
0 23 1 * * /bin/bash -x /data/script/mirrors.sh > /dev/null 2>&1
如何将新的rpm包添加到本地部署的内部yum源里
根据上面部署的内部yum源路径,将新的rpm包拷贝到centos6或centos7对应的yum源的Packages包内即可.
比如将新的rpm包拷贝到centos6对应的/data/mirrors/centos/6/os/x86_64/Packages的rpm包路径下,然后执行:
# yum clean all
# yum makecache

如果是centos7下添加新rpm包,同理拷贝到/data/mirrors/centos/7/os/x86_64/Packages的rpm包路径下.
*************** 当你发现自己的才华撑不起野心时,就请安静下来学习吧!***************

 浙公网安备 33010602011771号